How to Fix Half or Full Gray or Black Photos Easily
Photos always play an important role in daily life because too many cherished memories are saved in this way. However, it doesn't mean your memories are 100% safe, why?
The studies have shown that pictures on your computer, hard disk, or any storage space are also easier to get corrupt for some unknown reasons. That is also why more and more people wish to repair a corrupted picture that shows up half or full gray or black screen in recent years. If you're also one of them, then you've been in the right place. In this article, you'll be guided to figure out why your photos turn to half or full gray or black screen, and solutions to fix greyed-out pictures on Mac and Windows easily.
Let's get started now!
How to Fix Corrupted Photos | 5 Methods
There are several methods through which you can fix half or full grey-out photos. In this section, we will discuss the most effective and easy-to-follow solutions. Don't lose hope, if your pictures are corrupted, simply go through the following solutions.
Solution 1: Download the photos again
As mentioned, the most common reason for image corruption is an interruption in the download process. Sometimes when image files are not completely downloaded, or any error happens with the image, your first attempt should be to download the image file again, especially when images show partially.
Solution 2: Retrieve photos from your backup
Backup is one of the best-known options to repair corrupted files on any device. All you have to do is head to your backup tool, such as OneDrive, Cloud Backup, Local Disk, etc. Search for the desired image and replace this with your computer, USB drive, SD card, or memory card. Also, you can use Ubackit to protect your data.
Solution 3: Use professional photo repair tool- Wondershare Repairit
If your photo is still grey or black after trying the above ways, then you can ask for help from a professional photo repair program like Wondershare Repairit.
Wondershare Repairit is one of the best photo repair tools around the globe. It can repair multiple corrupted image files effortlessly. The following steps will help you to learn how to use Wondershare Repairit tools effectively to recover corrupted or broken image files your Mac or Windows PC.
- Download the Wondershare Repairit software on your system and have it installed.
- Insert your storage device if pictures that you want to repair are stored on an external drive but if it's in the system then just highlight the file ready to be scanned and run it on using the software.
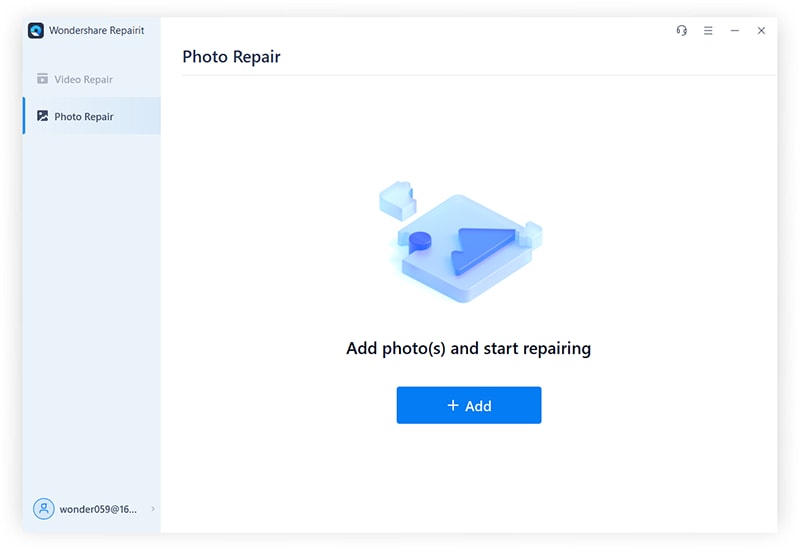
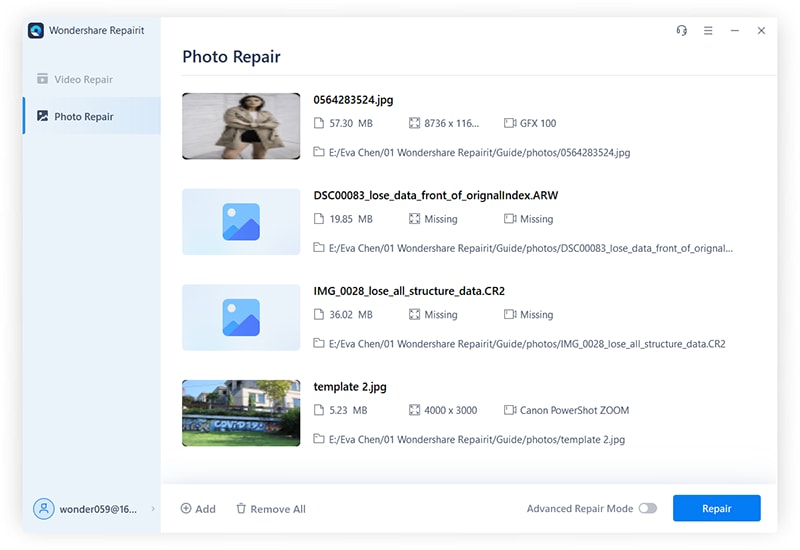
- Scans through the storage device and pops up files that are corrupted. Click " Repair" and a screen will pop up showing you a preview of the now corrupted file whose images must have been repaired now for you to check it for inconsistencies.
- Once the pictures are all repaired, click on save and it will ask you to choose a location different from where it was before. Once you've chosen your desired location, then your pictures are just as good as new.
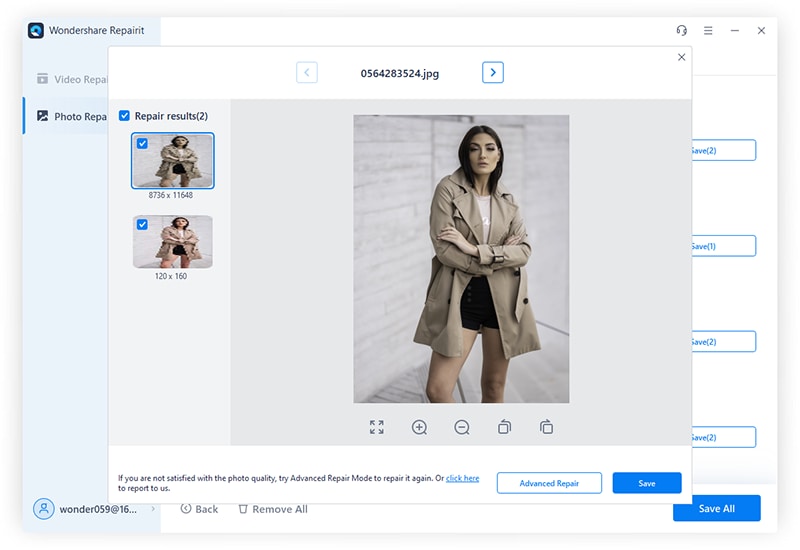
The tool is embedded with a sophisticated scan methodology that resolves corruption associated with images and allows you to choose the desired file from the preview for complete recovery. It not only supports almost every photo format such as PNG, GIF, TIF, JPEG, and so on, but also offers secure, simple, and reliable repairing and restoring functionalities of a damaged file. So, if you are worried about how to fix incompatible JPEG, then once having this best and most effective program, you do not need to worry about it.
Video Tutorial on How to Repair Photos on Windows?
Solution 4: Repair half grey picture with Command Prompt
Bad sectors are also one of the prominent causes that lead to the corrupted images. You can fix these bad sectors with the help of the Windows Command Prompt utility. Go through the following steps to learn how to fix corrupted pictures that show up half or full grey/black screen.
- Prompt Windows search box and enter Command Prompt or CMD.
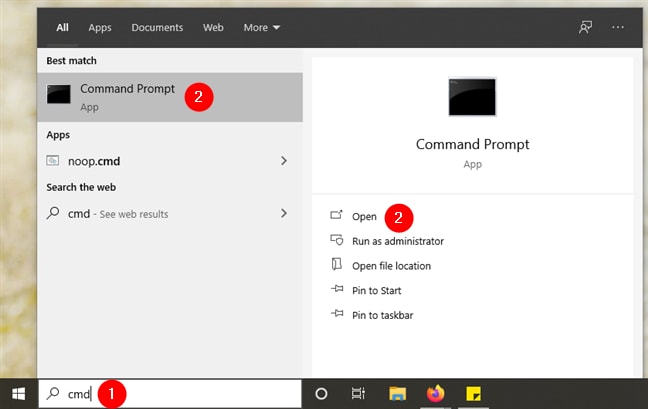
- Run the Command prompt and type CHKDSK (drive name) into it.
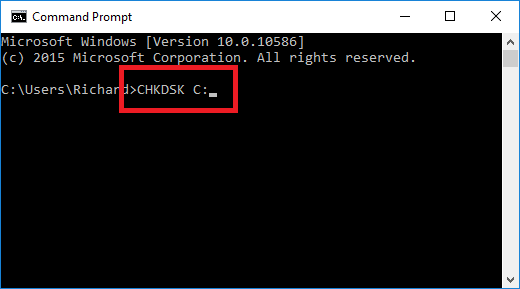
- Wait for a while until the process is complete, restart your computer, and check if you can see the corrupted image.
Also, here is the other usage of using Command Prompt to Repair Windows 10.
Solution 5: Repair corrupt picture with the Hex Editor tools
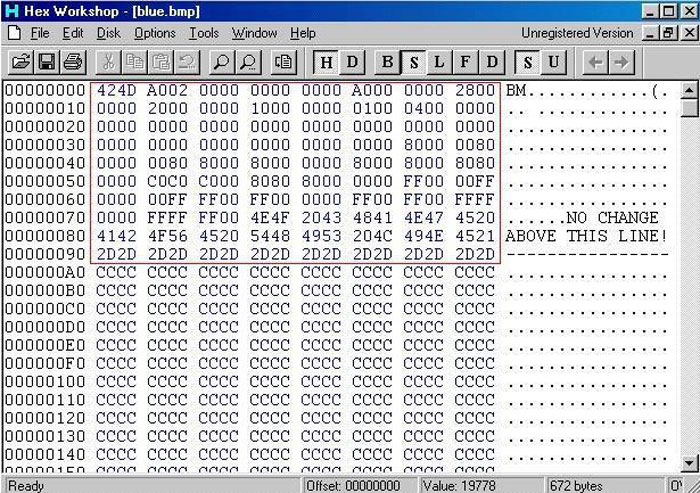
Hex Editor is a professional tool that displays the raw material of image files. You can repair corrupted pictures easily using the Hex editor. All you have to do so easily is replace the header of the corrupted file with the header of the healthy file that was taken by the same camera. If an image is showing zero bytes, then it is beyond repair.
The following steps will help you to repair corrupted pictures with the Hex Editor tool.
- First, you have to download and install any reliable Hex editor tool on your computer. HxD and Hex Workshop are the two most known Hex Editor tools available in the market.
- Install and launch the editor and open the corrupted file.
- Now, carefully go through the hexadecimal code of the corrupted image file. The hexadecimal code can be anything from 0000 to FFFF.
- Once you have made the changes, save them on your computer. Now open the corrupted image, this time you might be able to see the image.
Part 2: Why Are Photos Half or Full Grey or Black Screen?
One silly mistake or slight carelessness is enough to cause all the memorable and exciting moments in the past to become a grey or black screen. Several users may encounter this problem. Without further ado, please look at the cause of this kind of problem here as "Prevention is always better than cure".
1. Incompatible picture format
There is a common phenomenon that images appear half or full grey-out screen due to incompatibility issues. This mainly happens when your photo is RAW, which is a type of uncompressed image file format that's more like a digital negative. The RAW image isn't going to open in Photo Viewer, as a result, it may show half or full gray or black screen when you want to see it.
2. An interruption in the picture transfer process
This is another reason that might lead you to half or full grey-out screen images. When the picture transfer process is hindered, then your computer either deletes your pictures or makes them corrupted.
3. SD card is corrupted
If your SD card is corrupted, there are high chances that your pictures got damaged, such as half or full grey or black, unreadable, formatted, etc. The bad sectors are the primary reasons for SD card corruption.
4. Malicious attacks on the image files
For the image files most exposed to the malicious attacks, a minor change in the image format or data can lead to grey or black screen photos.
Apart from the above-mentioned reasons, there can also be some other possibilities for a photo to be half or all grey. If you encounter such a similar problem, please continue to read, we will provide you with a complete solution.
Bottom Line
In this article, we have discussed several methods that will help you fix half or full grey-out pictures. Despite that, repairing a corrupt picture is tricky, and some above solutions might fail to fix half or full grey or black image files. While professional tools like Wondershare Repairit are equipped with powerful functions and allow you to fix grey-out images in 3 simple steps.
Solve Media File Problems
- Recover & Repair Photos
- Recover & Repair Videos
- Recover & Repair Audio
- Recover & Repair Cameras


 ChatGPT
 Perplexity
 Google AI Mode
 Grok
Grok


Theo Lucia
chief Editor