How to Transfer Photos to SD Card
The present era is all about capturing your beautiful memories and storing them forever. Even for this purpose, you do not need a camera. Now all smartphones have a camera that serves the purpose of keeping beautiful memories. You can save these photos on your Android phone or iPhone. Sometimes, due to storage issues or other reasons, you may be required to transfer your photos from a smartphone to an SD card. A similar scenario got our attention. This article serves the purpose and tells you the solution. Hence, if you question how to transfer photos from internal memory to an SD card, this article will tell you all about it. So, gear up because we will provide you with the best and most efficient solution to transfer your pictures to an SD card.
Part 1: How to Transfer Photos from Android to SD Card
Solution 1: Transfer Files/Images from Android Internal Storage to SD Card
If you have any confusion about how to transfer data from internal storage to an SD card, no need to worry about it because you are in the right place. All you need to do is follow the simple steps mentioned below, and you will get your work done. The steps are as follows:
1. First of all, insert your SD card into your phone.
2. Open your file manager on your Android phone.
3. In the file manager, you will see categories of data. Click on the type of data, for example, "Photos."
4. From the above right corner, select the option of "Menu" illustrated by three dots.
5. There are various options on the screen; click the "Edit" option.

6. After this, select the desired files you want to move.
7. Then go back to the main menu of the file manager.
8. Click on the option of SD card there.

9. Choose your desired location and tap on it.
10. After that, click on the option of "Move here."
11. The process will take time, and then you will get all your files to transfer to the SD card.
You will get your work done without any issues by following the above steps.
Solution 2: Change the Default Camera Storage to SD Card
If you want your captured photos on an SD card, then you do not have to find answers to questions like how to transfer photos to an SD card or how to transfer files to an SD card. You can set your storage location to an SD card. In this way, you would not have to move pictures later. To deal with the purpose, follow the following easy steps.
Open "Camera" on your smartphone.
Choose the option of "Setting" in the camera application.

From the settings, click on "Storage Location."

From the available options, click on "SD card" OR "Memory card'. Your storage location will be set as an SD card.

After completing the whole procedure, your pictures will be saved on your SD card from now on automatically, and hence you will not have to worry about how to transfer photos from Android to your SD card.
Part 2: How to Transfer Photos from iPhone to SD Card
Solution 1. Export Photos from iPhone to SD Card via File Explorer
If you are looking answer to the question of how to transfer photos from an iPhone to an SD card, then this section will help you in this regard. You can export your pictures via File Explorer from the computer. To transfer your images this way, follow the easy and efficient steps listed below.
1. Insert your card in the card reader.
2. Connect the card reader with the SD card to the computer.
3. Connect your iPhone to the same computer via data cable.
4. Allow access to the computer on your iPhone by clicking on "Allow" in the pop-up notification.
5. Click on "This PC."
6. Choose the option of "Apple iPhone."
7. From the iPhone, choose the option of "internal storage" and then "DCIM."
8. From that, click on "100APPLE".
9. Then select the images to be copied and copy and paste them in the desired location of your SD card.

In this way, your pictures will be copied to your SD card, and then you can use it further.
Solution 2: Transfer Pictures from iPhone to SD Card with iPhone Transfer Software
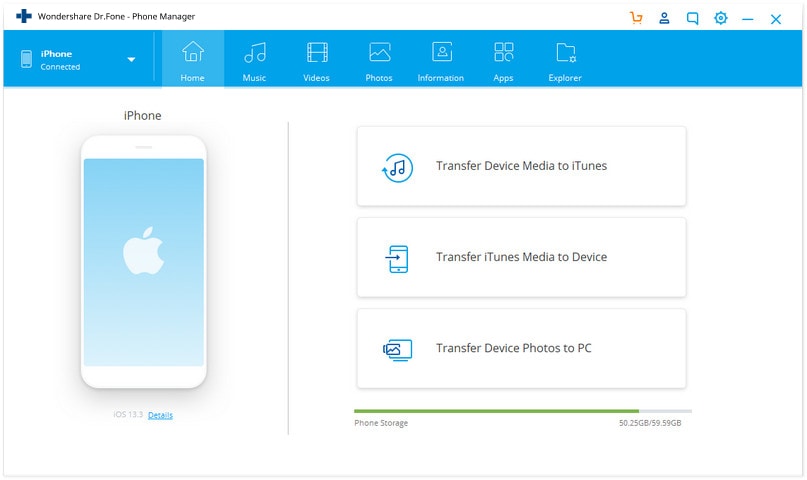
Usually, people face difficulty transferring photos from an iPhone to an SD card because the iPhone does not connect SD cards directly to it. But there's no need to worry about how to transfer photos from an iPhone to an SD card because you can use iPhone transfer software Dr.Fone Phone Manager to transfer your data from an iPhone to an SD card. To continue with this solution, follow the mentioned steps.

safe & secure
1. Put the SD card into the SD card reader and then connect it to the computer.
2. Connect your iPhone to the computer.
3. After connecting, run Dr. Fone's Phone Manager.
4. Click on the "Phone Manager" option.
5. Select the data category from the window appearing on the top.
6. Choose the "Export" button on the top and choose the option of "Export to PC" in the menu that appears
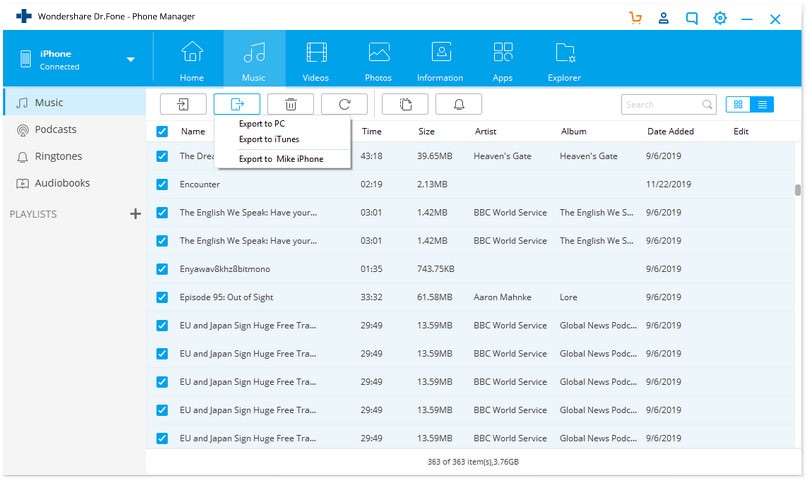
7. When the process is completed, check the transferred data in your SD card.
In this way, you can transfer your data from the iPhone to the SD card using iPhone transfer software.
Part 3. Recover Photos from SD Cards That Was Deleted or Lost
Sometimes people may lose their important data like pictures and videos due to viruses or some other error. That data can be vital for your use and can cause a disturbance if lost. But you do not have to worry. There's a fantastic software known as Wondershare Recoverit Photo Recovery Software, this software helps you to bring back your lost photos. Here are the features of this software that you can benefit from:
- 🖥 Drives & Disks Recovery - Recover photos from all the drives and disks of your system, including from your emptied Recycle Bin.
- 🔍 Dual Scanning Modes - Comes with 2 different scanning modes, an All-Around scan and a Deep scan for better recovery results.
- 👁 File Preview - Supports to preview all the scanned files before recovering deleted photos from Recycle Bin.
- 💪 Powerful - Supports 1000+ file formats recovery, and can help you recover deleted files from all kinds of storage devices like SD cards, hard drives, PCs, laptops, Windows, digital cameras, etc.
- ⚡ High Success Rate A high recovery success rate without any quality loss.
To take advantage of the software, let's have a look at the steps to follow.
Step 1: Downloading and launching the software
First of all, download the Wondershare Recoverit Photo Recovery Software from its website or the following buttons, then launch it.
Security Verified. 3,591,664 people have downloaded it.
Step 2: Connect SD card
Then put your SD card into the SD card reader and connect the SD card reader to your computer.
Step 3: Selecting the SD card
After connecting the SD card, select the device as the target location, and click on the "Start' button.

Step 4: Scanning the SD card
The scan will be launched on the SD card, and then you can start scanning the SD card. Scanning may take a while.

Step 5: Recovering pictures
When the scanning is over, select the pictures you want to recover and then click on "Recover" to recover the files. After recovery, you can save the images to the desired location.

More Related:
Transfer Files from PC to SD
Move Files from C Drive to D Drive
Conclusion
Nowadays, pictures are a source of storing memories. You can save these pictures on your smartphone and also transfer them to other devices. If you find out the answer about how to transfer data from internal storage to an SD card, then this article will help you. To transfer your pictures from Android to an SD card, you can insert the SD card and move photos to it, or you can also select a storage location as an SD card to store photos in your SD card. You can also transfer photos from an iPhone to an SD card via File Explorer or iPhone transfer software. Also, if by any chance you have lost your pictures from your SD card, you can recover them using Wondershare Recoverit Photo Recovery Software.
People Also Ask
-
How do I move all of my pictures to my SD card?
To move all pictures, select all the pictures and click on the option of the move. Then go to the SD card and click on the option of a move here.
-
Why can't I move files to my SD card?
It may be caused by a corrupted SD card or some malware in your SD card.
-
How do I switch from internal storage to SD card?
You can go to the camera setting and then change the default location to the SD card if you want to switch from internal storage to SD card.
-
Is it good to use an SD card as internal storage?
SD card is a storage medium, and it does not affect the quality of your pictures. Hence it is reliable and good to use.
SD Card Recovery
- Recover Card Data
- Repair Card Errors


 ChatGPT
 Perplexity
 Google AI Mode
 Grok
Grok


Eleanor Reed
staff Editor