To resolve unknown "Error Compiling Movie" failures in Adobe Premiere Pro, remove special characters from source filenames, switch to widely supported export formats, and turn off smart rendering or forced GPU rendering features. ● Fix "Out of memory" errors by navigating to Edit > Preferences > Optimize rendering for, and switching the preference from Performance to the Memory option. ● Resolve codec compression limitations by using an unconstrained codec, specifically selecting the 'None' option for AVI files or the 'Animation' setting for QuickTime files. ● Troubleshoot "Unable to produce frames" errors by locating the exact time frame listed in the error dialog and temporarily disabling accelerated effects, complex shape layers, or high-resolution stills at that specific point.
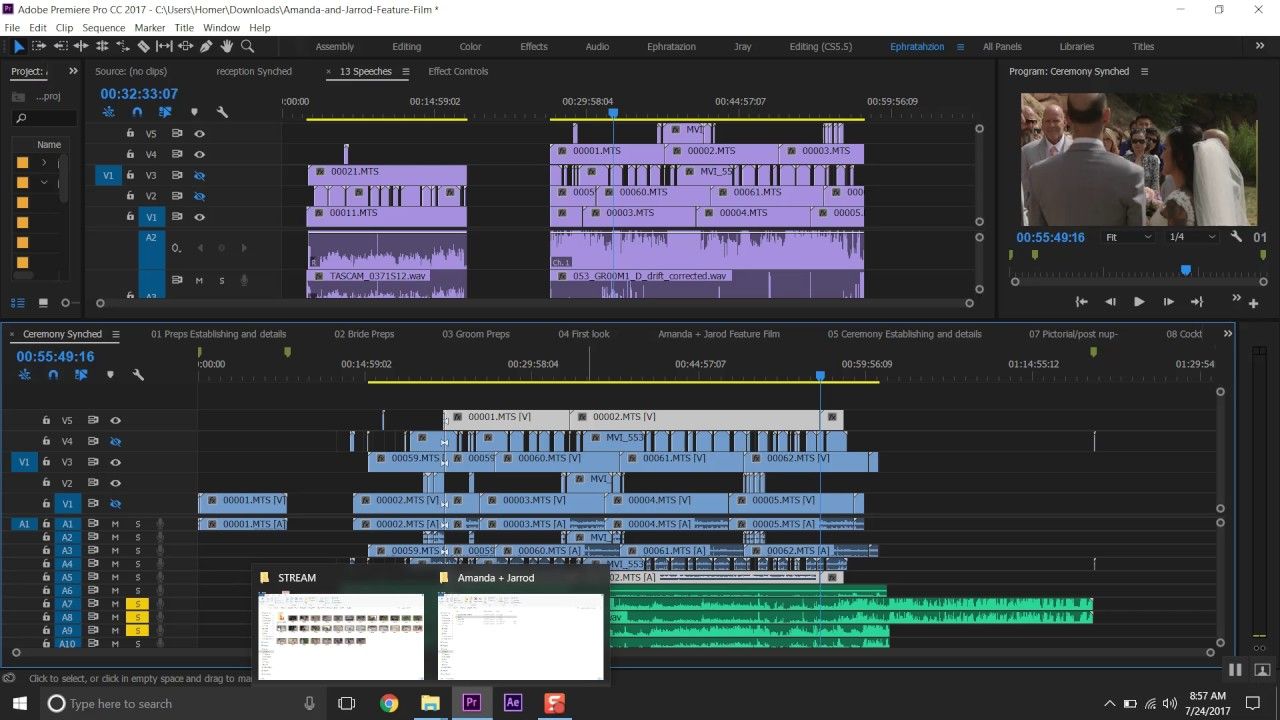
While compiling a movie in Adobe Premiere Pro, issues like "error compiling movie unknown error" can arise. These issues are very frustrating as all the editing and efforts you have put into the video will be wasted in an instance. Don't worry, there are a few ways to resolve and even prevent this issue.
Part 1. How to Identify Error Compiling Movie in Premiere Pro
To be able to resolve the issues that cause a compilation error, it is important to understand what the causes of this issue are and what does it mean. That's why below are some of the information that you might find vital for better understanding the error.
What Does Error Compiling Movie Mean?
This error means that the software was unable to process your request for compiling and editing the movie. This can be because of the error while rendering the video or editing it. Because of this error, your videos will not be compiled completely and all your hard work and efforts will go in wane. As it can happen due to a variety of reasons, it is tough for people to identify and single out a cause. So there're some necessary measures for its prevention.
Causes of Error Compiling Movie
There is a wide range of causes that can be behind "error compiling movie unknown error". Some of the primary ones are listed below.
Disk full
This error occurs when the disk you are rendering your file on gets full.
Duplicate file
If another file is present in the same location with the same title and format, you might see this error.
File not found
You get this error when the source files of the projects are not properly linked.
Invalid output drive
If the target disk that you wish to render your video on is not available or is right protected, this error will be displayed on your screen.
Unknown error
If the cause of the error is not known to the Adobe premiere pro algorithm, it will display an unknown error.
Unable to produce frames.
This can happen if the frame rates that you have set in a particular time frame of the video are facing issues with additional VFX and effects that you might have put in because of which it is not being able to produce the frames.
Codec compression error
This error message informs about unsupported frame size, which can be due to an issue with the system's memory or issues with some other hardware.
Accelerated renderer error
This error will appear if the current renderer that you are using is unable to render the files. The renderer can be changed from media encoder settings.
I/O error
Ensure that your hard disk has enough space and you have permission to write to the output location. Delete the cache files available from media cache and media cache database folders
Part 2. How to Resolve Unknown Error Compiling
To resolve errors arising due to unknown reasons, you must first make sure that the files used in the movie are all supported properly or try removing some unwanted clips or effects. If it doesn't work out, you can try to follow the methods given below.
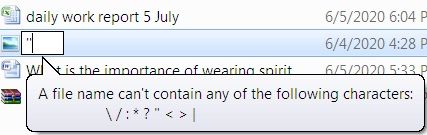
1. Ensure that file name doesn't have special characters
Make sure that the file name doesn't have any special character in it. If there are any special characters in the name of the file, it might not be able to get compiled and will show an error as the system will not be able to read. That's why make sure that you rename that specific file and remove special characters.
2. Try a different format
If one format is not working out for you, try using a different format for exporting the video. Sometimes, some part of your compilation video might have a clip that has an unsupported format for editing and rendering. If that is so, convert that file into some other format that is supported widely.
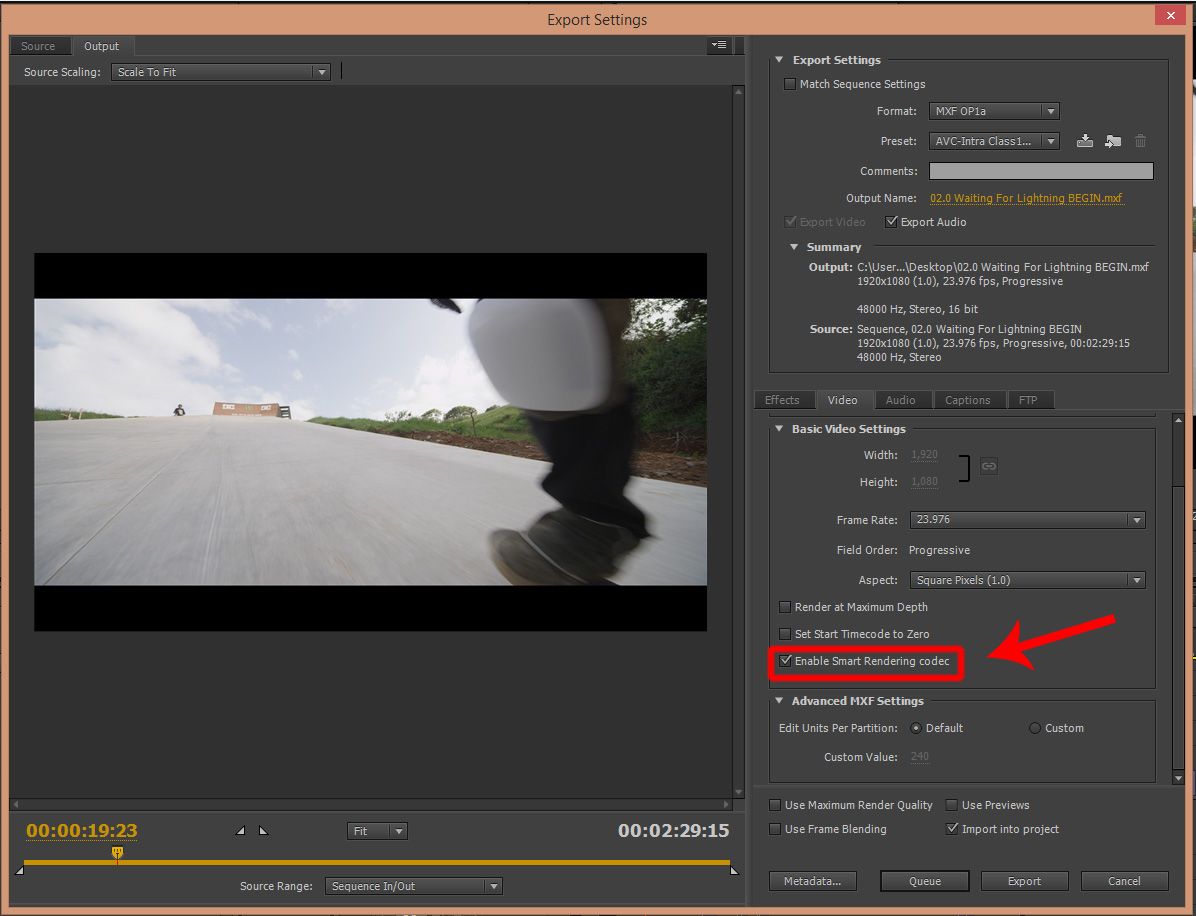
3. Remove effects and turn off special features
Sometimes because of excessive effects and features like smart rendering or GPU rendering can cause issues while you render your video. To resolve this problem, you can remove excess effects and turn of these special features like smart rendering and force GPU rendering. Also sometimes, clips present between the videos have formats that are not supported or some codec that cannot be played. They also need to be removed before you can render your video.
4. Restart your computer
As the causes of the issue are unknown, trying to restart your computer might just be helpful. First of all, save your editing and close the Adobe Premiere Pro software and close all other background processes as well. After all, that, restart your computer. After it restarts, refresh your computer, launch the software again and open the same video editing session and render the video again.
5. Restart Adobe premiere pro
Sometimes, simply restarting the Adobe premiere pro can do the trick as the software might have experienced a glitch or a bug during the last rendering attempt. Make sure that you have saved the editing progress before you exit adobe premiere pro or you will lose all the progress you have made so far. Close the software and refresh your system a few times and then launch the software again.
Part 3. How to Fix Error Compiling Movie Due to Specific Causes
Errors that have a known explanation can be easily resolved. The dialogue box that shows the error usually specifies the problem that the application is facing so that you can take countermeasures to avoid or resolve them. The following are some of the solutions to commonly find specific errors in Adobe premiere pro.
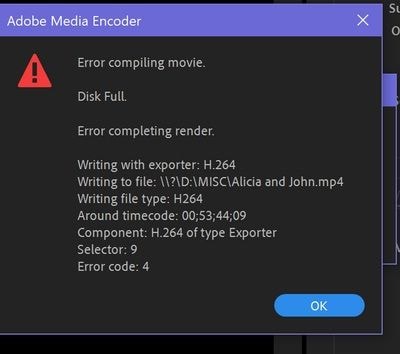
Disk full error
The disk full error arises when the location where you are trying to render the file doesn't have enough space. You can clear out space in your hard disk by deleting unwanted files and cache present on your computer. Adobe premiere pro also creates a lot of cache for your files when you import clips to edit, make sure you clear it all as it will allow you to save a lot of space on your hard disk.
Duplicate file
If a file with the same name exists in your system and on the same location as the file you are rendering, adobe will show this error. This is because no system allows you to have 2 different files with the same name and format. To resolve this, simply change the name of the file you are rendering by adding a letter or word in the end, or you can simply render and save the file into a different location where you can find free space.
File not found
Make sure all input or source files that you have inserted are linked properly. Use the Link Media option or the Locate File dialog box to locate and link the offline media files back again, which will bring them back online on the software so that you can use it in your project without any issue.
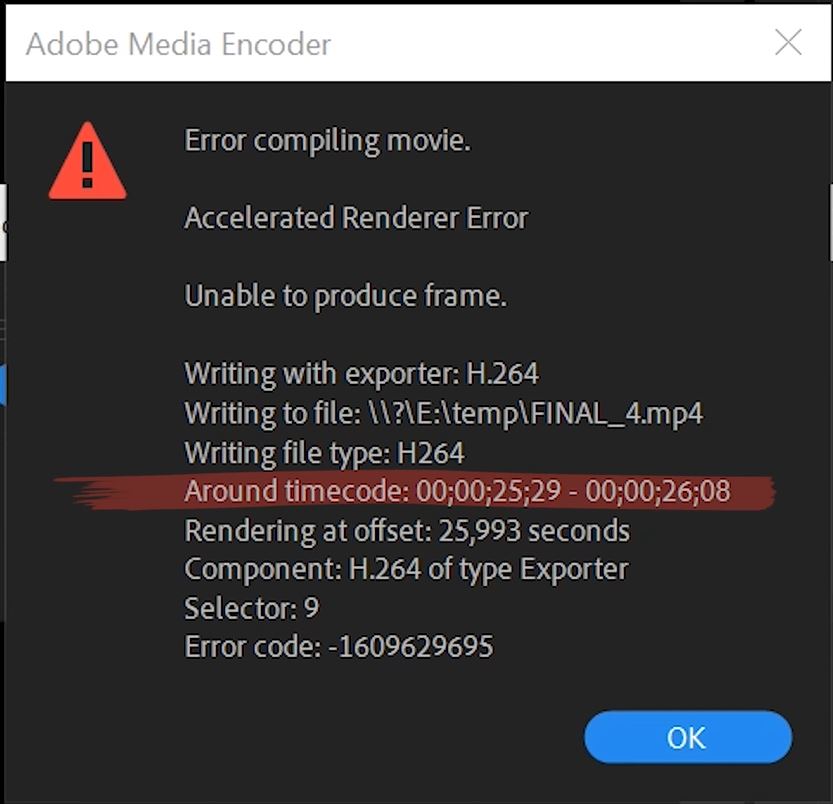
Unable to produce the frame
When this error surfaces, you will be able to see the time frame during which the error has happened. It will be written on the error dialogue box that you get. To resolve it, go to that frame mentioned in the error and look for things like accelerated effects in the time frame where the issue was experienced. You can try to disable the effects for a test run. It is advised to let the effects be minimal if possible. Also, look for extremely high-resolution stills, or shape layers with effects and try to keep them down a notch.
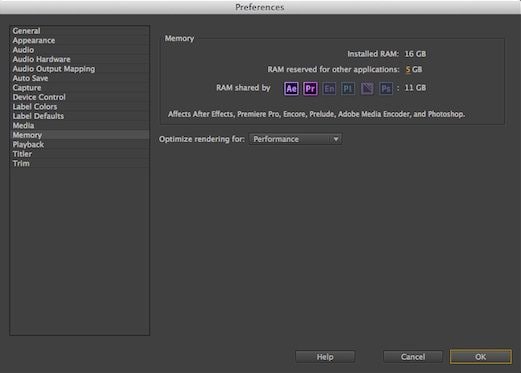
Out of memory. To maximize available memory, set the rendering optimization preference to "Memory".
Adobe premiere pro allows you to maximize the available memory on your computer. For this, you will have to change the rendering optimization preference. This option will usually be turned to performance, but you will have to switch it to the memory option. You can easily change this option back to its original setup once your work is done. The following steps will guide you to it.
Step 1: Go to Edit > Preferences > Optimize rendering for and select the Memory option.
Step 2: From the drop-down menu next to Optimize Rendering For and select Memory. Now click OK, close Premiere Pro, restart it, and open the same project again to render it.
Codec compression error. This codec may be unable to support the requested frame size, or there may be a hardware or memory problem
This is perhaps the most common specific issue and to solve it, you can use an unconstrained codec such as the 'None' option found in AVI files. In QuickTime files, you can set it to animation so that you can be assured that frame size is causing the issue. The error dialogue box will also have a link to the supported formats in Adobe premiere pro. You can refer to that as well to find a better solution
Invalid output drive
If you don't have the permission to write on the output location that you have selected or if the system is unable to read the location, you will get this error. The solution to this is simple and you can either get administrative permissions to get access or you can choose another drive to render the video in.
Part 4. How to Recover Not Found Files on Computer
If suddenly your files go missing from your computer, you will get worried. Suppose this happened to an important file from work and think about the problems you might face. This is why you must be aware of the software that is responsible for file recovery like Recoverit. This software is supported across different formats like Mac and Windows.
You can download this software for free and use it to recover any type of files including movies, images, videos, music, text documents, etc. This software supports almost all the major file formats for file recovery and is very easy to use. It boasts of a very clean and clutter-free user interface that allows new users to understand the features of the software easily and navigate without any issue. This software also has an advanced recovery mode for videos that requires you to upload a sample file that originated from the same device and has the same format.
The following are the steps to use Recoverit for recovering the missing files from your computer.
Step 1. Select and Start
Now install the setup, launch the tool, and select the location where you think the file was originally stored, and click on start to start the scan.
Step 2. Scanning the Location
The software will now scan the location for recoverable files and will list them on your screen. You can apply filters to narrow down your search. Scanning will take some time.
Step 3. Preview and Save the Video
As soon as the scanning is completed, you will get the option to preview the files and check if they are working or not. If they are working fine, click on the save option and the files will be saved to your device.
Try Wondershare Recoverit to Recover Your Vital Data
Security Verified. Over 7,302,189 people have downloaded it.
Part 5. How to Ensure Premiere Pro Plays Videos Smoothly?
If you understand the file types, limitations of software, and your computer, you will be able to manage to make the video play smoothly. To make sure that Adobe Premiere Pro can run the videos smoothly, you can follow the tips given below.
Keep your system updated
Keep on checking your operating system, adobe premiere pro, and video/audio drivers for any updates. Keeping these things updated will ensure that all the latest codecs and drivers are present on your computer, which in turn makes sure that your videos play flawlessly on Adobe premiere pro.
Make sure that the video is in the right format
Before playing the video check if the format is right or not. Wrong formats or unsupported formats will always have issues when you play the file.
Check system requirements
Adobe premiere pro is advanced software and to play all the files, it needs support from equally capable hardware. Ensure that your computer meets the system requirement of Adobe premiere pro or you might face playback issues or constant crashing.
Check media cache
From time to time, clean the media cache. Also, premiere pro has complex file management, i.e. the files are referred from its location and when you open it, a media cache is created in the time it loads up. Although, they are very small individually over time media cache will fill your memory. This is why try cleaning it from time to time and set a location that can house a large amount of cache.
Free up memory
Every process uses up RAM, especially video editing and playback. This is why, having a lot of programs open in the background can eat up a large part of the available RAM, making intensive tasks like video playback and editing can face lag and stuttering.
Conclusion
Adobe premiere pro is a major video editing tool for Mac as well as windows based computers. It is a professional-grade editor that is used for high-level video editing. Often, errors can occur during the compiling process, which can make videos unusable or might drop their quality or usability.
You should understand the causes and effects of this issue to better resolve it properly. If you have a file missing that is causing this issue, third party recovery software like Recoverit can be of great help as well for recovering those files.


 ChatGPT
 Perplexity
 Gemini
 Claude
 Grok
Grok


Eleanor Reed
staff Editor