Tips for Fujifilm Instax Mini 8/9 Troubleshooting
"Good day, everyone. I need your help with my Fujifilm Instax mini 9; the camera will not turn on. What do I do, please?"
Today, the Instax mini 8/9 cameras provide an entertaining way of taking pictures. Although these cameras have a fun appeal and seem easy to handle, like toys, they are prone to problems like other equipment types.
The good news is that you can troubleshoot the problems you face with your Instax mini 8/9. This article provides you with the right tips to apply when handling your camera.
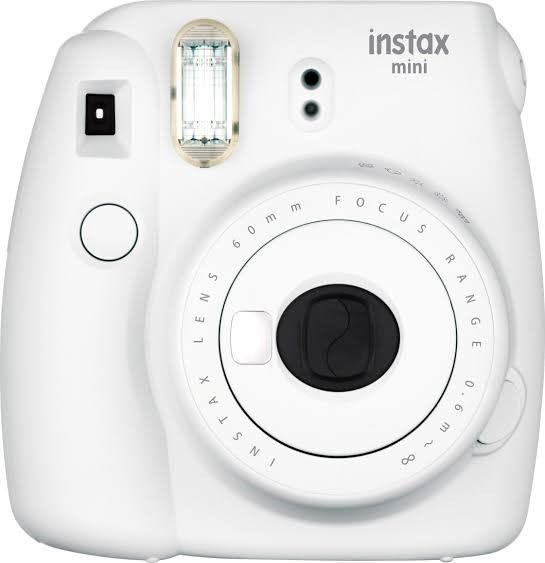
Overview of Fujifilm Instax Mini 8/9 Camera
The Fujifilm Instax Mini 8 is a camera that takes photos and develops them instantly. Its working is similar to that of an old school Polaroid camera. This analog camera resembles a toy that gives it an appeal among hipsters.
The Instax mini 8 looks hulky, but it weighs only about 307g, and it is slimmer in size than previous models of Fujifilm Instax cameras. It has five different colors, including blue, black, white, yellow, and pink.
- Its buttons are necessary. The lens is collapsible.
- The camera trigger is on the handgrip; the viewfinder is above it with the flash beside it.
- It contains five different levels of exposure. It also includes a "High Key" mode, enabling you to shoot photos with very high levels of brightness and a subtler atmosphere.
- The flash recycles every 0.2 to 6 seconds. It uses film, which is 62 x 46mm in size. This means that the photos are usually small in size.
- The Fujifilm Instax Mini 8 camera does not have autofocus.
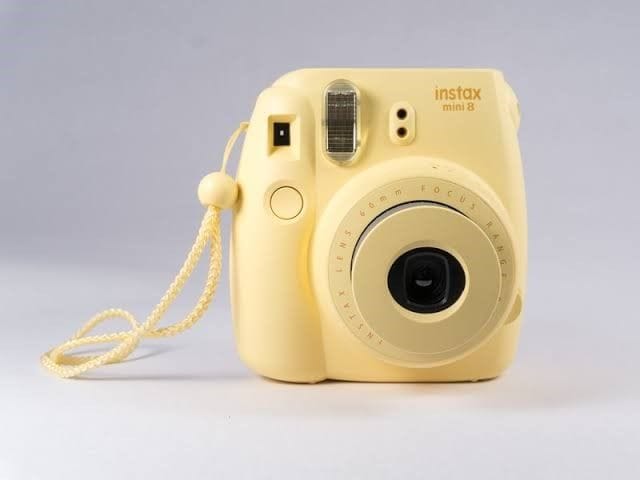
The Fujifilm Instax Mini 9 is also an instant camera that produces photos in credit card sizes. The Instax Mini 9 camera has five colors: Lime Green, Flamingo Pink, Ice Blue, Smoky White, and Cobalt Blue.
- Its measurements are 116 x 118 x68 mm. Also, it weighs 307g when it is without film and batteries.
- It uses a 60mm lens and its maximum aperture is F12.7. This is the same as a 34mm lens on a camera with a full-frame. Besides, it has a close-up lens attachment that you can clip on the camera's lens. This attachment enables you to focus your camera on a subject which is between 35cm to 50cm away.
- There is a mirror in front of this camera, enabling you to know your position during selfies.

Both the Instax mini 8 and 9 have a constant shutter speed of 1/60 seconds. This means that all you need to do to shoot an instant photo is: put the camera on, use an icon-based brightness dial to choose the aperture, and press the shutter button.
Troubleshooting of Fujifilm Instax Mini 8/9 Camera
The tips for troubleshooting for both Instax Mini 8 and 9 cameras include:
1. The Camera Refuses to Turn On:
You may be able to turn on your camera because its batteries are dead or drained. Therefore, to resolve this issue, simply check your camera battery compartment to ensure that the batteries get fully charged.
Also, check that the batteries are 2xAA batteries and ensure the correct placement in the compartment.
2. The Lens is Stuck:
Fix this problem by extending the switch used to release the lens. Extend the lens to the point that you are sure there is an opening through it when you view from behind. Once the release switch has been triggered, your mini 8/9 camera lens should pop out. When a light naturally appears on the aperture ring, it is an indication that the camera is now ready to be used for shooting.
3. The Film is Not Developing or Ejecting from the Camera: The film slot may be blocked, thereby preventing the film from coming out of the camera.
- Replace the film cartridge with a different one to solve the problem. If this doesn't work, check for any blockage in the ejection slot and eliminate any debris found in it.
- If the film is damaged, it may not correctly eject from the camera. Avoid this problem by not applying excessive pressure, bending, or exposing direct sunlight when the camera begins to self-develop the images you have shot.
- Always check that you load the correct film in the film holder because if the film cartridge is inserted improperly, it may affect the workings of the camera. Ensure that there is always a film in the film holder before you take a photo.
4. The Lens Fails to Open and Close:
If the lens fails to open, it may be because you are using the wrong eject button.
To open the lens, click the button at the bottom right of the front of the camera.
To retract your lens, simply press it back into the camera's body without pressure. Before carrying out either action, check that nothing is blocking the lens.
5. There are Issues with the Viewfinder:
If the viewfinder does not provide a clear view of the images you are trying to shoot, maybe it is the dirt that blocks it.
Always clean your viewfinder to prevent this problem from coming up. Use a soft and clean microfiber cloth in ridding the viewfinder of any dirt.
If the blurry images emanate from a crack in the viewfinder, you should remove the camera's back cover and replace it with a new one.
6. The Flash Unit has Problems:
To fix flash unit issues, ensure that the flashbulb is neither damaged nor missing in the first instance.
Also, ensure that there is enough charge in the internal flash capacitor. If it is unable to hold enough charge, get a replacement for it.
How to Recover and Repair Fujifilm Instax Videos
Recover Fujifilm Instax Mini Camera Recordings
If you lose important data from your Fujifilm Instax Mini 8/9, a great tool recommended for you to recover your data is Recoverit Data Recovery. With Recoverit, you can retrieve videos from digital cameras, SD Memory Card, trash bin, hard drive, USB, and so on. You can also scan and merge your video fragments from the same video. You can be sure of recovering most of your lost videos in one piece.
Video tutorial: How to Recover Deleted Photos/Videos from Digital Cameras
The steps involved are quite easy, as will be shown below:
Step 1: Select a Location.
Choose the location where you wish to recover your lost files.

Step 2: Scan the Location
After you have chosen the location, Recoverit will begin scanning the area to find your lost files.
In this step, you will have to wait for Recoverit to scan and retrieve your lost data. Usually, it takes a few seconds or minutes, depending on how small or big the files are in size.

Step 3: Preview and Recover Videos
Here, you preview all the files that have been scanned and retrieved. Then you can go ahead to save them. Click on the "Recover" tab to get back data.

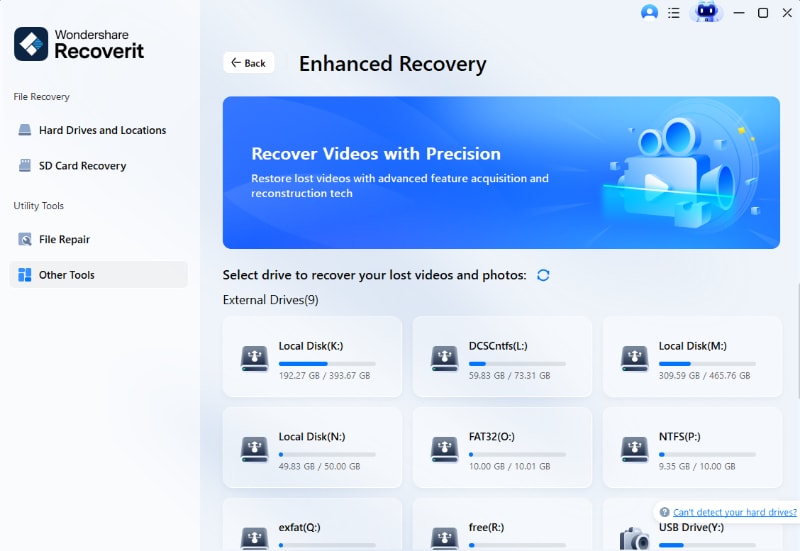
Advance Video Recovery: To perform an advanced video recovery, you will need a superior tool.
Recoverit has provided you with this tool through the "Advanced Video Recovery" function. Sometimes your lost videos are scattered around your device with multiple fragments. This function enables you to scan, merge, and recover your video fragments.
Simply click on the "Advanced Video Recovery" button to use this great feature, as shown below:
Repair Fujifilm Instax Mini 8/9 Videos
When it comes to repairing corrupted videos from your Instax mini 8/9, you need the video repair feature. This tool repairs videos in all major file formats such as MOV, M4V, MP4, MTS, M2TS, FLV, AVI, and 3GP. There is no limit to the size of files for repair.
The tool supports repairs in two modes. Quick Repair enables you to repair your video files with minor errors. Meanwhile, Advanced repair makes use of a sample video to fix your files with severe damage.
Step 1: Add your corrupted videos
Launch the application on your computer. To repair your corrupted video files, you can add it through clicking the Add button or "Add video and start repairing" area.

Step 2: Repair your videos
As soon as you have added all the corrupted videos, click on the Repair option to start the video repair process.

Step 3: Preview the videos
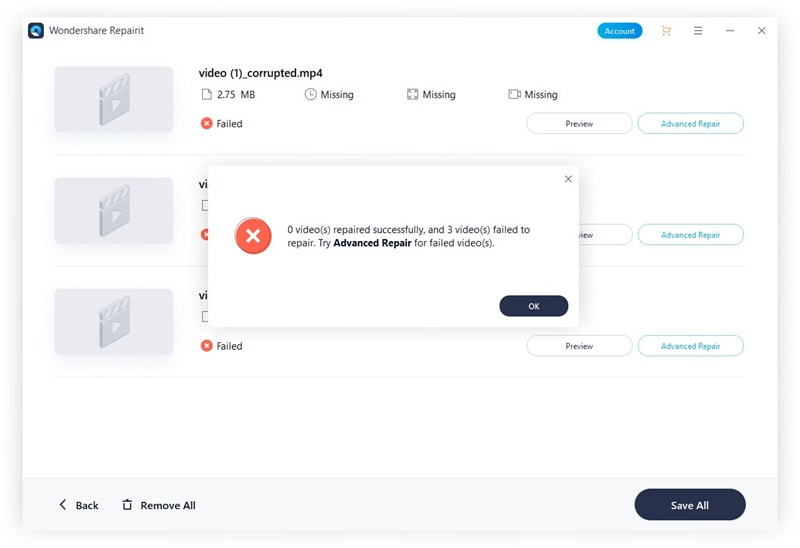
It will take some time to repair, and once it has finished the repair process, a reminder showing info of a successful fix will pop up on the screen. Press OK to close the operation.

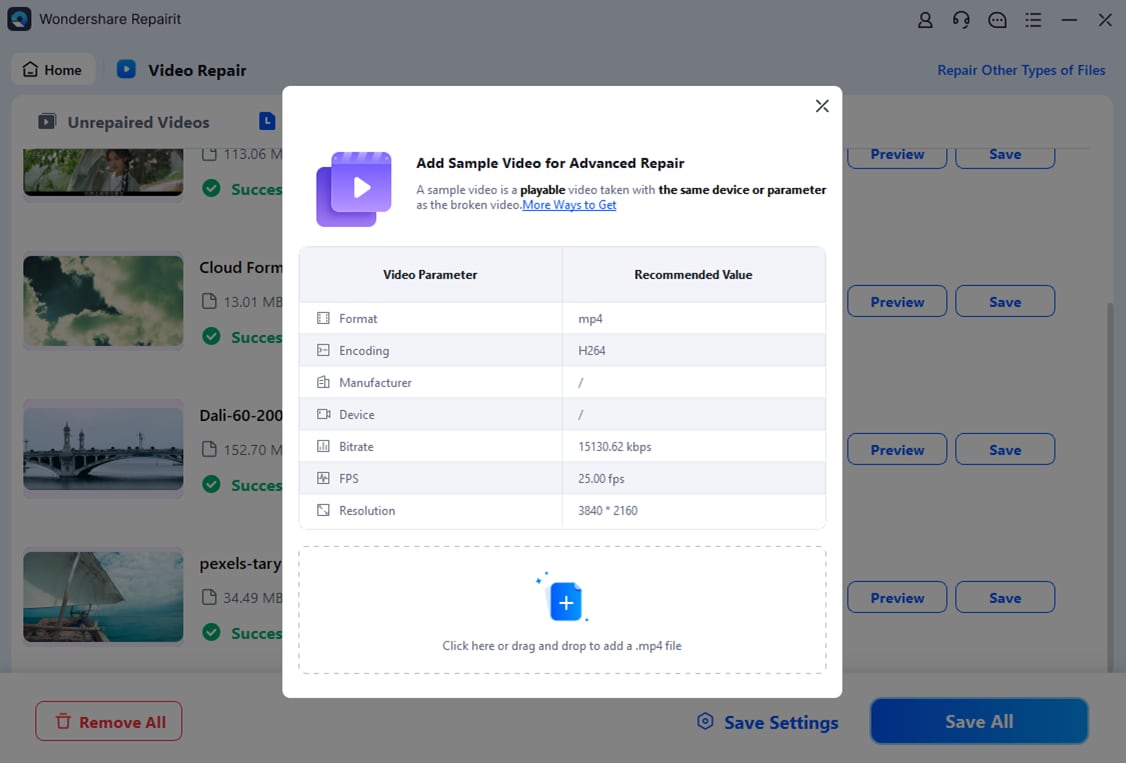
Step 4: Advanced mode for in-depth repair (optional)
If the videos are severely damaged and not repaired successfully, please go to the Advanced repair mode. Just click the Advanced Repair button.
Then add a sample video and repair it now.
Then add a sample video and repair it now.
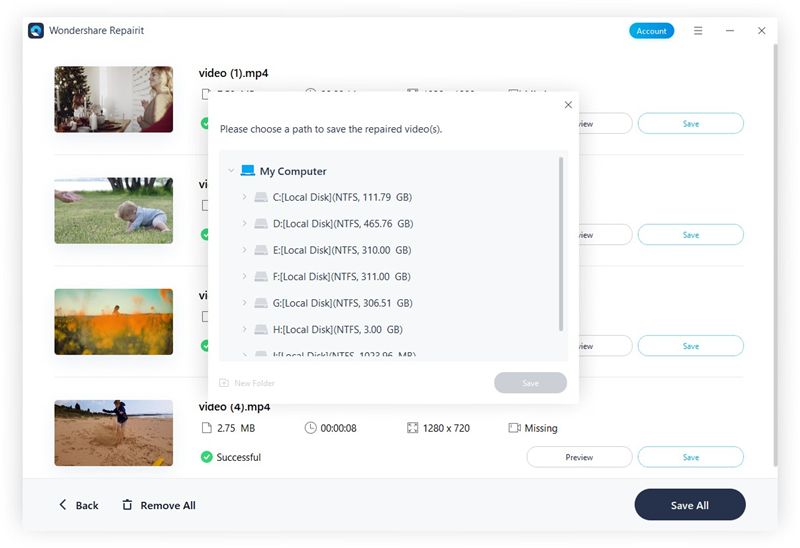
Step 5: Save repaired video
The Advanced Repair will perform the repairing process and prompt a success message when it finishes. Now, you can play these videos, and you will not see any errors on the screen.
Closing Words
This article has succeeded in introducing the Instax mini 8/9 cameras to you. The tips for Fujifilm Instax mini 8/9 troubleshooting, data recovery, and video repair, are quite straightforward, as you have seen in the article. You can now fix your camera problems on your own.
Solve Media File Problems
- Recover & Repair Photos
- Recover & Repair Videos
- Recover & Repair Audio
- Recover & Repair Cameras


 ChatGPT
 Perplexity
 Google AI Mode
 Grok
Grok


Eleanor Reed
staff Editor