What Files Should Be Excluded from Backup: Windows and Mac Solutions
Do you know there are some file types to exclude from backup in Windows and Mac? Find out what kind of data should be excluded from backup in this post.
While backing up their computers, a lot of people make the rookie mistake of including everything from the disk. Although it would help you take the entire backup of your system, it can backfire at times. For instance, you might not know, but there are some file types to exclude from a backup in almost every computer. Therefore, I will let you know about the Windows 7/8/10 and Mac files that should be excluded from a backup in this quick post.

Why Some Files Should Be Excluded from the Backup?
Before we list all the files to exclude from a backup, it is important to discuss why we follow this practice. Ideally, you should exclude some files in your Windows 7/8/10 backup due to the following reasons:
- Most of the system files are recommended to be extracted from a genuine recovery or installer media instead of a backup.
- A lot of system files won’t need to be extracted again and it will only increase the size of your backup.
- At times, a few log or system files can even make the restoring process complicated or halt it in between.
- There could be some clash between the existing system files and the backup files, leading to a deadlock or a corrupt backup.
- If there is licensed or copyrighted material, then it can also cause issues with your backup.
- The files of the apps that are already open, transient data, temporary files, etc. are also not recommended to be included in the backup.
- If some files are corrupted by malware, then it can also affect your backup and might even corrupt the entire drive.
Therefore, once you know about the file types to exclude from the backup, you can not only optimize its size but would also keep it secure.
What Files Should Be Excluded from a Windows Backup?
Without much ado, let’s explore the files should be excluded from backup that would optimize its size and avoid any further complications.
At first, you can just identify the system apps that are already installed on Windows. You can just go to your computer’s Settings > Apps & Feature to get a list of all the installed apps. Here, you can view system or third-party apps that you want to exclude from the backup. You can also identify them from the Program Files folder of the Windows directory.

- Cache Data, Log Files, and Temp Files
Windows also store log files, browser cache, and other temporary files that won’t be of any use in the backup. Therefore, you can just avoid keeping cache, log, and other temp files in it. You can identify them from the Local > Temp folder or by visiting the Browser’s folder where its cache would be stored.

Since Recycle Bin mostly contains the files that we no longer need, there is no point in taking its backup. While taking a Windows 7/8/10 backup, you can find a dedicated Recycle Bin folder that you can simply avoid.
If you are using a third-party backup tool, then you don’t need to take a backup of the existing Windows backup (as it would be a waste of space). For instance, if there are existing File History backup files, then they can simply be excluded.
- Other File Types to exclude from the backup
Besides the above-listed data, these are some other files should be excluded from backup in Windows 7/8/10:
- SQL database files (mostly protected data)
- Virtual Machine Data
- Any suspicious file/folder that could be corrupted by a malware
- Outlook or third-party cache data
- System files in C > Windows or C > Program Files
- Microsoft Office App or Cache files
- Cache generated in C > Application Data > Microsoft/Apple/Cache (or any other application folder).
- Event logs, storage management services, Metadata, Internet Information Services files, Windows Registry, Active Directory, Terminal Licenses, DHCP files, COM database, boot files, and more.
- Any other unwanted system file such as win.exe, io.sys, msdos.sys, config.sys, boot.ini, hiberfile.sys, pagefile.sys, swapfile.sys, boot.mgr, etc.

What Files Should Be Excluded from a Mac Backup?
Just like Windows, there are plenty of files and folders that you can exclude from your Mac backup as well. Here’s a quick list of file types to exclude from backup in Mac systems.
All cache files and cookies that are stored by your browser (like Safari, Chrome, Opera, Firefox, etc.) can be excluded from the backup.
All the other temporary data (maintained by the system or any other app) can also be excluded from the backup. You can find most of the temporary files in Private > Tmp folder that can be skipped.

Any existing backup from your Mac (like the Time Machine backup) can be excluded too. Besides that, you can also skip the Virtual Machine data from the backup.
Just like Windows’ Recycle Bin, you can also avoid the Trash folder from the Mac. This is because the Trash folder would have deleted data that is only stored on a temporary basis.
Apart from that, you can also avoid licensed downloads, boot drives, configuration files, and desktop data. Some of the folders where these files are stored are Desktop, Applications, System, Network, Bin, Usr, Net, Private, Etc, Tmp, Cores, and Users.

Pro Tip: Backup Windows Files with Wondershare UBackit
By now, you can easily know the files should be excluded from the backup in Windows 7/8/10 to save its storage and avoid other issues. Though, if you want to maintain a selective backup of your Windows PC, then simply try Wondershare UBackit. Having tons of high-end and user-friendly features, it is one of the best ways to back up and restore data on your system.
- With the help of UBackit, you can manually select what you wish to include in the backup.
- There are inbuilt filters and a search option that would let you pick the files and folders to be saved.
- UBackit takes an incremental backup of data by maintaining different history versions to optimize the storage.
- There is also a provision to enable automatic backup and set up a preferred schedule to save your time.
- Apart from that, UBackit also comes with an inbuilt storage management feature and a smart virus scan to keep your files safe.
To learn how to back up and restore your data with the help of Wondershare UBackit, you can follow these instructions.
Step 1: Launch the UBackit Backup Section
At first, you can install UBackit on your computer and launch it whenever you want to save your data. Go to the Backup & Restore section from its home and choose to create a new backup.
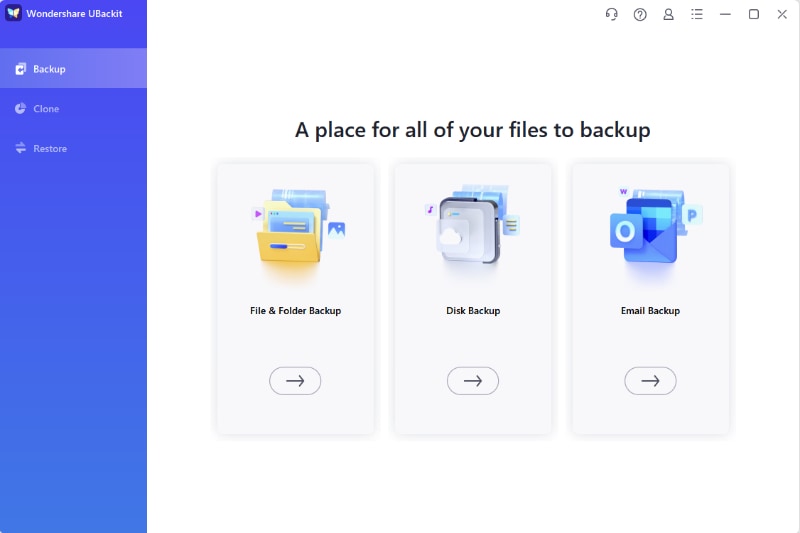
Step 2: Select the Files and Folders you want to Backup
Afterward, the application will simply ask you to browse the system’s directories and select what you wish to backup. You can simply browse the available folders or select the entire partition as well.
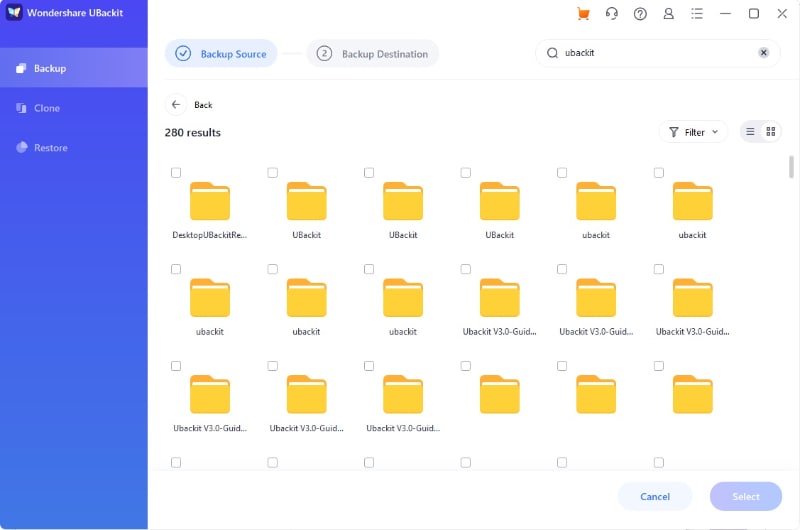
In case you are looking for specific files, then you can enter keywords on the search bar to get the exact results.

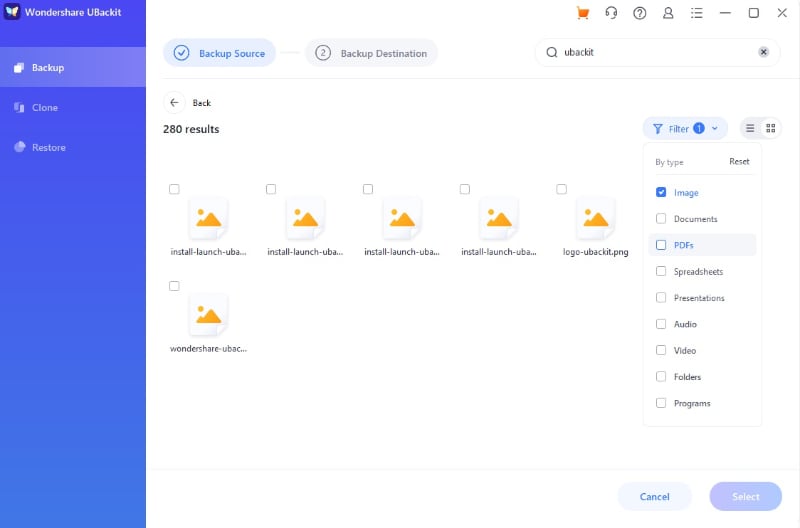
Apart from that, you can also use the inbuilt filters of UBackit to get specific results for any type of data.
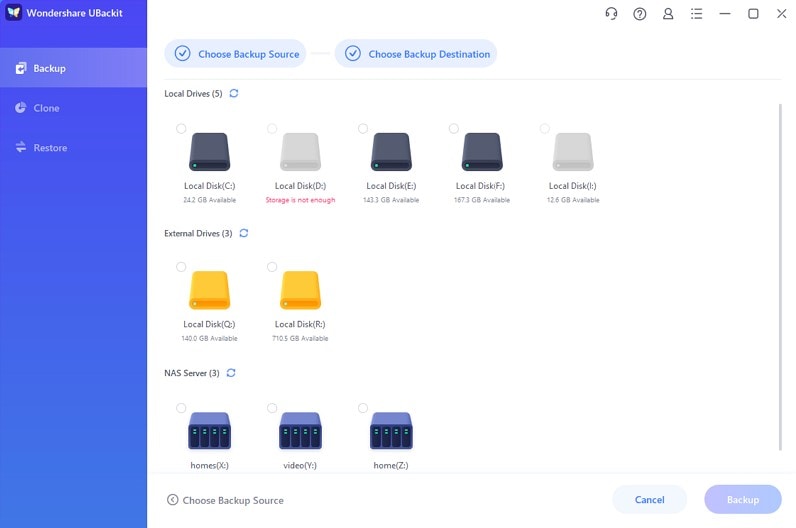
Step 3: Select a Destination Location to Save the Backup
As you would proceed, the application will simply ask you to select a location to save the UBackit backup. You can select any inbuilt partition or even an external hard drive (or any other connected source) from here.
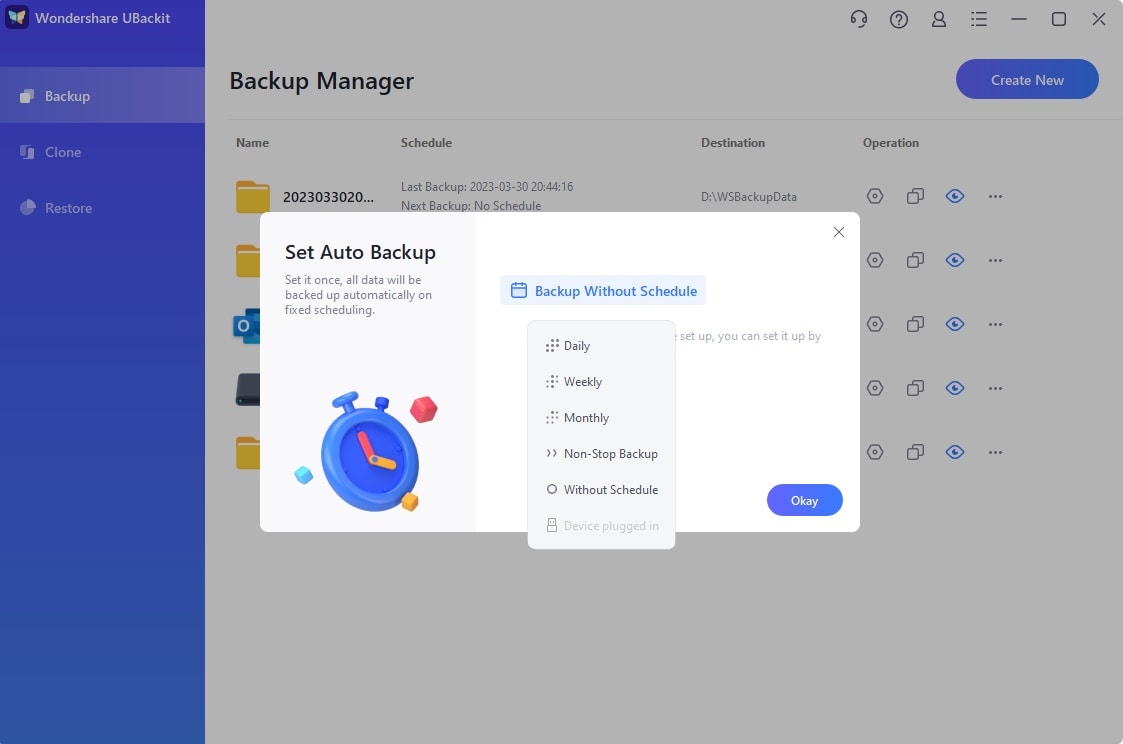
Step 4: Set up an Automatic Backup Schedule
In this optional step, you can click on the Auto Backup option of UBackit to set up its automatic schedule. Here, you can simply set up a preferred schedule (like daily, weekly, or monthly) to automate the backup process.
Step 5: Complete the UBackit Backup Process
After setting up everything, just click on the “Start Backup” process and simply wait for a while as UBackit would back up your data. The application will also display the progress of the backup process on the screen.
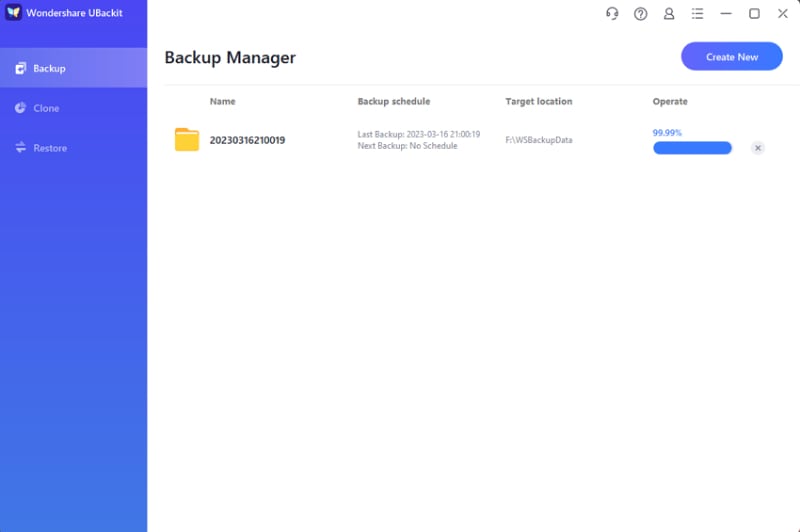
That’s it! Once the backup process is completed, you will be notified by UBackit. You can now check the stored backup files on its dashboard, view the history, and restore your data however you like.
After reading this post, you would be able to know about the file types to exclude from backup on Windows or Mac. To make things easier for you, I have included specific files should be excluded from backup Windows 7/8/10 here. Besides that, if you want to customize the backup process, then Wondershare UBackit would be the perfect pick. The application will let you include specific files to backup and would maintain different versions of the incremental backup to make things easier for you. It also offers an automatic backup process and has an inbuilt virus scan to keep your files safe and secure.
Data Backup Services
- Computer Backup
- Hard Drive Backup
- Mac Backup
- Cloud Backup


 ChatGPT
 Perplexity
 Google AI Mode
 Grok
Grok


Amy Dennis
staff Editor