How to Perform Factory Reset on Toshiba Laptop?
So, today’s question is how to backup files on a Toshiba laptop? You have come to the right place for the answer. For many reasons, you may end up factory resetting your Toshiba Satellite laptop. For example, it's working very slow and you may need to remove its cache memory. You may need to wipe all data before selling it, or it may be to remove BSOD errors. Most people also factory reset their laptops to remove viruses permanently. However, there is a 50% chance that the virus will survive after the reset. It can still survive if it's hidden in BIOS or in a storage drive.
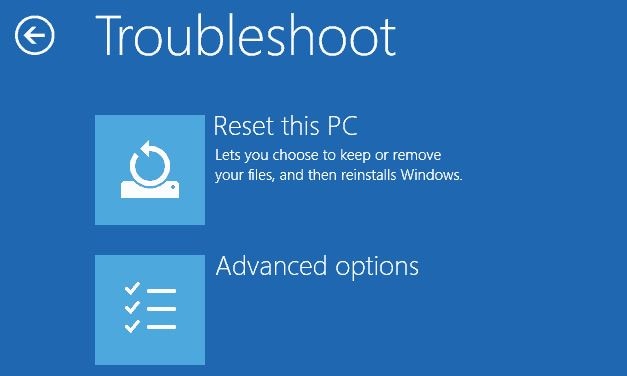
Part 1: How to Factory Reset Toshiba Laptop on Windows 7/8.1/10?
Factory Reset Toshiba Laptop on Windows 7
If you want to reset the Toshiba laptop and bought it recently in the last years, it should include a recovery disc with it in a hidden partition. It is used as a recovery partition on the hard drive which contains all the operating system files and drivers. So, use that hidden partition and restore your Toshiba Satellite and make it work like a new one.
The process of using the recovery partition on “Toshiba Satellite Windows 7” is easy. Follow the steps below.
Step 1: Turn off the laptop and remove all external peripherals attached to the laptop such as mouse and external hard drives.
Step 2: Now connect your Toshiba laptop to the laptop charger to avoid a power outage.
Step 3: Press and hold the 0 key on the keyboard and press the power button at the same time to boot up the laptop. When you hear a beeping sound, release the 0 key.
Step 4: Select the Yes option to continue the system recovery when the warning screen shows up.
Step 5: Select your operating system. In this case, it is (Windows 7).
Step 6: Click on Yes to agree to the terms of the Toshiba Satellite factory reset.
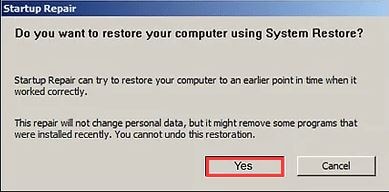
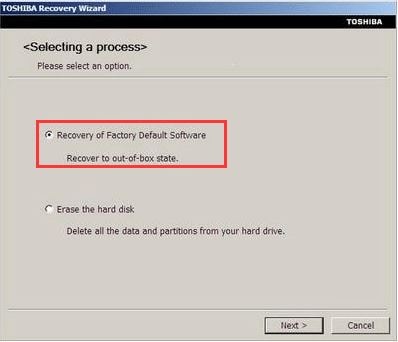
Step 7: Now select the option of Recovery of Factory Default Software from the Toshiba Recovery Wizard screen. Then, click next to continue.
Step 8: Select the option saying Recover to out-of-box state and then click Next to confirm and continue.
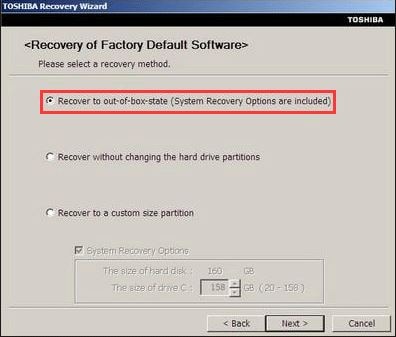
The Toshiba satellite factory reset process will take about 15 minutes to 2 hours to complete.
Factory Reset Toshiba Laptop on Windows 8.1
If you are running Windows 8.1 on your Toshiba Satellite laptop, follow these given steps in order to restore the laptop to its out-of-box state. Don’t forget to disconnect the peripherals.
Step 1: Navigate to the Settings menu on Windows 8.1 by searching or in the control panel and then click the Update and recovery option.
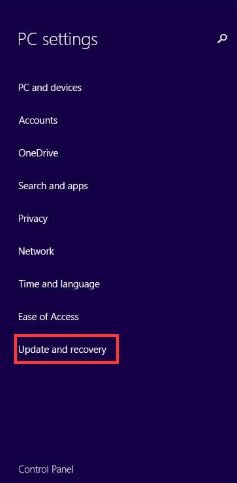
Step 2: Click on the Recovery option located on the left. Here, you will see two options to factory reset your Toshiba laptop on the right panel.
- Refresh your Computer without affecting your data files.
- Remove all data and install Windows.
Step 3: Follow instructions given on-screen and complete “Toshiba Satellite factory reset”.
Factory Reset Toshiba Laptop on Windows 10
Now we will discuss the Toshiba satellite reset windows 10 feature, which allows users to reset their laptop to the factory settings. Below are the steps to factory reset the Toshiba satellite laptop on Windows 10. You need to unplug all the extra peripherals first.
Step 1: Right-click on the Windows button located on the taskbar and then select the Settings option from the pop-up menu.
Step 2: Click the Update & security option from the Settings window.
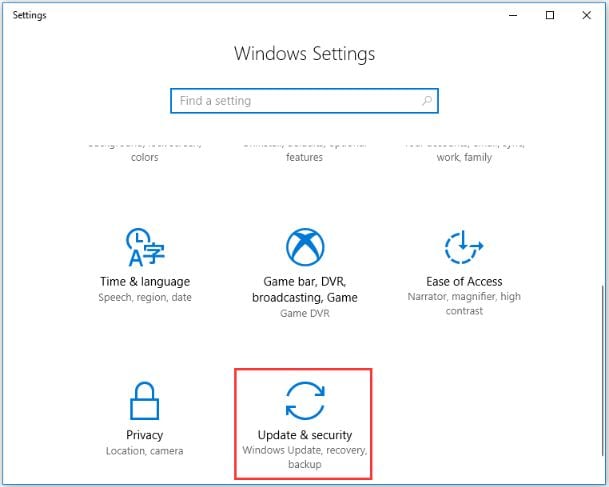
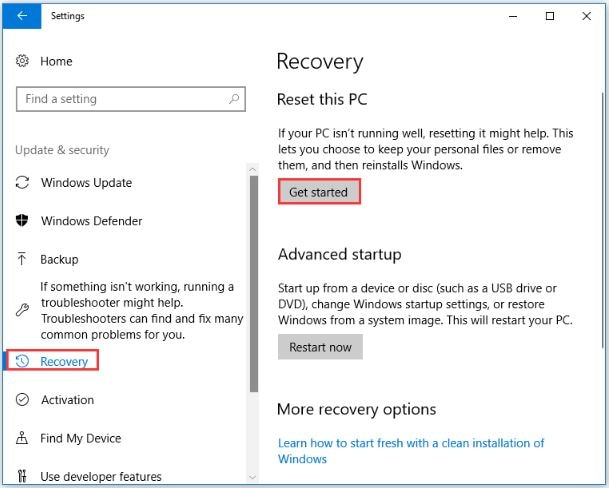
Step 3: Choose the Recovery option from the left panel and click the Get started button located under Reset this PC.
Step 4: Here two options will be available, just select one.
- Keep my files: If you choose this option it will remove all apps and settings without affecting your personal files.
- Remove everything: If you choose this option it will remove all of your personal data files, apps, and system settings.
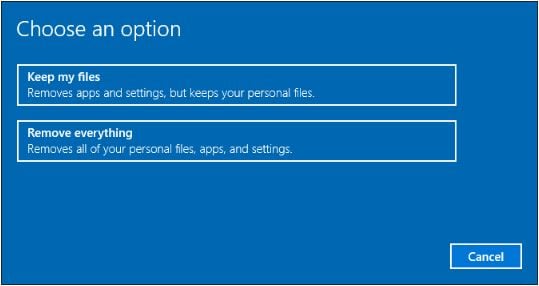
Step 5: Now it depends on you to select one option in the above step.
- If you choose the Keep my files option, it will show you the Getting things ready Then screen, click next when you see the information stating that your apps will be removed. Finally, click on the Reset button once you get ready to factory reset your Toshiba laptop.
- If you choose the Remove everything option, it will show you the Getting things ready Then screen, decide to choose the only the drive where Windows is installed option or the other option is All drives.
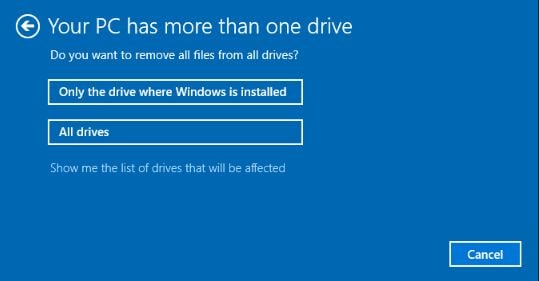
Step 6: Now just relax and follow the on-screen shown instructions to complete “Toshiba Satellite factory reset on Windows 10”.
Part 2: Backup Necessary File on Toshiba PC before Factory Reset.
Windows automatic File Backup tool can be complicated to use, Wondershare UBackit is a good alternative. It is one of the best automatic backup software, users can back up the files on their computer at any preferred location.
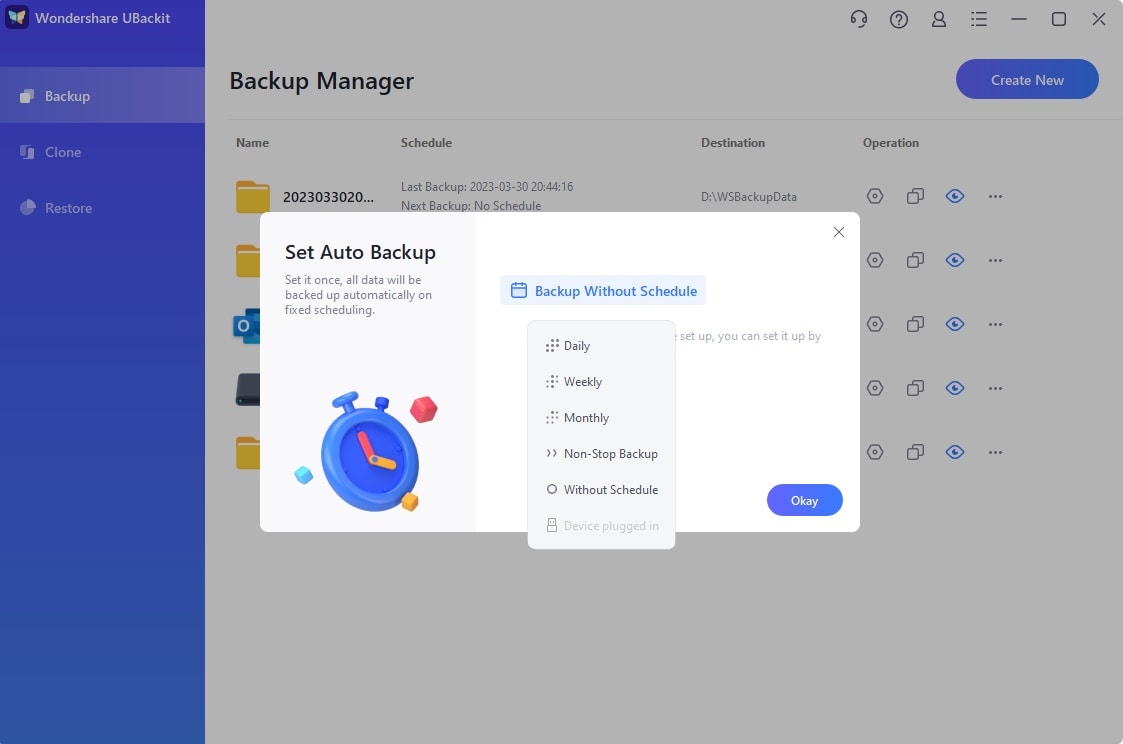
UBackit comes with an inbuilt automatic backup option, letting users select a preferred frequency such as daily, weekly, monthly, or ongoing.
- Incremental backup support
Instead of creating a new copy of the backup, UBackit takes an incremental backup and maintains different versions of personal files. This would save storage on computers by around 80 percent.
Users can select several partitions, folders, or files they need to back up. You can also filter results based on the file type or by entering keywords in the search box.
- Multiple formats supported
UBackit fully supports many major data types and file formats for photos, music, videos, documents, compressed files, emails, and much more.
UBackit provides an inbuilt virus detection feature to keep files safe. It also offers a preview of our data and has an advanced storage management feature.
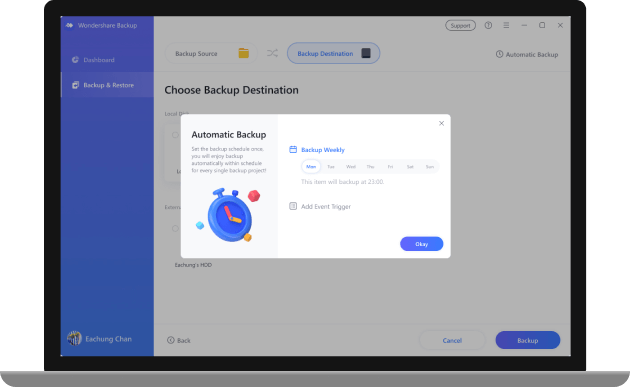
As we have mentioned all the features of UBackit, now let's explain how to use it in a few simple steps:
Step 1: Launch UBackit and select the Backup tool
Install Wondershare UBackit, start it to get an automatic backup. Click on the “Backup & Restore” option located on the sidebar and select create a new backup.
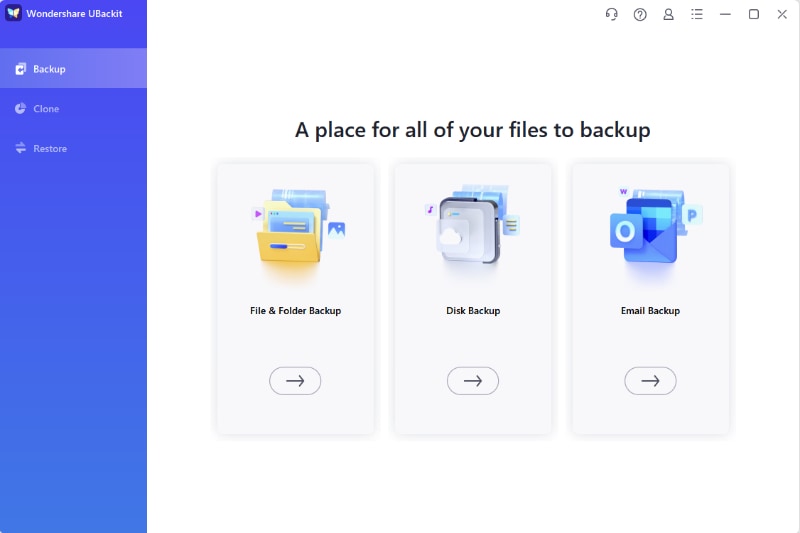
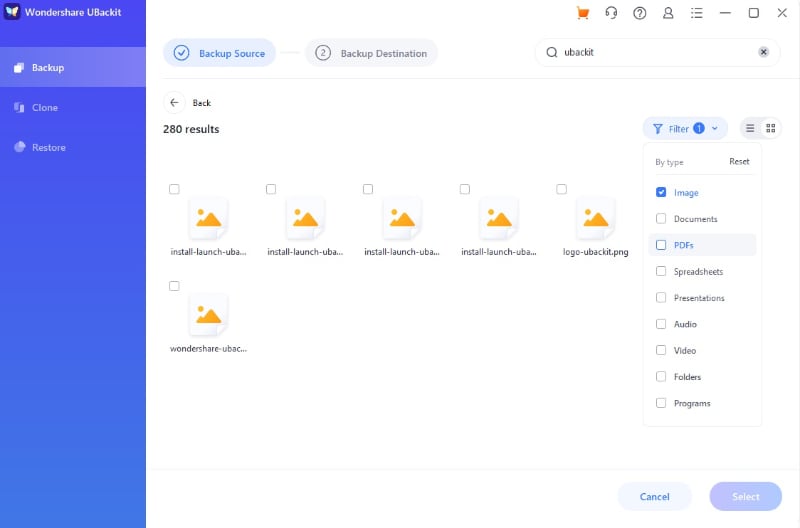
Step 2: Select the files/folders
Once you select the folder that you want to create a new backup in, now you need to select a source. Here, you can browse the partitions or storage drives on your PC and select the folder, files, or partition you need to backup.
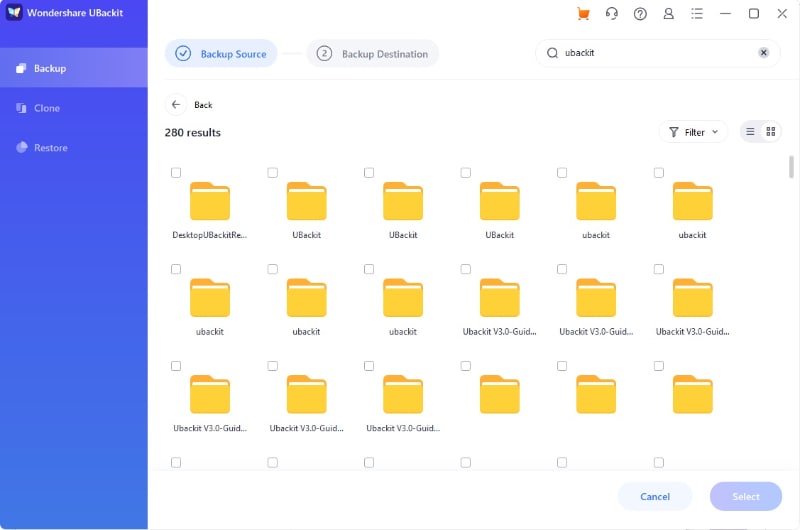
If you want to back up a specific file, then enter the keywords with the search bar manually and it will automatically give you results.

There are also various filters available to select your own choice data type to include in the backup.
Step 3: Select a destination to save the backup files
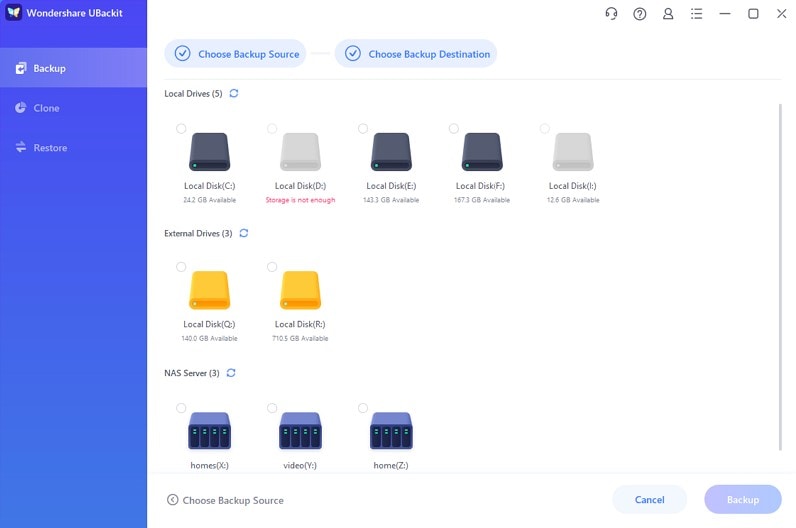
To proceed further, you have to select a location where the backup files will be restored. Here, the user can choose any local disk or external drive source connected.
Step 4: Enable the Automatic Backup schedule Option
If you want to carry out a file backup solution automatically, just click on the option “Set Auto Backup” located on the top. This way you can select a schedule from the options available to take automatic file backup. You can even take it manually whenever you like.
Step 5: Wait for the backup process to finish
That's it! Now click the “Start Backup” and sit back as UBackit automatically backups data.
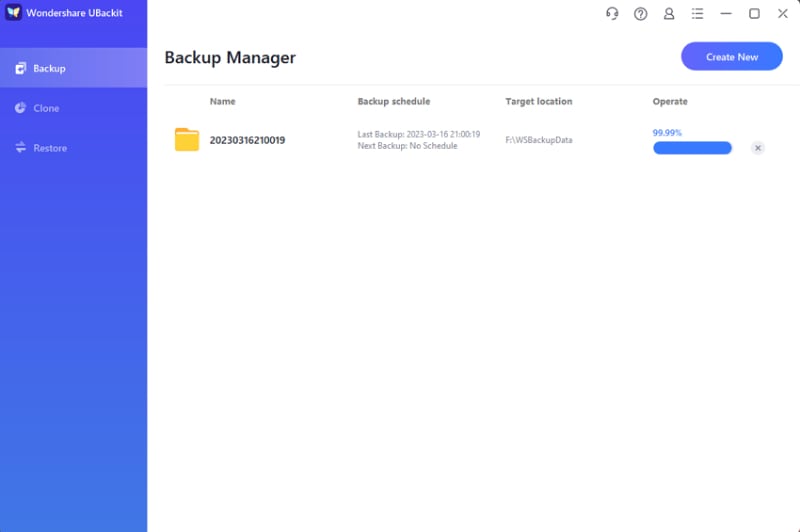
The software will keep you updated on the process progress so you won't have to check it. You will get a notification once the backup of files is updated so you can manage your data quickly.
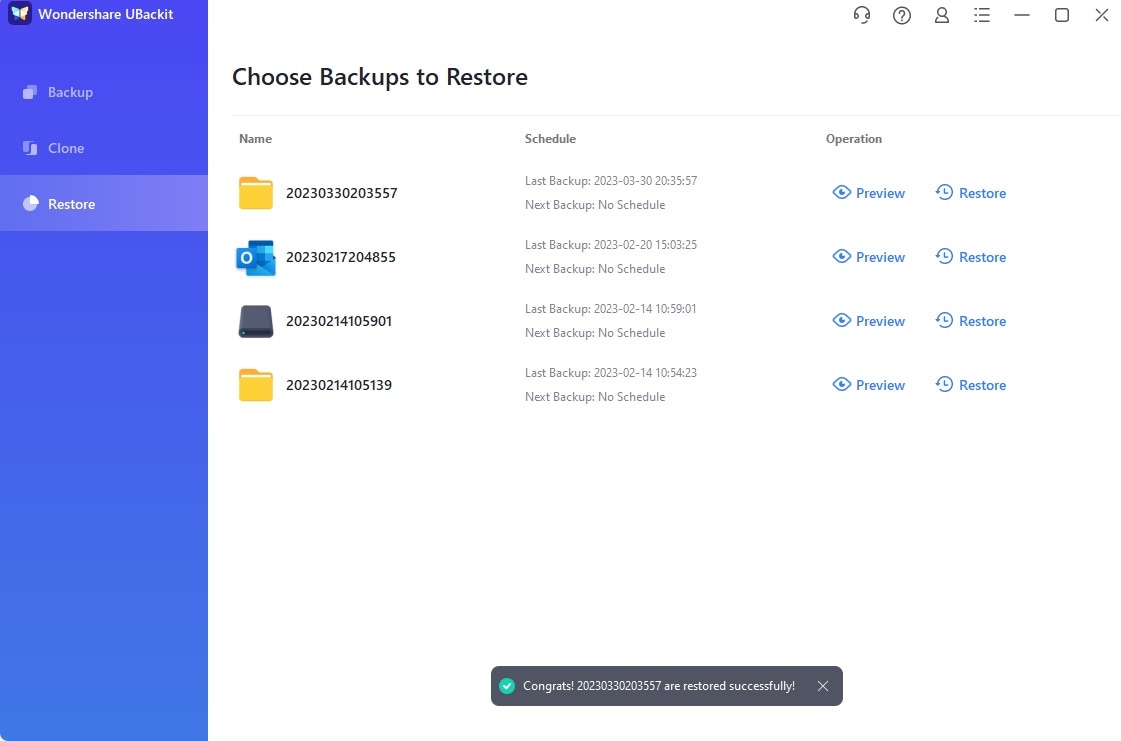
You can keep a check on the available backups and preview the files you restored to the selected location.
Part 3: Why do Users want to Reset Toshiba Laptops to Factory Settings?
How to factory reset the Toshiba laptop and why it's so important? There are many reasons for carrying out a factory reset. We have already discussed some of the reasons above such as the laptop is freezing and its working speed is very slow or maybe you use your laptop 24/7 and it's not working properly as it should due to heavy workload. Maybe you want to sell the old one and buy a new one. Mostly, it is because it is filled with malware errors. Viruses can hide in any Windows file or the recovery drive. If you factory reset the Toshiba laptop, it can solve the problem.
Bottom Line
You can find many more methods to perform a factory reset on Toshiba Laptop online. We have given you some of the best and working methods in this article. You can try them all to find out which helps you to fix the problem.
In case you have already lost your important files or data, we have given you a data recovering tool, Wondershare UBackit to try. If you want to avoid such disasters, consider using it beforehand. So, make sure you give this amazing tool a try.
Data Backup Services
- Computer Backup
- Hard Drive Backup
- Mac Backup
- Cloud Backup


 ChatGPT
 Perplexity
 Google AI Mode
 Grok
Grok


Amy Dennis
staff Editor