How to Backup QNAP to QNAP NAS
For a long time, information from computers has been stored on physical devices, and gradually storage devices have become more sophisticated, so much so that today there are drives of several terabytes of capacity. However, each time the amount of information that is usually stored can exceed this capacity, and backing up your information may be a headache, that's why NAS servers have become popular, which are storage devices connected on a network that can host large amounts of information, a very popular alternative to making backups is QNAP (Quality Network Appliance Provider), in which this post will be focused.
Part 1: Easy Method to Back Up QNAP to QNAP NAS
Q: How to backup QNAP to QNAP NAS?
Before solving the doubts and procedures of the methods to back up QNAP to QNAP NAS, we must understand how this device works.
QNAP (Quality Network Appliance Provider) is a leading brand in data storage servers, characterized by ease of use, large storage capacity, and fast data access from anywhere in the world and device. It is characterized by the manufacture of NAS, which are devices that can store an immense amount of data remotely and which also turns out to be quite practical because it can make backups from different computers.
The great advantage that QNAP offers is its operating system (QTS), which makes all your devices fully compatible and makes the most of them. In addition to this, this operating system offers multimedia applications for music, photography, video editing, and streaming media, among others. Therefore, QNAP is a very attractive option for demanding users and companies that want to ensure that their information is kept active and protected at all times.
Part 2: The Importance of QNAP to QNAP Backup
Backing up one QNAP to another QNAP may sound strange and exaggerated, as it is not at a very common practice to back up a NAS to another NAS; however, this may be more useful and safer than you think, below, I will mention three important reasons why you should do this procedure:
- To keep all data on NAS safe: QNAP NAS are high-quality devices that have a very long lifespan, allowing them to be used for many years. However, a NAS is an electronic device and however developed the technology is today, a device that uses electricity for its operation always has the risk of breaking down; therefore, due to an electric shock, a configuration error, or an accident which may affect your NAS an enormous amount of information may be lost and the backups could disappear. So, making a QNAP to QNAP backup will give you the security that your information will be safe and synchronized without depending on a single device.
- It can restore all of the files from backup images: The fact that your information is stored on two QNAP NAS gives you the great advantage that, through backup images, you can restore all your files in a very fast and practical way. Thanks to the native backup application of the QNAP operating system, you will simply have to carry out the relevant configuration and with a few clicks, you will be able to do this task that will remove you from many worries.
- To share files: Thanks to the QNAP operating system (QTS) and its remote application, you will have the facility to share files between NAS QNAP. In this way all your information can not be more secure and, if that were not enough, you will have access to other functions that will allow you to organize, order, and rank your information according to your needs and tastes.
As you may have noticed, the importance of QNAP to QNAP backup turns out to be a very useful idea and procedure. Although it may sound like a heavy investment that must be made to have this advantage, it is an expense that will be reflected not only in an imminent increase in security and protection of your information, but you will be able to share and restore it from backup images in a way very easy.
If you wonder how to do this procedure in the next section, I will show you in detail.
Part 3: How to Backup QNAP NAS to Another with QNAP Remote Replication?
Backing up QNAP NAS to another is simple. The first option can be done using a native QNAP application, which is Hybrid Backup Sync. Below I will show you how to do this process:
Step 1: Open Hybrid Backup Sync in your destination QNAP NAS
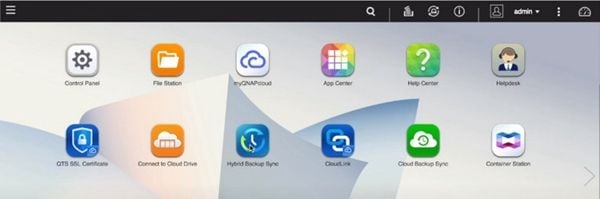
Make sure you have installed the Hybrid Backup Sync app in both QNAP NAS. First, open the application in your destination QNAP NAS.
Step 2: Go to "RTRR Server" page
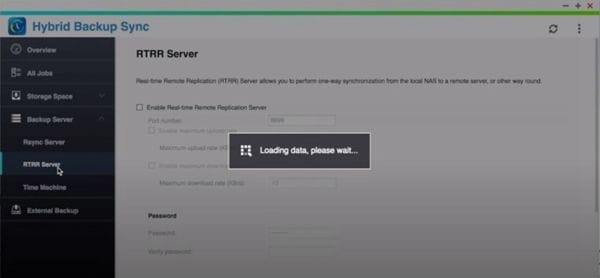
Click on "Backup Server" and then on "RTRR Server" and wait for some seconds until the data is loaded.
Step 3: Continue remote replication server process configuration
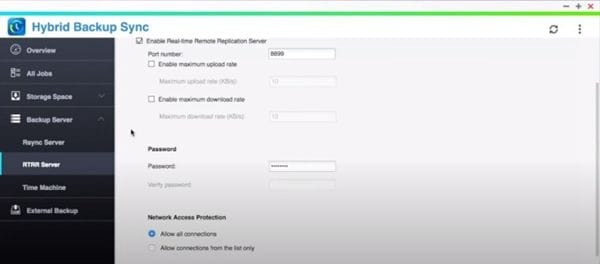
Tick the white square next to "Enable Real-time Remote Replication Server," then you have to type a password.
Step 4: Confirm
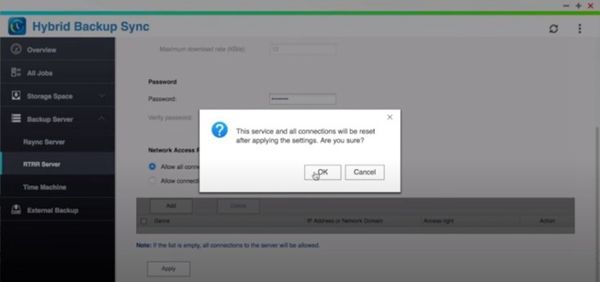
Scroll down and click on "Apply", then select "OK" in the pop-up window.
Step 5: Open Hybrid Backup Sync in your source QNAP NAS
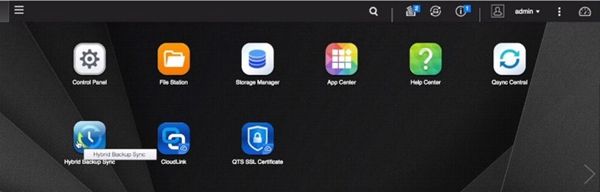
Go to your QNAP NAS desktop, then open Hybrid Backup Sync.
Step 6: Open backup configuration
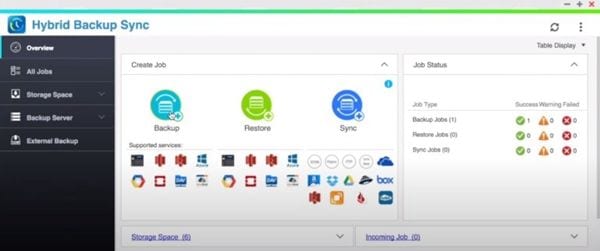
Click on the light blue circle icon above "Backup."
Step 7: Select "Remote Backup"
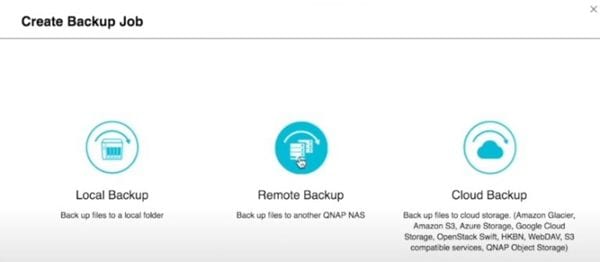
In this menu, click on the "Remote Backup" icon.
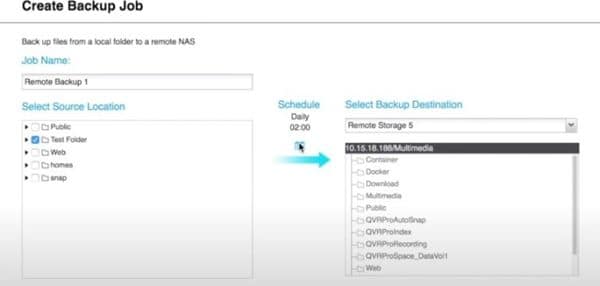
Step 8: Select source location and destination backup
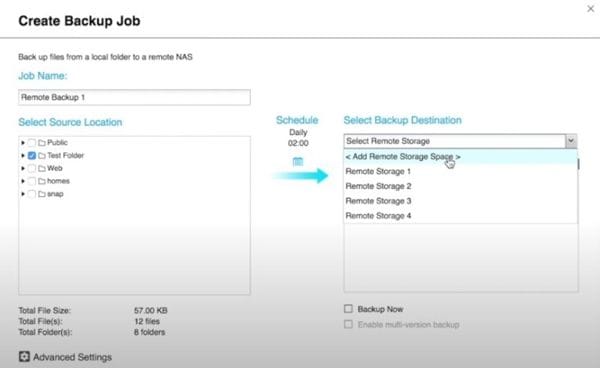
In the "Select Source Location" list, choose the folder or folders you want to back up; in the "Select Backup Destination" list, you can choose from one of the previous remote storage destinations (if you have already registered any) or you can add a new one by clicking on "."
Step 9: Add remote connection

If you want to add a remote connection, type the name of your choice, the IP Address or hostname, the port, and password (which have to be the same as in Step 3). You can click on "Test" to see if the configuration works and then click on "OK."
Step 10: Create remote storage space
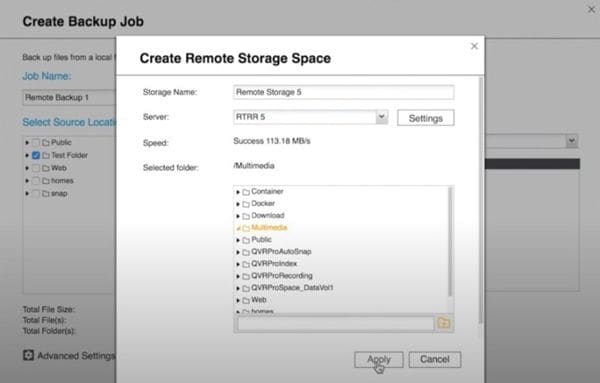
Select the destination folder of your backup, then click on "Apply."
Step 11: Schedule backup
If you want to schedule your backup, click on the blue calendar icon.
Step 12: Customize the schedule
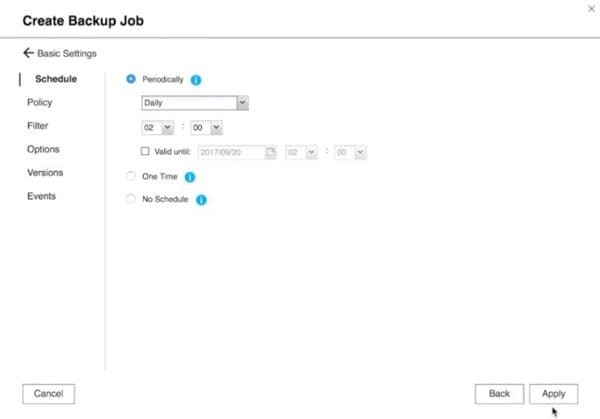
Choose from the options. You can select if you want to schedule your backup periodically, just once or even you might cancel the schedule to make manual backups. Once you finished your configuration click on "Apply."
Step 13: Start to back up
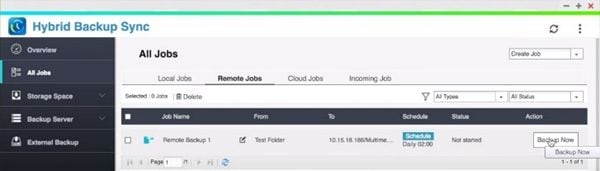
Click on "Backup Now" and the process will begin. You may have to wait for some minutes depending on the amount of information. When the process ends you will see "Finished" in the Status section and remote replication will be active.
Part 4: How to Backup QNAP to QNAP with UBackit File Backup?
If you want to do the same QNAP to QNAP backup and don't want to get familiar with QNAP's QTS operating system, it's understandable. For this, there is a great alternative, which is Wondershare UBackit for Windows, which will provide you with the same security standards with the advantage that you will not need QTS to perform your backups.
Next, I will show you how to perform this process:
Step 1: Go to "Backup"
Click on "Backup" and select "File Backup." You can also select "Disk Backup" which enables you to backup the whole disks to a NAS device.

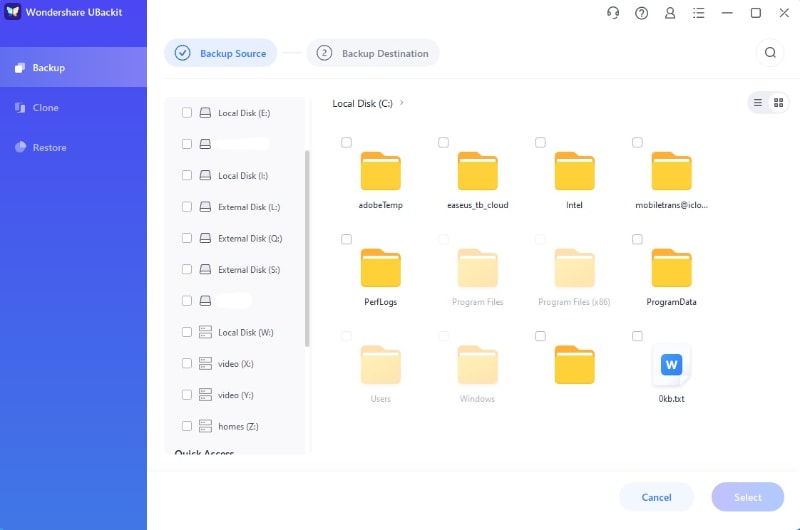
Step 2: Select NAS Files to Backup
In this case, choose the files or folders from your source NAS to bakcup. Then, click Select to continue the settings
Step 3: Select Backup Destination
After that, choose the disk where you want to save the NAS backup. To backup QNAP to QNAP, you can select the target NAS server as the backup destination.

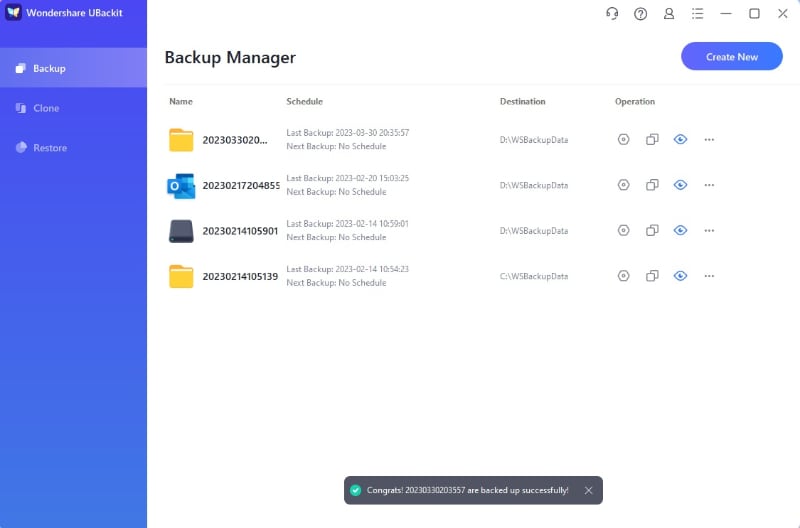
Step 4: Start QNAP Backup
The backup process will take a few seconds or minutes to complete. You can checek the progress on the main screen of UBackit. And it will send you a notification message once it finishes the process. You can choose to preview the backup files, start a new backup, or set automatic backup plan by clicking on the Setting icon. There are 4 options of backup schedule for you to choose: daily, weekly, monthly, or non-stop. You can set the backup plan according to your need.
You may also like: How to Perform QNAP NAS Data Recovery?
Conclusion
Today, information backups are synonymous with security and peace of mind, and having a device such as QNAP NAS is something reliable. On the other hand, you always have to avoid unforeseen events, and having two QNAP NAS to make backups between them will greatly reduce the possibility of losing information. Although QNAP Hybrid Backup Sync is quite useful, having UBackit software represents simplicity and because it is an application made for Windows, you will be able to make QNAP to QNAP backups without having to deal with a different operating system.
Data Backup Services
- Computer Backup
- Hard Drive Backup
- Mac Backup
- Cloud Backup


 ChatGPT
 Perplexity
 Google AI Mode
 Grok
Grok


Amy Dennis
staff Editor