3 Solutions to Backup Sticky Notes on Windows[2026]
You can back up and restore Windows 10 Sticky Notes manually by copying the local application data folder, using Microsoft's built-in cloud sync, or scheduling automated backups through Wondershare UBackit.
● To manually back up or restore notes, completely close the application, enable hidden files in File Explorer, and copy or replace the files located exactly at C:\Users\Username\AppData\Local\Packages\Microsoft.MicrosoftStickyNotes.
● Users running the Windows 10 October 2018 update or later can natively back up and sync notes to other devices by signing into a Microsoft account and clicking Sync Now within the application settings.
● Using Wondershare UBackit requires you to manually target the MicrosoftStickyNotes AppData folder during setup, but it adds the ability to schedule daily, weekly, monthly, or non-stop automatic backups and restore specific files to custom destinations.
Ask AI for a summary
We all use Sticky Notes in Windows for various reasons. From making a to-do list to writing reminders, they form a crucial part of our everyday work. A few people also write important information on a sticky note in order to use it afterward, as it is more convenient and time-saving. If you also use sticky notes to manage your work, then you should learn how to backup Sticky Notes Windows 10 and restore them. To help you, we have come up with this stepwise tutorial that will certainly keep your data safe.
Sticky Notes in Windows
Just like a physical sticky note, the desktop application provides a fast and reliable way to make post-it notes in Windows. The desktop application has more than 8 million monthly active users as of now. It is an inbuilt tool in Windows 7, 8, and 10. Though, other Windows users can also download the third-party app. With Sticky Notes, users can write any kind of information like emails, to-do lists, flight details, phone numbers, etc. You can manage multiple notes and edit them on the go as well. Later, you can use this information as per your needs. Since it is a fast and easy way to write and access the kind of content that is used on a frequent basis, it comes in handy to its users on numerous occasions.
You may also be interested in: How to Recover Deleted Notes in Outlook 365?
3 Methods to Backup Sticky Notes in Windows 10
Method 1. Copy and Paste to Backup Sticky Notes
Sometimes, Sticky Notes can contain our important data, and lose them can be a nightmare for many. Thankfully, there is a smart and easy way to backup Sticky Notes Windows 10 and restore it. As of now, Windows doesn’t have a dedicated application to backup and restore Stick Notes. Therefore, we need to manually extract notes and take their backup at a safe location.
The method doesn’t require a lot of effort or time. Since Sticky Notes is a light app, it hardly takes a substantial amount of space. After a simple copy and paste operation, you can easily backup its content. In order to backup sticky notes in Windows, follow these steps:
Step 1 If you have opened the Sticky Notes desktop app, quit it beforehand. Make sure that you have permanently closed the app before proceeding.
Step 2 Now, open the Windows Explorer (File Explorer) on your desktop and go to its "View" tab. From here, enable the option of "Hidden Item". The option can also be accessed under "Folder Options" in older versions of Windows.

Step 3 After enabling the view of the hidden files and folders, go to the directory where Windows is installed. In most cases, it is the C drive.
Step 4 Go to its "Users" folder and open the respective username you are accessing. Visit its AppData > Local > Packages > Microsoft.MicrosoftStickyNotes to view the Sticky Notes folder.

Step 5 Manually copy the content from this folder and save it to another location. Simply press Ctrl + A to select all the files in one go. Save everything in one folder on your local storage or an external hard drive.
Method 2. Backup Sticky Notes using Sync Cloud
In Windows 10 October 2018 update, Microsoft introduced the cloud sync feature to Sticky Notes. So for users who are running the version later than that, it is easy to sync the Sticky Notes to different devices.
How to Backup Sticky Notes with Cloud Sync?
Step 1 Open Sticky Notes. Tap Settings and sign in with your Microsoft account.

Step 2 Once you logged in successfully, the Sync feature is enabled. You can go to Settings->Sync Now to sync Sticky Notes to other devices with the same Mircrosoft account signed in. Now you can create a Sticky Notes backup on another device.

Method 3. Backup Sticky Notes on Windows 10 with Wondershare UBackit
If you have located the sticky notes position. You can download Wondershare UBackit on your Windows 10 desktop to backup Sticky Notes or restore it. The operation is quite easy with only several clicks.
Before eading the following guide, you must know that the location of your sticky notes folder. Usually, your stickt notes will be stored in the path: This PC>Local Disk (C:)>Users>Username>AppData>Local>Package>Microsoft.MicrosoftSticky Notes...
How to backup sticky notes on Windows 10?
Step 1 Launch Wondershare UBackit
After downloading and installing the app on your computer, launch it and click the Create New option from the screen. And click File Backup to get started.

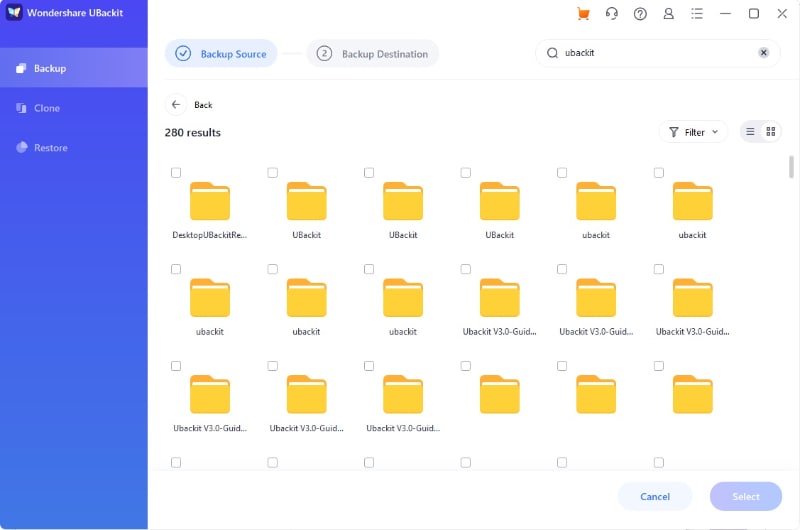
Step 2 Select Sticky Note Folder from Hard Drive
Now you need to find the Sticky Notes folder from the hard drive, and select the Sticky Notes folder to backup. Then click Select to continue.
Step 3 Choose Backup Destination
After that, select one destination to save the backup. And click Select to start the backup process.

Step 4 Complete Sticky Notes Backup
It will take a few seconds or minutes to complete the backup process. Once it finishes, you can click the Schedule option at the bottom of the backup folder. Set it as daily, weekly, monthly, or non-stop automatic backup as you need.
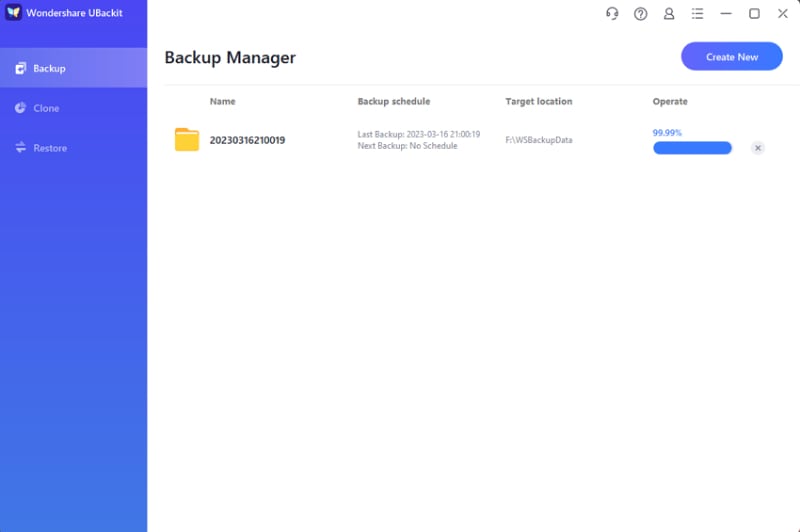
Now, the Stick Notes Backup completes successfully. And you can keep reading to know about how to restore Sticky Notes on Windows 10.
How to Restore Sticky Notes on Windows 10?
Method 1. Restore Sticky Notes on Windows 10 with Wondershare UBackit
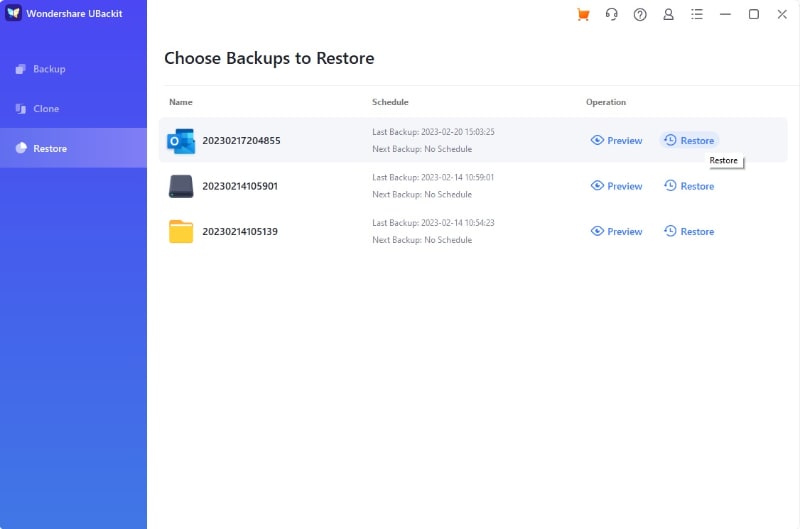
Step 1 Choose the Restore Option
Firstly, go to the “Backup & Restore” feature to view the saved sticky note backups. From the list of the available backups here, just select any preferred option and click the "three dot" icon at the top rigt corner of the backup folder, then click “Restore”.
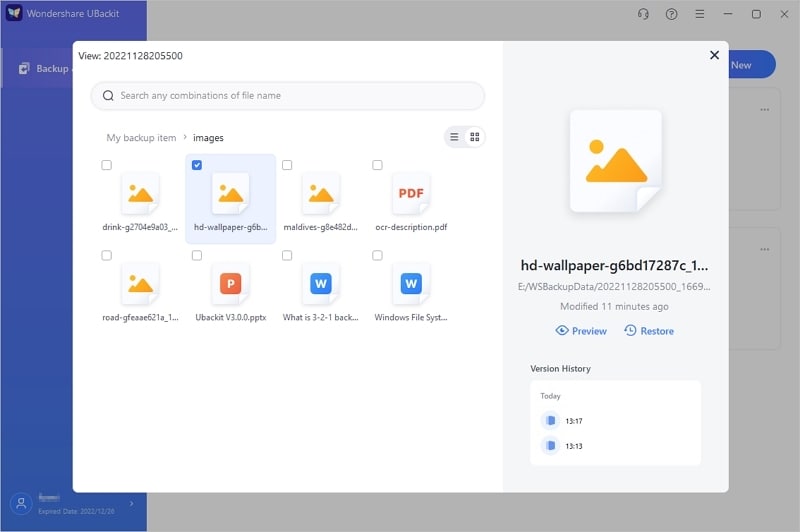
Step 2 Restore Specific File
If you want to restore one specific file or folder in the backup of your choice, you can click the View option and select the file you want to restore. Then, click Restore to continue.
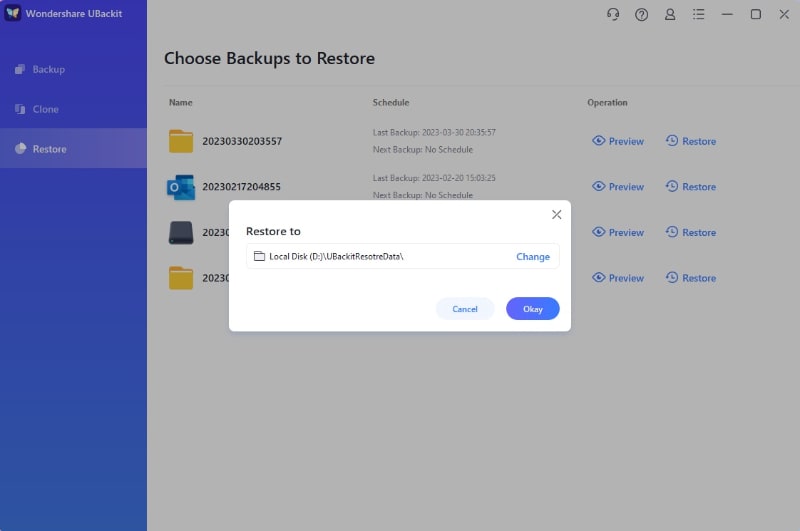
Step 3 Select Restore Destination
Now, it will show a new window asking you to select the restore destination. You can select any destination to save the sticky notes and click Okay to start the process.
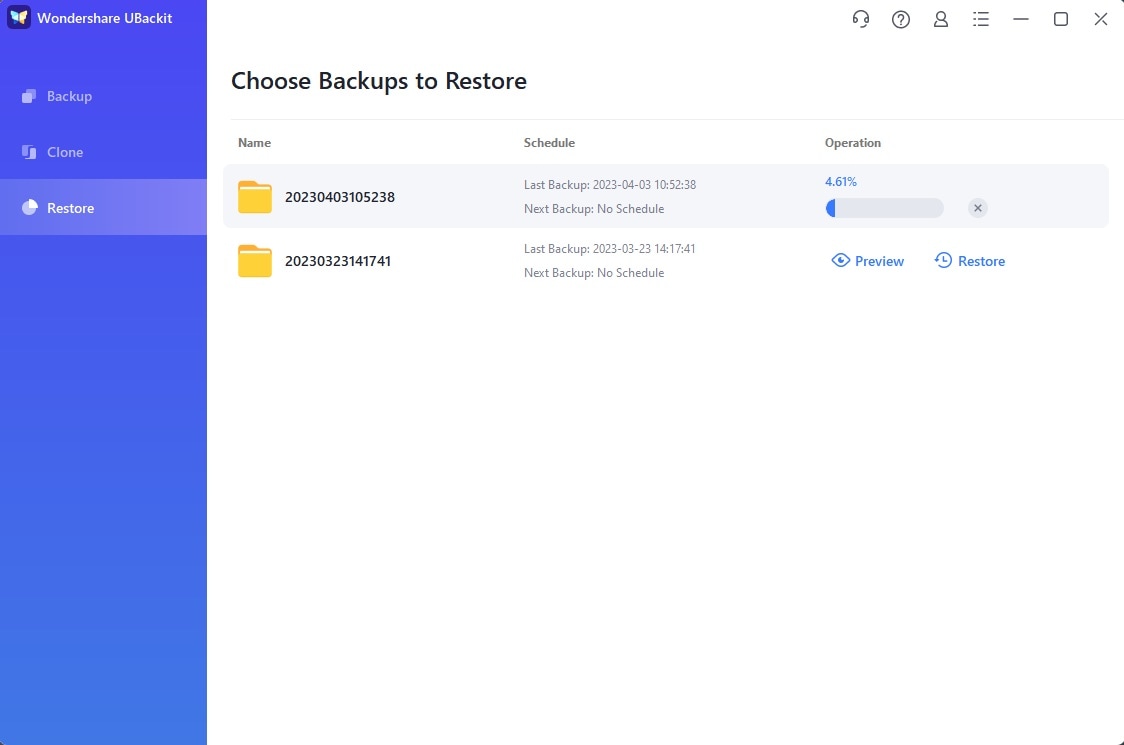
Step 3 Start the Restoring Process
You can now wait for a while as the application would start extracting the saved data from the backup. If you want, you can check the progress of the restoring process on UBackit as well.
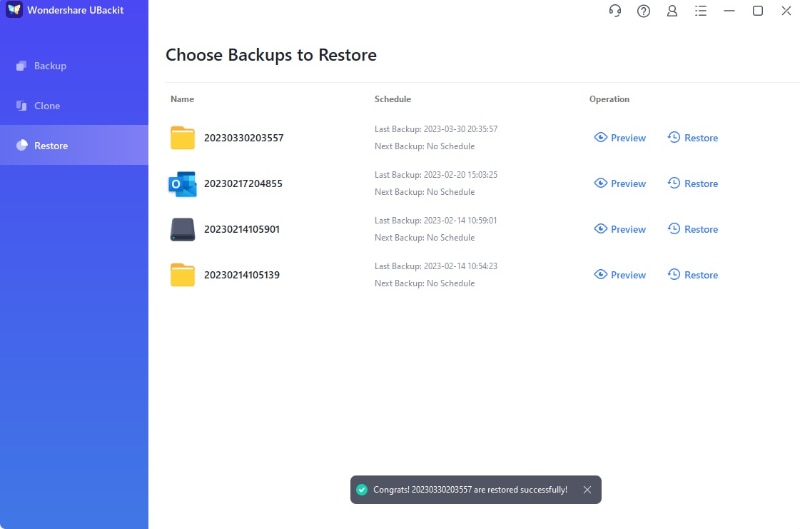
Step 4 Complete the Restoring Process
That’s it! Once the restoring process is completed, UBackit would let you know. You can now access your data by visiting the destination location easily.
Method 2. Copy and Paste to Restore Sticky Notes
You can backup Sticky Notes by following the above-mentioned technique. Ideally, you should do it in a timely manner if you don’t want to lose your data. After taking a backup of your Sticky Notes data, you can restore it easily as well. To restore Sticky Notes in Windows 10, follow these steps:
Step 1 Firstly, you need to enable the view of hidden files and folders on your system. To do this, follow the same drill. Open the File Explorer on your system and under the view section, enable the option of Hidden Files.
Step 2 Now, connect the external drive where you have saved your Sticky Notes data. If you have saved it on your local storage, then simply open the file.
Step 3 Open the backup data and copy everything. Simply press Ctrl + A to select everything and copy it to the clipboard.

Step 4 Go to the drive where Windows is installed (mostly C drive) and open the "Users" folder. Open your username file and visit its AppData > Local > Packages > Microsoft.MicrosoftStickyNotes folder.

Step 5 Paste the content into the Microsoft Sticky Notes folder. You might get a message like this, stating the presence of duplicate data. Just replace your old content with the new one in order to complete the restoring process.
After following these steps, you would be able to learn how to backup Sticky Notes in Windows and restore it. Even though the tutorial is focused on Windows 10, you can follow the same method for other Windows versions as well.
It is recommended to regularly take a backup of Sticky Notes if you wish to keep your data safe. Nevertheless, there are times when we lose our data, and that too without having a backup option. Under such circumstances, you can take the assistance of the Recoverit Data Recovery tool. It provides a fast and 100% reliable way to
recover your lost data. Supporting more than 550 file formats, it can restore your notes, photos, contacts, documents, music files, and more. With more than 10 years of presence, it provides an easy click-through process for data recovery.
Now when you know how to backup and restore Sticky Notes in Windows, you can easily keep your data safe. Even after suffering from an accidental loss of data or system crashes, you can restore your Sticky Notes from your backup. This will certainly help you in numerous ways to safeguard your files. Additionally, if you have lost your data without taking its backup, you can easily use the Wondershare Recoverit Data Recovery tool as well to retrieve your lost files.
Data Backup Services
- Computer Backup
- Hard Drive Backup
- Mac Backup
- Cloud Backup


 ChatGPT
 Perplexity
 Gemini
 Claude
 Grok
Grok


Amy Dennis
staff Editor