How to Move Program Files To Another Drive on Windows?
Moving program files is a relatively simple task that Windows users are used to doing frequently. With a few simple steps, it is possible to migrate applications and their content to another partition or another storage device, generally to other disks. However, even though it appears to be a risk-free activity, there is a chance that the information will not be transferred correctly, so it is advisable to back up the operating system. In this post, you will learn various alternatives on how to move your programs and how to backup Windows in a safe way.
Move Program Files To Another Drive on Windows
Q: I bought a new SSD, and I want to move my program files from my hard drive. Could you tell me which is the safest way to do it?
Moving program files is a task that allows you to migrate the folder where your programs and their content are stored to another disk or partition. It is an action that many users usually do.
On the other hand, regardless of the purpose or objective, it is always advisable to make a backup of the operating system, because, after a Windows error or human mistake, the information can be lost forever.
Loss of information when moving program files is more common than it seems. So, when you make a backup of your operating system, you will have the security and confidence that in the event of any error, you will be able to recover your information.
Remember that, no matter how simple the processes maybe, when you modify or transfer information (as in this case), there will always be a possibility, albeit minimal, that you run the risk of it being eliminated. Some reasons may be the unfortunate coincidence that there is a power outage at the time of the transfer, that there is an error in the process, that the source disk has some failure due to work overload, or even the program files get damaged at the moment of the relocation.
Perhaps everything I mentioned sounds exaggerated; but it will never be counterproductive to keep in mind that this possibility, no matter how remote, exists and can affect you.
Situations of Moving Program Files to Another Drive on Windows
Depending on what you want to do, there are two different situations for moving program files to another drive on Windows. Next, I'll explain what each one is about:
1. Move program files to another drive on the same disk: This method is useful for those users who want to transfer the program files to a different partition, freeing up space on the drive where the user installed Windows. Also, it can be a security mechanism, since, if for some reason you need to format or reinstall Windows, all the information you have on the partitions outside the C drive will not be affected under any circumstances.
2. Move program files to different physical disks: If you want to free up space on your disk or you want it to work less forcefully, or it is crashing, and you want to change it for a new one, this option is very functional. There is the possibility that you can migrate your program files to another disk, and you can do it without any restrictions.
Backup the Program Files Through Wondershare UBackit
As I mentioned in part 1 of this post, you must make a Windows backup before moving your program files, since this process can generate transfer problems and threaten your information. Although it is not a fact that happens often, it is highly recommended to do this task.
To do this process the best option is through Wondershare UBackit, a professional application that can help you to backup programs to another drive on Windows.
Step 1 Launch Wondershare UBackit
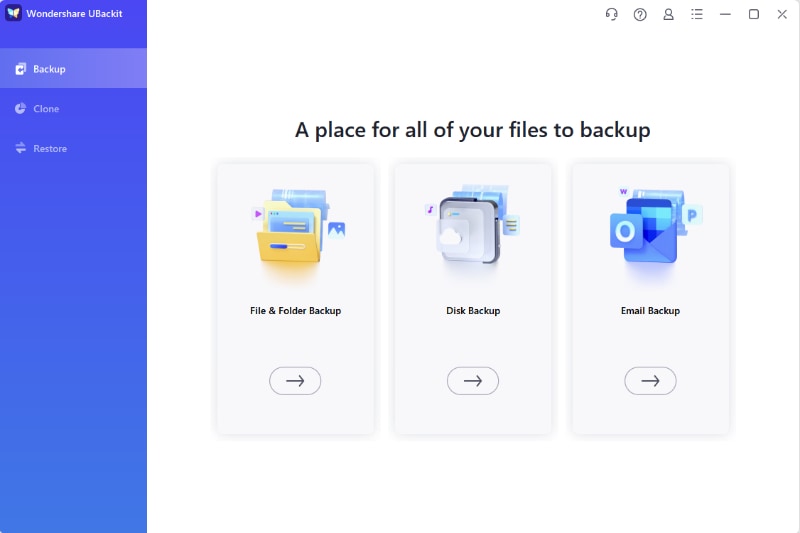
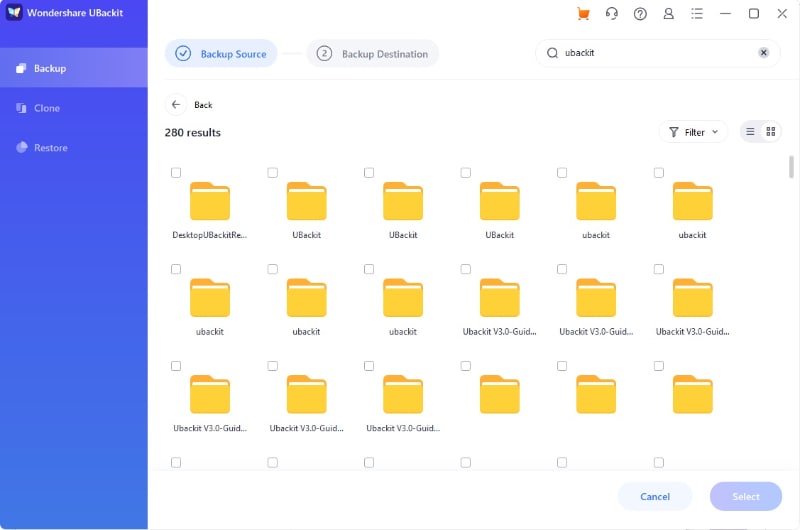
Step 2 Select The Exact Programs
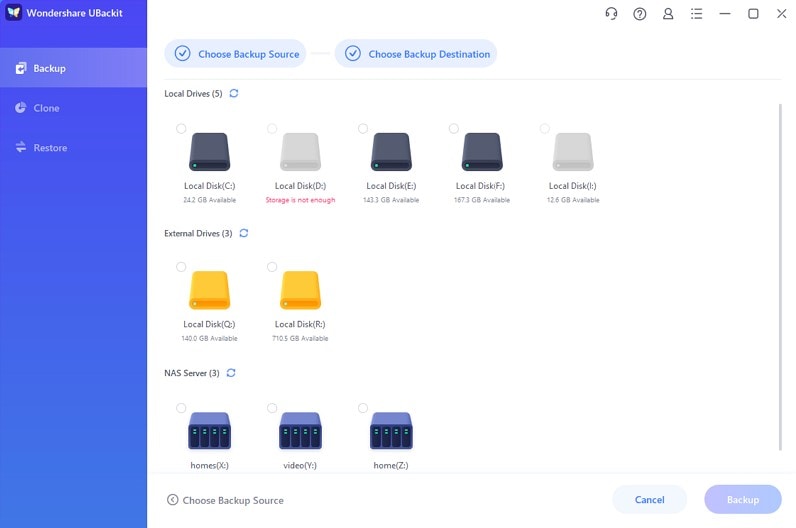
Step 3 Choose Backup Destination
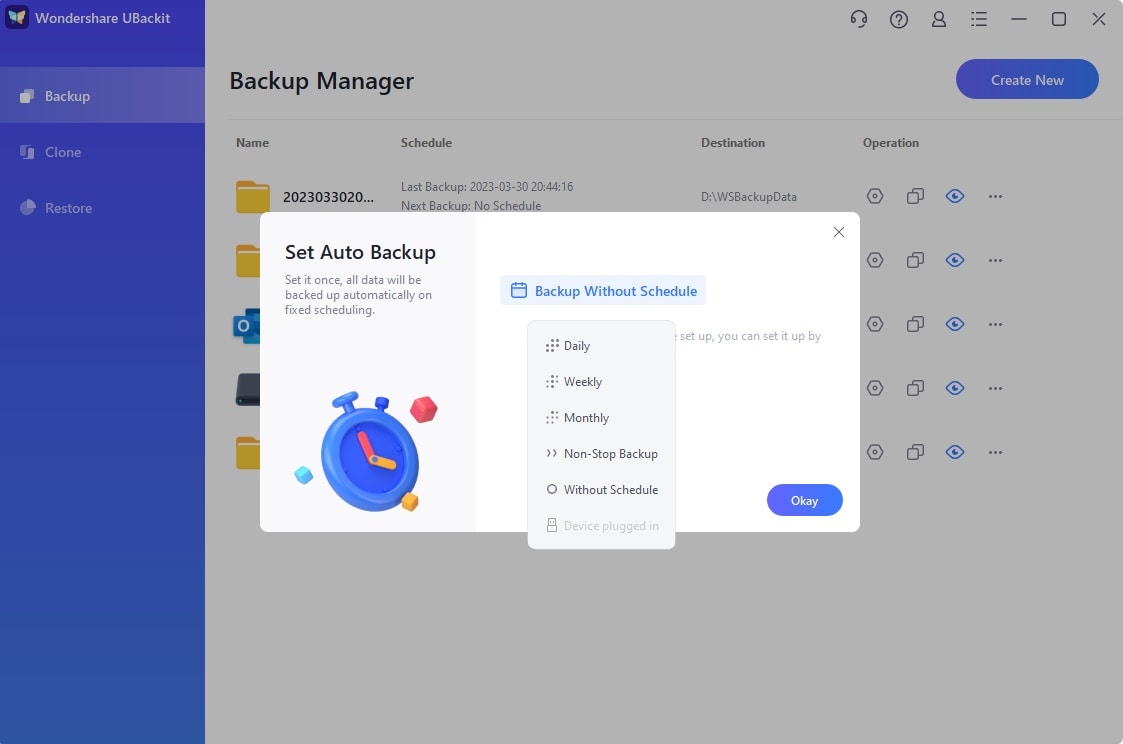
Step 4 Set Automatic Backup
Step 5 Evoke The Backup Process
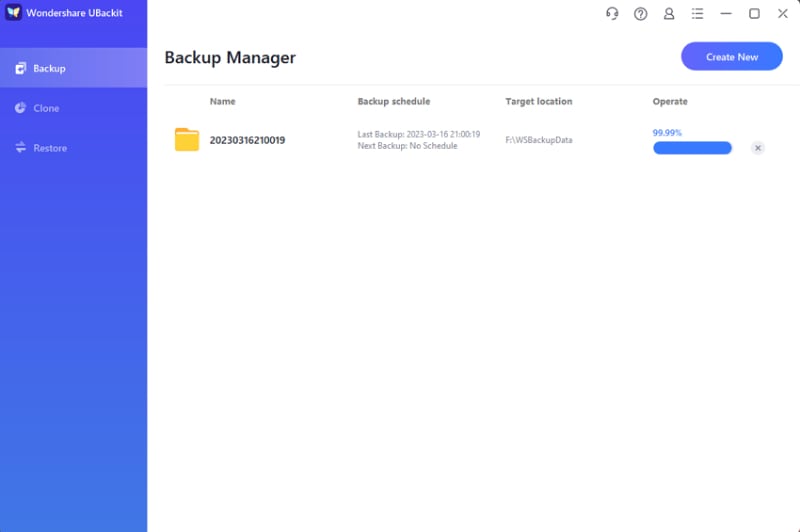
The backup process will take seconds to minutes, it will depend on your program size.
Move Program Files for More Space or Better Performance
Apart from Wondershare UBackit, there are surely other methods that can help you to move program files. I will show you the three most efficient below.
1 Migrate program files to another drive using Registry Editor
With the Registry Editor tool, you can migrate program files. You can follow these steps to do it:
Step 1: Copy Program Files and Program Files (x86) folders on the new target drive

Go to the source drive. Copy Program Files and Program Files (x86) folders; then, paste both folders to the target drive.
Step 2: Open Registry Editor tool

Press and hold Win key + R to open the Run tool. Type Regedit and click on OK to open the Registry Editor tool.
Step 3: Edit Program Files and Program Files (x86) locations

After you opened the Registry Editor tool, click on the folders from the left list. This is the indicated path to access to Program Files and Program Files (x86): HKEY_LOCAL_MACHINE\SOFTWARE\MICROSOFT\Windows\CurrentVersion
Step 4: Modify Program Files location

In this window, click ProgramFilesDir and select Modify… from the drop-down list.
Step 5: Edit location

You have to change the location in this dialog box. Erase the first letter and type the letter of the drive where you want to move the Program Files. Then, click on OK, and you should repeat steps 4 and 5 to relocate Program Files (x86) as well.
2 Move program files to different drive using mklink
This alternative allows you to relocate Program Files through mklink command in Command Prompt tool. To perform this task, you must do the following:
Step 1: Copy Program Files and Program Files (x86) folders on the new target drive

Go to the source drive. Copy Program Files and Program Files (x86) folders; then, paste both folders to the target drive.
Step 2: Open Command Prompt tool

Click on the Windows icon and type cmd. Then right-click on Command Prompt and click on Run as administrator from the drop-down list.
Step 3: Type mklink and the corresponding commands to migrate Program Files

After opening Command Prompt tool, type mklink and press Enter; now, type this command: /J "Program Files" "D: Program Files" and press Enter one more time.
In this case, the new directory of Program Files is the D: Drive. You should type the corresponding letter of your drive to migrate Program Files correctly.
3 Relocate program files to another drive using the Move feature
In the Apps & Features section of Windows Settings, you can relocate a program and its files. To do it, you only need to follow the next steps:
Step 1: Go to Windows settings

Click on the Windows icon, now click on the gear icon to open Windows settings.
Step 2: Click on Apps

Once you entered Windows Settings, click on Apps.
Step 3: Find the program you want to relocate

Scroll and find the program you want to relocate. Once you found it click on Move.
Step 4: Change program location
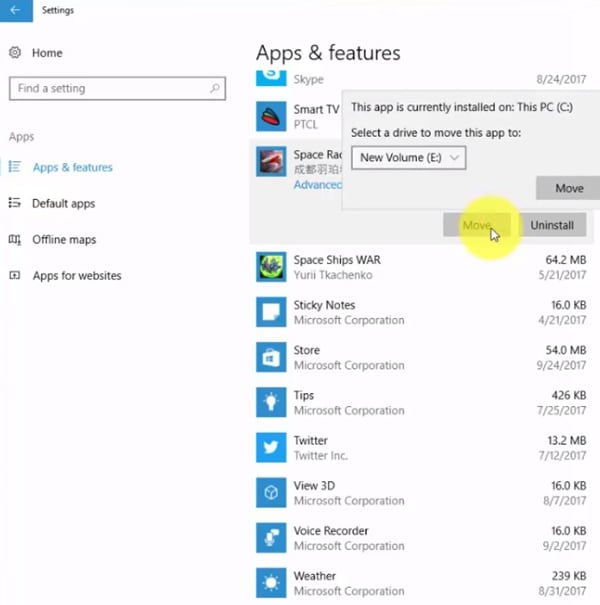
Click on the white box from the dialog box. Now, choose the new location of your program and, finally, click on Move.
Step 5: Confirm

To confirm you did the task well, repeat steps 3 and 4. If This PC is listed as a location to move the program, this will let you know that you relocated it correctly, and it is stored in the drive that you selected.
Conclusion
Moving program files is a common task for many users, whether to free up disk space, improve performance, or upgrade to a new storage device. Whatever the goal, it turns out to be a useful task, and it offers several advantages, specifically saving a lot of time. And here in the article, there are several methods for your choice. Just choose one method that you like and transfer your programs.
Data Backup Services
- Computer Backup
- Hard Drive Backup
- Mac Backup
- Cloud Backup


Amy Dennis
staff Editor