How to Synchronize Files between Windows Servers
Windows Server file synchronization can be achieved manually via external storage or network sharing, natively using the DFS Replication role, or automatically scheduled using UBackit Data Backup.
● Configuring the built-in DFS Replication requires installing the File Server and DFS Replication roles on all participating servers, establishing network permissions beforehand, and utilizing at least three computers if deploying a Hub and spoke topology.
● Standard network folder sharing fails to generate local copies and relies entirely on the host computer remaining powered on, whereas direct-attached storage (DAS) bypasses network bandwidth constraints via a direct cable connection.
● UBackit Data Backup automates synchronization with daily, weekly, monthly, or continuous schedules, provided that network access permissions for the target folders are manually configured prior to software setup.
Ask AI for a summary
Synchronization is one of the most effective ways to share and back up data, for this reason, it has become very common for companies to use this technology to optimize time and coordinate large work teams. There are various methods to synchronize data between Windows Servers, in this post I will talk about the most common and also, I will show you how to synchronize Windows server with each one.
As you try to synchronize Windows server, you must realize the importance of data backup. Join us to celebrate 2024 World Backup Day. Let's take the pledge, and make data backups a regular part of your day.
Part 1: How to Synchronize Files between Windows Servers
Q: In my company, we use cloud storage services to backup and synchronize the information from our servers, however, this has become very expensive over time and ineffective. Is there a cost-effective way to sync files between two or more Windows Servers?
Synchronization is a commonly used data management technology for backup purposes; however, it also offers excellent advantages for teamwork. Synchronization ensures that the information between two or more devices is the same, maintaining a criterion based on the hierarchy of the devices and evaluating the difference between the existing files. It is for this reason that synchronization is one of the most versatile and practical tools to coordinate teamwork regardless of the number of participants. This greatly streamlines the data distribution and backup processes.
Part 2: 3 Ways to Sync Data between Windows Servers Manually
Synchronization is a process that can be carried out in different ways; however, the important thing is to find the method that best suits your needs and that maintains an equitable balance between costs and benefits. Next, I will tell you about the most effective methods and with a minimal or even no investment.
Method 1. With an external storage media
One of the easiest ways to share information between multiple computers is through an external disk. This may seem like an unorthodox solution, but some methods and technologies make this option much more efficient and dynamic, such as DAS and NAS technologies. Both have something in common and that is that both technologies allow multiple users to have access to the same information stored in an external device.
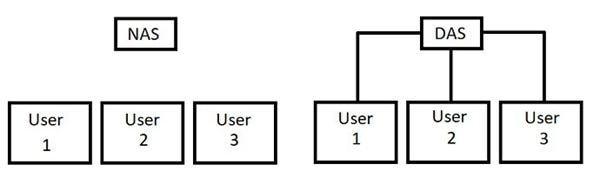
The two most relevant differences are transfer speed and practicality. NAS (Network Attached Storage) is the most versatile option because data transfer is through the network, however, DAS NAS (Direct-attached storage) is the most practical option since it would be enough to connect computers through a cable with a high data transfer capacity, therefore, you will not need a large bandwidth or configure a network.
Method 2. Through network
A common method of sharing information between Windows Servers is through the network. This feature allows you to share access to a folder with multiple users who are connected to the same network. This method is extremely practical but you must remember that this technique does not generate copies on your local disk and therefore, the reading and writing of the files depend on you having a stable connection, also, if the computer that stores the original version of the shared folder is turned off or damaged, no user will be able to access the information of the shared folder.
Below I will show you how to share a folder
Step 1: Share access to the source folder
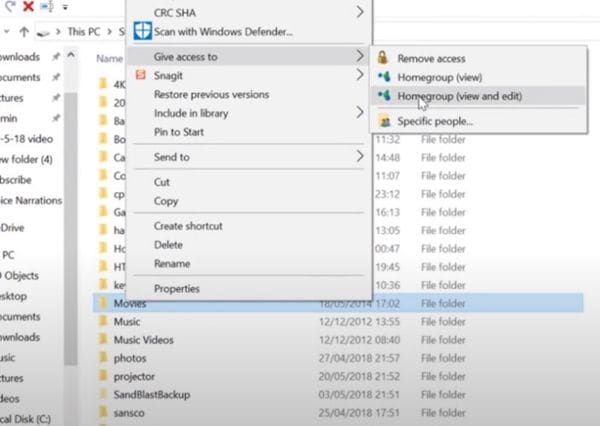
Go to the location where the folder you want to share is located and right-click on it. A menu will appear, and you must move your cursor over the "Give access to" option and click on "Homegroup (View and edit)"
Step 2: Choose people to share with
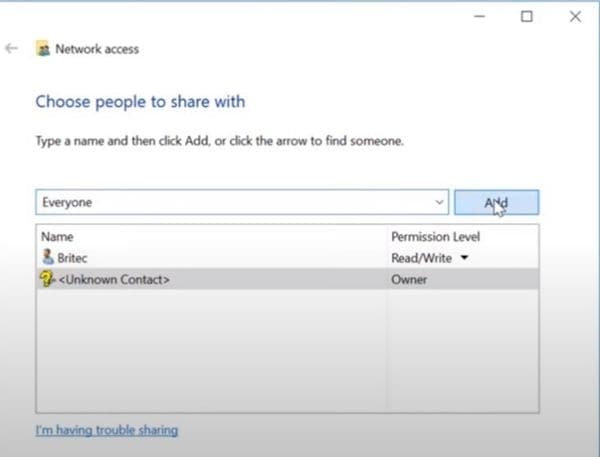
In this window, you can add different computers that are connected to the Network and give them permission to add and edit information in this folder.
Method 3. With the Windows built-in tool: DFS replication
There is a tool available in Windows Server with which to carry out the synchronization process between servers, this tool is named "DFS Replication" and next I will show you how to configure it.
Before continuing, keep in mind that you must have previously configured the network permissions, also, if you want to use the "Hub and spoke" topology, you must have at least three computers connected to the replication group.
Step 1: Go to Add Roles and Features
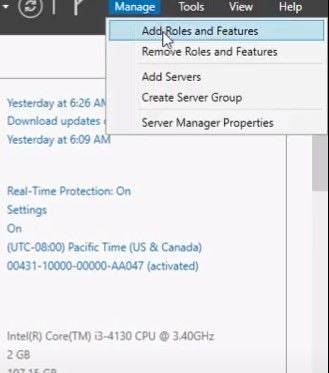
This option is located in the upper right corner of the "Server Manager" window.
Step 2: Choose installation preferences
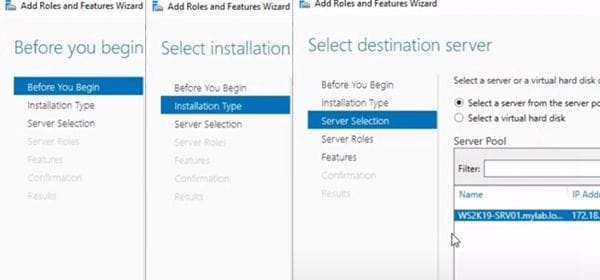
The "Add Roles and Features Wizard" tool will allow you to choose the preferences of the installation. Choose "Role-based or feature-based installation" as the type of installation and make sure that the destination server that appears in the third window corresponds to the computer you are using.
Step 3: Install DFS Replication

In this step you must click on "File and Storage Services" and then you must click on "File and iSCSI Services." Once there you must select "File Server" and "DFS Replication."
Step 4: Confirm the installation process
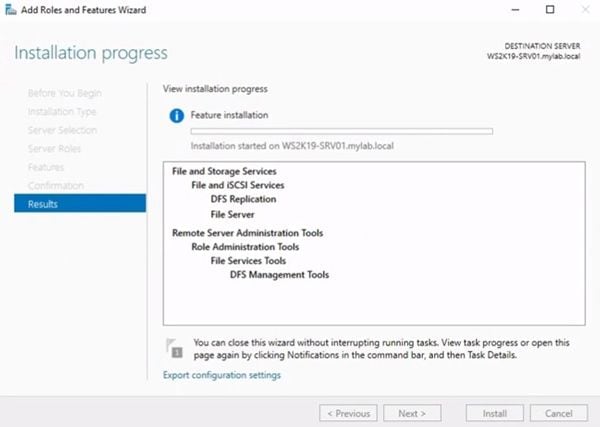
After enabling the options "File Server" and "DFS Replication" a confirmation pop-up will appear. Click "Next" until you reach the last step of the installation. Once there, a summary of the installation will be displayed.
Note: Keep in mind that you must carry out this installation process on all the computers you want to synchronize.
Step 5: Create a Replication Group
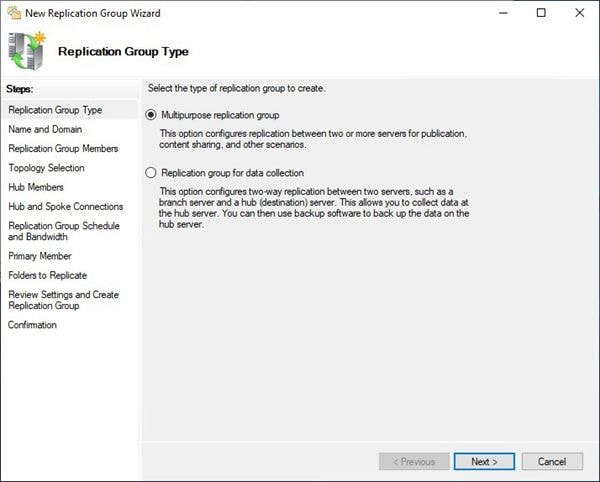
To access the replication group creation tool, just right click on "Replication" from "DFS Management" and choose the "New Replication Group" option. Once opened, select the "Multipurpose replication group" option and click on "Next."
Step 6: Assign a name to the replication group
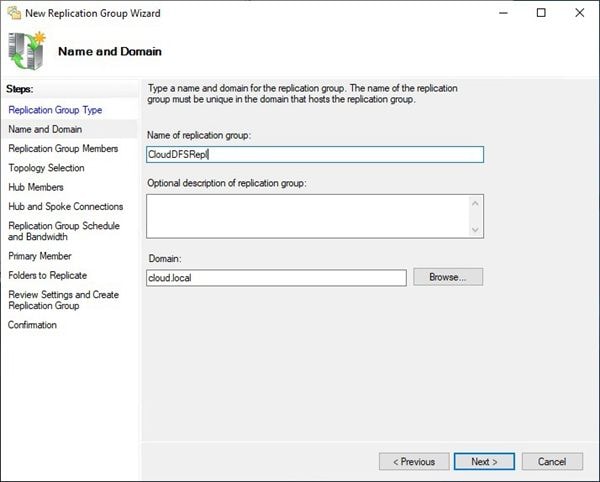
In this step you can assign a name to the replication group, you can also add a description that helps you manage one or more replication groups.
Step 7: Add members to the replication group
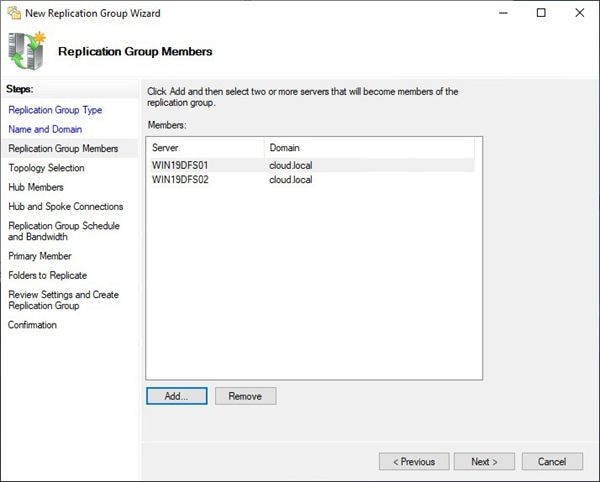
In this step, you can add members to the Replication group by clicking on the "Add..." Button.
Step 8: Choose a topology type
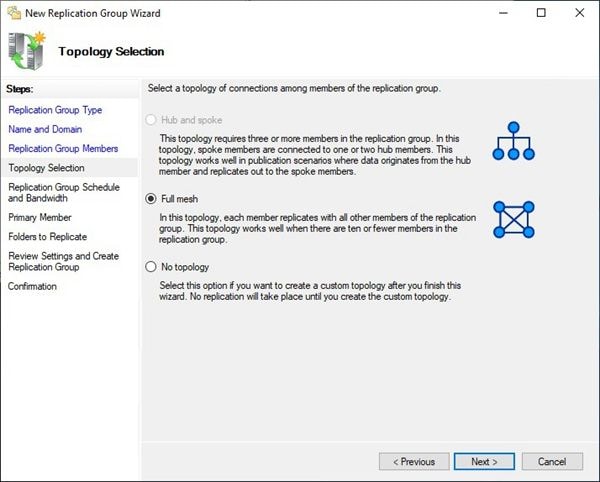
In this step, you should carefully consider which option best suits your needs. If you want all the information that is replicated to come from a single hub member, you must choose "Hub and Spoke", on the other hand, if you want the information to be replicated mutually between all the computers that are connected to the replication group, you must choose "Full mesh"
Step 9: Set replication time intervals and bandwidth rates
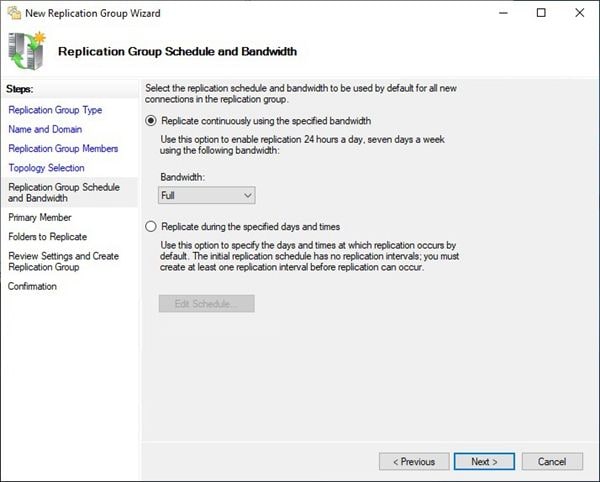
Here you can set the frequency of data replication, also, you can adjust the Bandwidth rates and thus optimize the use of the resources you have.
Step 10: Assign a Primary Member
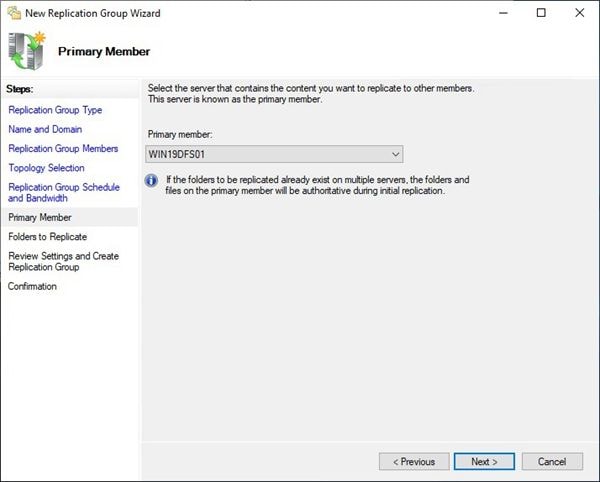
In this step, you will have to assign one or more primary members (depending on the replication group topology). The primary member will serve as a reference to manage differences during replication processes.
Step 11: Add folders to replicate
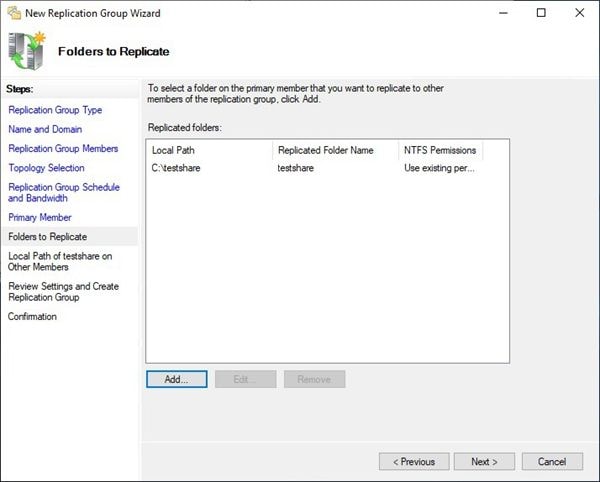
In this step, you must assign a local folder to store the data that will be replicated and distributed to the other members of the replication group. To add a folder, click on "Add ..."
Step 12: Add a Destination folder
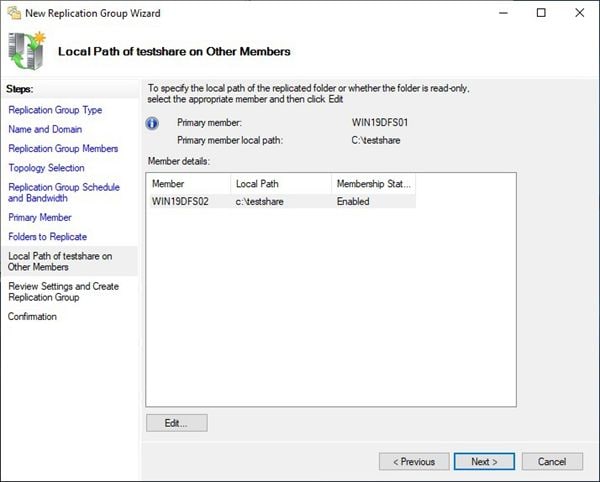
Now you must assign the folder where the information that you replicate from the primary member to the other members will be stored. Also, you can click on "Edit ..." to customize the security parameters and permissions of each user.
Step 13: Confirm
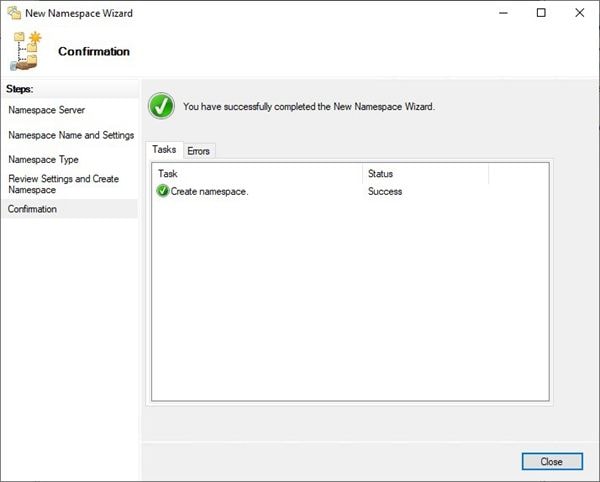
A summary will be displayed and if everything is ok, click on "Create" and then on "Close"
Part 3: How to Sync Data between Windows Servers Automatically?
The methods I mentioned before are effective but may be complex to manage and therefore impractical. The solution to this problem is to use specialized software for backup and synchronization processes such as UBackit Data Backup.
UBackit Data Backup is software that has a very friendly user interface, which greatly facilitates the management and automation of synchronization processes.
Below I will show you how to use it.
Note: Before starting to use UBackit as a synchronization tool between two or more Windows servers, it is necessary to have previously configured the network to allow access to the folders that you are going to synchronize. (As indicated in method 2)
Step 1: Go to "File Backup"
Once you have installed and opened the software, go to the "Backup" section and click on "File Backup." If you want to sync the entire disk, Disk Backup will make it more convenient.

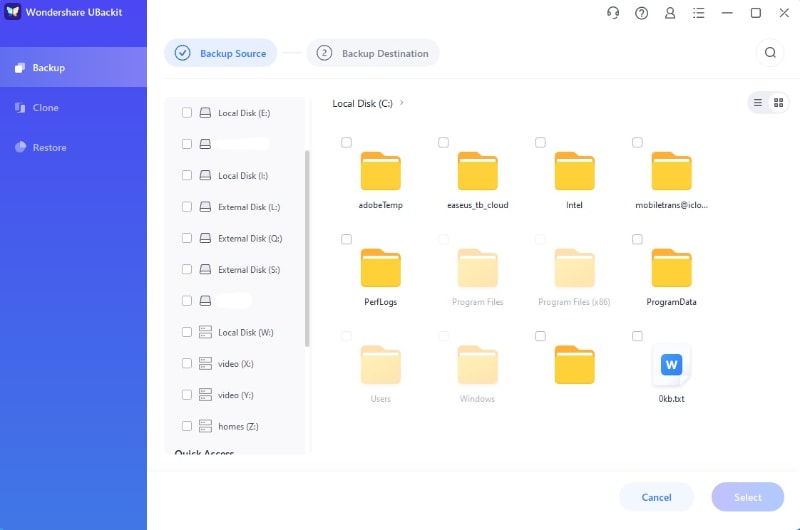
Step 2: Select file/folder
Here you need to select the files or folders you want to backup. Then, click Select to continue.
Step 3: Choose the target location
Choose the destination to save the backed up files. After that, click Select, and the backup process will start.

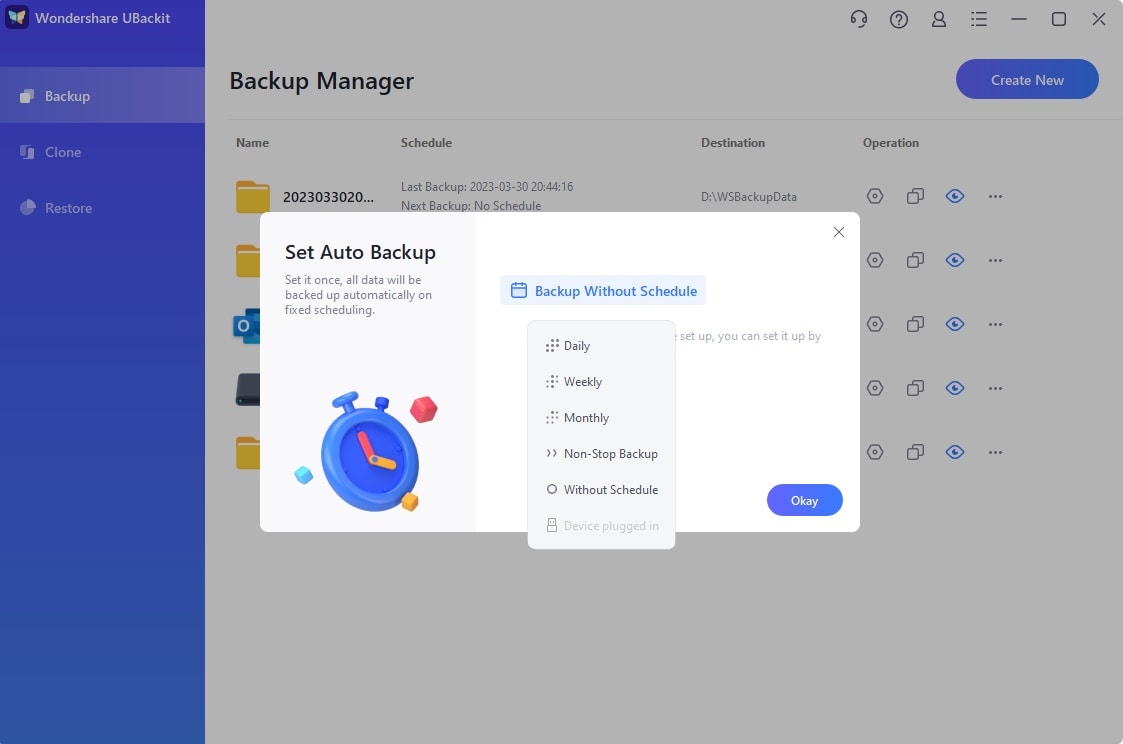
Step 4: Schedule
You will receive a notification from the tool if the process completes, and you will see three options below the backed up folder: Schedule, Backup and View. Tap Schedule and you can set a daily, weekily, monthly and even non-stop automatic backup schedule. To sync the files at any time, you need to select Non-stop.
Conclusion
Synchronization is a process that greatly improves teamwork performance. It can be used to optimize file version control, share information, and even back it up. Windows Server can perform a process quite similar to synchronization but many times, using the DFS Replication tool may be a complicated task for those who are not experts, fortunately, UBackit can perform any type of backup or synchronization without technical complications of any kind, thus saving you a lot of time and effort.
Data Backup Services
- Computer Backup
- Hard Drive Backup
- Mac Backup
- Cloud Backup


 ChatGPT
 Perplexity
 Gemini
 Claude
 Grok
Grok


Amy Dennis
staff Editor