

 TL;DR:
Disabling Fast Startup in Windows 10/11 resolves driver failures, interrupted system updates, and Linux dual-boot partition locks by forcing the operating system to perform a complete hardware reset during shutdown.
● The most direct method is unchecking "Turn on fast startup" under "Choose what the power buttons do" in the Control Panel, or by executing "powercfg -h off" in an Administrator Command Prompt to disable the underlying hibernation process entirely.
● Users running Windows Pro or Enterprise editions can administratively disable the feature globally via the Local Group Policy Editor under the System Shutdown templates.
● Turning off this setting safely prevents hardware initialization errors and BIOS access restrictions, with the sole limitation being a slightly longer initial boot time without affecting daily computer performance.
Ask AI for a summary
 ChatGPT
 Perplexity
 Gemini
 Claude
 Grok
Grok
Many Windows users notice that their PCs shut down unusually fast. This is due to a built-in feature called Fast Startup, available in Windows 10 and Windows 11. The feature is designed to make the system boot more quickly after a shutdown. However, it can sometimes cause issues: devices may fail to start correctly, updates might not install as expected, and dual-boot setups can encounter errors. In such cases, you may need to learn how to disable fast startup on windows 10/11.
Before changing anything, it is important to understand what is fast startup on windows 10/11 and how it works. This feature saves part of the system state to a file during shutdown. When you turn on the PC again, Windows loads the saved file. This makes the startup faster.
However, it is not a full shutdown. Some drivers and services may not reset properly. That is why many users choose to disable fast boot or turn off fast startup on Windows when facing system issues.
Table of Contents
Part 1: Why Disable Fast Startup on Windows 10/11?
Fast Startup is helpful in many cases. It reduces boot time. It makes the system feel quicker. But it is not always perfect. If you are wondering what is fast startup on windows 10/11, it is a mix of shutdown and hibernation. The system saves kernel data to a file called hiberfil.sys. This file is used during the next startup.
Here are the top reasons why many users choose to disable fast boot or turn off fast startup on Windows.
- Fix Driver Problems Sometimes drivers do not reload properly. This may cause keyboard, mouse, or graphics issues.
- Solve Dual Boot Errors If you use Windows with Linux, Fast Startup can lock the Windows partition. This creates access issues.
- Apply Windows Updates Correctly Some updates need a full shutdown. Fast Startup may stop updates from finishing properly.
- Fix BIOS Access Issues Fast boot can skip hardware checks. This may stop you from entering BIOS settings.
- Prevent File System Errors Because the system is not fully shut down, file corruption may happen.
- Improve Network Stability Network adapters sometimes fail to reset during Fast Startup.
- Troubleshoot Startup Crashes If your PC crashes during boot, turning off Fast Startup may help.
- Allow Full Hardware Reset Some hardware changes require a complete shutdown.
These reasons explain why many users search for How to disable fast startup on windows 10/11.
Part 2: How to Disable Fast Startup on Windows 10/11
There are several ways to disable fast boot. You can use built-in tools like Control Panel or Command Prompt. Choose the method that feels comfortable for you.
Each method below explains how to disable fast startup on windows 10/11 clearly and safely.
Method 1: Use Control Panel
This is the easiest and most common method. It works in both Windows 10 and Windows 11.
Control Panel gives direct access to power settings. From there, you can turn off fast startup on Windows with just a few clicks. This method does not require technical skills.
If you are new to Windows settings, this option is safe. It does not affect other system features.
Steps:
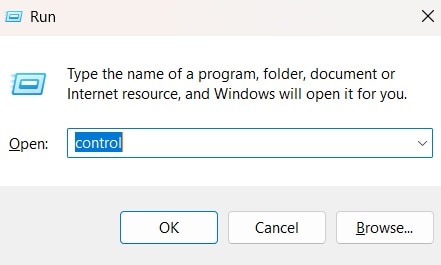
Step 1. Press Windows key + R. Type control and press Enter.
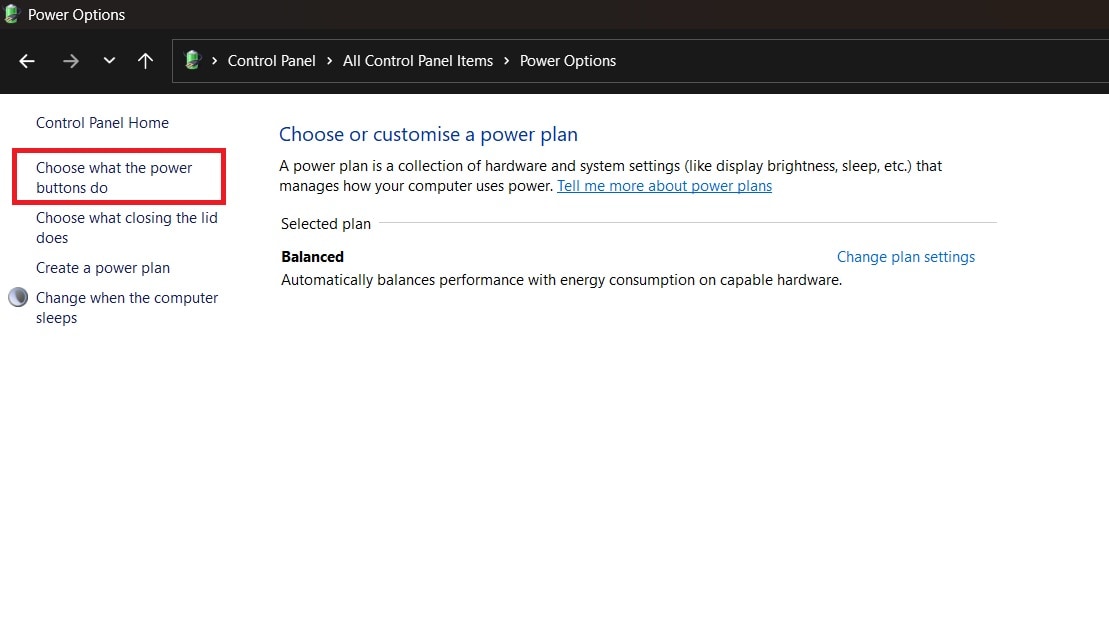
Step 2. Click Power Options. Click this option: Choose what the power buttons do.
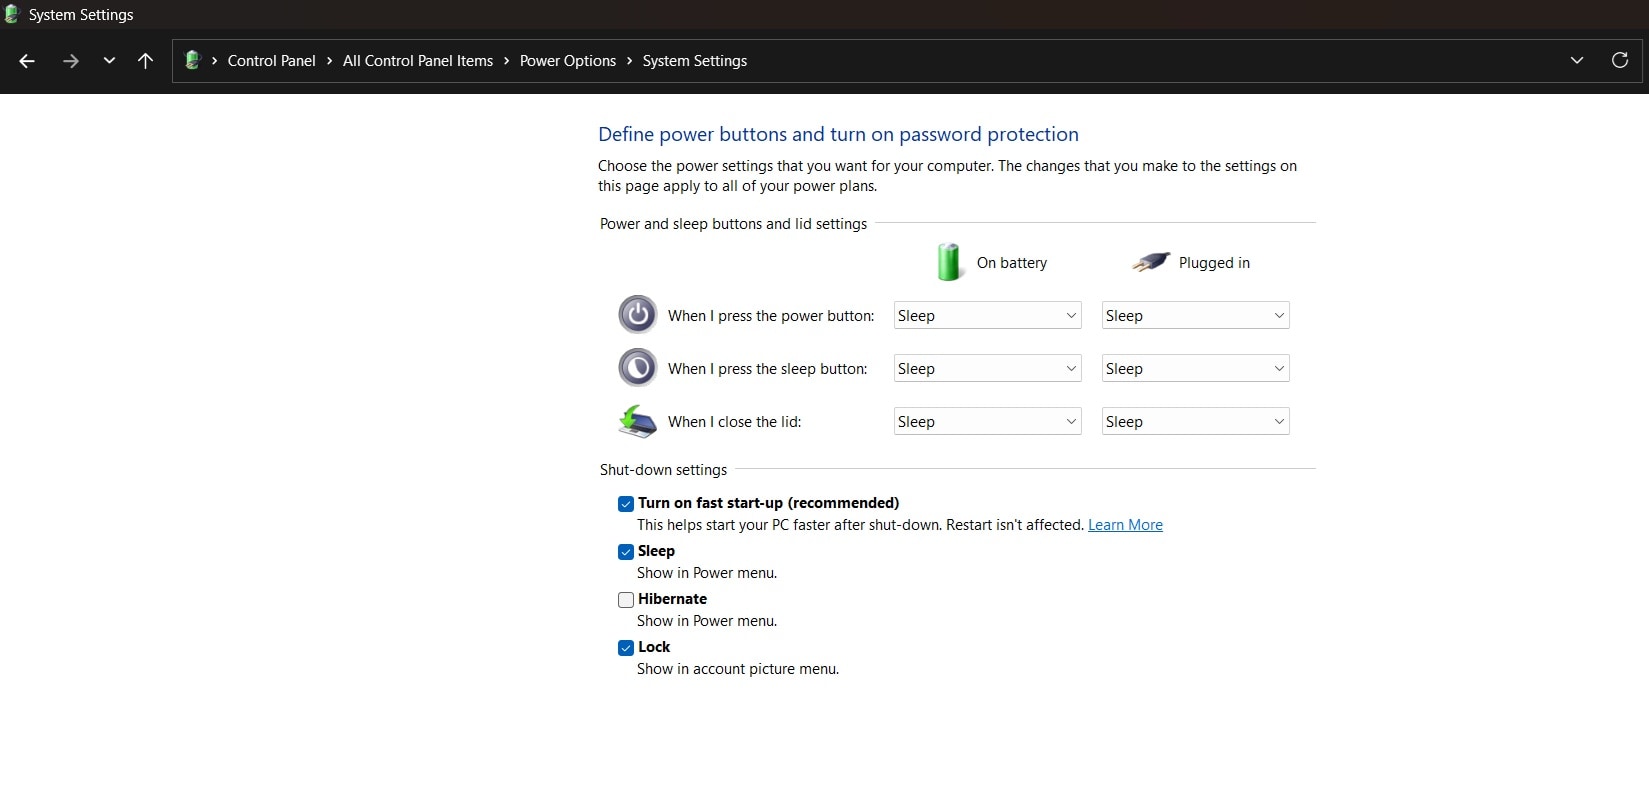
Step 3. Select Change settings that are currently unavailable. Go to the Shutdown settings section. DisableTurn on fast startup. Click Save changes, then restart your computer.
Method 2: Use Command Prompt
This approach is both quick and effective, especially if the Fast Startup option doesn’t appear in the Power settings. By using the Command Prompt, you can disable hibernation. Since Fast Startup relies on hibernation, turning it off will completely disable fast boot.
This method also helps if you want to learn how to enable fast boot on windows 10/11 later using commands.
Steps:
Step 1. Right click Start button. Select Command Prompt Admin. Click Yes if prompted.
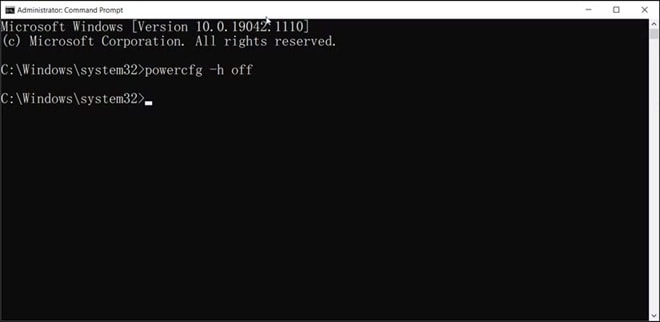
Step 2. Type powercfg -h off and press Enter. Restart your system.
To reverse it and learn how to enable fast startup windows 10/11, type powercfg -h on.
Method 3: Disable Fast Startup Using the Power Options Shortcut
If you cannot find the Fast Startup setting inside the Windows Settings app, this method is simple and reliable. It opens Power Options directly using a Run command. This works on both Windows 10 and Windows 11. It avoids menu changes and layout differences.
Many users prefer this shortcut when learning how to disable fast startup on windows 10/11 because it takes them straight to the correct page.
Steps:
Step 1. Press Windows key + R. Type powercfg.cpl and press Enter. This opens Power Options directly.
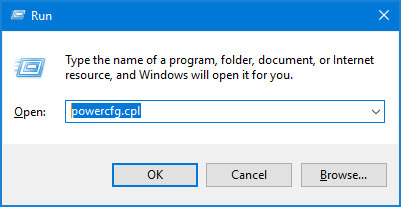
Step 2. Click Choose what the power buttons do. Uncheck Turn on fast startup. Save changes.
Method 4: Use Local Group Policy Editor
This method is available in Windows Pro and Enterprise versions.
Group Policy Editor controls advanced system settings. It is useful in office environments. IT administrators often disable fast boot using this method.
This approach is more technical but effective.
Steps:
Step 1. Press Windows key + R. Type gpedit.msc and press Enter. Navigate to Computer Configuration. Click Administrative Templates. Select System. Open the Shutdown folder.
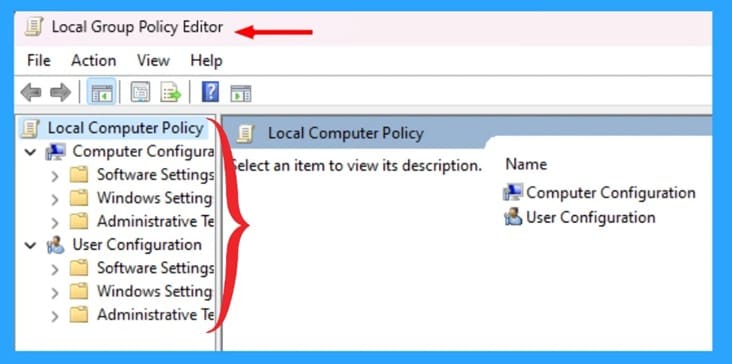
Step 2. Find the required use of fast startup. Double-click it. Select Disabled. Click Apply and then OK. Restart PC.
Method 5: Use Registry Editor
Registry Editor changes deep system settings. Use it carefully.
This method works if other options are missing. Always create a backup before editing the registry.
If done correctly, this will help you disable fast boot permanently.
Steps:
Step 1. Press Windows key + R. Type regedit and press Enter. Navigate to: HKEY_LOCAL_MACHINE\SYSTEM\CurrentControlSet\Control\Session Manager\Power
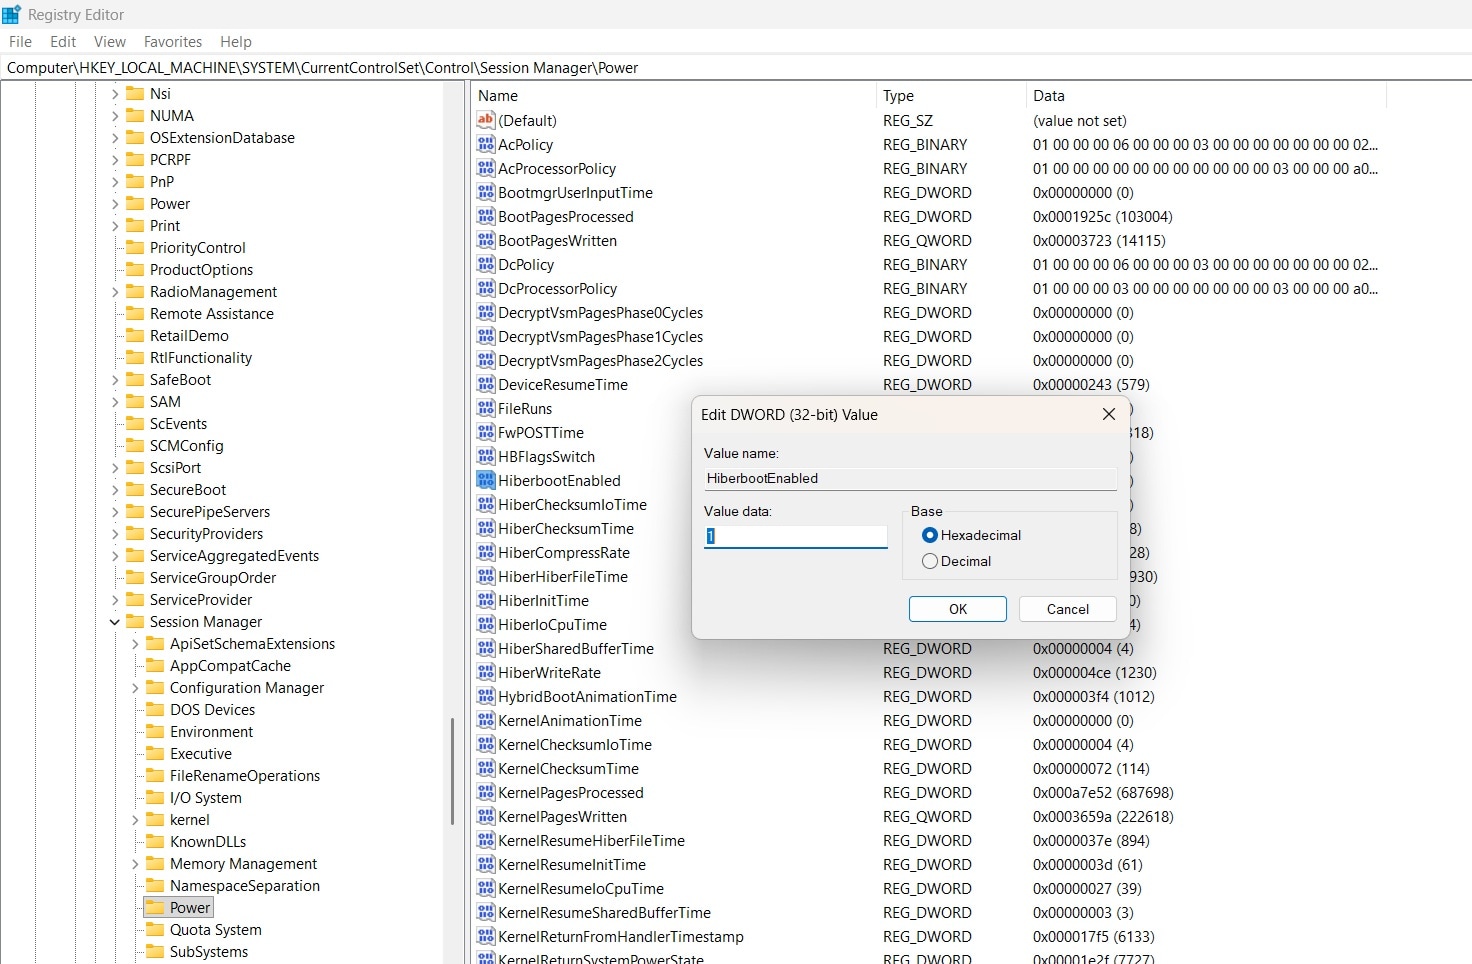
Step 2. Find HiberbootEnabled. Double-click it. Change value to 0. Click OK. Restart your computer. To restore, change the value to 1. That is how to enable fast startup windows 10/11 again.
Part 3: Lost Data While Disabling Fast Startup? Recover Lost Data Easily Using Recoverit
Sometimes system changes do not go as planned. A sudden power cut may interrupt the process. The computer may freeze or restart on its own. In rare cases, the system may fail to boot. When this happens, important files may seem missing. Documents, images, or office files may not open. This is the moment when many users start searching for how to recover lost data from a crashed computer.
Recoverit is a reliable data recovery tool designed to handle such situations. It works smoothly on both Windows 10 and Windows 11. The software can recover files lost after a system crash, blue screen error, accidental deletion, virus attack, or disk formatting. It scans deeply and finds files that are no longer visible in the normal File Explorer view.
If you faced trouble while trying to disable fast startup on windows 10/11 and your system became unstable, this tool offers a practical solution. It supports recovery of documents, photos, videos, emails, audio files, and many other formats. The interface is simple and clear. You can preview files before restoring them. This helps you recover only what you truly need and keeps the process safe and controlled.
Recovery Steps:
Step 1. Download and install Recoverit. Launch the program. Select the location where data was lost.

Step 2. Click Start. Let the software scan your drive. Preview files during scanning.

Step 3. Select the files you want. Click Recover. Save them to a different drive.

This is one of the easiest ways for how to recover lost data from a crashed computer safely.
Part 4: Smart Things to Check Before You Turn Off Fast Startup
Before you disable fast boot, review these points carefully.
Turning off Fast Startup can solve issues. But you must understand its impact.
- Check Startup Speed Needs If your PC is already slow, the startup may take longer.
- Backup Important Data Always protect files before system changes.
- Confirm Windows Version Some options differ between Windows 10 and Windows 11.
- Understand BIOS Settings Fast boot in BIOS is different from Windows Fast Startup.
- Update Drivers First Sometimes driver updates fix the issue without disabling the feature.
- Check Dual Boot Setup If using Linux, disabling helps avoid file lock errors.
- Ensure Stable Power Supply Sudden shutdown during changes may corrupt files.
- Know How to Enable Again Learn how to enable fast boot on windows 10/11 if needed later.
Conclusion
Fast Startup is helpful for many users. It reduces boot time and improves convenience. However, it is not perfect. If you face driver issues, update failures, or dual-boot problems, you may need to turn off fast startup on Windows.
Now you understand what is fast startup on windows 10/11 and how it works. You also learned multiple methods for how to disable fast startup on windows 10/11. Follow the steps carefully.
If anything goes wrong, you now know how to recover lost data from a crashed computer using a reliable tool.
FAQs
-
Is it safe to disable Fast Startup?
Yes, it is generally safe to disable this feature. Fast Startup mainly controls how Windows shuts down and starts up again. Turning it off does not delete your files or remove installed programs. It simply forces the system to perform a complete shutdown each time. Many users disable fast boot to fix driver or update issues without facing any risk to their personal data. -
Will disabling Fast Startup slow my computer?
Your computer may take a few extra seconds to start because it will no longer load saved system data. However, this only affects boot time. Once the system is fully started, overall speed and daily performance stay the same. Apps, browsing, and file access work as usual after you turn off fast startup on Windows. -
Can I enable Fast Startup again?
Yes, you can easily switch it back on at any time. Windows allows you to restore the settings through Power Options in Control Panel or by using Command Prompt. If needed, you can follow the steps for how to enable fast startup windows 10/11 and bring back the faster boot process without affecting your files.


