

 TL;DR:
To restore a malfunctioning HDMI connection on a Windows 10 or 11 laptop, sequentially rule out hardware faults by verifying cable integrity, manually selecting the corresponding monitor input, and ensuring the correct projection mode is active via the Windows + P shortcut.
● Force the operating system to recognize a missing monitor by clicking Detect under Display settings, or press Windows + Ctrl + Shift + B to instantly reset an unresponsive display adapter without rebooting.
● Resolve screen flickering and unsupported resolution errors by updating the display adapter drivers in Device Manager and matching the system output settings to the monitor's native refresh rate.
● If severe display failures completely block access to the system, you can use recovery software like Recoverit to extract inaccessible files from the hard drive before attempting advanced BIOS or UEFI firmware adjustments.
Ask AI for a summary
 ChatGPT
 Perplexity
 Gemini
 Claude
 Grok
Grok
An external display failure can disrupt work, entertainment, and everyday laptop use. Still, the problem often appears, even when everything seems normal. That uncertainty makes small connection issues feel much bigger than they are. For many users, “HDMI Port Not Working on Laptop” becomes an immediate concern.
Meanwhile, Windows 10 and 11 users face this issue more often today. Sometimes the screen stays dark, while the laptop seems fine. However, that confusing gap leaves users questioning the port, system, or screen. This topic matters because modern setups depend on smooth device connectivity.
Try Recoverit to Perform Data Recovery
 Security Verified. 3,591,664 people have downloaded it.
Part 1. Common Symptoms of HDMI Not Working on a Laptop
Before looking deeper, it helps to recognize the problem through visible signs. Many users search for an “HP laptop HDMI port not working fix” after noticing the following symptoms:
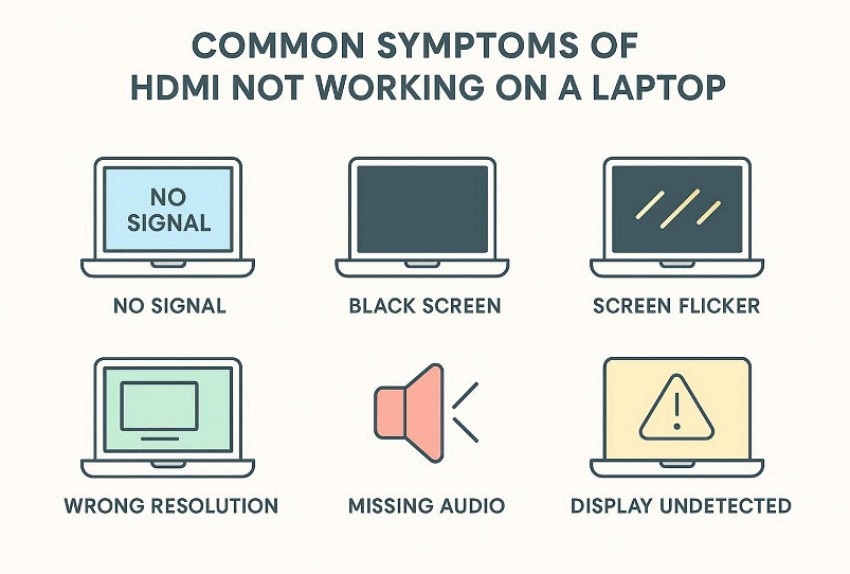
- No Signal: The monitor shows a no signal message after connecting the laptop properly. Meanwhile, the laptop screen remains normal, causing confusion about the source of the connection.
- Black Screen: The external display turns black, even though the power lights remain visible nearby. However, the laptop detects something, but no picture appears on the screen.
- Screen Flicker: The connected screen flashes on and off during normal laptop use sessions. As a result, videos, slides, or games become hard to watch comfortably.
- Wrong Resolution: The second screen appears stretched, blurry, or oddly sized after connection setup. The text looks unclear, and icons appear larger or smaller than expected onscreen.
- Missing Audio: Picture appears correctly, but sound keeps playing through the laptop speakers instead. In other cases, the monitor stays silent during videos or calls entirely.
- Display Undetected: Windows does not recognize the connected display after plugging everything in properly. Therefore, display settings show only one screen instead of two connected displays.
Part 2. HDMI Not Working on Laptop Windows 11 – Causes
Understanding the following possible reasons behind “HDMI not working on laptop Windows 11” makes this issue easier to assess:
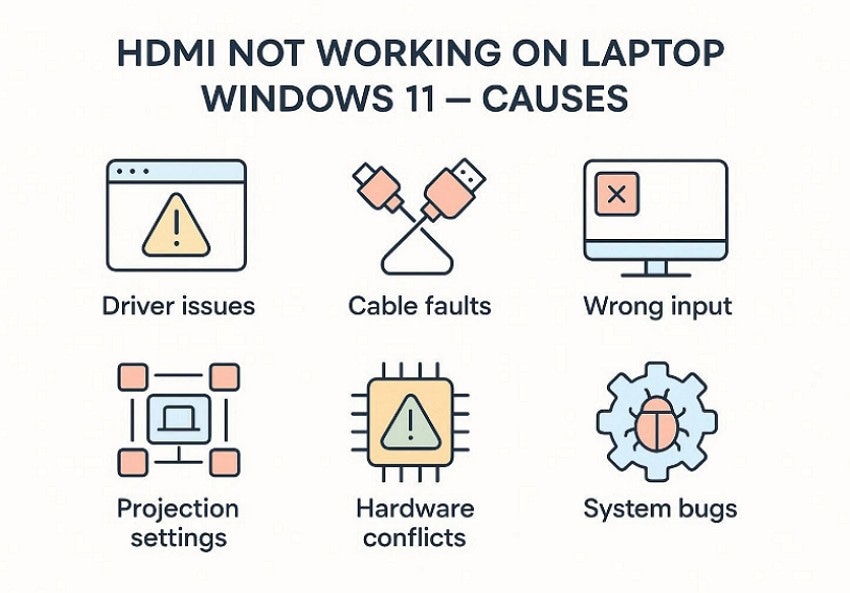
- Driver Issues: Outdated graphics drivers often prevent laptops from sending video signals correctly today. Similarly, display drivers may conflict after updates and interrupt HDMI detection badly.
- Cable Faults: Damaged or low-quality cables can fail even when ports seem normal outside. Internal wire breaks often cause flickering, black screens, or no signal issues.
- Wrong Input: Sometimes the monitor stays on another input source instead of the HDMI mode. This makes the laptop appear faulty, although the connection still works properly.
- Projection Settings: Incorrect projection settings can keep Windows from extending content properly across displays. Therefore, the screen may stay hidden, mirrored, or completely inactive during use.
- Hardware Conflicts: Docking stations, adapters, or hubs sometimes interfere with direct HDMI output signals. Power-saving features may also disable external displays when resources are limited unexpectedly.
- System Bugs: Windows updates occasionally introduce temporary bugs affecting screen detection behavior after installation. These software issues usually appear suddenly, even on previously stable laptops.
Part 3. HP Laptop HDMI Port Not Working? Step-by-Step Solutions
Since each symptom points to a different problem, a quick comparison helps more. The table below connects each visible issue with its likely cause and fix:
| Symptom | Likely Cause | Best Fix |
|---|---|---|
| No Signal | Wrong input, cable faults, or system detection failure | Select Correct Input, Check the HDMI Cable, Detect External Display |
| Black Screen | Cable faults, wrong screen mode, or temporary adapter failure | Check the HDMI Cable, Choose Screen Mode, Reset Display Adapter |
| Screen Flicker | Cable faults, driver issues, or wrong refresh rate | Check the HDMI Cable, Update Graphics Drivers, Set Resolution, and Refresh Rate |
| Wrong Resolution | Incorrect display settings or unsupported refresh rate | Set Resolution and Refresh Rate |
| Missing Audio | Wrong output path after HDMI connection or incomplete device detection | Detect External Display, Power Cycle Devices |
| Display Undetected | Driver issues, projection settings, hardware conflicts, or system bugs | Update Graphics Drivers, Choose Screen Mode, Power Cycle Devices, and Run Windows Update |
Now, let’s move ahead and examine the fixes more closely. The detailed solutions below explain how to address each problem properly:
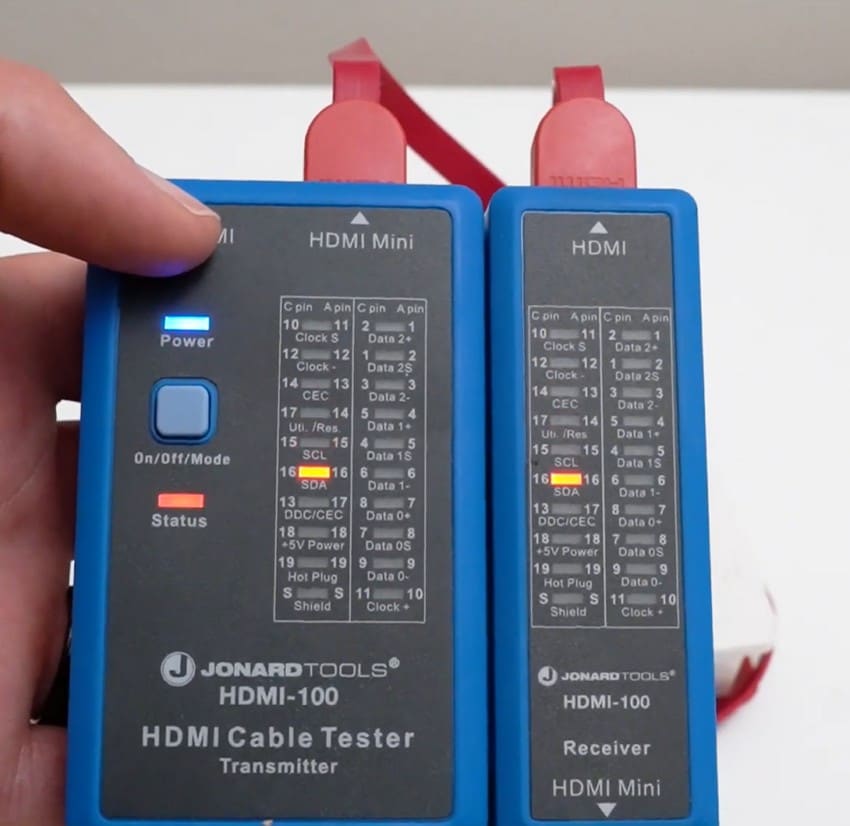
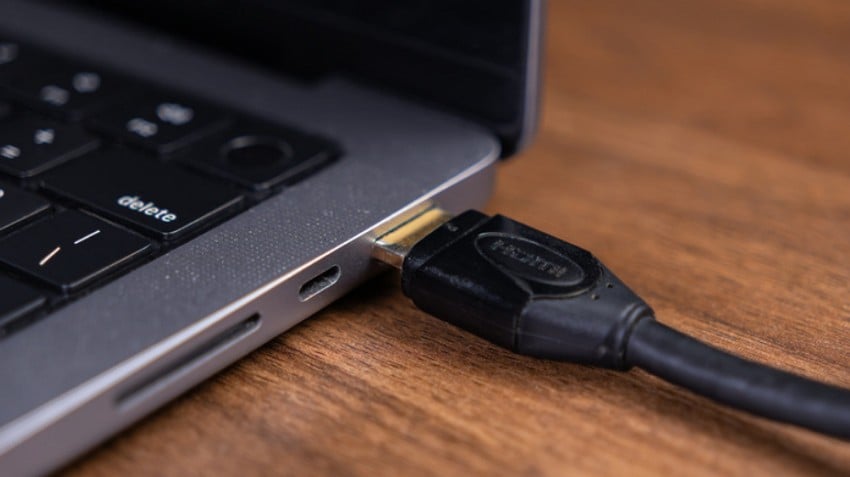
Fix 1: Check the HDMI Cable
A loose HDMI cable often interrupts display signals between connected devices. Minor connector damage can cause flickering, black screens, or detection problems. Moreover, “HDMI not working on laptop Windows 10” often means cable trouble. So, checking both ends carefully helps confirm whether the connection remains stable. This simple inspection should be done before changing settings or drivers.
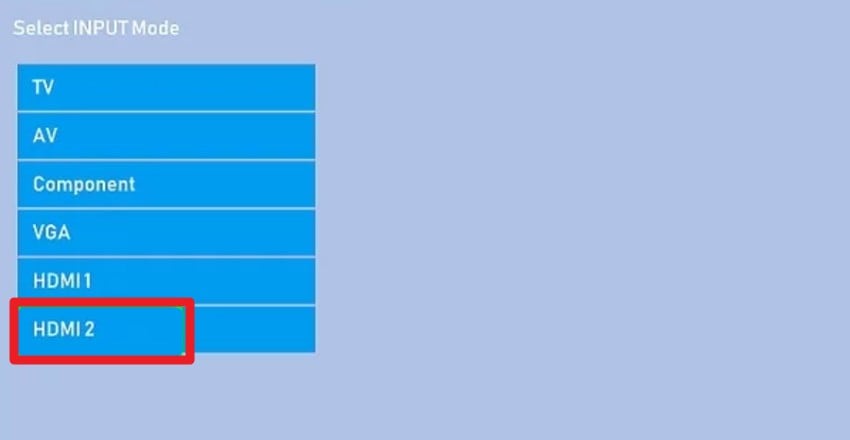
Fix 2: Select Correct Input
Sometimes the monitor stays on the wrong source, even after the connection. That makes the laptop appear faulty when the signal is simply not selected. In many “HP laptop HDMI port not working fix” cases, the display source is the real problem. Choosing the correct HDMI input often restores the picture immediately without deeper troubleshooting. So, adhere to the instructions below to switch the monitor to the correct input source:
Instructions. To switch the monitor to the correct input source, press the Input, Source, or Menu button on the monitor, select the “HDMI” option matching the connected laptop port, and then wait a few seconds to confirm the external display appears properly.
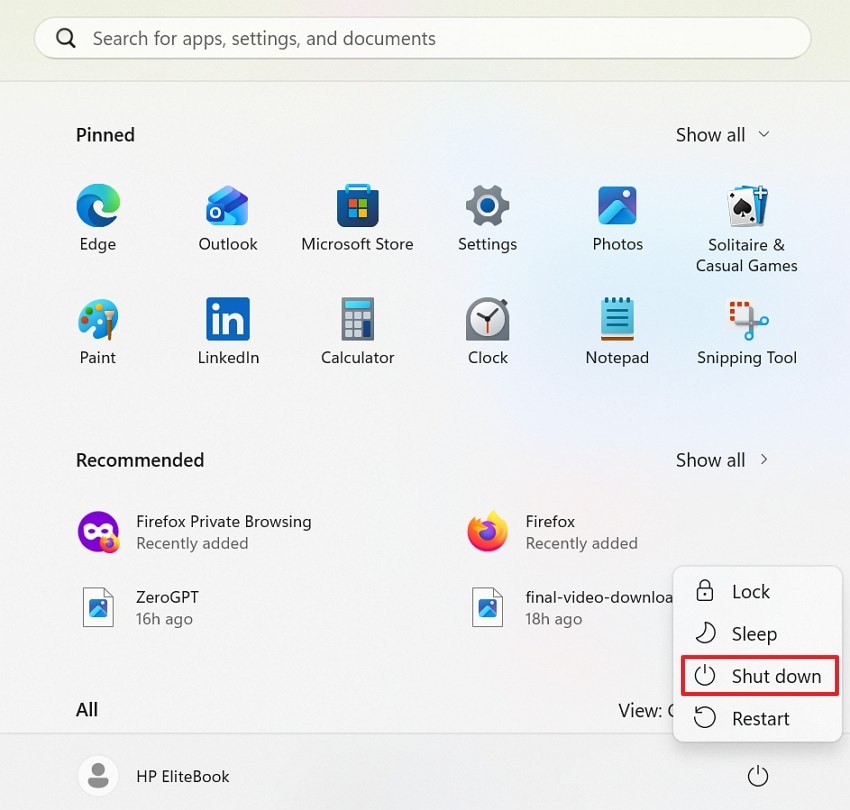
Fix 3: Power Cycle Devices
Temporary communication faults can stop laptops and monitors from syncing correctly. A full power cycle clears stuck hardware states and refreshes the connection path. For “HDMI not working on laptop Windows 10,” this simple reset often helps quickly. It is especially useful when the screen suddenly stops responding after previously working normally. Follow the instructions below to refresh both devices and rebuild the HDMI connection:
Instructions. First, access the “Start” menu, choose the “Power” button, and select “Shutdown.” After that, turn off the external monitor, unplug the HDMI cable, remove power for one minute, reconnect everything carefully, restart both devices, and then check whether the external display appears correctly.
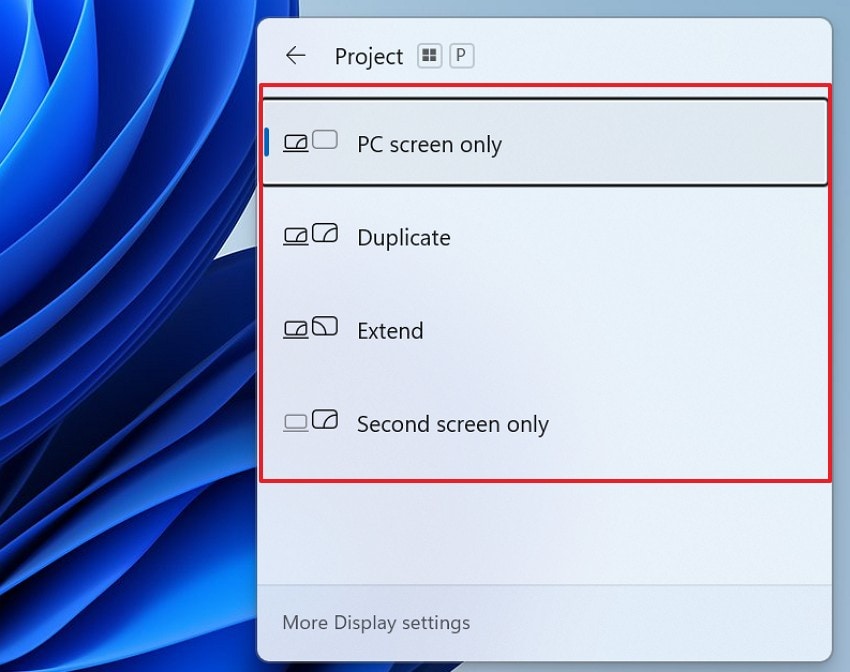
Fix 4: Choose Screen Mode
Windows can send the wrong projection setting to the connected display. That leaves the second screen blank, mirrored incorrectly, or disabled completely. In many “HP laptop HDMI port not working fix” situations, screen mode causes confusion. Selecting the proper mode helps Windows show content where you actually need it. The following instructions help you choose the correct projection mode in Windows:
Instructions. To start, press “Windows + P” to open the screen mode panel. Then, choose Duplicate, Extend, or Second screen only as needed. Afterwards, check whether the external display now responds and shows content properly.
Fix 5: Detect External Display
Sometimes Windows does not automatically recognize the connected external monitor. When that happens, the display remains invisible inside settings despite proper cable placement. With HDMI not working on the laptop Windows 10, manual detection can trigger recognition again. This is useful after reconnecting hardware, restarting devices, or changing projection settings recently. These steps mentioned below help Windows search again for the missing external display:
- First, right-click the desktop and choose “Display settings” from the menu to proceed.
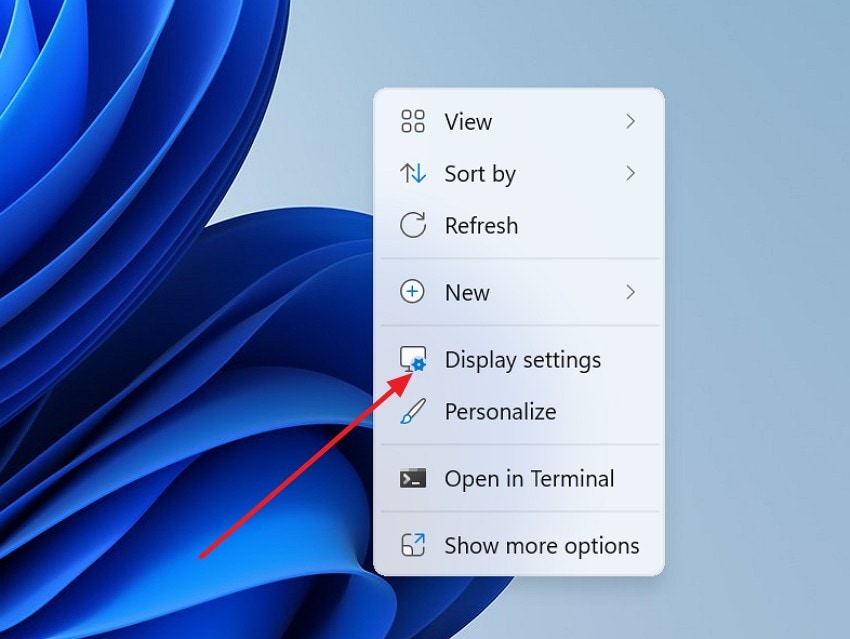
- Next, scroll down and click the “Detect” button under multiple displays. Now, wait briefly and confirm whether Windows now finds the monitor.
Fix 6: Update Graphics Drivers
Graphics drivers control how the laptop sends video through HDMI connections. If they are outdated or corrupted, the display output may fail unexpectedly. Many “HP laptop HDMI ports not working fix” cases improve after updating drivers. New driver versions often fix compatibility bugs, improve detection, and stabilize external screen performance. Use the guide below to update your graphics driver the proper way:
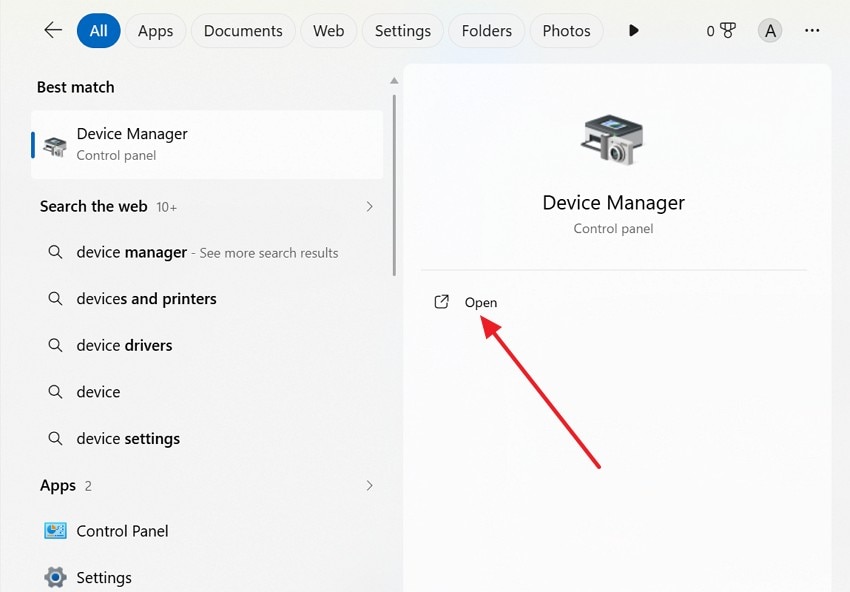
- Start by right-clicking the “Start” menu and opening “Device Manager” from the list.
- Next, expand the “Display Adapters” and find your graphics device and right click to choose “Update Driver” further.

- After that, select the “Search automatically for drivers” option for available updates.

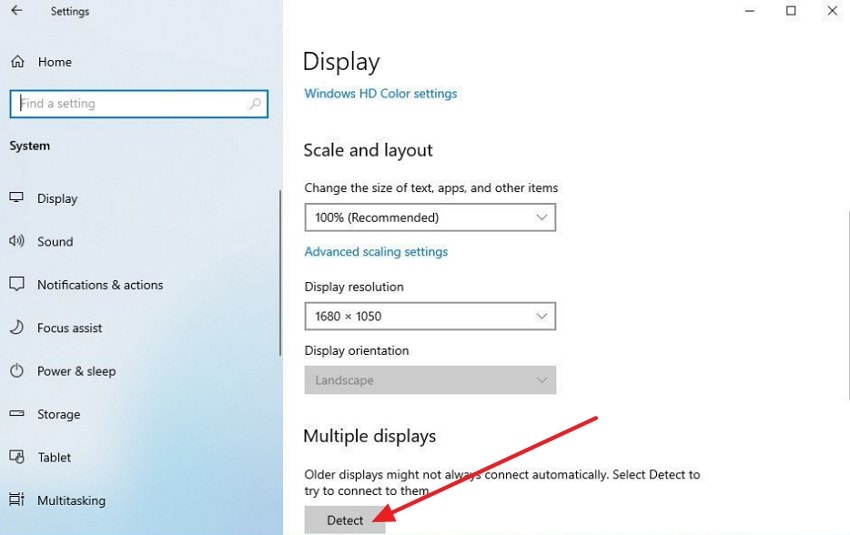
Fix 7: Set Resolution And Refresh Rate
Incorrect display settings can make a connected monitor look unsupported or unstable. A mismatched resolution or refresh rate may cause flickering, blur, or no picture. For HDMI not working on a laptop with Windows 10, adjusting these settings can restore normal output. This matters especially when using older monitors or unusual screen sizes. The steps below help match Windows settings to the monitor correctly:
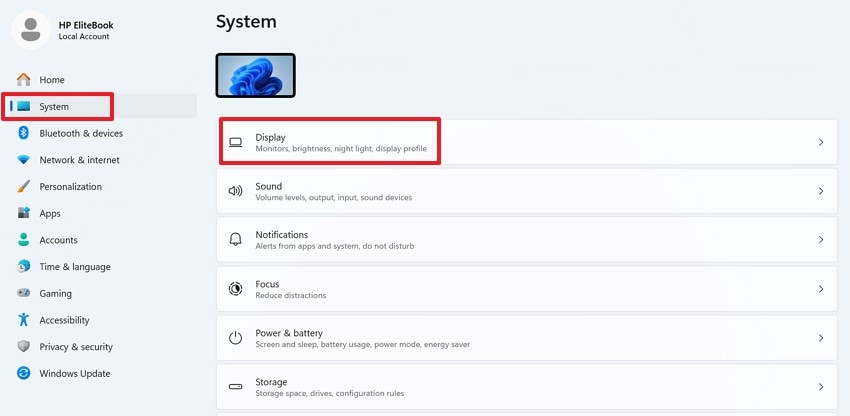
- Firstly, open “Settings,” select “System,” and then click “Display.” This takes you to the main screen settings section in Windows.
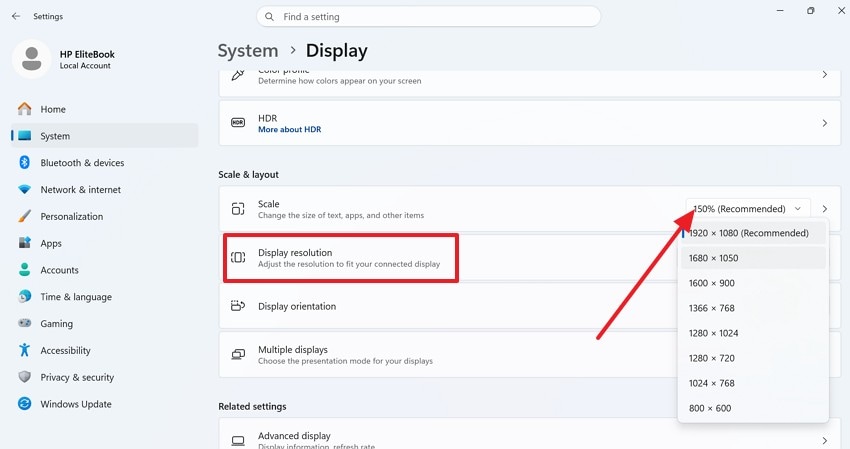
- Next, scroll to “Display resolution” and open the dropdown menu. Then, choose the recommended resolution that matches the connected display properly.
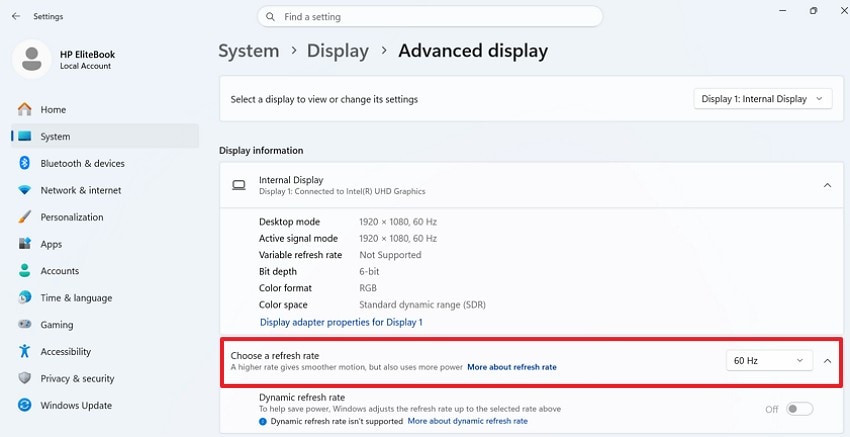
- Afterwards, locate the “Advanced display” and find the “Choose a refresh rate” option. After that, select a supported refresh rate and check whether the screen improves.
Fix 8: Reset Display Adapter
Sometimes the graphics adapter stops responding without fully crashing the system. Windows includes a quick shortcut that refreshes the display driver immediately. In some “HP laptop HDMI port is not working fix” situations, this reset restores output fast. It is helpful when the screen suddenly goes black after waking or switching modes. Try this built-in Windows shortcut with the instructions below to reset the display adapter:
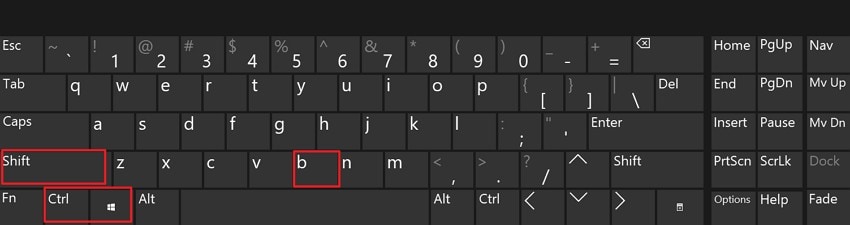
Instructions. To initiate, press “Windows + Ctrl + Shift + B”, wait for a beep or brief screen flicker, and then check whether the external monitor starts showing the laptop display.
Fix 9: Run Windows Update
System updates often include driver patches, stability fixes, and display improvements. An outdated Windows build may cause connection problems with modern monitors. When HDMI is not working on a laptop, Windows 10 continues; system updates are worth checking. Installing available updates can remove bugs that interfere with HDMI recognition and output. Follow the steps below to install Windows updates and refresh system components:
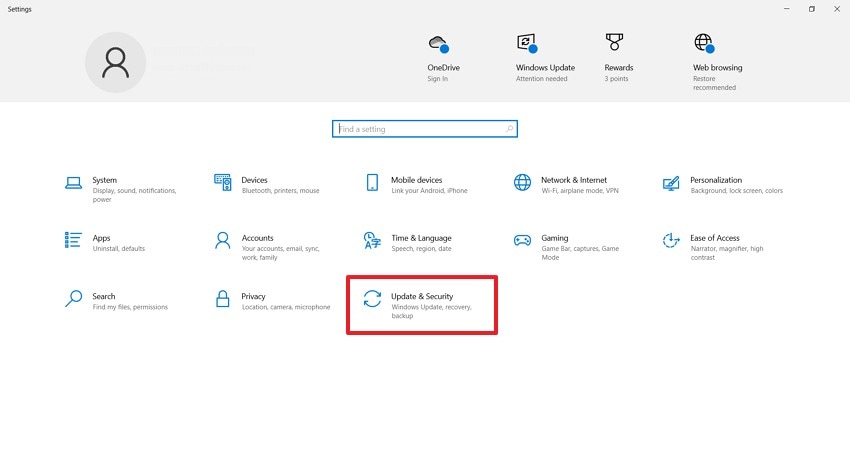
- Start by navigating to “Settings,” then choose the “Update & Security” option to continue.
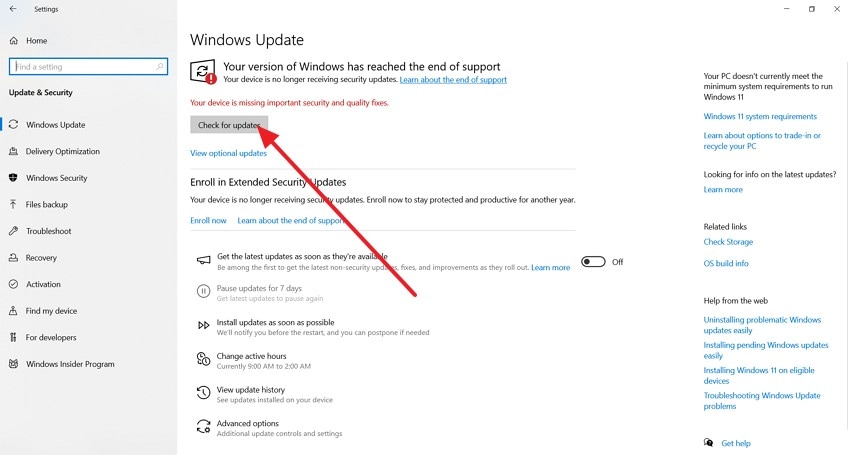
- Later, go to Windows Update and click “Check for updates”. Then, allow Windows to download and install all relevant updates.
Fix 10: Check BIOS/UEFI Settings
Some laptops manage graphics output through firmware-level display settings. If those options are incorrect, HDMI behavior may become limited or unstable. In certain “HP laptop HDMI port not working fix” cases, BIOS settings contribute silently. This check is more advanced, but it can matter after hardware changes or firmware resets. Now, try the steps below only if basic Windows fixes have not helped:
- First, hold Shift and click “Restart” from the Windows power menu to later select “Advanced options” from Troubleshoot.
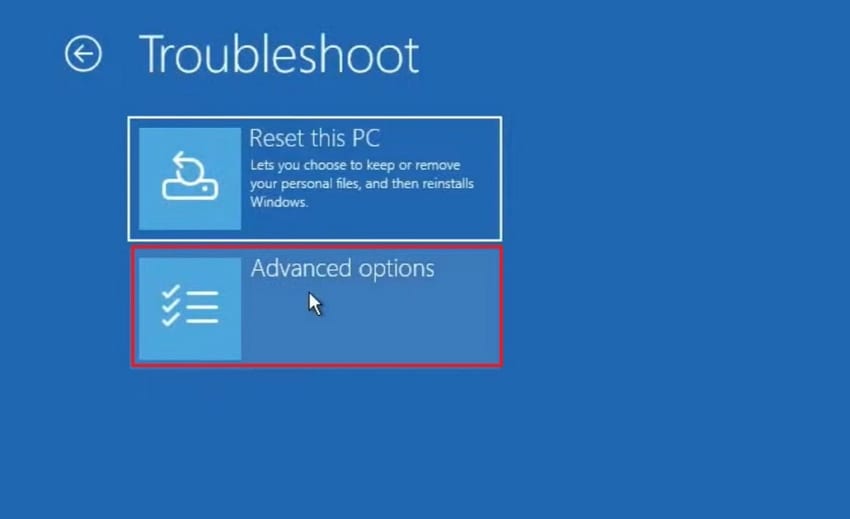
- After that, click “UEFI Firmware Settings” from the Advanced options screen.
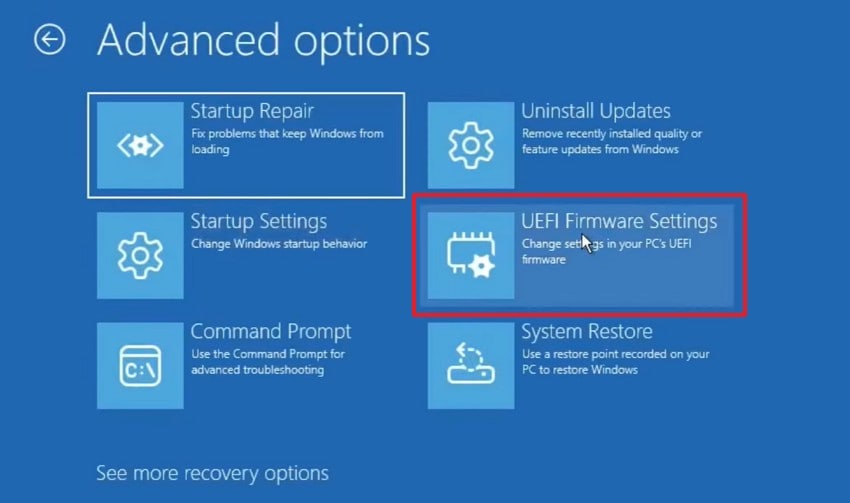
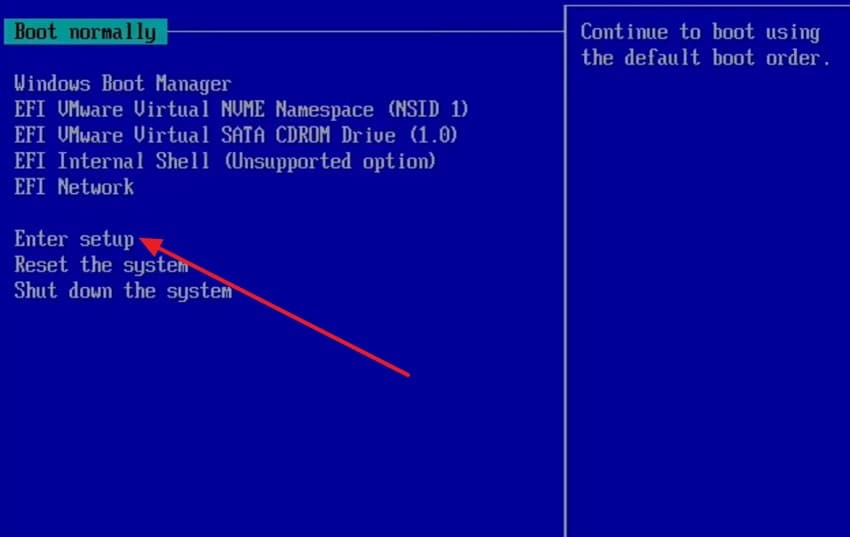
- Finally, select “Enter setup” after the firmware screen appears on startup. After that, review the BIOS or UEFI settings, save changes, and restart.
Fix 11: Test Another Device
Testing another screen or source helps isolate the actual faulty part. This method shows whether the problem comes from the laptop, cable, or monitor. For HDMI not working on a laptop with Windows 10, comparison testing saves time quickly. It prevents random guessing and gives clearer direction before replacing anything unnecessarily.
Fix 12: Contact Support
If every basic and advanced step fails, professional help becomes appropriate. Persistent problems may point to physical port damage or deeper hardware faults. Some HP laptop HDMI ports are not working and need an official diagnosis eventually. Contacting support helps confirm warranty options, repair choices, and model-specific troubleshooting guidance safely.
Pro Tip: How Recoverit Helps Recover Files If HDMI Prevents Viewing Content
Screen trouble becomes more stressful when important files are suddenly harder to access. A blank external display can interrupt work, delay deadlines, and create panic quickly. During moments like these, Recoverit offers practical support by helping users recover lost or hidden data safely. This becomes even more useful when searching “HP laptop HDMI port not working fix” during emergencies.
Rather than assuming everything is gone, users can approach the problem more calmly. Recoverit is designed for situations involving accidental deletion, crashes, formatted drives, and startup failures. That makes it a helpful option when display problems keep content from being viewed normally. The tool gives users another path to protect important work before frustration turns into permanent loss.
Key Features
- Crash Recovery: Recoverit restores files after system crashes, failed boots, or black-screen issues blocking normal laptop access.
- Preview Support: Users can preview recoverable files before saving, reducing confusion during stressful display-related data loss situations.
- Deep Scanning: Locates deleted or hidden files from drives affected by crashes or interruptions quickly.
Guide to Recover Files If HDMI Prevents Viewing Content
Adhere to the steps below now to recover files of HDMI prevents to view the content, using Recoverit:
- Pinpoint the Lost File Location
First, access Recoverit and stay in “Hard Drives and Locations.” Then, choose the drive, USB, desktop, or folder where the files were saved.
- Track Down Missing Files Fast
Next, let Recoverit scan the selected location for lost or hidden files. Meanwhile, use “Filter,” thumbnails, or file categories to narrow the results faster.
- Verify and Restore the Files
Finally, preview the file carefully to confirm it is the right one. After that, press the “Recover” button and save it to a safe location.
Video Tutorial On How to Fix HDMI Not Working on Laptop Windows
Part 4. 6 Tips to Prevent HDMI Issues on Laptops
Preventing connection trouble helps laptops and external displays work more smoothly for longer. This matters when “HDMI not working on laptop Windows 10” interrupts work.
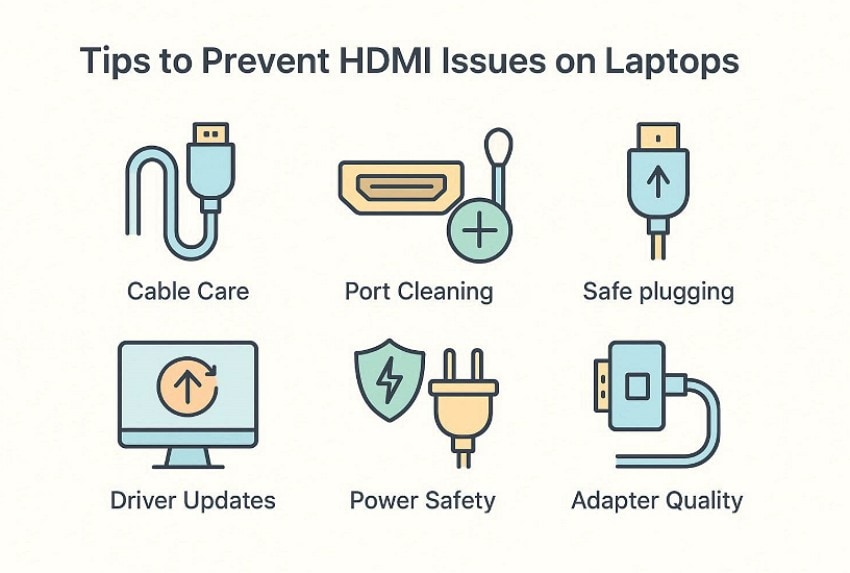
- Cable Care: Store HDMI cables loosely to reduce stress and protect delicate internal wiring. Avoid twisting connectors because repeated strain slowly weakens stable signal performance over time.
- Port Cleaning: Clean HDMI ports gently so dust does not block proper signal contact. Use soft air bursts because hard tools may damage delicate pins inside.
- Safe Plugging: Insert cables carefully to avoid bending pins or loosening the port. Never force connectors because resistance often signals poor alignment during connection.
- Driver Updates: Keep graphics drivers updated so laptops maintain better display compatibility overall. Regular updates also reduce conflicts after Windows installs new patches automatically.
- Power Safety: Use surge protectors to shield devices from sudden electrical spikes and damage. Stable power helps laptops and displays maintain smoother communication during use.
- Adapter Quality: Choose reliable adapters because poor accessories often weaken video output stability. Better converters usually deliver stronger signals and fewer display problems daily.
Conclusion
To conclude, HDMI connection problems can feel frustrating, but most cases improve with careful checking and the right settings. From cables and screen modes to drivers and updates, each step helps narrow the real cause. If HDMI not working on laptop Windows 10 still prevents access to important files, Recoverit offers a practical and reassuring recovery option during emergencies.
FAQ
-
1. Why does my laptop not detect the HDMI display?
Usually, driver issues, wrong input selection, or cable faults stop display detection completely. Projection settings and temporary Windows bugs can also prevent proper screen recognition today. -
2. Can a bad HDMI cable cause a black screen?
Yes, damaged HDMI cables often interrupt signals and leave the external screen blank. Even small internal breaks may cause flickering, signal loss, or unstable picture output. -
3. How do I know whether the problem is the port or the monitor?
Test another monitor, cable, or laptop to narrow the problem more accurately first. If other devices work normally, your laptop port or settings need attention instead. -
4. Can Windows updates affect HDMI connections on laptops?
Yes, some updates create temporary driver conflicts that affect HDMI output behavior suddenly. Keeping graphics drivers current usually reduces compatibility issues after major Windows changes later.


