File Recovery
- Recovers deleted or lost files effectively, safely and completely.
- Supports data recovery from 500+ data loss scenarios, including computer crash, partition loss, accidental human error, etc.
- Supports 1000+ file formats recovery with a high success rate and without any quality loss.

How to Use Powershell to Force Delete File and Folder

Jun 22, 2026 • Filed to: Recover Files • Proven solutions
 TL;DR:
You can force delete files and folders in Windows by executing the Remove-Item command in an elevated PowerShell window, appending the -recurse parameter to delete child items and the -force parameter to remove read-only or hidden files.
● Items deleted through PowerShell bypass the Windows Recycle Bin and are permanently removed, requiring third-party software like Wondershare Recoverit to restore.
● To delete multiple files or folders simultaneously, execute the Remove-item command followed by the full target paths separated by commas.
● You must log in with an account that has full access to the target objects and right-click the Start Menu to launch Windows PowerShell (Admin) for the commands to execute successfully.
Ask AI for a summary
 ChatGPT
 Perplexity
 Gemini
 Claude
 Grok
Grok
The worst nightmare for anyone in this world is probably to lose their data. When we say data, it includes all of that important information, including your selfies, videos, notes, documents, pictures, music, etc. So, in this article, we have introduced multiple ways to recover Powershell deleted files. In this article, we have elaborated step by step on how you can use Powershell to recover deleted files. Also, this article explains to you topics such as 'what is PowerShell?' and how could we use PowerShell to force the delete folder.
Part 1: What is Powershell?
Windows PowerShell is a scripting language and object-oriented automation engine. It is designed mainly for system administrators and also Powershell to recover deleted files. It supports IT professionals to control & automate the administration of the Windows OS and other applications.
It introduced some new concepts that allow you to increase the knowledge you have gained and the scripts you have built within the Windows Command Prompt and Windows Script Host environments.
It combines the flexibility of command-line speed, scripting, and the power of a GUI-based admin tool. It enables you to solve queries efficiently by improving system admin to reduce future manual labor hours. We will go through all the important aspects you should know to learn PowerShell.
Part 2: How to Force Delete File and Folder with Powershell?
Let's begin by running a simple command to delete a folder or a single file. Please keep in mind that you are logged in to the server or PC with an account that has complete access to the objects you want to delete.
- Open PowerShell by pressing the Start button and typing PowerShell. Press Enter.
- Type Remove-Item –path c:\testfolder –recurse and hit Enter. Please replace c:\testfolder with the full path to the folder you wish to delete.
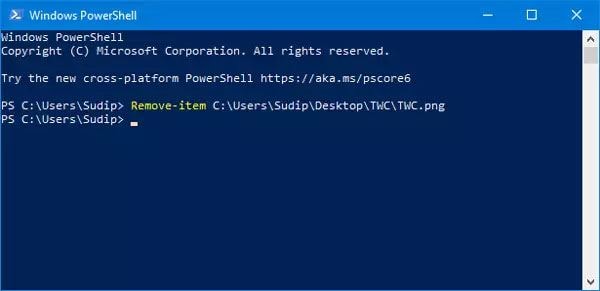
- The –recurse parameter will enable PowerShell to remove any child items without requesting permission. Moreover, the –force parameter can be added to delete read-only or hidden files.
- To ensure that the folder has been deleted, type dir c: in the command prompt and hit Enter, replacing c: with the folder's parent directory you just deleted.
More Related Articles:
Part 3: How to Delete Multiple Files Using PowerShell?
Deleting files with Powershell is no rocket science, you just need to know the right command that needs to be executed. But when it comes to deleting multiple files in one go, it becomes a bit complicated. Don't worry. For your convenience, we have mentioned below the exact command that you need to follow.
- Remove-item file-path, file-path1, file-path2
Here, “Remove-item” is the required command to tell the PowerShell that a particular file must be deleted/removed. And the “file-path”, “file-path1”, “file-path2” are the full path location of the files that needs to be deleted. Here’s the step by step tutorial for you.
- Launch the PowerShell application by right clicking on “Start Menu” and then opt for “Windows PowerShell (Admin)”.
- Once you have the PowerShell window on your screen, execute the aforementioned command. For instance, we have a file name TWC and TWC1 on desktop and downloads respectively. Therefore, the command will be:
- Remove-item C:\Users\user-name\Desktop\TWC.png, C:\Users\user-name\Downloads\TWC1.txt

Part 4: How to Delete Multiple Folders Using PowerShell?
Likewise, when deleting multiple folders, the command that needs to be executed is the same. Here’s an example for you.
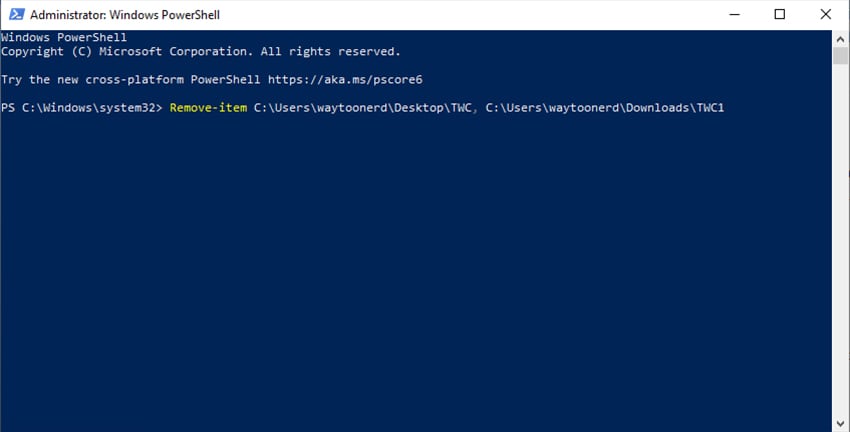
- Launch the PowerShell application by right clicking on “Start Menu” and then opt for “Windows PowerShell (Admin)”.
- As soon as the PowerShell window loads up on your screen, you need to execute the following command, just replace the exemplary paths with the paths of the folders you need to delete on your PC.
- For instance, we have folders named TWC on the desktop and TWC1 in downloads. Therefore, the command will be:
- Remove-item C:\Users\user-name\Desktop\TWC, C:\Users\user-name\Downloads\TWC1
Caution: Please remember, when you make use of PowerShell to delete/remove the files or folders, they just don’t go into the Recycle bin. Instead, they get deleted permanently.
Note: In case you would like to explore through more examples, you can visit this Microsoft link (https://docs.microsoft.com/en-us/powershell/module/microsoft.powershell.management/remove-item?view=powershell-7) that offers several different PowerShell examples.
Video tutorial: How To Delete Files And Folders In Windows With PowerShell
Part 5: How to Recover Files Deleted by Powershell?
Losing data is the most dreadful thought for most of us. Recoverit Data Recovery for PC can recover more than 1000 types and formats of data in various storage devices, including your Windows computer hard drive, Desktop, Recycle Bin, external devices, and crashed computer. It also provides dedicated specialties like advanced video recovery to get your misplaced videos back. The application also involves a video repair tool that can repair corrupted videos under different scenarios.
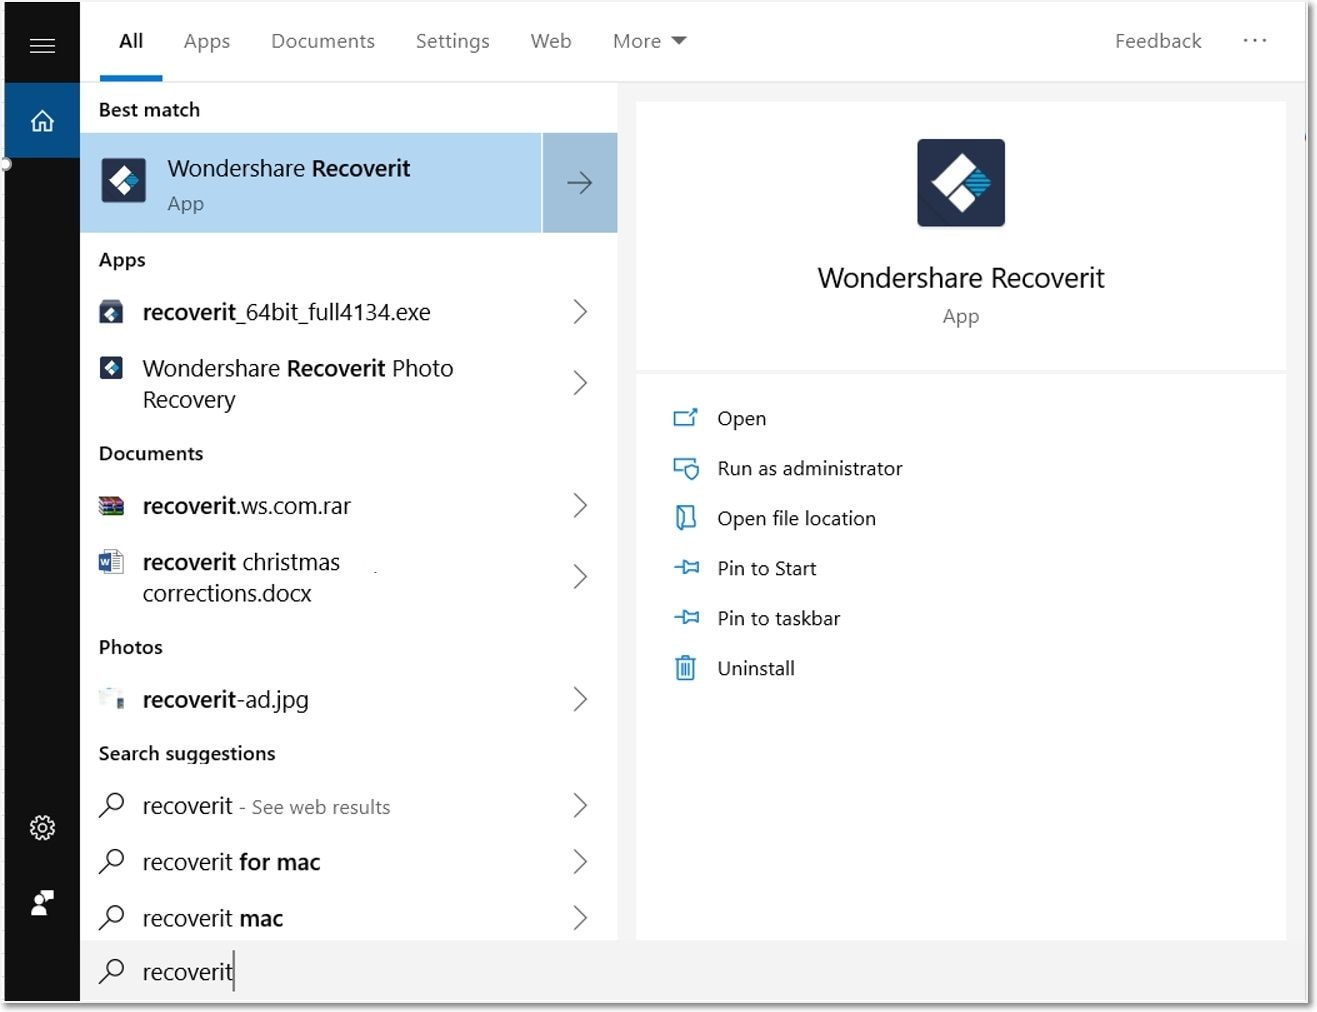
Step 1: Launch Recoverit on Windows
Firstly, launch Recoverit on your computer. Double click the "Wondershare Recoverit" icon on the Desktop to make it happen after installing it.
Step 2: Choose the location
Select the location from where the data was deleted. Click on "Start" after that.

Step 3: Scan the Location
The program will start an all-around scan. While scanning, you can choose your file or pause or stop the scanning as per your convenience.

Step 4: Preview and recover files
Once your files are scanned successfully, you will be enabled to preview your files before recovering. You can choose the targeted files and click the "Recover" button to retrieve your files back.
Preview data by clicking on the file. A thumbnail will appear on the right panel. You will see a preview window after you click the "Preview" button or double-click a file.
Additionally, once you click on the file, you will be able to see some information about the file, including the file name, file path, file size, and the modified date.
Recoverit allows you to have a wide preview for photos on its interface. Additionally, you can view the full-screen photo on the zoom out, or rotate it, full screen, zoom in.

Recoverit supports previewing almost all the common types of files, including Outlook emails, documents, images, videos, audios, and many more.
The Bottom Line
Losing your data is probably the worst nightmare for anyone, so to resolve it. We have explained how to use Powershell to recover deleted files. And also, we have introduced PowerShell, and it's working. Also, if you are fed up with those rigid files and folders that cannot be deleted easily, they can now be tackled with the help of PowerShell. In this article, you will get a clearer picture of how you can resolve these problems.
Rescue & Fix Files
- Recover Document Files
- Repair Document Files
- Recover & Repair More
- Permanently Deleted Files
- Delete Files Command
- Restore Sticky Notes
- Undo Deleted Files
- Get Back Laptop Files
- Cut&Past Files Loss Issue
- Undelete User Profile
- Clear & Delete File


Amy Dennis
staff Editor