Photo Repair
- Fix all photo issues like photo grainy, photo pixelated, photo not opening, etc.
- Enlarge the repaired photos to 2X, 4X, and 8X with AI technology.
- Repair photos of 15+ different photo formats, such as JPG, PNG, NRW, etc.
- Advanced Repair mode for severely corrupted photos.
- Support a wide range of storage media including cameras, SD cards, mobile phones, hard drives, etc.

Fix "JPG file couldn't be opened because you don't have permission to view it"

Sep 02, 2026 • Filed to: Photo/Video/Audio Solutions • Proven solutions
This error typically occurs on Mac due to corrupted Preview app cache files or disk permission conflicts.
The Quick Fix: Go to ~/Library/Containers and delete the com.apple.Preview folder to reset app permissions.
The System Fix: Restart in Recovery Mode (Cmd+R) and run Disk Utility First Aid to repair drive permissions.
The File Fix: If the error persists, the JPG file itself is likely corrupted. Use Wondershare Repairit to rebuild the image metadata and bypass permission blocks.
Are you trying to access some photos on your system, but have got an error stating that you don't have the needed permissions? Don't worry, the issue is quite common and is faced by a lot of Mac users in particular. Since there could be different reasons behind it, you should follow a stepwise drill to repair the JPEG file and retrieve your data. For your convenience, we have come up with a detailed guide to fix the "JPG file couldn't be opened because you don't have permission to view it" error. Read on and fix this issue right away.
Part 1: Common Reasons for Getting This Error
To repair the JPEG file or resolve the permission error, it is important to know its cause. The following are some of the common reasons for getting the restricted permission prompt.
Diagnostic: Why Can't You Open the JPG?
| Root Cause | Symptoms | Most Likely Solution |
| App Conflict | Only fails with "Preview" app | Delete Library/Cache files |
| Disk Corruption | Multiple files in one folder fail | Run Disk Utility First Aid |
| User Ownership | Error after migrating to new Mac | Change Get Info permissions |
| File Damage | "Permission" error on a specific file | Wondershare Repairit |
| System Security | Third-party app cannot open file | Enable Full Disk Access |
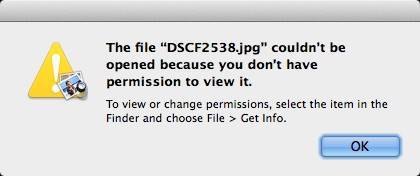
Part 2: How to Fix the Permission Error?
As you can see, there could be different reasons for getting a restricted permission error on your system. To fix the "JPG file couldn't be opened because you don't have permission to view it" error, the following methods can be implemented.
Video tutorial: How to Fix JPG File not Opened as Have no Permission?

Solution 1: Delete Some Files in the Library
If you have a Mac and you are getting the restricted permission error, then this should be the first thing that you should do. Sometimes, the presence of a few temporary or unwanted files can cause this problem. The easiest way to fix this is by simply getting rid of these files from the library. Don't worry, deleting these files won't cause any harm to your system. It will only resolve conflict and help you access the protected content.
Firstly, go to the Finder menu on your Mac. Press the Option key and select Go > Library to access all the saved library files.
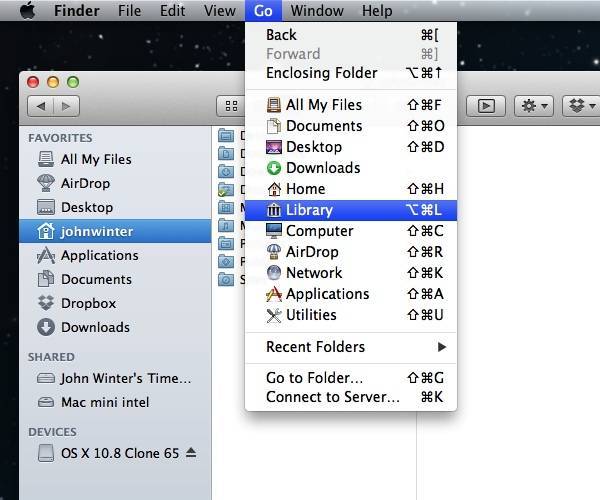
This will launch the Library folder and you can just browse the files that you wish to delete. Following are some files that you can delete:
- Caches > com.apple.Preview
- Saved Application State > com.apple.Preview.savedState
- Preferences > com.apple.Preview.LSSharedFileList.plist
- Preferences > com.apple.Preview.SandboxedPersistentURLs.LSSharedFileList.plist
- Containers > com.apple.Preview
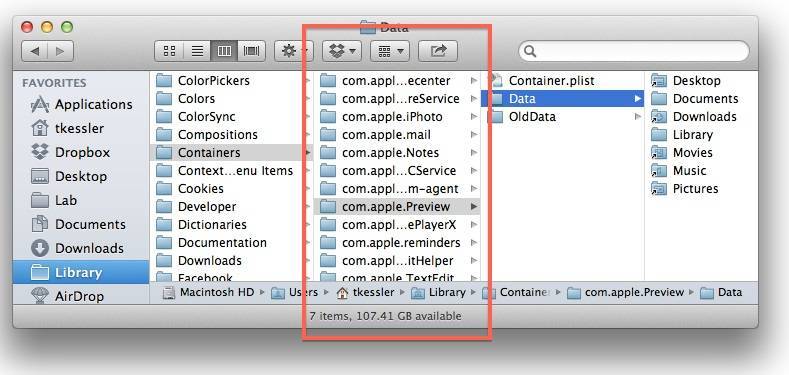
Simply select a file, go to its option, and click on the "Move to Trash" button. You can also select the file and press the delete key to get rid of it.
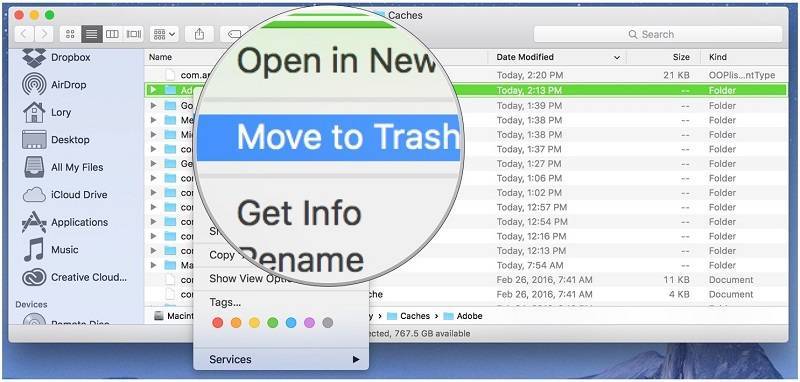
By following the same drill, you can delete all the above-mentioned files. Once it is done, try to access the restricted photos again.
Solution 2: Run Disk Utility on Mac
If there is a problem with your Mac's disk, then this would be an ideal approach to repair the JPEG file. To do this, you can take the assistance of Disk Utility. It is the native solution provided by Mac to repair various issues related to the connected disk. Once you scan the disk for any unwanted problem, you can fix the "JPG file couldn't be opened because you don't have permission to view it" error as well. Here's how you can do it.
- If your Mac is already turned on, then you need to restart it first.
- While Mac is getting started, press and hold the Command and "R" keys. Let go of them once you see the Apple logo on the screen.
- This will automatically display the macOS Utilities on the screen. From all the provided options, go to "Disk Utility" and continue.
- From here, you can select the drive that you wish to repair. Click on the First Aid or Repair icon after selecting a disk.
- Confirm your choice and click on the "Run" button to start disk utility.
- Wait for a while as the Disk Utility would repair your files.
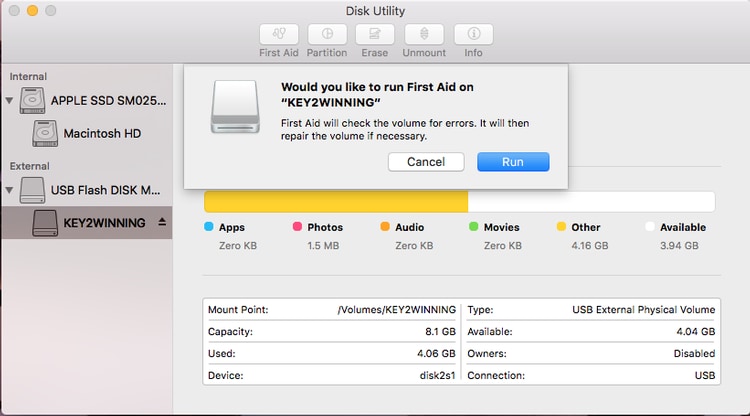
- In the end, your Mac will be restarted and the respective disk would be repaired. You can try to access the restricted files now.
In recent macOS versions (Ventura, Sonoma, and newer), Apple’s heightened security may block apps from viewing JPGs even if you are the Admin. If you encounter this error while using a third-party photo viewer, go to System Settings > Privacy & Security > Full Disk Access and ensure your application is toggled ON.
Solution 3: Repair JPG files with a reliable repairing tool – Wondershare Repairit
If none of the above solutions would seem to work, then you can try Wondershare Repairit. Available for both Windows and Mac, it provides highly advanced options to repair the JPEG file. It features a user-friendly interface and can repair unlimited photos in one go. Users can also preview the repaired photos and save them to any location of their choice. To fix the "JPG file couldn't be opened because you don't have permission to view it" error, follow these steps:
| Feature | Capability |
| Fix Permission Errors | Bypasses header corruption causing access blocks |
| Batch Repair | Fix 1,000+ JPGs simultaneously |
| Format Support | JPG, JPEG, ARW, CR2, NRW, RAF, and more |
| Advanced Repair | Uses "Sample Files" to fix severely damaged data |
- Launch Wondershare Repairit on your system and load the photos of your choice.
- Click on the "Add File" button to load your photos. A browser window will be opened so that you can locate the inaccessible pictures. You can load as many photos as you want.
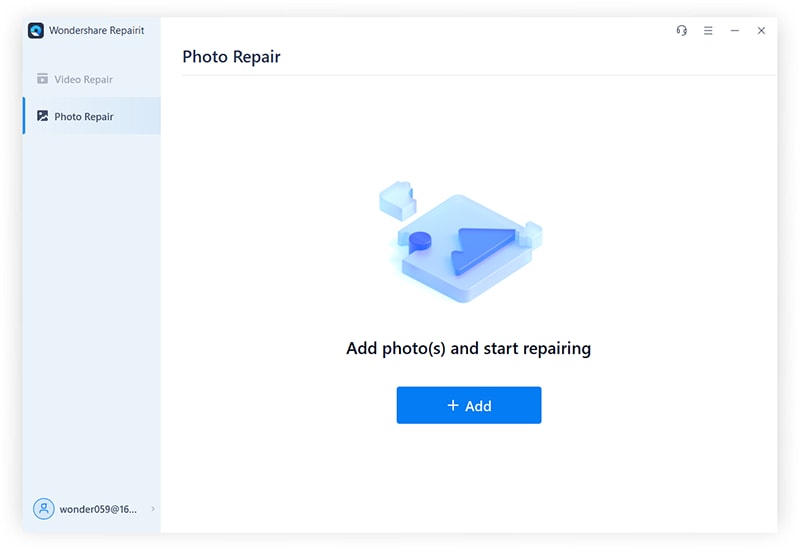
- The interface will display the loaded photos. You can add or remove photos from here and click on the "Repair" button to start the process.
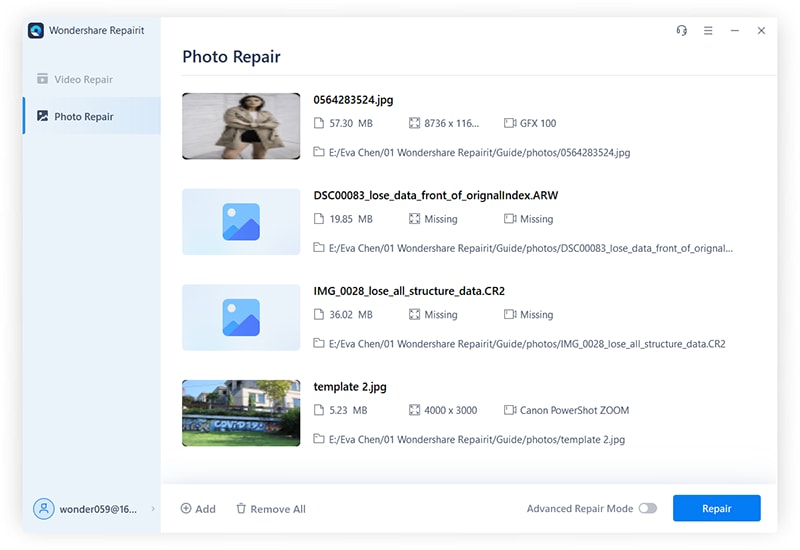
- Wait for a few minutes as the tool would repair your photos automatically. You can view the progress from an on-screen indicator.
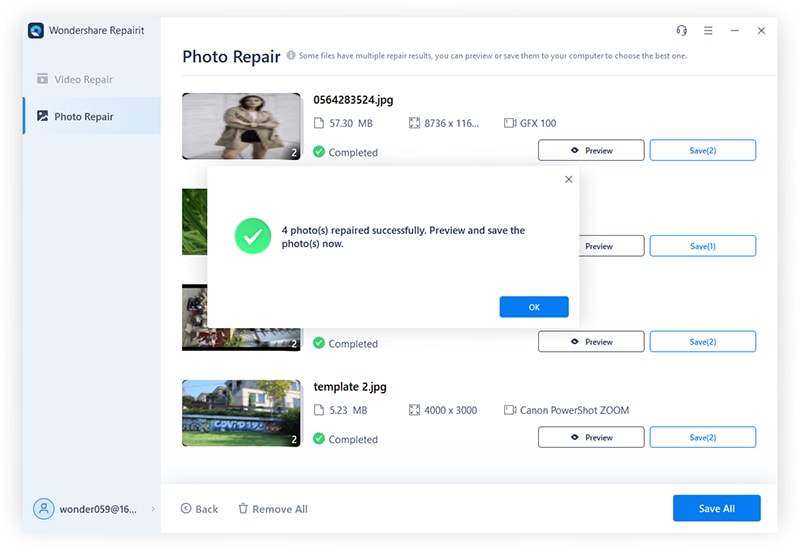
- Once the repairing of the JPG files is done, you will be notified. You can now preview the repaired photos, make the relevant selections, and save them to a safe location.
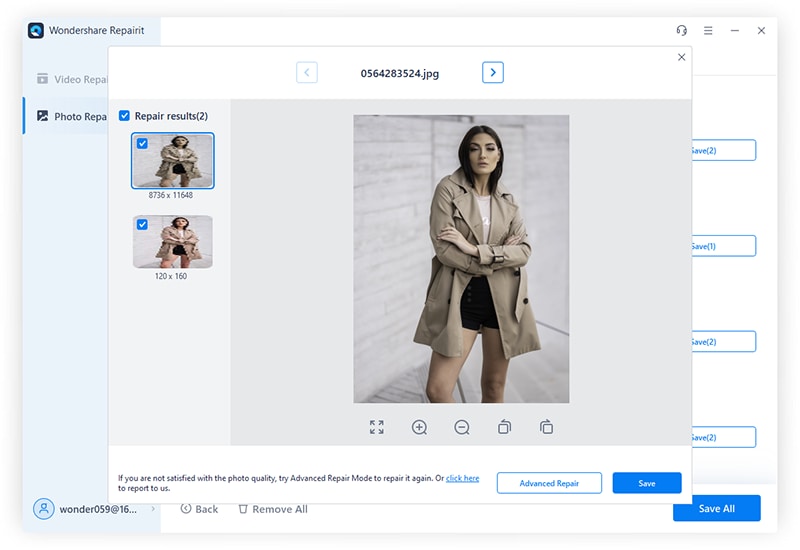
As you can see, Wondershare Repairit provides a user-friendly and reliable way to repair JPEG files. It can fix photos in all the other common formats as well and will help you retrieve your damaged or distorted pictures. By following this drill, you can easily fix the permission conflict error on your Mac. If you are still facing this issue, then let us know about it in the comments below. Also, you can find the solutions here to fix the "HTML5 Video File Not Found" error.
Summary: The Permission Error Troubleshooting Checklist
- Step 1: Reset Preview app caches in the Library folder.
- Step 2: Run First Aid via Disk Utility to fix file system structural errors.
- Step 3: Use "Get Info" (Cmd+I) to ensure your User Account has "Read & Write" access.
- Step 4: If the file structure is unreadable, use Wondershare Repairit to reconstruct the image.
- Step 5: Check for malware if permissions change across your entire drive.
Closing Words
It is common that photos get corrupted or cannot be opened.But with the development of technology,some powerful tools can help us easily handle these problems.With a solution like the Wondershare Repairit, you can rest assured of having those digital memories with you regardless of any error you commit. This is the most viable option for you,so don't hesitate to click here to download and regain the precious photos.
Solve Media File Problems
- Recover & Repair Photos
- What's picture recovery?
- SD card pictures are lost?
- Top 5 free photo recovery software.
- Restore photos from recycle bin.
- Recover & Repair Videos
- Recover SD card videos.
- Repair MOV/M4V/MP4 videos.
- Repair MKV videos.
- Solve video black screen.
- Repair restored videos.
- Recover & Repair Audio
- Repair video without sound.
- Fix audio sync problems.
- MP4 No Sound?
- Repair corrupt WAV files.
- Corrupted video repair guide.
- Recover & Repair Cameras
 > Resources > Photo/Video/Audio Solutions > Fix "JPG file couldn't be opened because you don't have permission to view it"


Eleanor Reed
staff Editor