

 TL;DR:
Repairing an NVMe SSD requires first extracting your data using recovery software like Recoverit to prevent permanent loss during the repair process, followed by applying targeted software, firmware, or hardware fixes.
● Run the Windows CHKDSK utility via Command Prompt to resolve minor file system errors, or use Disk Management to reformat and create a clean partition table if the drive appears as RAW.
● Utilize manufacturer-provided diagnostic tools to perform controller-level deep scans for bad blocks and apply firmware updates that specifically address drive slowdowns, sudden dropouts, or heat handling issues.
● If the NVMe SSD frequently disconnects, fails on subsequent boots, or completely vanishes from the BIOS, power down the system and physically reseat the drive to correct contact issues caused by heat expansion.
Ask AI for a summary
 ChatGPT
 Perplexity
 Gemini
 Claude
 Grok
Grok
An NVMe SSD is one of the fastest storage parts used in modern systems. Many users pick it for smooth work, fast loading, and long life. It brings a clear jump in speed when compared with older drives. This is why it is used in laptops, desktops, and workstations.
With all this speed, it still depends on small chips, tiny circuits, and software layers. Any trouble in these parts can stop the drive from working as it should.
Even a strong NVMe SSD can show faults. It may drop from the system. It may refuse to boot.
This guide explains how to repair NVME SSD in a simple way. Every part is written in short lines so you can follow without confusion. This guide also shows ways to protect your data before you repair anything.
Try Recoverit to Recover & Repair Video/Photo/Docs etc.
![]() Security Verified. Over 7,302,189 people have downloaded it.
Security Verified. Over 7,302,189 people have downloaded it.
Table of Contents
-
- Method 1: Use Recoverit Data Recovery Tool to restore lost or corrupted files before repair
- Method 2: Run Windows CHKDSK utility
- Method 3: Update NVMe firmware and drivers
- Method 4: Use Disk Management to format or repartition
- Method 5: Run maker diagnostic tools
- Method 6: Check the physical connection and reseat the SSD
How to Repair NVMe SSD
Repair steps must be done with care. Start with data safety. Then pick the correct method based on the issue. Each method here has clear steps and reasons. The guide avoids long lines. Everything is simple to follow.
Method 1: Use Recoverit Data Recovery Tool to restore lost or corrupted files before repair
Before any attempt to repair NVMe SSD faults, you must protect your data. This is vital for any user who wants to know how to recover data from a corrupted NVME SSD or how to recover data from NVME SSD. Many repair tasks rewrite parts of the drive. This may cause more loss if the drive is unstable. A recovery tool like Recoverit copies the data to a safe place. It helps you keep important files like work documents, study notes, or personal media.
This step is also useful when the SSD has become very slow. A failing drive sometimes works only for a short time. Quick recovery helps you grab important files before the drive stops. Recoverit scans deep. It reads the drive sector by sector. It tries to rebuild lost data. It finds files that do not show up in normal browsing. It also saves files without altering anything in the SSD.
How it helps
Helps recover lost data
Protects files during repair
Works on faulty drives
Easy to follow
Step 1: Install and open Recoverit on your system.

Step 2: Pick the NVMe SSD and scan.

Step 3: Click Recover. Then restore the files to a safe location.

Method 2: Run Windows CHKDSK utility to fix file system errors
This tool checks the drive for file system damage. It looks for broken entries. It also looks for small errors in the data blocks. This tool is simple to use. It is built into Windows. It is helpful when the SSD shows reading errors. You may also see missing folders or strange letters. These are signs of file system faults.
CHKDSK looks for areas that show incorrect data patterns. It marks damaged areas. It moves data to safe areas. It also clears small errors that pile up during use. After the scan, the system may load faster. The SSD may appear stable again. This tool does not fix deep hardware faults. Yet it helps with many common issues.
How it helps
Repairs broken file entries
Fixes small, corrupt sectors
Restores stable reading
Improves system load time
Step 1: Open Command Prompt as admin.
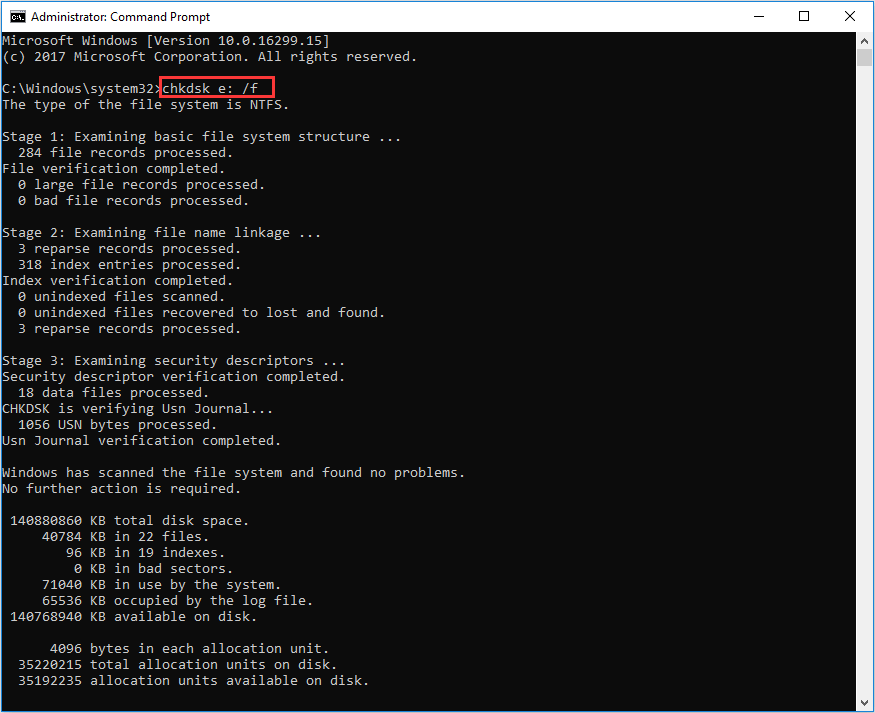
Step 2: Type chkdsk X: /f and press Enter. Replace X with your SSD letter.
Method 3: Update NVMe SSD firmware and drivers
Many NVMe SSD issues come from old drivers. A new system update may break the link with old drivers. A new game or app may need better drivers. Updating the driver helps the system talk to the SSD in a smooth way. It removes bugs that block reading or writing.
Firmware updates are also important. Makers release firmware with fixes. Some fix drive slowdowns. Some fix sudden drop issues. Some improve heat handling. Many users never update the firmware. This leads to trouble. A simple update can solve many issues that look serious.
How it helps
Removes driver faults
Improves speed
Fixes known bugs
Supports new system versions
Step 1: Open Device Manager.
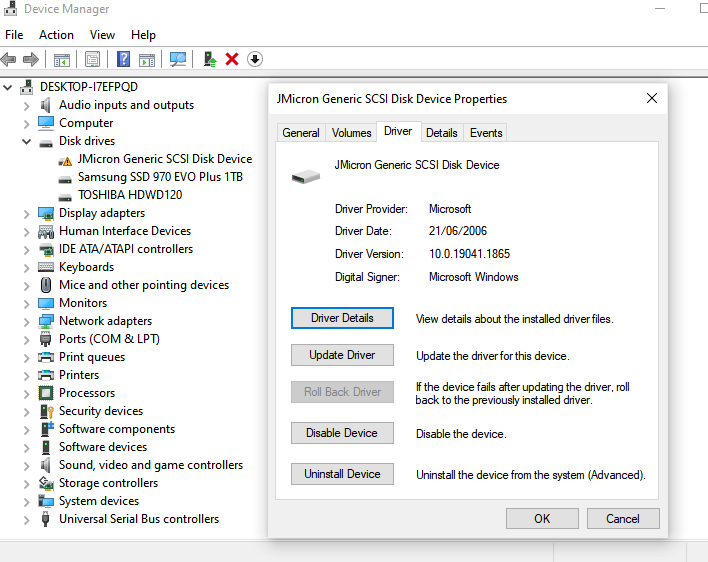
Step 2: Update the NVMe driver. Also, update the firmware from the maker's site.
Method 4: Use Disk Management to reformat or repartition the SSD
If the SSD has deep file system faults or broken partitions, Disk Management may help. You must back up data first. A format clears the drive. A new partition table creates a clean structure. This method is used when the drive shows as RAW. It is also used when the drive cannot open in Explorer.
Disk Management gives control over partition size. You can create new ones for fresh use. You can also fix alignment issues. Format also sets a new file system. This helps remove stale errors.
How it helps
Repairs broken partitions
Creates a clean table
Removes deep file errors
Prepares the drive for new data
Step 1: Open Disk Management.
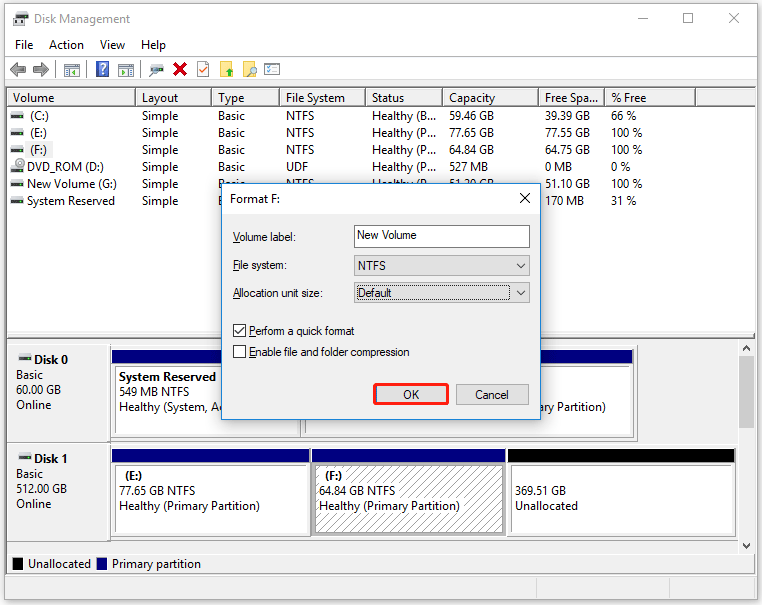
Step 2: Right-click the SSD and format or create a new partition.
Method 5: Run manufacturer-provided SSD diagnostic and repair tools
Makers create special tools for their SSDs. These tools run deep checks. They read the drive at the controller level. They detect failing blocks early. They also test speed. Some tools fix common faults with one click.
These tools can find hardware issues that normal scans miss. They also help update firmware. They offer clean status reports so users can see if the drive has reached its limits. Many users run these tools once a year. This helps increase drive life.
How it helps
Deep scans
Detects bad blocks
Repairs controller-level issues
Updates firmware
Step 1: Go to the maker website.
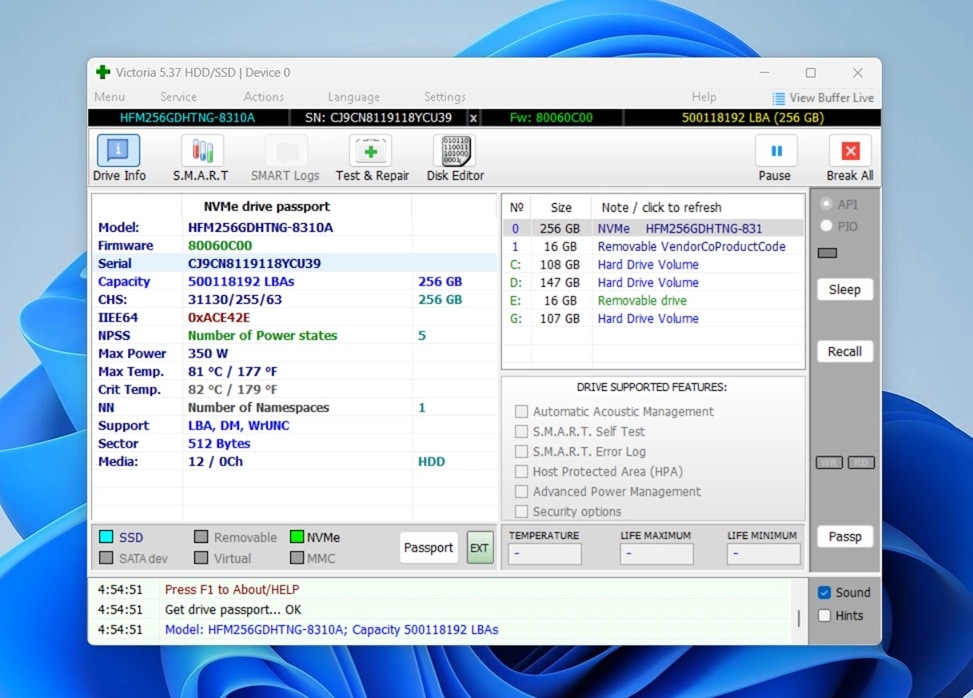
Step 2: Download and run the diagnostic tool.
Method 6: Check physical connections and reseat the SSD
Connection issues may look like a drive failure. The SSD may not sit well in the slot. Heat expansion may shift it. A screw may get loose. When the link breaks, the system cannot read the SSD. Reseating the drive helps create fresh contact.
This method is useful when the SSD vanishes from the BIOS. It also helps when the system boots one time but fails the next. A clean contact gives stable work. While doing this, handle the SSD with care. Avoid pressure on the chips.
How it helps
Restores proper contact
Fixes loose fit
Helps the system detect the drive
Stops random disconnects
Step 1: Shut down the system and remove power.
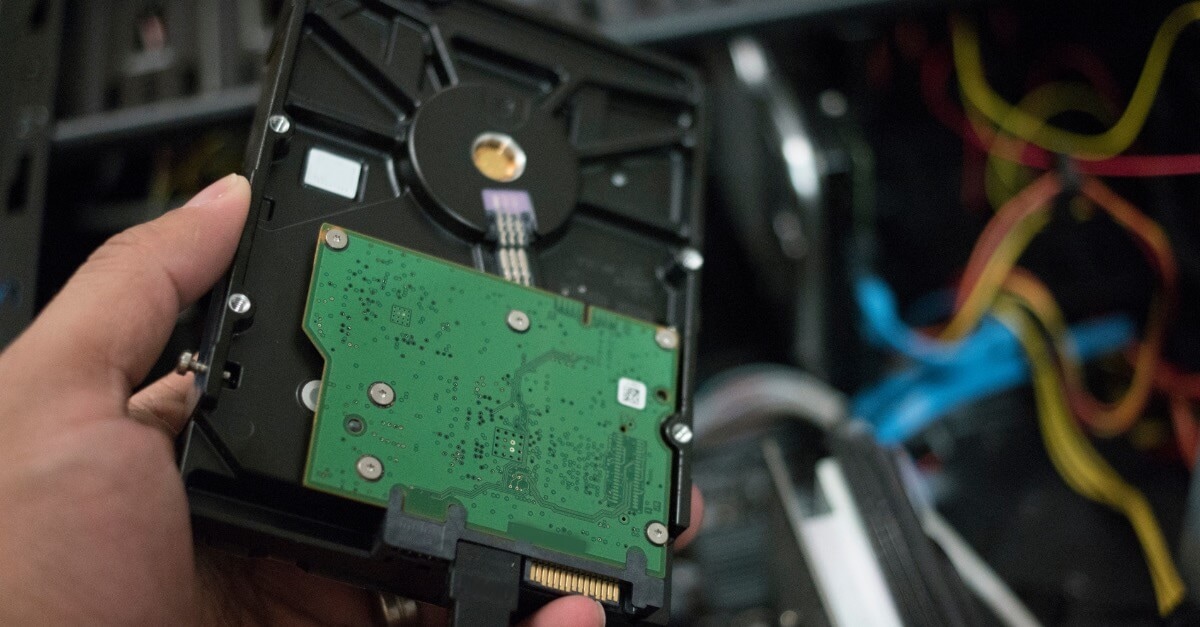
Step 2: Open the case. Remove the SSD and place it back with care.
Conclusion
You now have a clear guide on how to repair NVME SSD in a simple and safe way. The guide shows causes, repair methods, and prevention tips. Each method is written in short lines so that any user can follow with ease. Many SSD issues come from small faults. With patient steps, they can be fixed. You also saw how to protect data before repair.
These methods work for new users and skilled users. They cover physical faults, software faults, and system faults. A mix of simple tools and careful work can bring the SSD back to stable use. With good habits and regular checks, you can avoid future faults. You can now repair NVME SSD with confidence. You also have NVME repair solutions that help handle common issues without stress.
FAQs
-
1. Why does an NVMe SSD stop working
It may stop due to heat, old drivers, wrong firmware, file system faults, or sudden power loss. A loose connection may also cause trouble. -
2. Can an NVMe SSD be repaired
Yes. Many issues can be fixed. You can update drivers, update firmware, run checks, format the drive, or reseat the SSD. Makers also provide tools to scan for faults. -
3. Should I recover data before repair
Yes. It is wise to recover data first. This protects files from loss during repair. A recovery tool is the best way to do this.


