
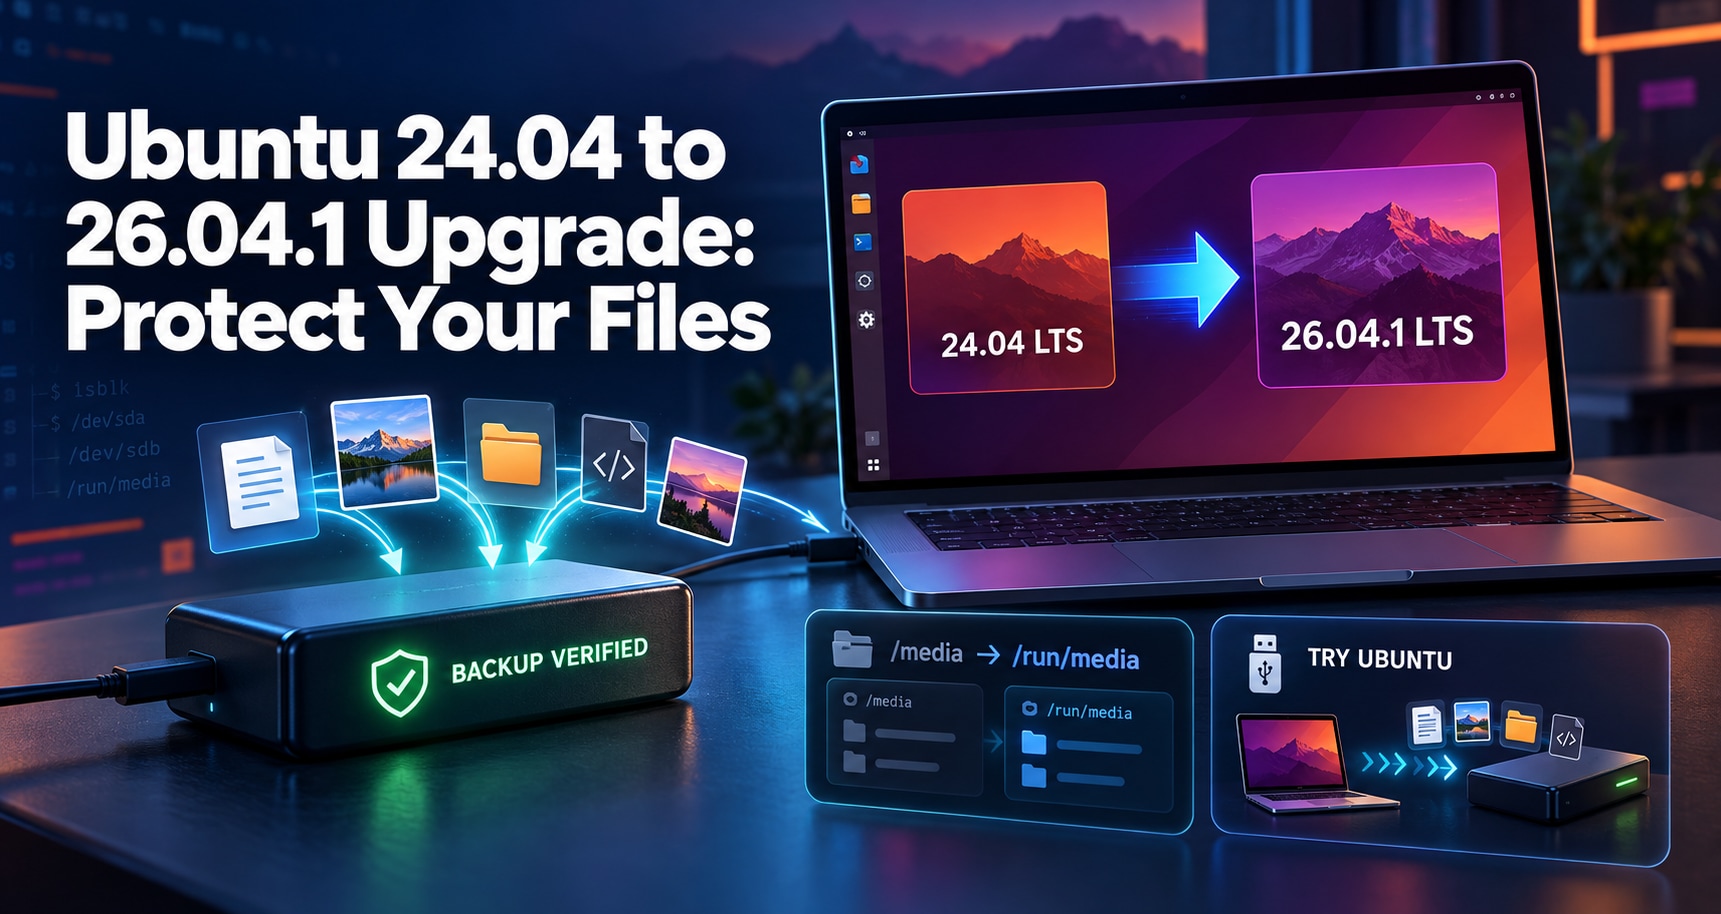

 TL;DR:
The official upgrade from Ubuntu 24.04 LTS to 26.04.1 LTS is unlikely to cause data loss, but you should verify a standalone backup beforehand because apparent post-upgrade file loss is typically an access issue that requires careful diagnosis rather than immediate disk repair.
● Ubuntu 26.04 changes the removable media mount base from /media to /run/media and removes the GNOME Files Google Drive integration, which can make external or cloud files appear missing to existing scripts or workflows.
● If the updated system will not boot, boot from an Ubuntu Live USB to check accessibility and copy important files to a separate external drive before executing system repair commands or reformatting unmounted partitions.
● Downgrading an installation back to Ubuntu 24.04 requires a complete reinstallation, and data recovery software cannot bypass LUKS or hardware-backed encryption to rescue files if you overwrite the drive without your original credentials.
Ask AI for a summary
 ChatGPT
 Perplexity
 Gemini
 Claude
 Grok
Grok
On September 29, 2026, Ubuntu officially enabled the supported upgrade path from Ubuntu 24.04 LTS to Ubuntu 26.04.1 LTS. Desktop users are being offered the release progressively through Update Manager, while users who do not want to wait and Ubuntu Server administrators can start the supported release upgrade manually. This is an upgrade-enablement milestone, not the original release of Ubuntu 26.04 itself. The Ubuntu Release Team announcement also tells users to review the release notes before proceeding.
There is no official evidence that this upgrade broadly deletes user files. Canonical's current upgrade guidance says data loss is unlikely, but still tells users to back up all user data before a release upgrade. That distinction matters: after a major Linux upgrade, a file can appear to be "missing" because a removable drive is mounted somewhere new, a cloud integration disappeared from the file manager, a partition did not mount, or the system no longer boots. Those cases should be diagnosed before you treat the problem as actual data loss.
This guide follows a data-first order: protect a verified copy before the upgrade, use the supported 24.04-to-26.04.1 path, distinguish accessibility problems from deleted data, copy readable files before repair or reinstall, and use file-recovery software only when data is genuinely missing from storage that remains readable.
In This Article
Part 1. What Changed for Ubuntu 24.04 LTS Users on September 29?
Ubuntu 26.04.1 Was Not Newly Released on September 29
Ubuntu 26.04 LTS, code-named Resolute Raccoon, originally shipped in April 2026, and the 26.04.1 point release followed later. The September 29 event matters because the large Ubuntu 24.04 LTS user base can now move to the next LTS through the supported release-upgrade mechanism. Canonical's Ubuntu 26.04 LTS release notes remain the right place to review the LTS-to-LTS changes, compatibility requirements, caveats, and current known issues before starting.
That timing also changes the troubleshooting context. An Ubuntu 26.04 problem reported by a clean-install user is not automatically the same as a problem seen after carrying an existing 24.04 system, its packages, PPAs, storage layout, encryption, and user data through a release upgrade.
You Do Not Have to Upgrade Immediately
Ubuntu 24.04 LTS remains within its standard support window through May 2029, while Ubuntu 26.04 LTS extends standard support to 2031. If the computer holds irreplaceable work, runs production services, depends on specialized hardware, or uses software that has not been validated on 26.04, there is no data-safety reason to rush the upgrade merely because it is now offered. Check your application, driver, encryption, container, and backup requirements first. Canonical's Ubuntu release lifecycle confirms that 24.04 LTS is still a supported release.
| Your Situation | Safer Decision |
| Personal desktop with a current verified backup and supported apps | The normal 24.04-to-26.04.1 upgrade path is reasonable. |
| Production workstation or server with untested dependencies | Validate compatibility and restore procedures before upgrading. |
| No current backup of irreplaceable files | Do not begin the release upgrade yet. Back up and verify first. |
| Disk already reports I/O errors, disconnects, or unusual behavior | Protect data first. A release upgrade is not a disk-repair procedure. |
Part 2. Protect Your Files Before the Ubuntu 26.04.1 Upgrade
Create a Separate Backup and Verify It
Canonical's current Ubuntu Desktop upgrade guide explicitly recommends backing up all user data to external storage before upgrading. The useful part is not merely having a backup job that says it completed; you should confirm that the copy is readable independently of the Ubuntu installation you are about to change.
Step 1. Copy important user data to a physically separate drive, a trusted network location, or another backup target. Prioritize home-directory content, work projects, photo and video libraries, virtual-machine images, SSH keys, locally stored mail, databases, and application-specific data that cannot simply be re-downloaded.
Step 2. Open representative files directly from the backup destination. Check a few large files as well as small documents, and confirm that important directory trees are present.
Step 3. If your backup tool creates archives or snapshots, make sure you know how to restore them. A backup that cannot be restored without a missing password, unavailable repository, or damaged destination is not yet a dependable rollback plan.
Step 4. Leave the backup disconnected from unnecessary writes during the release upgrade when practical. This reduces the chance that an unrelated command, installer action, or mount mistake affects both the source and backup.
Prepare the Existing Ubuntu 24.04 Installation
Release upgrades work best from a healthy, fully updated source system. Before you start, connect a laptop to power, confirm adequate free disk space, apply all pending 24.04 updates, and reboot if requested.
Step 1. Refresh package information:
sudo apt update
Step 2. Install current Ubuntu 24.04 updates:
sudo apt upgrade
Step 3. Reboot if the updater or a kernel/package update requests it.

Also inventory PPAs and third-party repositories. Ubuntu's release upgrader may disable them, and packages from third-party sources are a common reason that release upgrades need additional attention. Do not remove software blindly; instead, know which external repositories and vendor drivers you rely on so you can check for 26.04-compatible versions afterward.
Preserve Encryption Recovery Information
If the machine uses encrypted storage, make sure the credentials required to unlock that storage are available outside the computer before you change the operating system. This is especially important for hardware-backed full-disk encryption. Canonical documents a dedicated hardware-backed disk encryption recovery procedure that requires the recovery key and a disk that is still readable.
Important: File-recovery software cannot legitimately bypass LUKS, TPM-backed encryption, or another encryption layer without the correct key or credentials. Protecting the recovery information is part of protecting the data.
Part 3. Use the Supported Ubuntu 24.04 to 26.04.1 Upgrade Path
Upgrade Ubuntu Desktop
For a normal Ubuntu 24.04 LTS Desktop system, the supported route is the release upgrader. As the 26.04.1 offer rolls out, Software Updater may present the new release automatically.
Step 1. Open Software Updater and install any remaining updates for Ubuntu 24.04.
Step 2. When the new release is offered, choose Upgrade.
Step 3. Read the release information and package summary rather than clicking through automatically. Pay attention to packages that will be removed and third-party packages that may be disabled.
Step 4. Keep the computer powered and avoid interrupting the upgrade. Reboot when the upgrader says it is complete.
If the graphical offer has not appeared but the supported path is enabled for your system, the official command-line route is:
sudo do-release-upgrade
Upgrade Ubuntu Server
For Ubuntu Server, use the supported release-upgrade tooling rather than manually changing APT source entries. Canonical's Ubuntu Server release-upgrade documentation likewise recommends a complete backup and warns that third-party repositories are disabled during the process.
For remote servers, plan for console or out-of-band access before upgrading. If SSH, networking, a kernel, or a boot dependency is affected, you do not want your only path to the machine to be the same service you are changing.
Do Not Force a Development-Release Upgrade
Now that the normal 24.04-to-26.04.1 upgrade path is enabled, there is no reason to use a development-release flag just to reach 26.04. The current Ubuntu documentation warns that upgrading with --devel-release targets a development release, is unsupported, and may break the system. For this LTS-to-LTS move, use the standard release upgrader.
Part 4. After the Upgrade, Are Your Files Actually Lost?
If something appears missing after rebooting into Ubuntu 26.04.1, do not format a partition, reinstall Ubuntu, or run filesystem repair simply because the file manager does not show what you expected. First identify which layer changed.
| What You See | What It May Mean | Safe First Action |
A removable drive is no longer at an old scripted path under /media |
Ubuntu 26.04 changed the default removable-media mount base to /run/media. |
Check the current mount location before treating the files as missing. |
| Google Drive is no longer visible inside Files | The GNOME Files Google Drive integration was removed in Ubuntu 26.04. | Check Google Drive in a browser. This is not evidence that local files were deleted. |
| The disk appears in the system but a data partition is not mounted | This is an accessibility or filesystem problem, not yet proof of deletion. | Protect readable data before repair attempts. |
| Ubuntu no longer boots, but the disk is detected from a live environment | The operating system may be broken while user data is still readable. | Copy important files out before package repair or reinstall. |
| Specific files are absent from a mounted, readable filesystem | This may be actual deletion, overwrite, or filesystem metadata damage. | Stop unnecessary writes and evaluate data recovery. |
| The drive disappears, repeatedly disconnects, or produces I/O errors | Possible hardware or connection failure. | Avoid repeated scans and consider professional recovery. |
Check the New Removable-Media Mount Location
One Ubuntu 26.04 behavior can make an external disk or card look missing to scripts even when it mounted correctly. Canonical's 26.04 backwards-incompatible changes document that removable media are now mounted under /run/media instead of the previous /media base path.
That means a backup script, development tool, media workflow, or shell alias with a hard-coded /media/... path can fail after the upgrade while the files themselves remain intact. Check the current mount location and update the path-dependent workflow before concluding that the drive was erased.
Do Not Mistake the Removed Google Drive Integration for Local Data Loss
Ubuntu 26.04 also removes Google Drive integration from GNOME Online Accounts/Files because the underlying library was unmaintained and presented a security concern. If a Google Drive entry that used to appear in Files is gone after the upgrade, that does not mean Ubuntu deleted the cloud files. Access the account through the web and confirm the data there.
This distinction matters for recovery: a missing file-manager integration is an access-path change, not a block-level data-loss event. Scanning a local disk for files that live in Google Drive would solve the wrong problem.
Separate an Unmounted Partition From a Deleted File
If a partition is visible in the system but will not mount, treat that as a storage-health or filesystem-access problem first. Do not immediately format it to "make it usable," and do not run repair tools before you have protected irreplaceable data. Some filesystem repairs intentionally change metadata; those changes can make later forensic recovery harder.
If you are comfortable with Linux administration, use non-destructive identification commands such as lsblk -f to confirm the disk, partition, filesystem type, UUID, and mount state. If you are not sure which device is the affected one, stop there rather than guessing at repair commands.
Part 5. Recover Files Before Repairing or Reinstalling Ubuntu
If Ubuntu Will Not Boot, Try a Live Session and Copy Readable Files First
A system that will not boot after a release upgrade is not automatically a data-loss case. The installed operating system can fail while the home partition is still readable. Before reinstalling, use a current Ubuntu live environment to test whether the storage can be accessed.
Canonical's Try Ubuntu Desktop documentation explains how to start Ubuntu from USB without making permanent changes to the installed system.
Step 1. Download a current Ubuntu image on another working computer.
Use Canonical's official Ubuntu Desktop image and prepare a bootable USB. Do not write the installer image to the disk that contains the files you are trying to save.

Step 2. Boot the affected computer from the USB and choose Try Ubuntu.
The live session lets you inspect the machine without committing to a new installation. Do not choose an erase-and-install option while important data is still only on the internal drive.

Step 3. Check whether the affected disk and user files are readable.
If the files open normally, copy the important data to a different healthy external drive before attempting package repair, bootloader changes, filesystem repair, or reinstallation.
Step 4. Verify the copied files from the destination.
Open representative documents, photos, archives, and project files from the destination. Once the copies are verified, you have far more freedom to troubleshoot the installed system without gambling the only copy of your data.
If the Disk Is Detected but a Partition Will Not Mount
When a live session detects the physical disk but a required partition cannot be mounted, avoid the reflex to initialize, reformat, or repair the filesystem first. The safer sequence is: identify the correct device, minimize writes, image or recover important data if needed, verify the recovered copy, and only then attempt repairs.
If the volume is encrypted, unlock it only with valid credentials. If the disk repeatedly disappears, makes unusual noises, reports severe I/O errors, or becomes unavailable during reads, stop repeated software attempts. That pattern can indicate a hardware problem where a professional recovery lab is safer than repeated scans.
If Files Are Truly Missing From a Reachable Linux System
If Ubuntu or a live/repaired Linux environment is reachable, the target storage remains readable, and specific files are genuinely deleted or missing rather than merely unmounted, you can move from troubleshooting into data recovery. This is the point where Recoverit is relevant. It is not an Ubuntu upgrade fixer, bootloader repair tool, or encryption bypass.
Recoverit's current Linux workflow runs from a Windows or macOS computer and connects to a reachable Linux system. The existing Ubuntu data recovery software guide explains the Ubuntu-specific connection requirements, while the EXT4 recovery guide covers filesystem-specific recovery scenarios. Recoverit's current Linux product documentation lists EXT4, BTRFS, XFS, and BFS support.

Before scanning: stop unnecessary writes to the affected Linux storage. Do not install new software onto the volume that contains the missing data, and prepare a separate healthy destination for anything you recover.
Step 1. Open Linux Recovery on a Windows or Mac computer.
Launch Recoverit and choose the Linux recovery workflow under the available recovery tools.
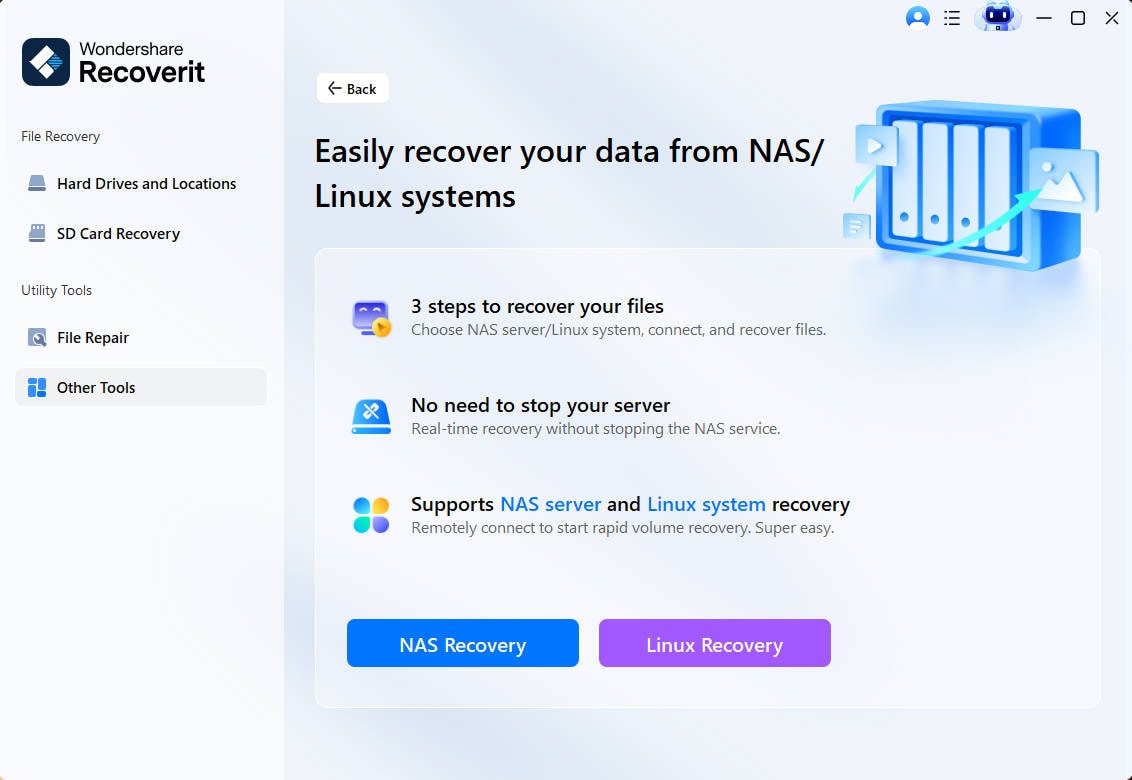
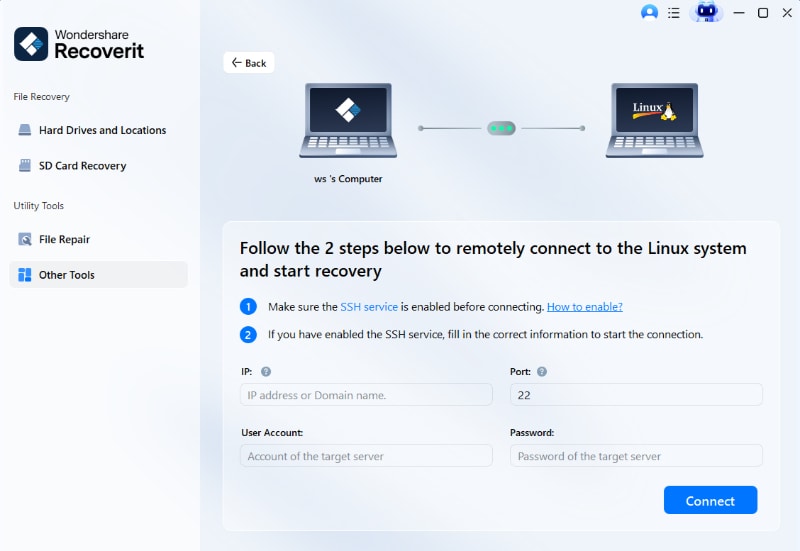
Step 2. Connect to the reachable Ubuntu system.
Enter the Linux host information and credentials required by the supported connection workflow. This route requires the Linux machine to be reachable; it is not a substitute for the live-session rescue step when the computer cannot boot or be reached at all.
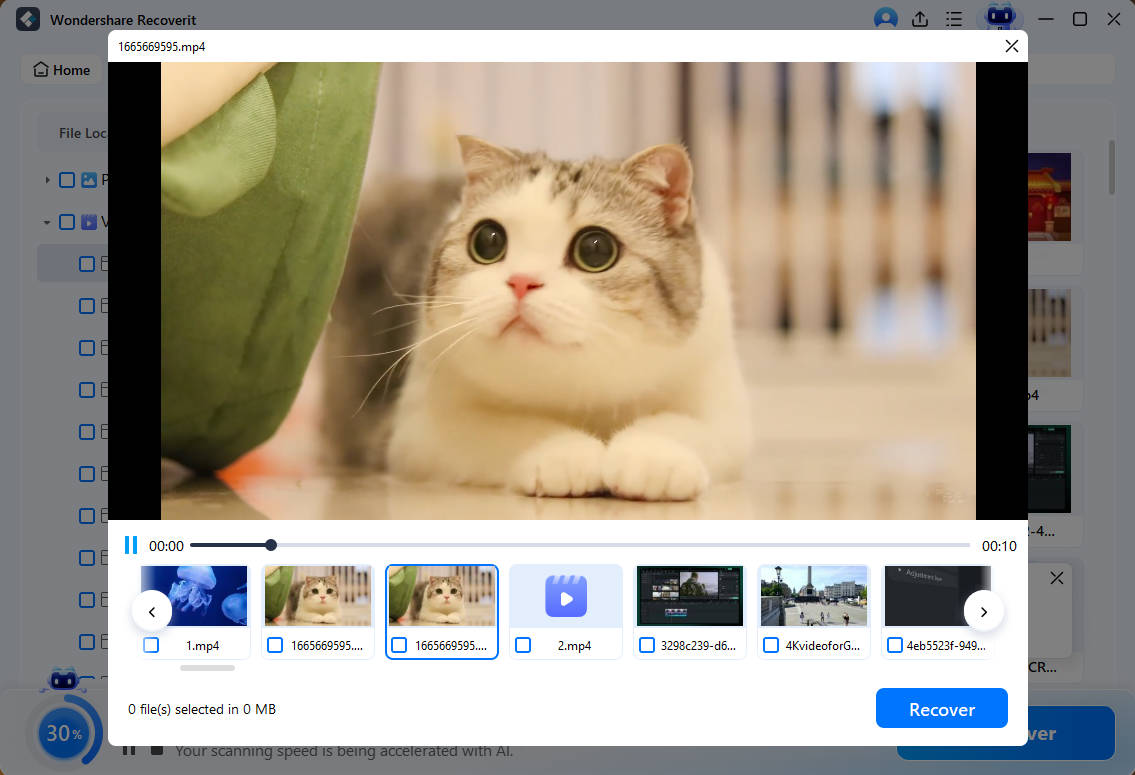
Step 3. Scan, preview, and recover to another location.
Scan the affected Linux storage, filter and preview recoverable candidates, then save the required files to a different healthy drive. Open the recovered copies before you make destructive changes to the original filesystem.
Limits matter: no recovery application can guarantee files whose blocks have been overwritten. Remote software recovery also cannot bypass LUKS or hardware-backed encryption, and it should not be used as a substitute for a lab when the storage device has physical failure symptoms.
Part 6. Only After Your Files Are Safe: Repair or Reinstall
If Power Was Lost During the Upgrade
Canonical's current Desktop upgrade guidance includes package-repair commands for a system that lost power during the release upgrade. If you can log in and your important data is already protected, the documented sequence is:
sudo dpkg --configure -a
sudo apt --fix-broken install
Those commands are for repairing an interrupted package state. They are not file-recovery commands. If your only copy of important data is on a questionable disk or filesystem, protect the data first rather than using system repair as the first experiment.
If You Need to Return to Ubuntu 24.04 LTS
Ubuntu does not support downgrading an installed system in place from a newer release to an older LTS. Returning to 24.04 generally means reinstalling it. That is exactly why file rescue belongs before the reinstall decision: installer disk choices can overwrite partitions or filesystem metadata.
Once your files are backed up or recovered and verified, you can reinstall with a clear understanding of which disk and partitions may be erased. Keep the external backup disconnected until the installer step that genuinely needs it.
Part 7. How to Reduce Risk Before the Next Ubuntu Release Upgrade
- Keep at least one backup independent of the system disk: A second partition on the same failing SSD is not a substitute for a separate backup device.
- Verify restores, not only backup status: Open files from the destination and periodically test the restore workflow.
- Record storage and encryption details: Know which partitions contain user data, whether LUKS or hardware-backed encryption is enabled, and where recovery information is stored.
- Document PPAs and third-party software: Release upgrades can disable external repositories, so record what must be re-enabled or replaced afterward.
- Review release notes for behavioral changes: The move from
/mediato/run/mediais a good example of a change that can break workflows without deleting data. - Separate recovery from repair: If files matter, get a verified copy before filesystem repair, formatting, repartitioning, or reinstallation.
Conclusion
The September 29 enablement of Ubuntu 24.04 LTS to 26.04.1 LTS upgrades is an important adoption milestone, but it is not evidence that the upgrade normally causes data loss. The safest workflow is to back up and verify before upgrading, use Ubuntu's supported release upgrader, and diagnose what changed before assuming files were deleted.
In particular, Ubuntu 26.04's new /run/media mount location and the removal of Google Drive integration from Files can make data appear missing when it is still available elsewhere. If the system will not boot, a live Ubuntu session can often let you copy readable files before repair or reinstall. Only when files are genuinely missing from readable storage should you move into data recovery, and even then the original storage should be protected from unnecessary writes.
FAQ
-
Does upgrading from Ubuntu 24.04 to 26.04.1 delete personal files?
There is no official evidence that the supported upgrade broadly deletes personal files. Canonical says data loss during an upgrade is unlikely, but still recommends backing up all user data first. A backup is protection against upgrade problems, storage failure, human error, and unexpected interruptions. -
Why did my external drive path change after upgrading to Ubuntu 26.04?
Ubuntu 26.04 changed the default mount base for removable media from/mediato/run/media. Scripts or applications that rely on a hard-coded old path may stop finding the drive even though its files are still present. -
Why is Google Drive missing from Files after the Ubuntu 26.04 upgrade?
Ubuntu 26.04 removed the Google Drive integration previously provided through GNOME Online Accounts and Files. You can still access Google Drive through a web browser. The missing sidebar entry is not proof that your cloud files were deleted. -
Can I recover files before reinstalling Ubuntu if the system will not boot?
Often, yes. Boot a current Ubuntu live USB and choose Try Ubuntu. If the affected disk and files are readable, copy important data to a different healthy drive and verify the copies before reinstalling or repairing the installed system. -
Should I run fsck before recovering files from a partition that will not mount?
Not when irreplaceable data has not yet been protected. Filesystem repair can modify metadata. Identify the correct disk and preserve or recover important files first, then repair the filesystem after you have a verified copy. -
Can data recovery software bypass Ubuntu disk encryption?
No. LUKS and hardware-backed disk encryption require valid keys or credentials. Recovery software cannot legitimately bypass encryption, and encrypted data that cannot be unlocked should not be treated like an ordinary unencrypted EXT4 volume. -
Can I downgrade Ubuntu 26.04.1 back to 24.04 without reinstalling?
Ubuntu does not support downgrading an existing installation in place to an earlier LTS. Returning to 24.04 generally requires reinstalling it, so protect and verify important files before making that change.


