How to Downgrade from macOS Catalina 10.15: A Complete Guide
Q: What can I do to downgrade from macOS Catalina?
"Initially, I upgraded my MacBook to the newly released macOS Catalina, but it is causing a lot of issues. Some of my apps are not running and my Mac has never been slower. Can someone tell me how to downgrade from macOS Catalina to Mojave?"
This is a query posted on one of the leading Mac online forums about the possibility of downgrading macOS. While macOS Catalina is getting rave reviews, not every user is happy about it. If you are also facing unwanted issues with it, then you can just choose to downgrade macOS Catalina to a previous stable update. Don't worry – it is pretty easy to downgrade from macOS Catalina. Simply read this stepwise tutorial on how to downgrade macOS Catalina and regain the full access to your system

Part 1: Why do you wish to Downgrade from macOS Catalina?
From incompatible applications to a slow system – there could be different reasons for choosing to downgrade macOS Catalina. Here are some of these common issues:
- You could have updated to a beta or unstable version of macOS Catalina that can cause numerous issues with your system.
- Since macOS Catalina only supports 64-bit applications, some crucial apps might become incompatible with your Mac.
- It has replaced iTunes with different apps (like Music) and has created an iTunes XML file crisis. Due to this, a lot of music enthusiasts and DJs are downgrading from macOS Catalina.
- If you have an old Mac, then the upgrade could have made it slower.
- Sometimes, the update can go wrong and create all kinds of firmware or software related issues with the system.
- You can face any unwanted compatibility or configuration issues with macOS 10.15 as the firmware is relatively new.
- You could have not liked the new update overall and wants to roll back to a previous stable macOS version.
Part 2: Preparations for Downgrading macOS Catalina
It doesn't matter what kind of situation you are in, you can easily downgrade macOS Catalina to a previous version. Although Apple does not provide a direct method to do it, there are certain loopholes that we can exploit. Before you learn how to downgrade from macOS Catalina, prepare your system by following these steps:
1. Back up your Mac
First things first – make sure that you maintain a backup of your data as you might end up losing some files in the process. Also, if you wish to downgrade macOS Catalina using a previous Time Machine backup, then it is important to keep your existing files safe.
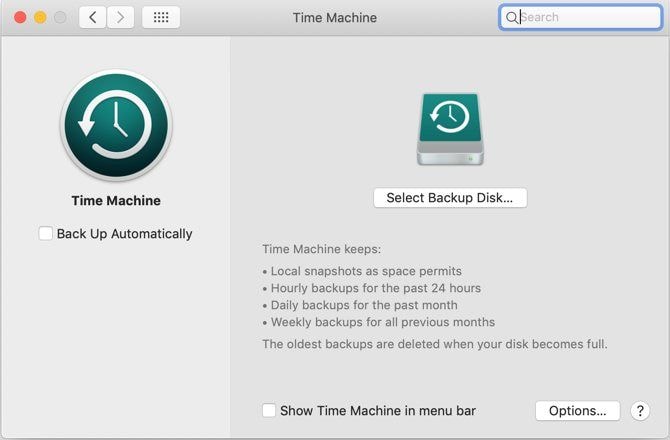
1.1 Back up data using Time Machine
Time Machine is the native application in Mac that is used to backup and restore our data. To use it, you can just attach an external hard drive with enough free space. If Time Machine won't detect it automatically, then launch it by visiting Finder > Applications. Now, select a backup disk and start the process to create a Time Machine backup of your data.
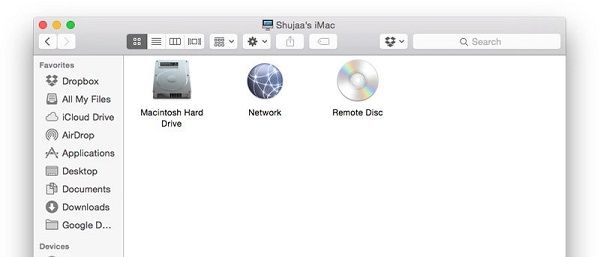
1.2 Back up data by copying and pasting
If you don't want to create a dedicated Time Machine backup, then you can simply copy and paste specific files as well. To do this, just attach any USB drive, hard drive, and any other external source. Now, go to the Finder and simply copy and paste the files you wish to save from Mac to the attached media.
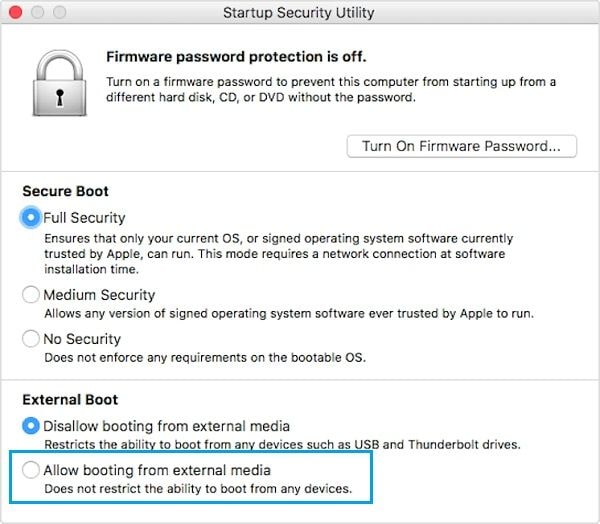
2. Enable external media booting
If you wish to downgrade from macOS Catalina using a different startup disk, then you need to make this tweak on Mac settings. To do this, you can just go to Finder > Applications > Utilities and launch the Startup Security Utility application. From here, just enable the option to allow booting from external media. You need to enter the administrator account details to save these changes.
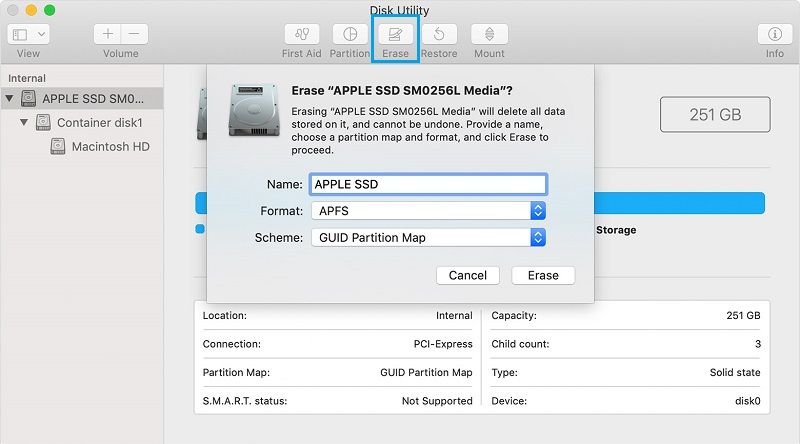
3. Erase the Mac drive
Lastly, you can just erase the Macintosh HD entirely to have a smooth process. This would get rid of the macOS Catalina components and you can easily restore files from a Time Machine backup. To do this, just go to Applications > Utilities and launch the Disk Utility tool. Select your Macintosh HD from the sidebar and click on the "Erase" option from the toolbar. Confirm your choice and select the file system and partition table option for the formatting.
Part 3: How to Downgrade macOS Catalina to Mojave or Other versions
There are different ways to learn how to downgrade from macOS Catalina that you can try. For your convenience, I have listed three ways to downgrade from macOS Catalina that you can opt for depending on your system. We have started from the basics and have gradually moved to complex solutions.
Solution 1: Restore macOS Mojave from Catalina with Time Machine backups
If you have already maintained a Time Machine backup when your device was running macOS Mojave, then you won't face any trouble downgrading from macOS Catalina. For this, we will take the assistance of macOS Utilities and will restore the system from an existing Time Machine backup. Beforehand, just make sure that you have already saved your existing data from your Mac. To downgrade macOS Catalina from a Time Machine backup, follow these steps:
- Firstly, connect the Time Machine backup drive to your Mac and restart your system.
- Press and hold the Command + R keys when it restarts so that your system would boot in the recovery mode.
- Once your system would boot in the Recovery Mode, you will get the macOS Utilities option. From here, just click on the "Restore from Time Machine Backup" feature.
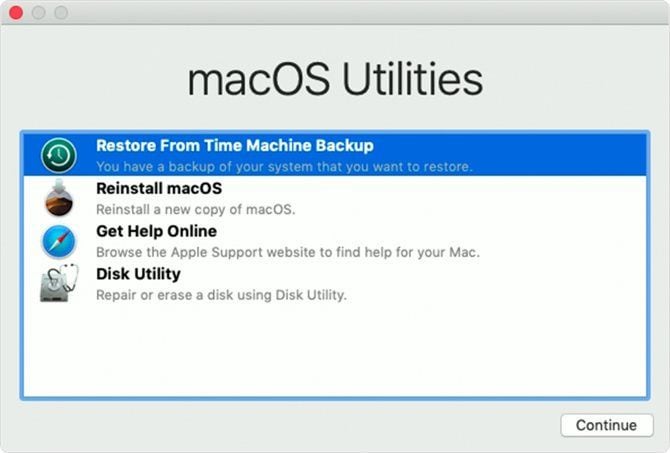
- This will launch a dedicated wizard to perform Time Machine data recovery. Click on the "Continue" button and select the source drive where the backup was saved.
- In the end, just select the appropriate backup file and restore it to your Mac. Apart from its data, it would also downgrade macOS Catalina to macOS Mojave.

Solution 2: Downgrade to macOS Mojave via macOS Recovery
If your Mac did not come pre-installed with macOS Catalina, then you can also try this trick. In this, we will first boot Mac into a recovery mode and will choose to reinstall macOS. This will automatically install the default version of macOS that came pre-installed on your system when you initially purchased it. For instance, if your system was running macOS Mojave initially, then it would just downgrade from macOS Catalina to macOS Mojave.
- Firstly, shut down your Mac and wait for a while. As it would turn on, press the Command + R keys to boot it in the Recovery Mode. You can also press Shift + Option + Command + R keys instead to boot Mac in Recovery mode over the internet.

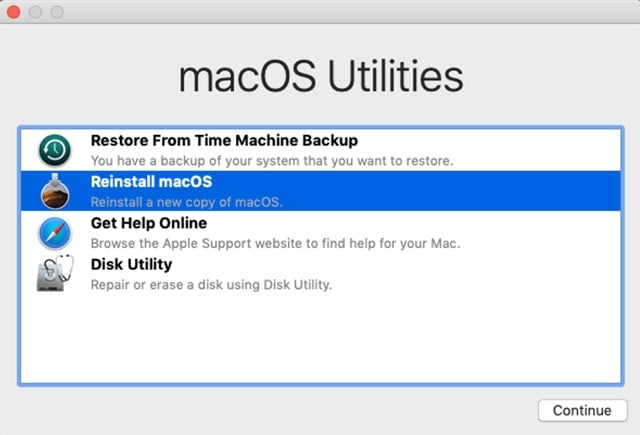
- As your system would boot to the Recovery Mode, click on the "Reinstall macOS" button under the macOS Utilities window.
- Now, you can follow a simple click-through wizard and maintain a stable internet connection as the default macOS version would be installed.
Solution 3: Downgrade macOS Catalina with a Bootable Installer
Lastly, you can do a clean installation of another macOS version by creating a bootable media. For this, you would need an installer package for a previous macOS version. You can go to the Mac's App Store for this, use any third-party web source, or download it by using someone else's Mac that is still running on an older macOS version. Once you have the installer of the desired macOS version ready, follow these steps to downgrade macOS Catalina.
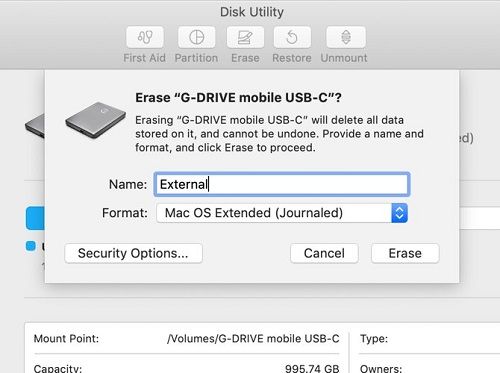
- Take a USB drive or an external hard disk with a minimum of 16 GB of space in it. Now, go to Applications > Utilities and launch the Disk Utility app.
- Choose the connected external drive and click on the erase button to format it. Make sure that you pick the HFS+ or APFS format that is supported by Mac.
- Great! Once the hard disk is formatted, launch Terminal from Applications or Spotlight and run the following command:
sudo /Applications/Install\ macOS\ High\ Sierra.app/Contents/Resources/createinstallmedia --volume /Volumes/External --applicationpath /Applications/Install\ macOS\ High\ Sierra.app
- The above code works for macOS High Sierra (as you can easily avail its installer). The code would be slightly different for other macOS versions. Wait for a while as this would create the connected drive into a bootable media.
- Once the bootable media is created, you can boot your Mac in the Recovery Mode, go to Disk Utility, and erase the Macintosh HD entirely in a supported file format.
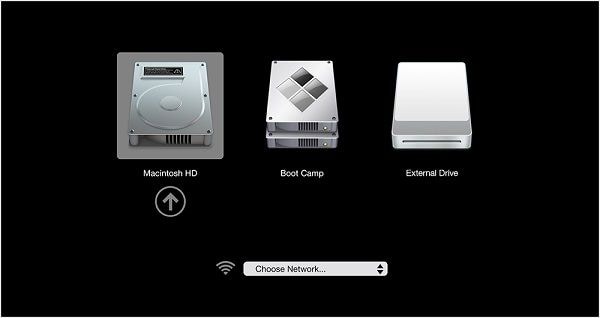
- Now, you need to take the assistance of the Startup Manager. Just restart Mac and hold the Option key as it boots.
- As the Startup Manager would launch, you can just use the arrow keys and select the connected bootable media to load.
That's it! You can now follow a simple wizard to downgrade macOS Catalina to a previous macOS version instead.
Part 4: How to Recover Lost Data after Downgrading from macOS Catalina
Too many times, while downgrading from a macOS version (like macOS Catalina), users end up losing their data. For instance, you would have forgotten to take a backup of your data before or would have formatted a drive by mistake. As you can see, to reinstall macOS, the startup disk has to be formatted. If you have not saved your data before, then you might end up losing it. Don't worry – you can still get it back by using a reliable data recovery tool like Recoverit Data Recovery.
Developed by Wondershare, it is known for its high recovery rate and an intuitive user interface. It can recover lost data under all scenarios like a formatted disk, accidental deletion, malware attack, and so on. It supports every major Mac version and all the file systems like APFS, NTFS, HFS+, and more. To recover your lost files from a Mac using Recoverit, follow these steps:
Step 1: Select a location to scan
Firstly, you can launch Recoverit on your Mac, and from its home, select a location to scan. It can be an entire drive, a partition, or selected folders as well. You can also perform data recovery on external devices too.

Step 2: Scan the selected location
Simply wait for a few minutes as Recoverit would scan the location and will extract the lost or deleted data. If you want, you can even halt or resume the process whenever you want.

Step 3: Restore your data
When the process is completed, all the extracted files will be listed under different sections. You can preview your data, select multiple files, and save them to any location by clicking on the "Recover" button.

This brings us to the end of this guide on how to downgrade macOS Catalina to a previously stable macOS version. For your convenience, I have listed a stepwise tutorial with three solutions to downgrade macOS Catalina and all the prerequisites. Apart from that, you can also keep a data recovery tool like Recoverit handy. A highly secure recovery application, it will help you instantly whenever you would suffer from an unexpected data loss on your Mac the next time.
What's Wrong with Mac
- Recover Your Mac
- Fix Your Mac
- Delete Your Mac
- Learn Mac Hacks


Sue Wayne
staff Editor