

 TL;DR:
To recover a deleted folder on a Mac, first attempt to restore it from the Trash or use the Undo command (`Command + Z`), and if the Trash is already emptied, rely on Time Machine backups, iCloud version history, or dedicated data recovery software like Recoverit.
● For immediate reversals, press `Command + Z` right after the deletion, or open the Trash, right-click the item's preview, and select "Put Back" to return the folder to its original directory.
● If the folder is no longer in the Trash, you can extract it from hidden directories using Terminal commands (`cd ~/.Trash` followed by `mv`), retrieve previous versions via iCloud's "Restore Files" account setting, or navigate past drive snapshots using Time Machine.
● To prevent permanent accidental deletions in the future, navigate to Finder's Advanced Settings to check "Show Warning Before Emptying the Trash" and uncheck the "Remove Items from Trash After 30 Days" option.
Ask AI for a summary
 ChatGPT
 Perplexity
 Gemini
 Claude
 Grok
Grok
You accidentally emptied the Trash on your Mac, realizing that important project folders are gone. Losing critical files can cause panic, especially when deadlines are near. Fortunately, macOS offers several ways to retrieve lost data, and there are reliable third-party tools designed for folder recovery. Understanding how to recover deleted folders on mac can save hours of work and prevent permanent data loss.
Whether the folders were removed accidentally, corrupted, or lost during a system update, following the right steps ensures a high chance of restoration. This guide walks you through practical methods to restore your deleted folders efficiently.
Try Recoverit to Perform Mac Folder Recovery
 Security Verified. 3,591,664 people have downloaded it.
In this article

Part 1. Is It Possible to Recover Deleted Folders on Mac?
Yes, recovering deleted folders on a Mac is often possible with effort. Folders recently removed from the Trash can usually be restored easily using Time Machine. If the data is overwritten, recovery becomes more difficult but can still be achieved. Third-party tools can scan your Mac's storage for lost or deleted files. Acting quickly improves the chances of restoring important folders before permanent loss.
Why Folder Recovery on Mac Is Important
Understanding the importance of folder recovery helps users find deleted folders quickly and efficiently. The following points explain why folder recovery on Mac is so important:
- Protecting Critical Work: Accidentally deleted folders may contain important projects that affect deadlines and productivity. Recovering them ensures work continuity without unnecessary stress or time loss.
- Preventing Data Loss: Folders often include irreplaceable personal files, photos, or documents. Recovering deleted folders prevents permanent loss and preserves valuable information.
- Maintaining System Integrity: Unexpected deletions can disrupt system organization and file structures. Recovering lost folders restores order and keeps your Mac running smoothly.
- Reducing Financial Impact: Losing business or client data can result in monetary losses. Folder recovery minimizes risks and protects valuable business-related information.

Part 2. Recover Deleted Folders on Mac Safely: Complete Recovery Solutions
With a clear understanding of why folder recovery matters, it’s time to explore the actual methods that can help you retrieve lost data. Provided below are some of the simple and easy methods that you can try to learn how to find a lost folder on mac:
1. Check Trash (Safest And First)
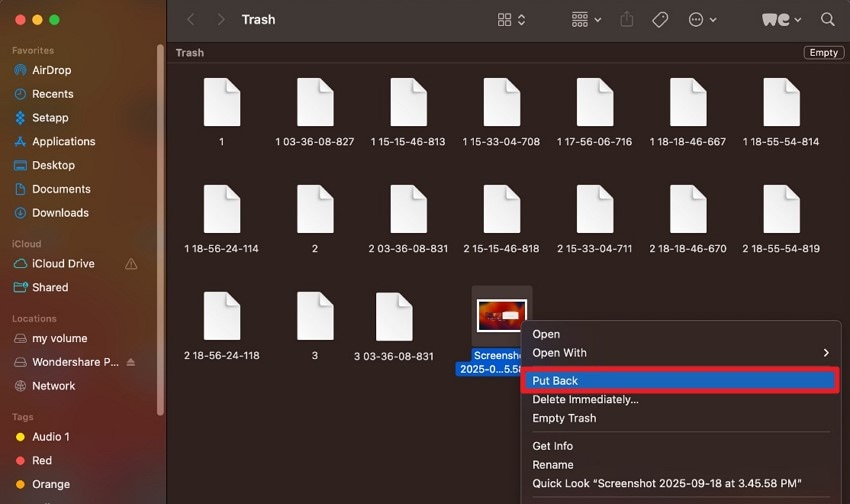
Checking the Trash is the safest first method for recovering deleted folders on a Mac. When files are removed, they often remain in the Trash until permanently deleted, giving you a quick chance to restore them. This built-in option offers a simple way to retrieve folders without using additional tools or advanced recovery methods. To learn how to recover a replaced folder on mac from Trash, read the instructions mentioned below:
Instructions. Start by opening the Trash folder and finding the earlier version of the file you accidentally removed. After locating it, right-click on the item’s preview and select the “Put Back” option. This will restore the file to the directory where it was originally saved.
2. Use Undo/Recent Items
Using Undo or Recent Items offers another quick way to recover deleted folders on a Mac. If the deletion happened moments ago, the Undo command can instantly reverse the action. Recent Items also provides easy access to previously opened folders, helping you locate them without deeper recovery steps. This method works best for immediate, accidental deletions. Follow the instructions mentioned next to learn how to recover deleted folders on mac:
How To Undo
Instructions. To undo a folder deletion on Mac, act immediately after removing the item. Click on your desktop or inside Finder, then press “Command + Z” to reverse the action instantly.

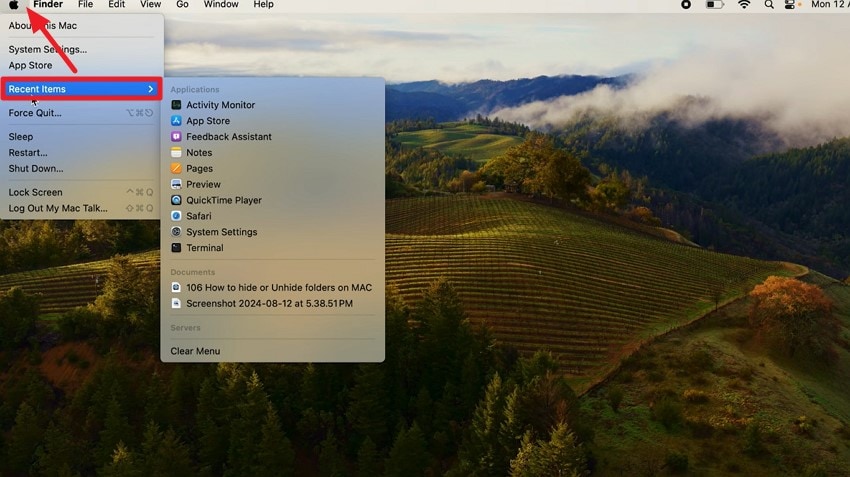
How to Check Recent Items
Instructions. To check recent items on your Mac, click the “Apple” menu in the top-left corner of the screen and select “Recent Items” from the dropdown list. Here, you’ll see a neatly organized menu showing your recently opened apps, documents, and servers. You can click any item to reopen it instantly.
3. Restore From Time Machine
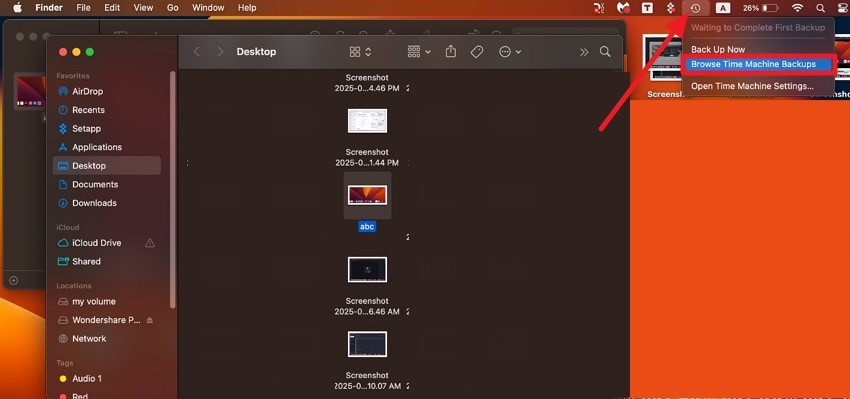
Time Machine provides a powerful way to recover deleted or lost folders on a Mac. By browsing through previous backups, users can locate versions of files and folders that may have been accidentally removed. Learning how to find a lost folder on mac using Time Machine ensures that important data can be restored efficiently. Follow the steps mentioned next to learn how to use this fix on your Mac device:
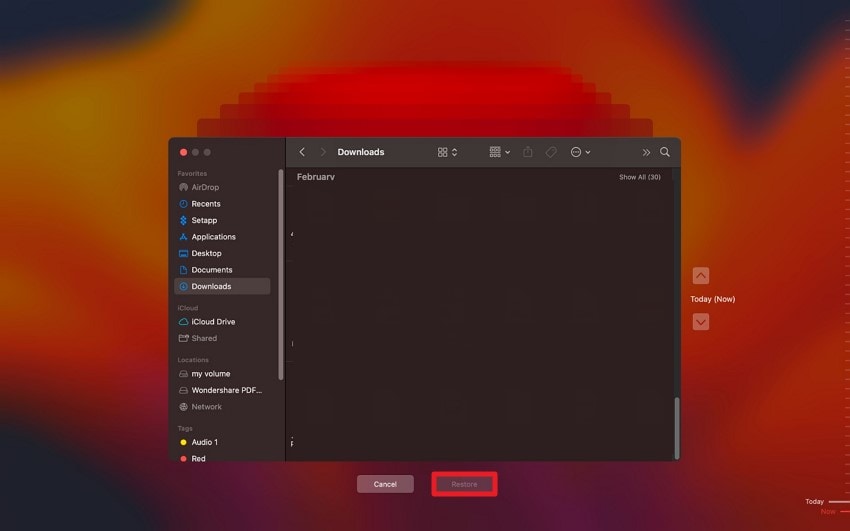
- Open the Finder app and locate your “Time Machine” backup. Click on it, then find your storage drive in the window. Move to the top-left taskbar, expand the “Clock” icon, and select “Enter Time Machine” to access your backups.
- Use the timeline on the right side to navigate to the date when the file existed. Preview the folder containing your file, then click “Restore” to successfully recover photos from your Mac.
4. Restore From Cloud Services
For users wondering how to recover a replaced folder on mac, cloud services offer a reliable solution. Platforms like iCloud often keep version histories, allowing you to restore previous folder versions. Leveraging these services ensures that even overwritten or replaced folders can be retrieved safely, providing an extra layer of protection beyond the Mac’s local storage. To learn how to recover lost folders using iCloud, read the steps mentioned below:
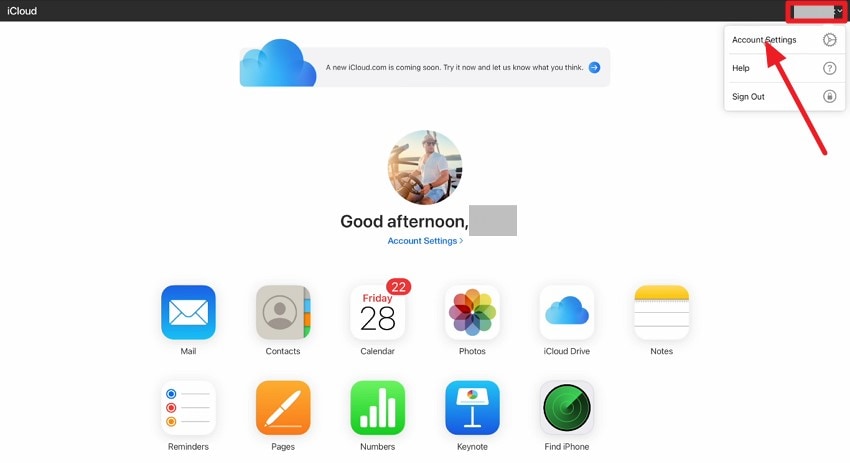
- Start by visiting the official iCloud website and signing in to your account. Then, click your profile in the top-right corner and choose “Account Settings” from the dropdown menu.
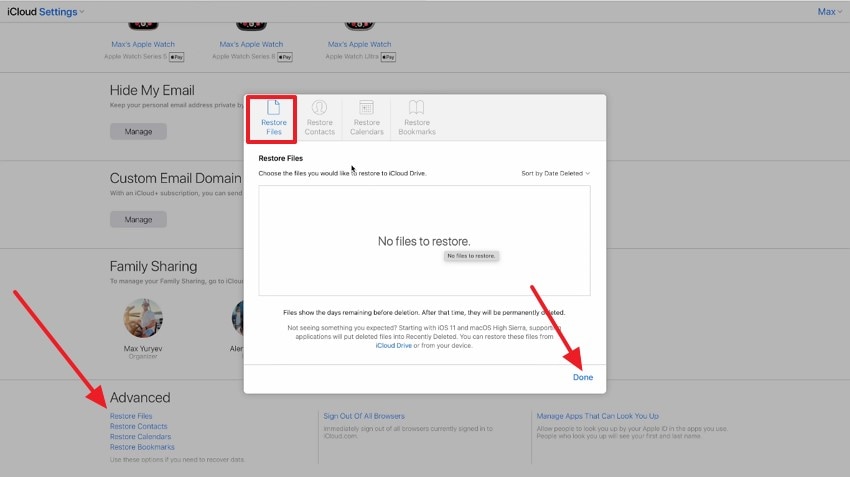
- Scroll down the “Account Settings” page to find the “Restore Files” option at the bottom. Click it to open a small window, select the files you want to recover, and press “Done” to complete the restoration.
5. Using Terminal To Restore Deleted Folders
Using Terminal to how do i recover a folder i accidentally deleted offers a more advanced recovery method on Mac. By executing specific commands, users can access hidden or recently removed files that aren't visible in Finder. This approach is particularly helpful for tech-savvy users who need precise control, making it an effective option when traditional methods fail to recover important folders. Read the instructions next to learn how to use Terminal for deleted files:
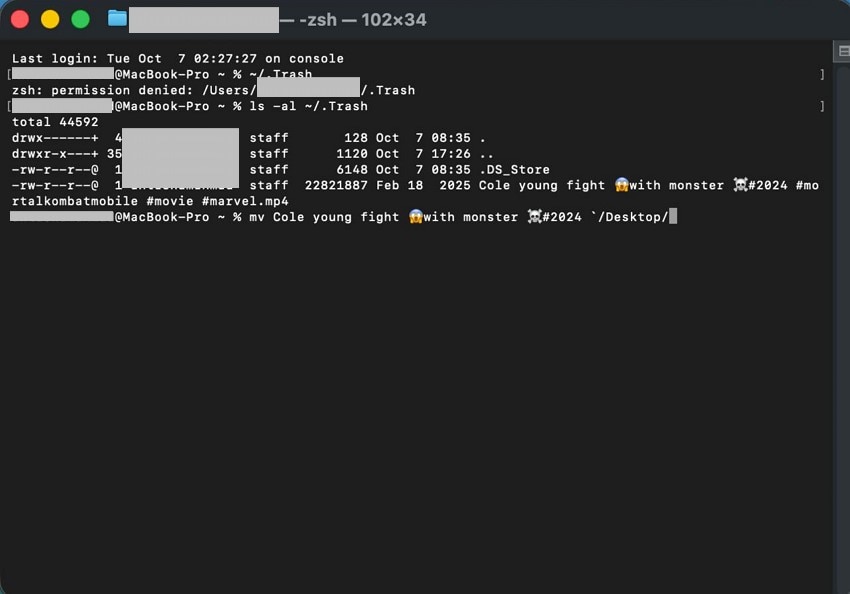
Instructions. Begin by opening Terminal on your Mac and navigating to the Trash folder with cd ~/.Trash. List all contents using “ls -al ~/.” Trash to locate the deleted file. Once found, restore it to your preferred location with the command mv filename ~/Desktop/.
6. Use Reputable Data Recovery Software (When Trash Is Emptied)
When the Trash has been emptied, and folders seem permanently lost, Recoverit offers a reliable solution. This powerful data recovery software scans your Mac deeply to locate deleted or overwritten files, ensuring high recovery success. With support for various file types, including documents, photos, and videos, Recoverit provides a safe and efficient way to restore important folders. Its user-friendly interface makes the recovery process straightforward even for beginners.
A key advantage of Recoverit is its ability to recover data on Mac while preserving the original file quality and formatting. It also supports a wide range of storage devices, including SD cards and external hard drives. Additionally, a built-in search bar allows users to quickly locate and restore files, making the recovery process fast and efficient.
Notable Features of Recoverit
- Batch Recovery: Recover multiple images at once, saving time and effort compared to restoring files individually.
- Multiple Format Support: Restore data in various formats such as JPEG, PDF, Excel, and more.
- Advanced Recovery Mode: Perform deep scans to recover severely damaged or lost files with high success rates.
Guide to Recover Deleted Files Using Recoverit
Having explored the features of Recoverit, here’s a step-by-step guide on how to recover deleted folders on mac efficiently:
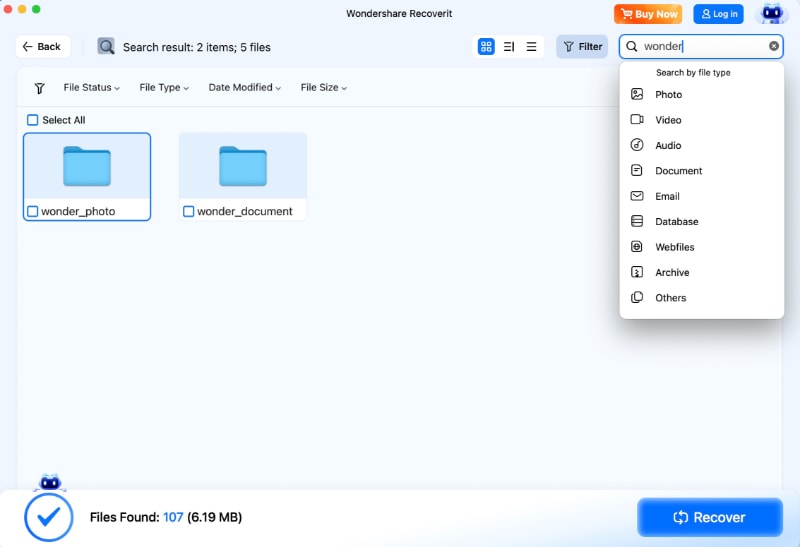
- Begin by Selecting the Folder
From the homepage, click on the specific location where your lost image or folder was originally stored.

- Initiate Scanning and Select Files
Once the folder is chosen, let Recoverit perform a thorough scan to find all recoverable files and folders. After scanning, select the items you wish to restore and click “Recover.”
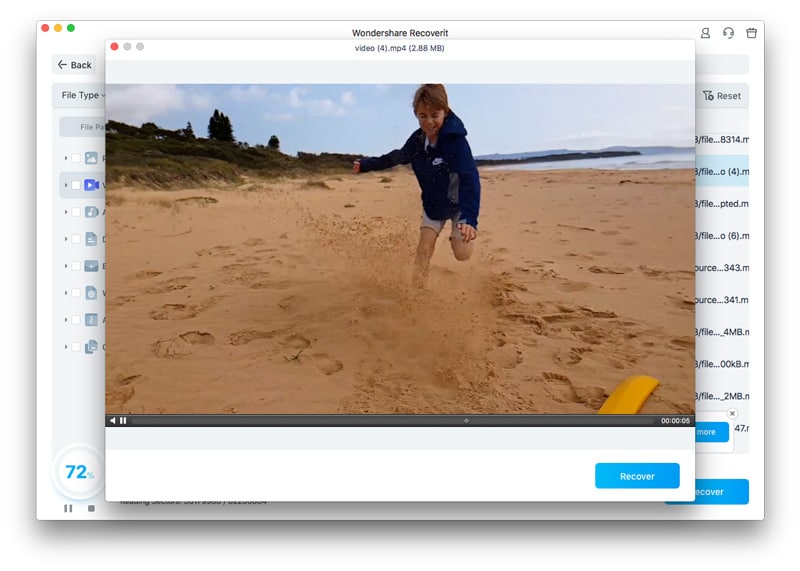
- Preview and Save Recovered Files
Use the built-in preview feature to check the recovered file or folder. Once confirmed, press “Recover” again to save the data safely back onto your Mac.
Video Tutorial on How to Recover Deleted Folders on Mac
After exploring multiple recovery methods, it’s equally important to focus on prevention. Taking proactive steps can help you avoid accidental deletions. These preventive measures help you minimize the risk and make it easier to how do i recover a folder i accidentally deleted whenever necessary:
1. Turn off Automatic Trash Deletion and Turn on Emptying Confirmation
Turning off automatic Trash deletion and enabling emptying confirmation helps prevent accidental data loss on Mac. By requiring manual approval before permanently removing files, you gain an extra layer of protection. This simple precaution ensures important folders aren’t erased unintentionally, making it easier to manage your data. To learn how to enable these settings, read the steps mentioned next:
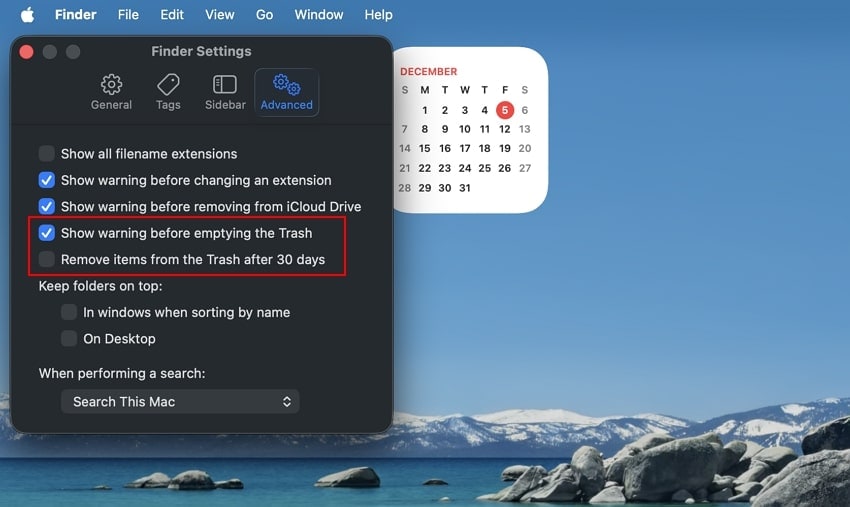
- Head to Finder and click on it to open the options list. From here, locate the “Settings” option and click on it.

- Next, access the “Advanced” section and tick the check box for “Show Warning Before Emptying the Trash.” Next, uncheck the checkbox for "Remove Items from Trash After 30 Days” and hit Enter to save the changes.
2. Back Up Using Time Machine
Backing up your Mac using Time Machine is a crucial preventive measure. Regular backups create copies of your folders, allowing you to restore lost data. By maintaining up-to-date snapshots, you ensure that important information is always recoverable, making it easier to learn how to recover a replaced folder on mac. Follow the steps mentioned below to learn how to create a backup of your Mac using the Time Machine utility:
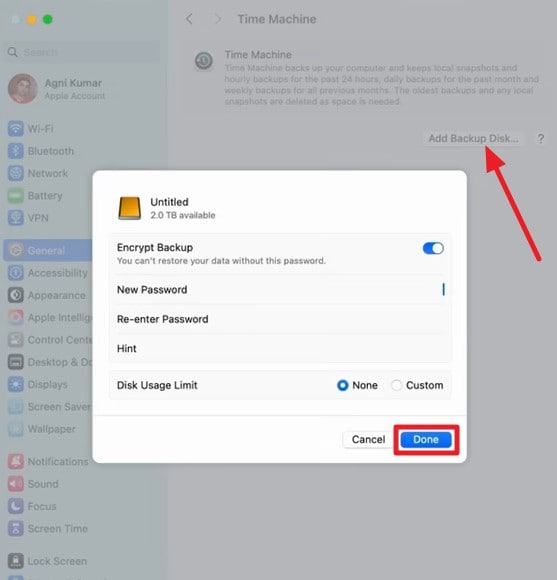
- Plug in an external hard drive or SSD to your Mac. Ensure the drive has enough storage to hold your backups. Now access settings and open the “General” section. Click on the “Time Machine” option located on the right.
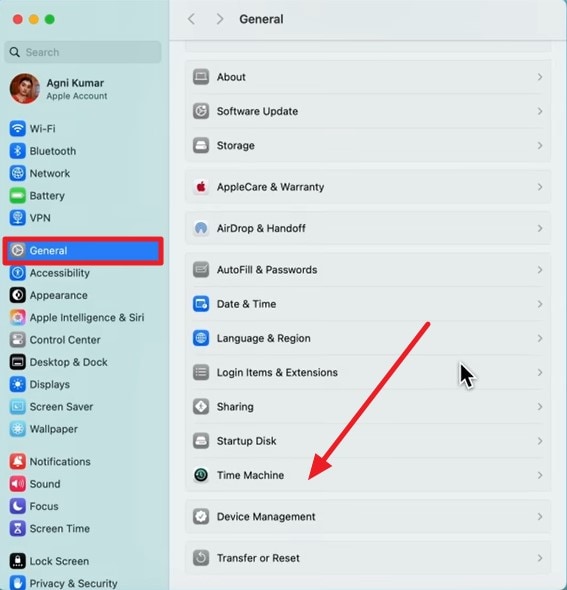
- Click on the “Add Backup Disc” button and configure settings, such as adding a password. Press the “Done” button to successfully create the Time Machine backup.
Conclusion
To sum it up, this article provided a complete guide on how to recover deleted folders on mac safely. For a fast, reliable, and user-friendly recovery process, Recoverit comes highly recommended. Its advanced scanning modes, multiple format support, and ability to preserve original file quality make it an ideal tool for restoring lost data.
FAQ
1. How can I recover deleted folders on Mac?
You can check the Trash folder or use Finder’s “Recents” folder to locate recently deleted items. For a more reliable solution, tools like Recoverit can safely restore lost folders with minimal effort.2. How do I check recently deleted files on a Mac?
Open Finder and click on the “Recents” folder or check the Trash to view recently deleted files. You can also sort by date to quickly find the file you need.3. Can Time Machine help recover lost folders?
Yes, Time Machine allows you to restore files and folders from past backups. Simply navigate to the backup date that contained the lost data and restore the items.4. Can I restore files deleted from an SD card on a Mac?
Yes, files deleted from SD cards can often be retrieved if they haven't been overwritten. Using dedicated recovery software like Recoverit ensures a higher chance of full recovery.


