
 TL;DR:
Formatting a drive to the Apple File System (APFS) requires a GUID Partition Table scheme and is natively optimized for Macs running macOS High Sierra to Ventura, though the process permanently erases all existing disk data.
● For macOS High Sierra to Ventura, format the drive directly via Disk Utility by selecting Show All Devices, choosing the non-indented media name, and erasing it with the APFS format and GUID Partition Map selected.
● For macOS Sierra, Disk Utility can produce unexpected setbacks for this format, requiring users to safely calibrate the drive via Terminal using the diskutil apfs createContainer and diskutil apfs addVolume commands.
● APFS cannot be applied to disks using the older Master Boot Record (MBR) scheme, is completely incompatible with Windows systems (which require FAT32 or exFAT), and does not support Time Machine on external drives running macOS High Sierra through Catalina.
Ask AI for a summary
 ChatGPT
 Perplexity
 Gemini
 Claude
 Grok
Grok
With the storage technology moving towards more efficient means like Solid State Drives (SSDs), you might require a few upgrades with the software to keep up. That is a massive concern for macOS users. Apple File System (APFS) is the new generation of file formats explicitly designed for SSDs. It allows easy management of files, enables multi-key encryption, and supports up to 9 quintillion files on each volume. If you want to learn how to format a Drive to APFS on Mac, this is just the guide.
Does Your Mac Device Support APFS?
APFS is fully compatible with the following versions:
- MacOS 10.13 (High Sierra)
- MacOS 10.14 (Mojave)
- MacOS 10.15 (Catalina)
- MacOS 11 (Big Sur)
- MacOS 12 (Monterey)
- MacOS 13 (Ventura)
Still, it is best to determine that you are running the appropriate macOS version on your device. If you have an older variant, APFS can be less effective and more resource-draining than your current file system. You can check the precise macOS version on your system by clicking the Apple icon > About This Mac.
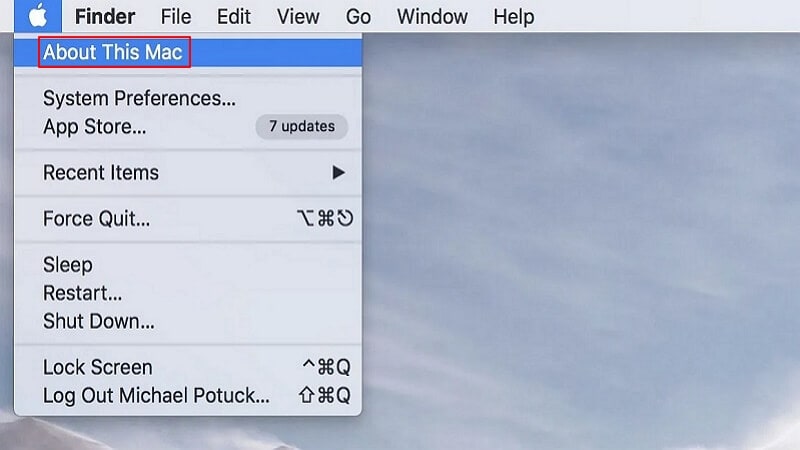
It should display all the relevant information regarding your device. Ensure that the macOS version you have installed belongs to any of the ones mentioned above or later.
Considerations When Formatting to APFS
It would help to consider several factors before formatting your drives to APFS. In addition to your macOS version, you also need to determine the following:
Is your scheme set to GUID partition?
You can only apply APFS on your PC if your scheme is set to GUID Partition Tables (GPT) for all disk partitions. It allows you more than four partitions per disk and is compatible with high-density storage, especially with capacities above 2 TB. APFS is not applicable if your scheme is set to Master Boot Record (MBR), which is an older type of disk scheme that uses the standard BIOS partition.
Do you want to use Time Machine?
The Apple Time Machine is only compatible with APFS disks starting with Big Sur. It is a crucial feature for macOS that lets you recover any lost files from a malware attack or drive corruption. You may be unable to use Time Machine for APFS formatted external drives on macOS versions High Sierra to Catalina.
Are you going to migrate to Windows?
In case you temporarily switched to a macOS device, there is little use in applying APFS formatting to any external drive. The system is not compatible with Windows, so you are better off using FAT32 or exFAT instead.
Do you have a data backup?
When you browse through most results for searching 'how to format APFS mac,' you'll notice that several of them warn you about a data wipe. This is because when you format a disk for APFS, it deletes all data from the drive. So, creating a backup on a cloud or external storage is best before you commence APFS formatting. In case you lost any data, Wondershare Recoverit can help you retrieve it with a few simple steps.
How to Format APFS Drive on macOS Sierra
If you have implemented the APFS drive on macOS Sierra, you might face a few unwanted setbacks. The new APFS gives exceptional results for macOS High Sierra or later versions, but it isn't the same as its predecessor. We recommend taking the assistance of Terminal instead of Disk Utility to format the APFS drive. It is a safer alternative and won't produce any unexpected results.
Note:formatting the drive will wipe all data on the drive, so you should back up your important files before formatting.
You can format an APFS drive in macOS Sierra by following these steps:
- Launch the Terminal on your Mac. You can go to Utilities and launch Terminal from there.

- Enter the command "diskutil list." That will provide a list of all the disks (internal and external) that are attached to your Mac.
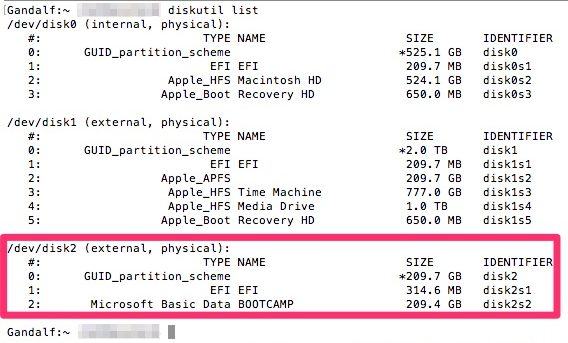
- From the list, you need to look for the identifier of the APFS disk you wish to format. Be careful while noting down the exact identifier for the respective disk.
- Let's suppose the disk's identifier is "disk2s3". Now, you need to format this disk. Provide the command "diskutil apfs createContainer /dev/<identifier>". Since the identifier for this particular disk is disk2s3, the command would be "diskutil apfs createContainer /dev/disk2s3".
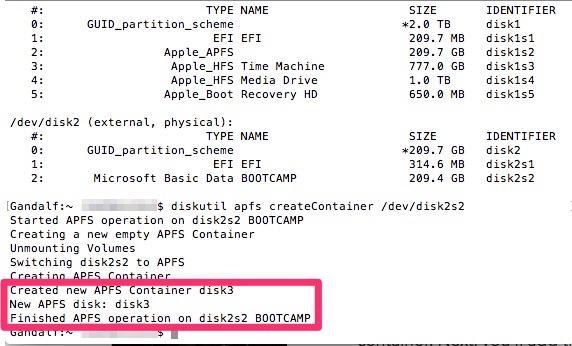
- The setup will now start creating the new APFS container. You will be notified as soon as the container is made. It will also list the number for the new APFS disk, which you can modify as per your preferences.
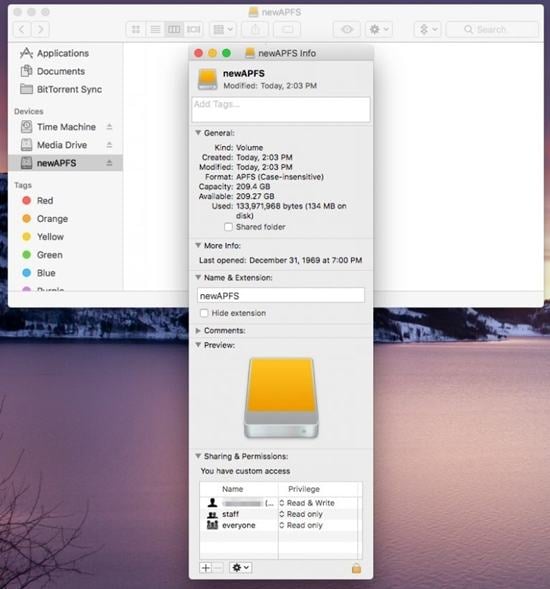
- Great! You are almost there. In the end, you just have to add the APFS volume to the disk. To do so, provide the command "diskutil apfs addVolume disk3 APFS <newAPFS>". Here, the "new APFS" would be replaced by an identifier of the new APFS container just created. For instance, you can view it as disk 3 in our case.
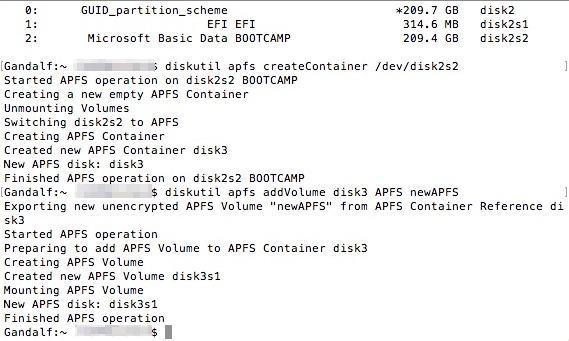
And that concludes the process. Now, you have a whole disk calibrated for APFS. You can use it directly or try to create partitions according to your requirements.
How to Format APFS Drive on macOS High Sierra to Ventura
Ever since High Sierra, Apple has made APFS formatting much more straightforward. You can do it directly from the Utility tab in the Applications menu. Follow the below-mentioned steps to format the APFS drive on macOS High Sierra, Movaje, Catalina, Big Sur, Monterey, and Ventura.
Note: formatting the drive will erase all data on the drive, so you should back up your important files before formatting.
- Go to Finder > Applications > Utilities > Disk Utility on your Mac computer to open the Disk Utility window.
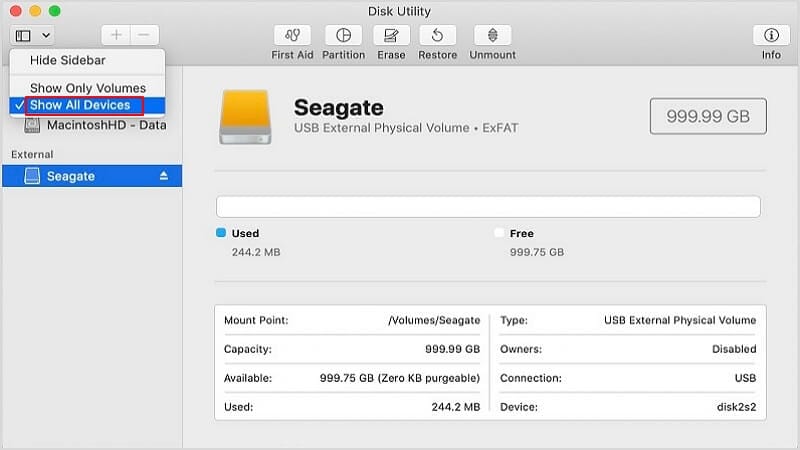
- From the upper left corner of the screen, click View. Then, select the Show All Devices option from the drop-down menu.
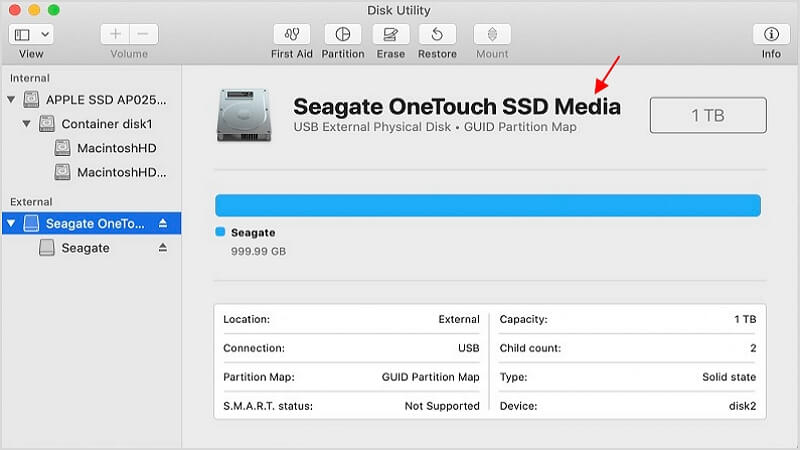
- Choose the non-indented entry, and you will see Media in the drive's name.
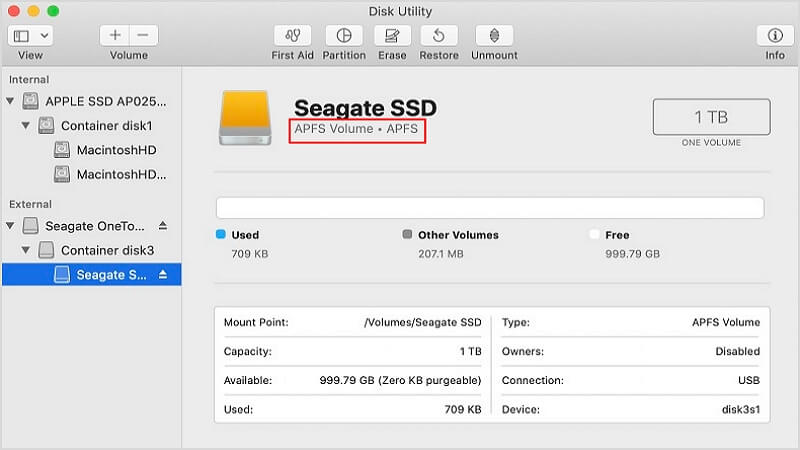
- Click the Erase button in the menu. In the pop-up windows, provide a Namefor the volume, set Formatto APFS, and choose GUID Partition Map for the Scheme. Ensure the scheme is set to GUID Partition Map and not Master Boot Record (MBR). If APFS is unavailable, then the drive is in MBR and not GUID Partition Map.
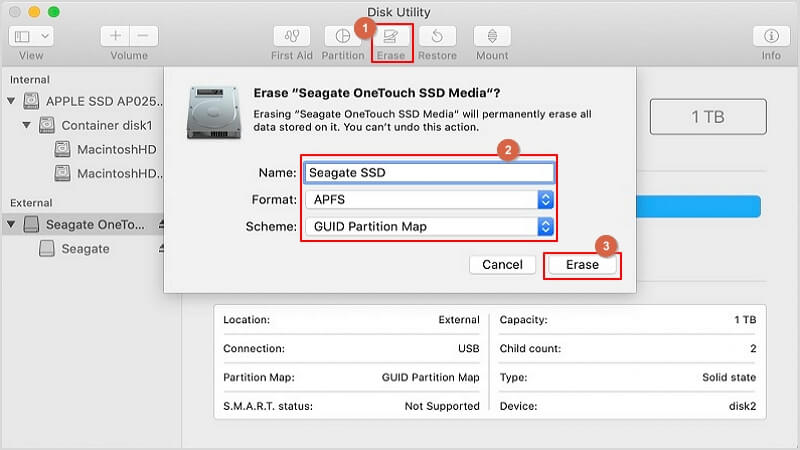
- Click Erase. Disk Utility will start formatting your drive to APFS. It might take some time, so you are best off attending to other tasks like making a cup of coffee.
- Click Done after the APFS formatting is completed.
- You can confirm if the drive is successfully formatted to APFS by selecting the indented entry. You should see the APFS Volume under the name you provided. You can now go to System Settings and enable Time Machine or other required functions for your newly created drive.
Bonus Tips: Why Format APFS Drive?
There could be plenty of reasons to format the APFS drive. From wrong partitioning to a malware attack, your macOS drive can experience some unwanted setbacks. Since APFS supports full-drive multi-key encryption, users often choose to format the disk and get rid of their sensitive content as well. Additionally, all files on the system have separate encryption keys, so infestation or deletion from an external malware or virus is made more challenging.
You can also format an external hard disk, not just the internal drive. It is mainly done to make the external storage unit work for other file systems (like FAT or HFS). With APFS, recovery of data is made more convenient. You get timestamps for files down to nanoseconds, and the TRIM command allows you to use obsolete drive areas.
APFS supports the Server Message Block (SMB) technology natively. It is a system that allows you to read/write files while communicating with Apple servers. That makes it easier to sync necessary files with the cloud for recovery.
Recoverit enables you to recover the deleted APFS partition on Mac. Regain it within only 3 steps
For Windows XP/Vista/7/8/10/11
For macOS X 10.10 or later
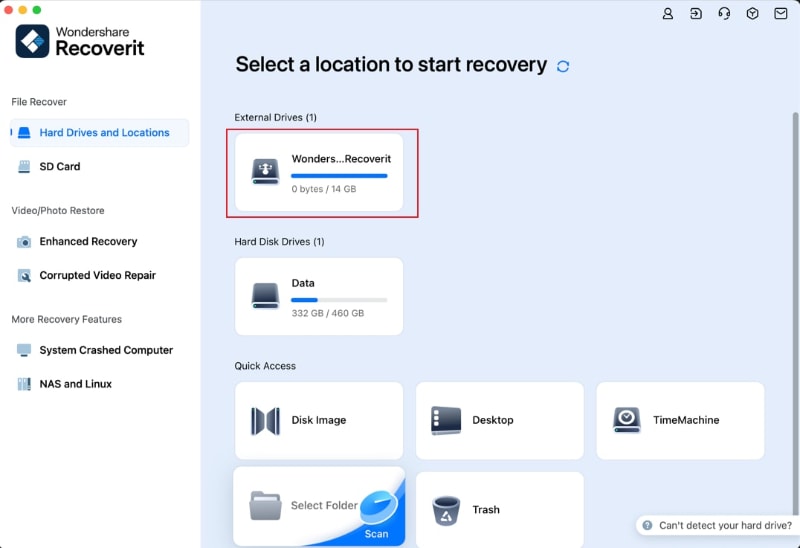
Step 1:To recover lost or deleted files from an external media, you should first connect it into your Mac, and then choose it as the target location for data scanning and searching.
Step 2:An all-around scan starts once you make the choice. It usually takes a few minutes. During the process, you can filter and locate files of your choice.

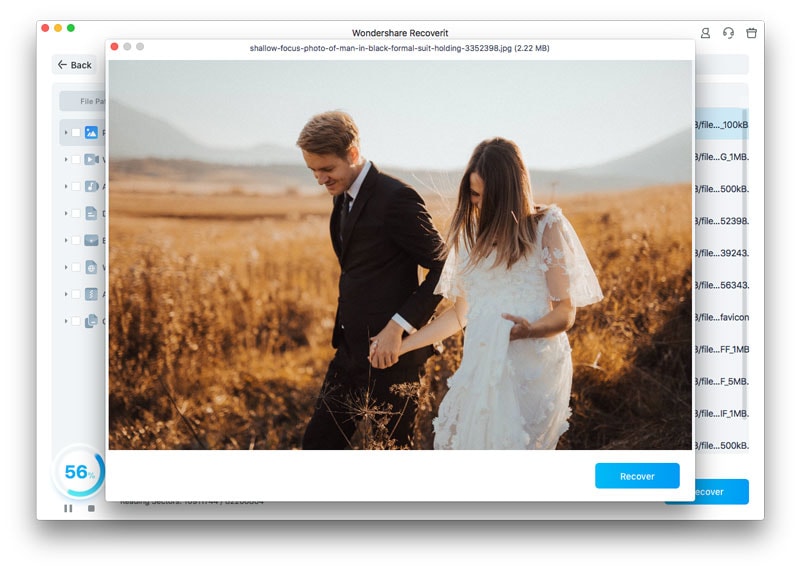
Step 3:After that, Recoverit provides the preview function for you before recovery. A variety of files can be previewed, such as pictures, videos, movies, audio, music, documents, and so forth. Then, select one or more files you want to restore and click "Recover" to get all of them back.
Conclusion
APFS constitutes a significant step forward with advanced file systems for Apple PCs. Still, not all of them have SSDs that allow for the ideal application. We hope this guide proved valuable in helping you learn how to format Drive to APFS on Mac. Do you still have any burning questions? Try some other related articles from the list below.


