


 TL;DR:
Partitioning a hard drive divides a single physical disk into separate logical segments, allowing you to isolate your operating system from personal files or games to prevent total data loss during system crashes and simplify backups.
● Older MBR disks support a maximum of four primary partitions, whereas modern GPT (GUID Partition Table) setups allow up to 128 distinct primary partitions on a single drive.
● Always allocate an extra 25-30% of free space to the operating system partition for updates and temporary files, formatting with NTFS for Windows, APFS for macOS, or exFAT for cross-platform compatibility.
● While partitioning protects isolated files against local OS corruption, a physical hardware failure will still compromise all logical partitions sharing that specific drive.
Ask AI for a summary
 ChatGPT
 Perplexity
 Gemini
 Claude
 Grok
Grok
Your computer drive feels crowded when work files, photos, videos, and system data all sit on it each day. You waste time searching for files, and a wrong click can remove something you still need without any clear warning. Here, a single drive makes backup plans hard, since all important data shares the same risky space with no clear walls.
That's why Drive Partition partitions split one physical drive into clear parts that act like separate, easy-to-manage drives for daily control. Therefore, this guide explains "why partition a hard drive" and gives a detailed stepwise guide to do so.
Try Recoverit to Perform Partition Recovery
 Security Verified. 3,591,664 people have downloaded it.
In this article

Part 1. What Is Hard Drive Partitioning?
Partitioning a hard drive implies that you divide one physical drive into distinct segments, each of which functions as its own drive, i.e., C:, D:, or E: in Windows. A partition is a logical portion of a disk that the system considers a distinct drive having its own file system and folder organization.
The disk also maintains special records that indicate where each partition begins and terminates, such that the system is aware of the appropriate use of each partition.
Types of Hard Drive Partitions
So, before you know "how to partition a hard drive," this section explains 3 main types of drive partitions below:
- Primary Partition
A primary partition is a main part of a hard drive that can hold an operating system and normal files. On older MBR disks, a drive can have up to 4 primary partitions at one time. Whereas, with GPT (GUID Partition Table), a hard drive can have up to 128 primary partitions. Additionally, one primary partition on MBR disks can have an active mark that tells the computer where to boot. - Extended Partition
Unlike a primary partition, an extended partition is a special part of a hard drive used on MBR disks when you need more than 4 partitions. You can have only one extended partition per disk, and it does not store files directly. Inside it, you can create logical partitions, which are the parts that actually hold your data. - Logical Partition
A logical partition is a part inside an extended partition that works like a normal drive to store files. Hence, you can create many logical partitions, which allows you to have more than 4 partitions on an MBR disk. Usually, operating systems go on primary partitions, while logical partitions hold data or extra storage.
Reasons to Partition a Hard Drive
If one asks, "why partition a hard drive?" some of the possible reasons for this action are listed below for clarity:
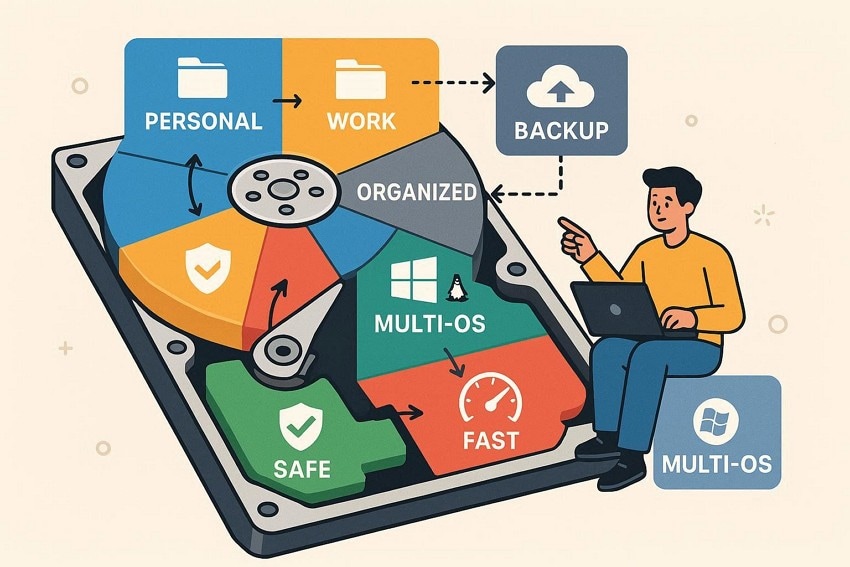
- Improved Data Organization: Drive partition allows one drive to be partitioned into system files, personal files, and work or backup files. Therefore, this keeps everything organized, minimizes confusion, and makes it easier to locate critical files very fast.
- Simpler Back-up and System Maintenance: With the system and personal data in different partitions, you can only back up the data and repair or reinstall the OS. In addition to that, small partitions are also faster to repair, check, and scan than a large single drive.
- Reduced Risk of Data Loss: If the OS becomes damaged or infected, or if it requires reinstallation, files on other partitions often remain safe. Also, problems in one partition rarely affect other partitions immediately.
- Support for Multiple Operating Systems: Know that each operating system needs its own partition, such as Windows on one and Linux on another. Thus, a boot manager lets you choose which system starts, while keeping data separate or shared as needed.
- Performance and Management Benefits: Partitions can improve performance when frequently used files sit on faster sections of a drive. Above all, small partitions also fragment less and repair faster than a single large drive.
The Pros and Cons of Partitioning a Hard Drive
As you decide on partitioning a hard drive, adhere to the listed pros and cons to determine if it's worth it:
Pros
- You can separate system files, personal data, and work/projects easily.
- Reinstall or restore the system partition without affecting your personal data safely.
- Important files stored separately reduce the risk of loss during system crashes.
- Each operating system can have its own partition, avoiding installation conflicts.
- Partitions can use different file systems or dedicated roles effectively.
Cons
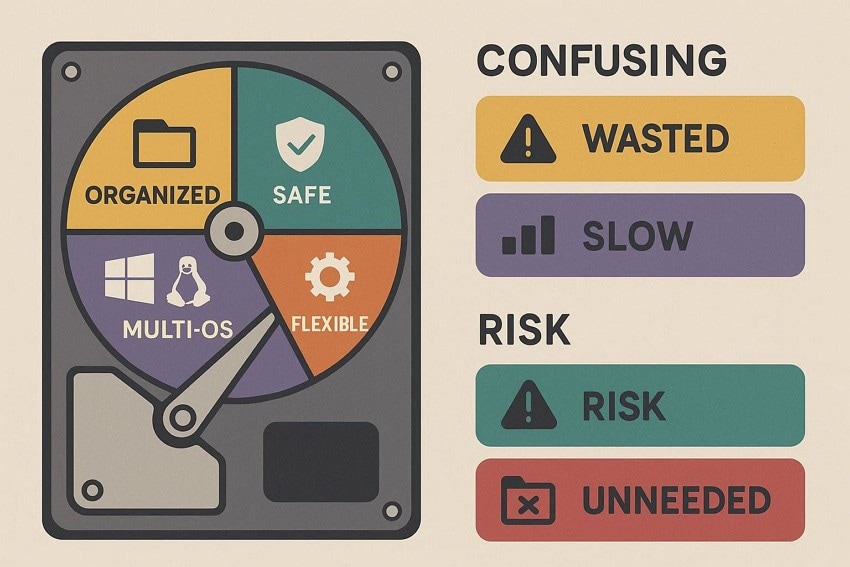
- Planning partition sizes and managing multiple drives can confuse inexperienced users.
- Badly sized partitions can leave one full while another remains empty.
- HDDs may slow down due to fragmentation or read/write head movement.
- All partitions share the same drive, so hardware failure affects everything.
- Casual users often need only one well-organized partition with folders.
Part 2. Step-by-Step Guide to Partitioning a Hard Drive Like a Pro
Now that you want to learn how to partition a hard drive, dive into the given prerequisites and detailed steps for Windows and Mac:
Preparing to Partition a Hard Drive
- Always copy important files externally before changing partitions to prevent loss.
- Run a disk check to ensure no serious errors exist before resizing.
- Plan partitions, sizes, and purposes for OS, data, games, and backups.
- Check if the drive is HDD or SSD and uses MBR/GPT.
- Use reliable power and close programs to avoid errors during resizing.
Tools Needed
Built-In Tools:
- Disk Management - Windows
- Disk Utility - macOS
Optional Supporting Tools: Use external backup software and bootable rescue media for safety.
On Windows
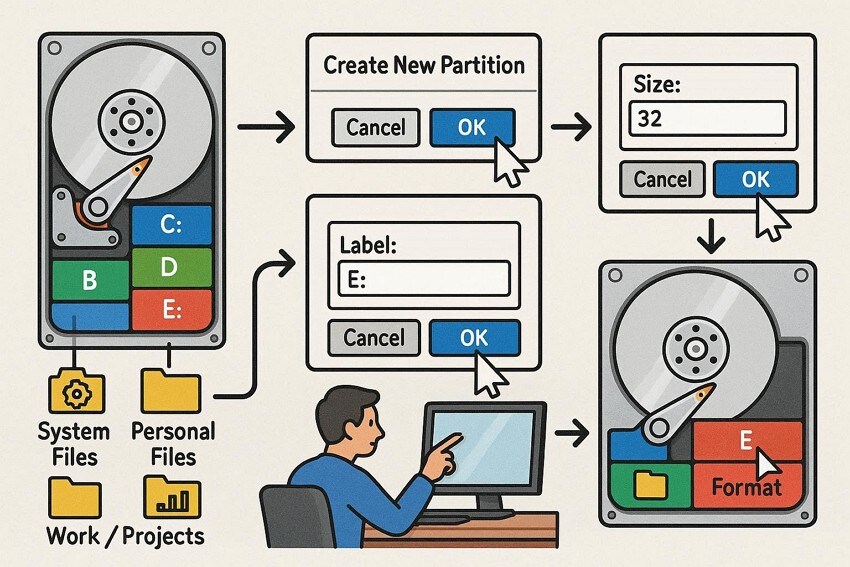
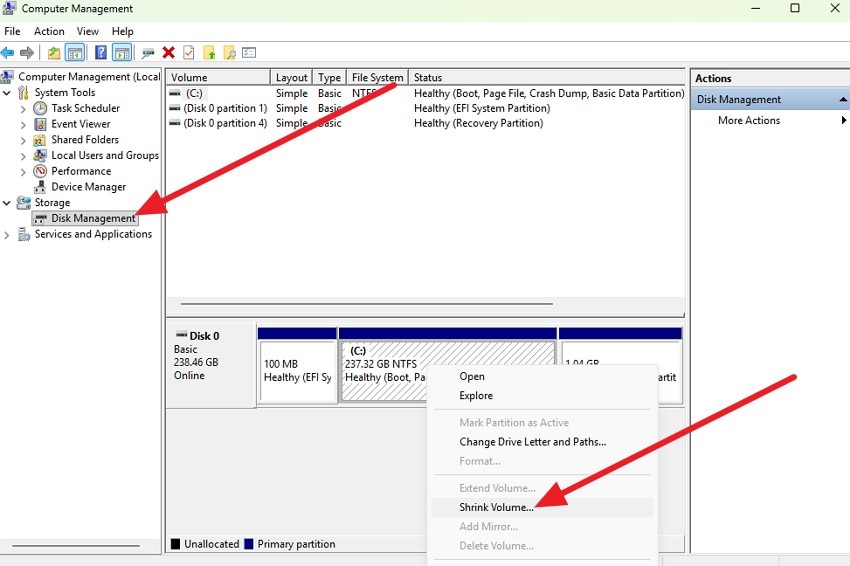
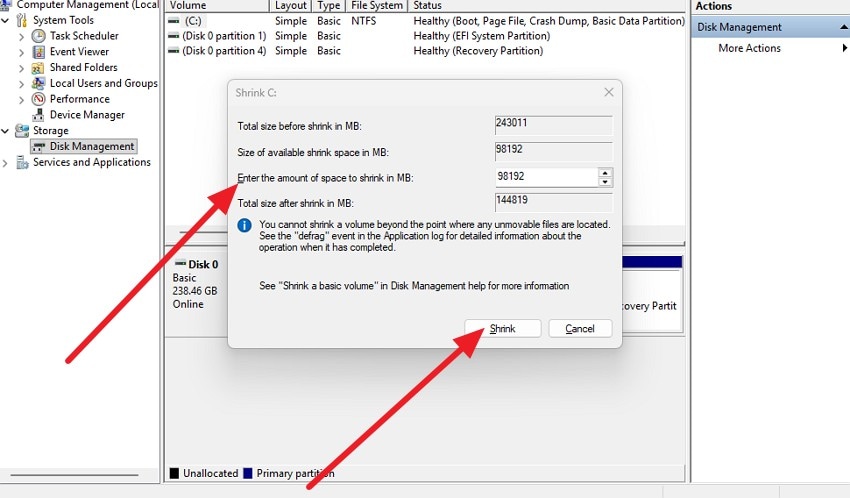
- Pick "Disk Management" as you search for "Computer Management" in the Start menu. After that, select the desired volume to create a partition from, then right-click and choose the "Shrink Volume" option.
- Next, choose the "Enter the Amount of Space to Shrink in MB" option in the given textbox and press the "Shrink" button.
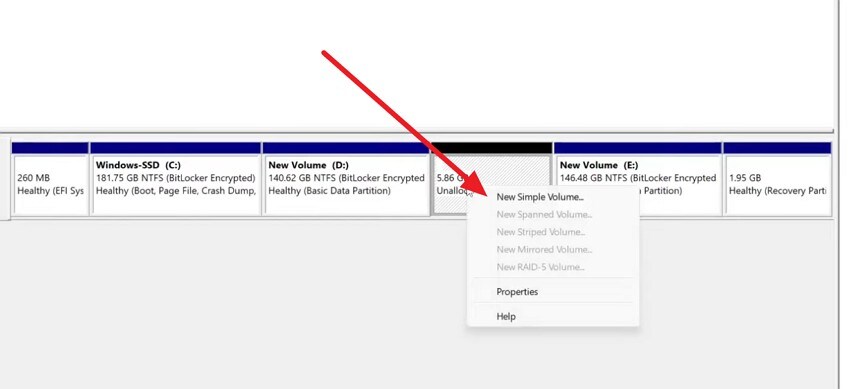
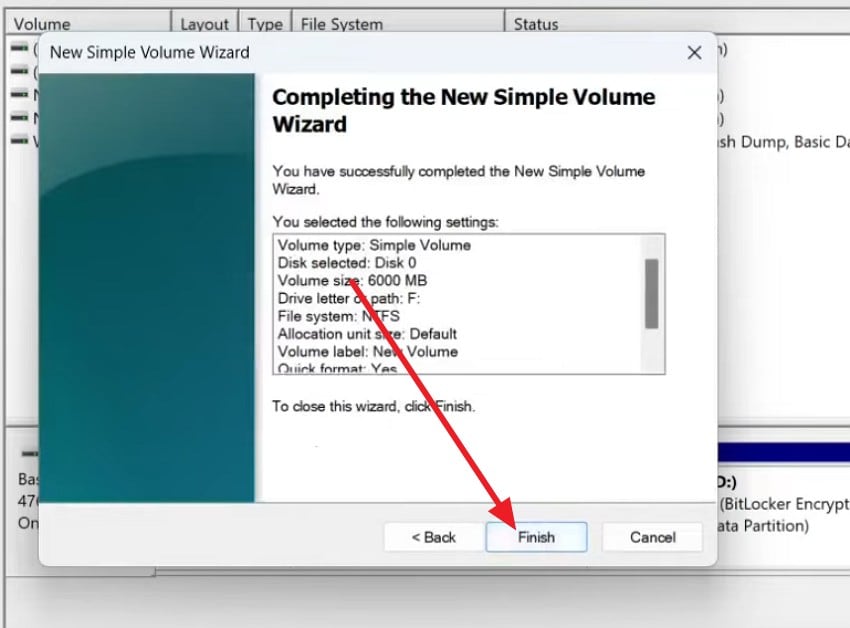
- Allocate a drive by selecting the "New Simple Volume" option upon right-clicking and choosing "Next." After that, assign a new drive letter, such as "F" or "D," then choose Next and select the format settings option.
- Once done, tap "Finish" in the popup windows to create a new volume.
On Mac
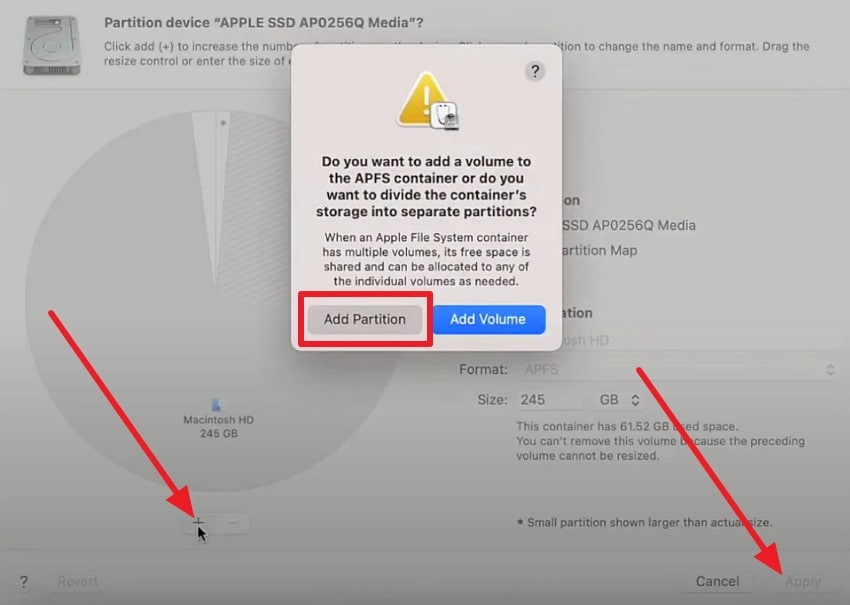
- In Disk Utility, choose the main physical drive in the "External" section and pick the "Partition" option at the top for partitioning a hard drive.
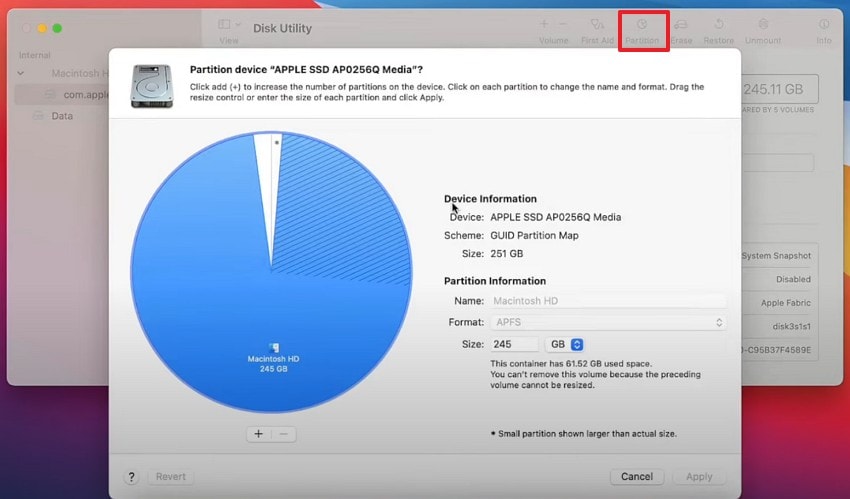
- Within the popup menu, choose the "+" icon and select the "Add Partition" option. Once created, use the pointer to adjust the size, assign the name, and click the "Apply" button.
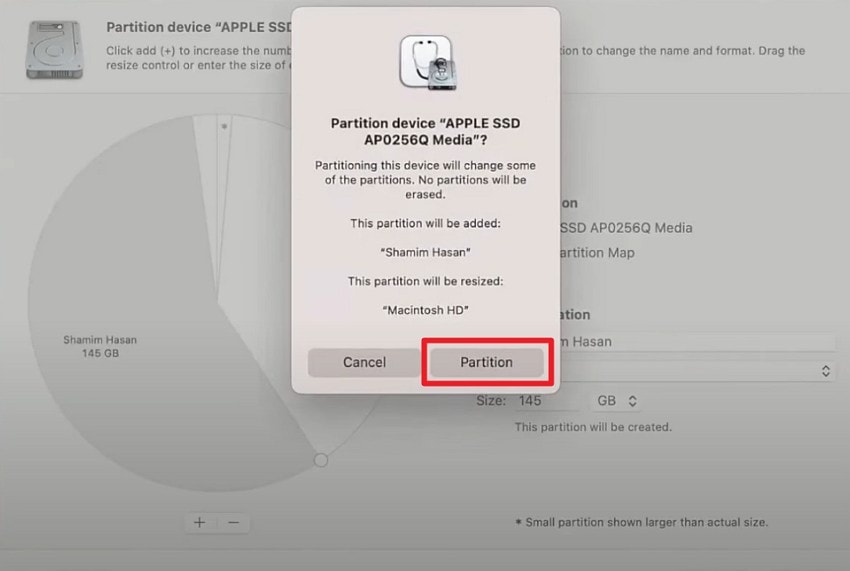
- After that, pick "Partition" and the "Continue" button in the popup menu.
Pro Tip: Dynamic Partition Management:How to Adjust Your Disk Layout
When your C Drive is clogged with system files and "Low Disk Space" warnings appear, UBackit allows you to intelligently borrow unused space from other partitions (like your D Drive) to balance your disk layout.
Step 1. Identify and Select Disk
Launch UBackit and navigate to the Partition Management tab. Select the physical disk you wish to modify. Double-click the disk or click the Adjust Disk Layout option from the right pane to continue.

Step 2. Adjust the Disk Layout
Use the intuitive visual interface to drag the edges of your partitions. Alternatively, enter specific GB/MB values to precisely reallocate unallocated space from one volume to another.
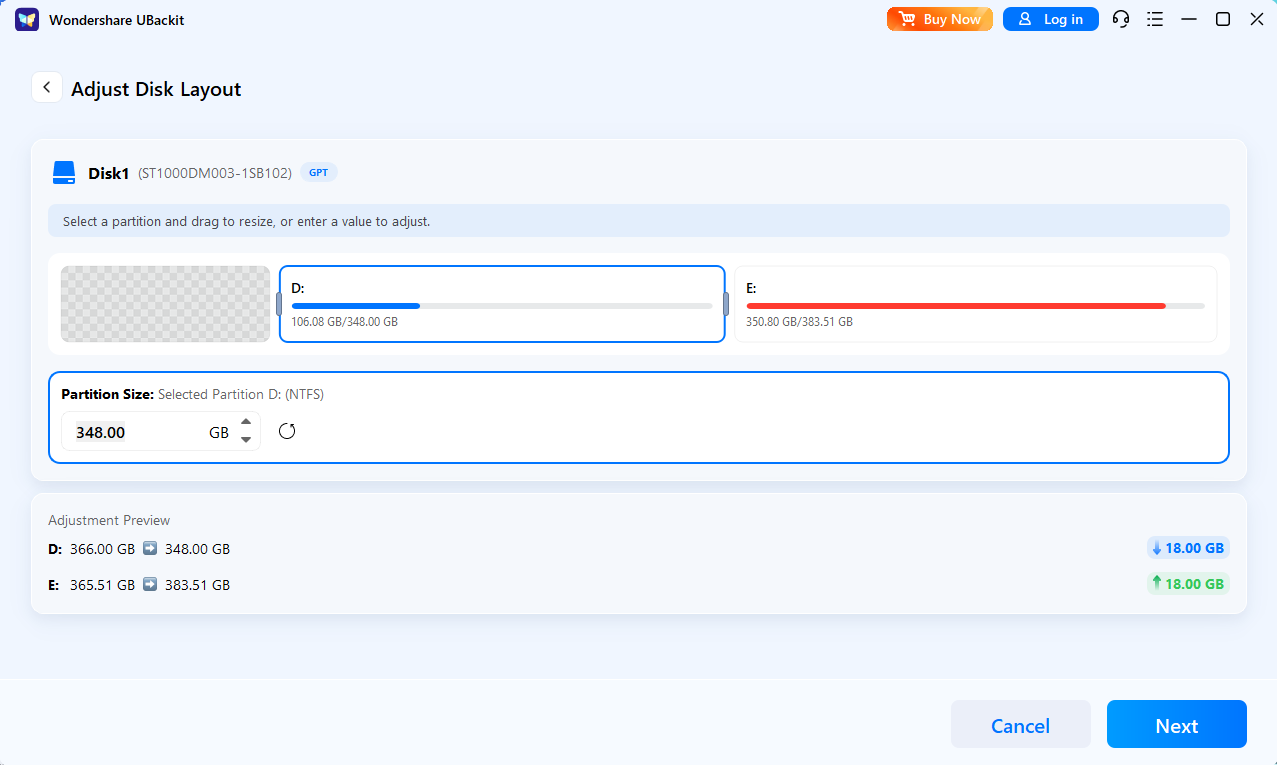
Step 3. Initiate the Process
Review and confirm the partition layout. Once confirmed, click Next to execute the operation.
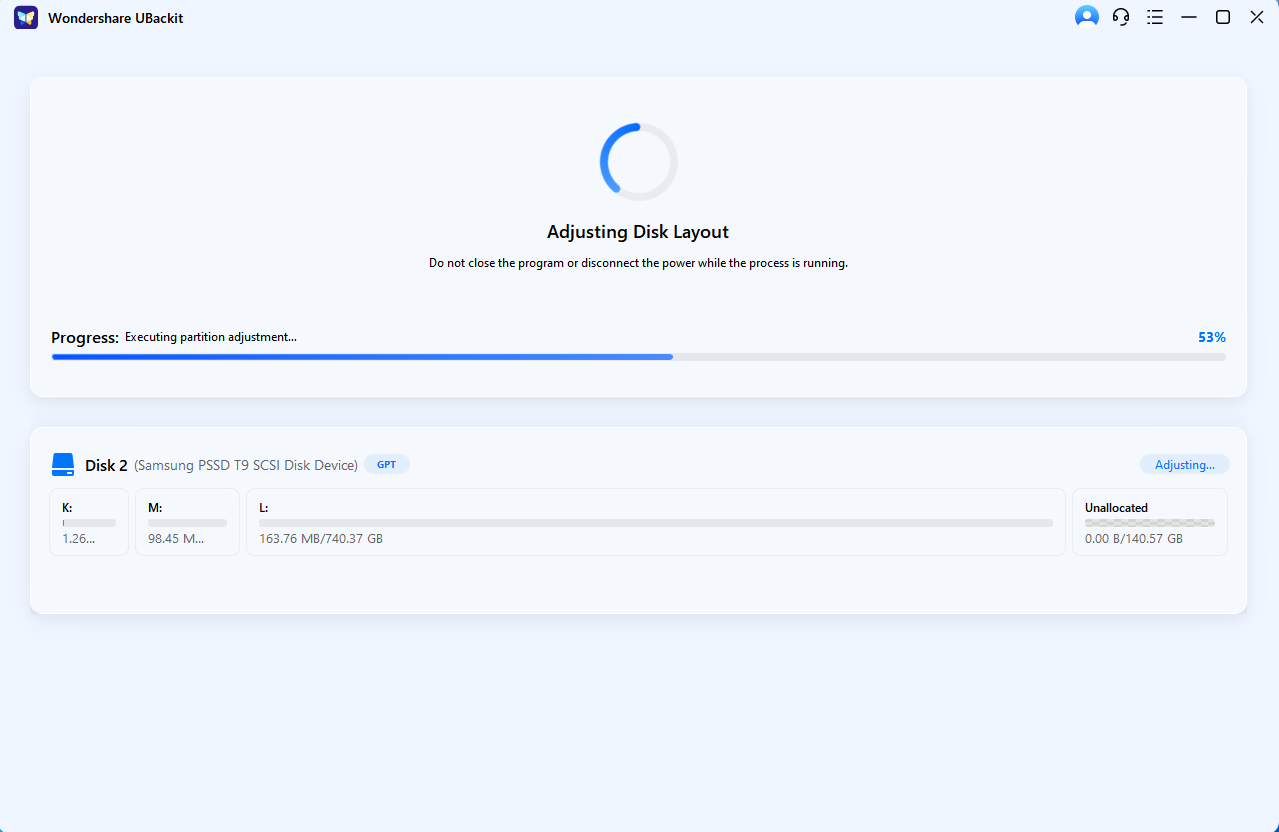
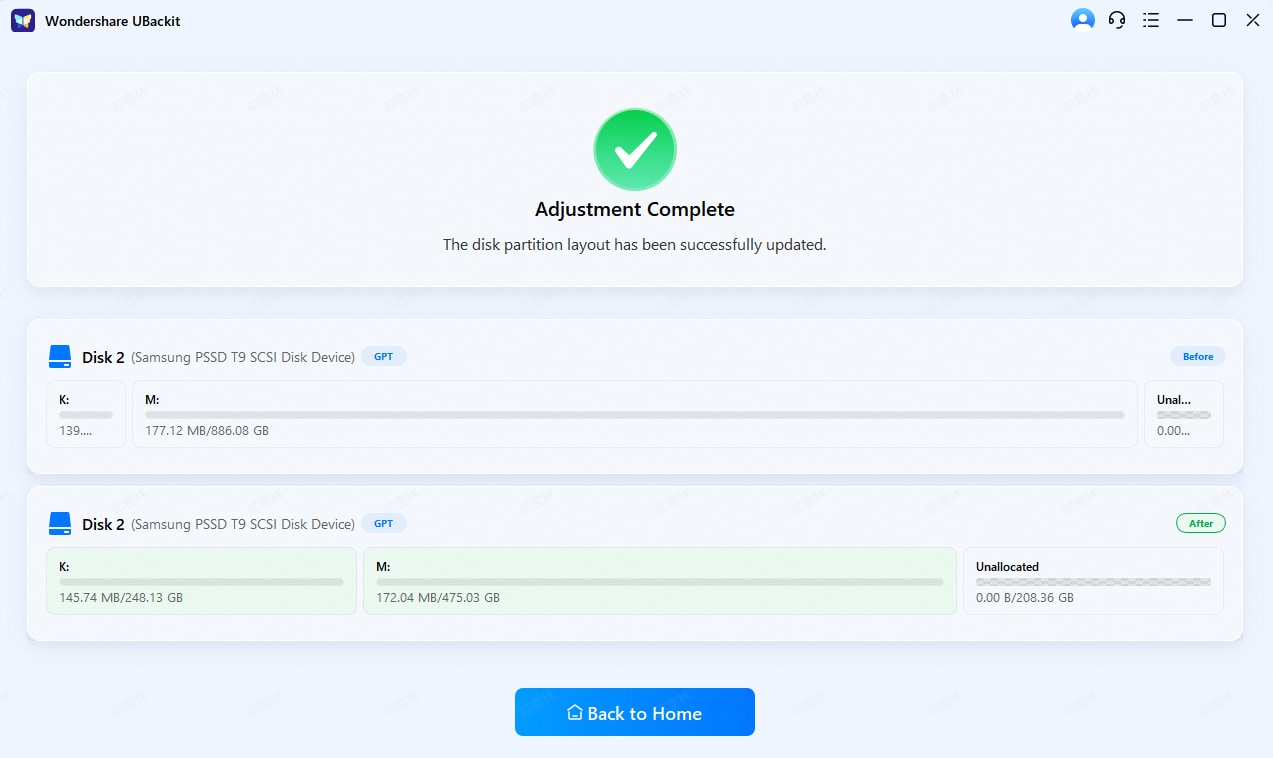
Step 4. Complete Management
Wait for the process to finish and view the updated disk layout. UBackit will safely move data blocks to accommodate the new boundaries. Once the progress bar reaches 100%, your disk will reflect the updated capacity instantly.
Part 3. 5 Best Practices for Hard Drive Partitioning
Now that you know all about partitioning a hard drive, follow the mentioned practices carefully to avoid errors and data loss:
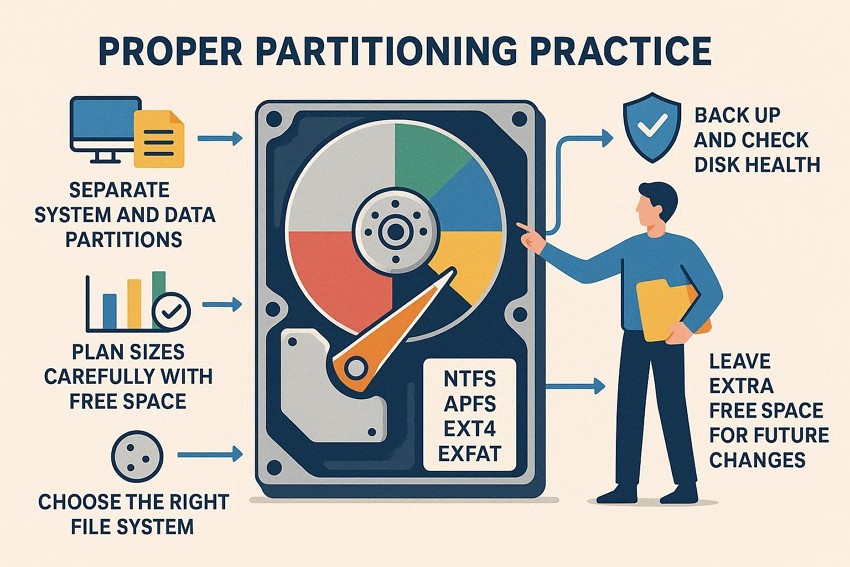
- Separate System and Data Partitions: Have the operating system and programs on one drive, and store personal data such as documents, photographs, and projects on another drive. This arrangement simplifies system reinstalls or repairs, as you can format the OS partition without having to reduce the data.
- Plan Partition Sizes Carefully: Before creating or resizing partitions for the OS, programs, games, or backups, check their current usage and estimate their future needs. Additionally, you should leave 25-30% of the OS partition free so that updates, temporary files, and new programs can be installed.
- Check disk Health Check Backup and Check: It is always best to save important files as a first step before partitioning or formatting, as a power failure or errors will result in your data being lost forever. Also, check the stability drive with a disk check or SMART health test, and on HDDs, defragment first to remove files at the end to resize more easily.
- Select The Right File Systems and Layouts: When selecting your operating system file system, use the suggested file system, including NTFS with Windows, APFS with macOS, and ext4 with Linux systems. It is also recommended to maintain traditional system partitions on Windows UEFI/GPT systems and to use exFAT for interoperable data between Windows and macOS rather than NTFS or HFS+.
- Free Space and Partitions: Leave some free or readily reconfigurable space to allow future layout changes, particularly to multiple boot installations, or drives that grow rapidly. Also, keep partitions with 10-20% free space, verify errors and label partitions, and make partitions smaller or larger on demand when some are full, and others are mostly empty.
Conclusion
To sum up, this guide has explained why partition a hard drive while giving detailed instructions on how to create one on Windows and Mac. Additionally, best practices and prerequisites are listed to help users safely manage their drives, protect their data, and avoid errors. However, if you lose any data after creating a partition, the usage of Recoverit is suggested because of its support for exFAT, FAT16, FAT32, etc.
FAQ
-
1. Can I resize partitions later if needed?
Yes, you can resize partitions later with proper tools, but always back up data first. Also, resizing allows better space utilization when one partition fills while another remains mostly empty. -
2. Does partitioning work on SSDs as well as HDDs?
Yes, both SSDs and HDDs support partitions for system files, personal files, and backups. In addition, SSDs benefit from separate partitions for faster file access and easier organization. -
3. Do partitions last forever?
Partitions remain on the drive until you delete, merge, or change them with proper tools. However, maintenance and careful management help ensure partitions stay safe and useful over long periods.


