Solved: CRITICAL-PROCESS-DIED BSOD Error in Windows 10

Jun 03, 2026 • Filed to: Windows Computer Solutions • Proven solutions
 TL;DR:
Resolve the Windows 10 CRITICAL-PROCESS-DIED BSOD error by repairing system file corruption, driver conflicts, or disk errors using built-in diagnostic modes and command-line utilities.
● Execute administrative command-line scans to repair underlying corruption: use sfc/scannow for system files, DISM/Online/Clean-Image/Restore health for Windows images (requires 10-30 minutes), and chkdsk C: /f /r to resolve logical and physical drive errors.
● Isolate software and hardware conflicts by updating device drivers via Device Manager, uninstalling recent Windows updates, or running a Clean Boot via System Configuration to disable non-essential background services.
● If standard booting fails, access Safe Mode via WinRE or the Shift+F8 shortcut to apply fixes, or use System Restore to revert the OS state, which strictly requires a restore point created before the stop code occurred.
Ask AI for a summary
 ChatGPT
 Perplexity
 Gemini
 Claude
 Grok
Grok
Have you booted your computer recently only to find an error prompt on a blue screen with this message "Critical Process Died Error"? Do not be alarmed, as this error is not unique to your system. This error is a common one others have had to deal with, and we want to show you how to address this issue to get your system functioning again, just like before.
- Overview of Critical Process Died Error
- Method 1. Run a Device and Hardware Troubleshoot
- Method 2. System file checker
- Method 3. Perform an Anti-Virus Scan
- Method 4. Use the DISM Tool
- Method 5. Update system drivers
- Method 6. Uninstall recently downloaded updates
- Method 7. Clean Boot
- Method 8. Restore system to a previous state
- Method 9. Update Computer BIOS
- Method 10. Restart Your Computer in Safe Mode
- Method 11. Check Your Disk for Errors
Overview of Critical Process Died Error
If you experience this error, it means that your system has stopped working due to some of the following reasons.
- Corrupted background processes
- Incorrect data modification
- Improper reboot
- Memory error
There are so many causes of this kind of error, and pinpointing the exact cause can be very difficult, but there are ways to fix the error though. Here are 11 solutions for resolving a Critical Process Died Error
How to Fix the Critical Process Died Stop Code?
There are so many troubleshooting steps, but here are 11 of them!
Method 1. Run a Device and Hardware Troubleshoot
Running a troubleshoot is the quickest and easiest way to solve this problem. To run a device troubleshoot, follow the below steps:
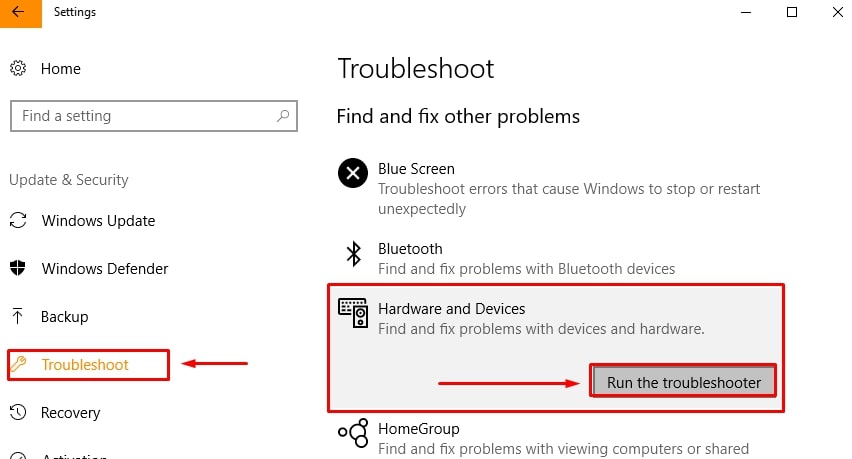
Step 1. Go to Settings and navigate to Update and Security > Troubleshoot.
Step 2. Select Hardware and Devices and click Run Troubleshooter. It takes only a few minutes to troubleshoot for errors.
When completed the scan will give you a report if errors were found and provide you with quick fixes.
Method 2. System file checker
You can also run the system file checker tool. This utility tool is a solution provider for diverse issues related to Microsoft Windows. Although a file checker does not always solve all issues, it is worth trying when looking for a solution to a BSOD error.
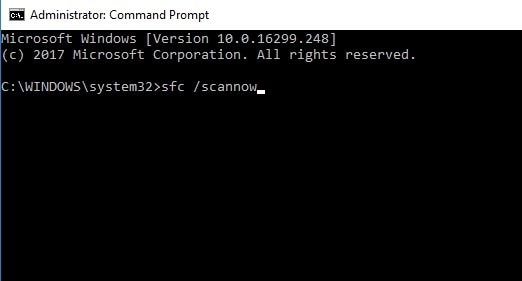
Step 1. To run file checker, open Command prompt as admin and search for cmd. Click the result and run as administrator.
Step 2. Type: sfc/scannow. Press Enter. When the process is complete, a list of problems, if found, will be displayed with steps on how to resolve them.
Method 3. Perform an Anti-Virus Scan
If the error was caused by a malware infection, an anti-virus scan will reveal it. You can download any third-party anti-virus software to perform a quick scan. If a virus is detected, the anti-virus will eliminate it so your device can function well again (It is important to make sure that your device is protected using anti-virus software at all times).
Method 4. Use the DISM Tool
If none of the methods listed above work, run the Deployment imaging and servicing management tool to repair corrupted images.
Step 1. As an administrator, open the Command prompt.
Step 2. Once open, type this code DISM/Online/Clean-Image/Restore health. Press Enter.
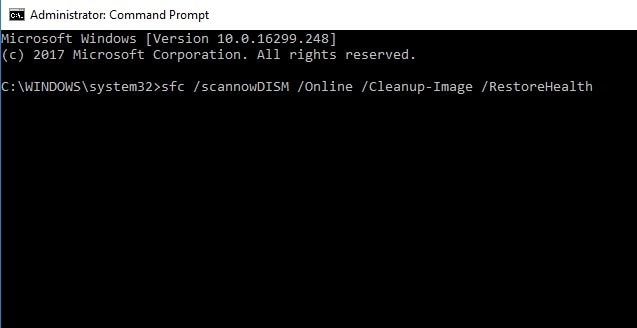
Step 3. The process takes between 10-30 minutes, so you will need to be patient. After the scan, restart the device.
Method 5. Update system drivers
An outdated driver may cause this type of error to occur. You can't be so sure, so updating drivers may fix the problem.
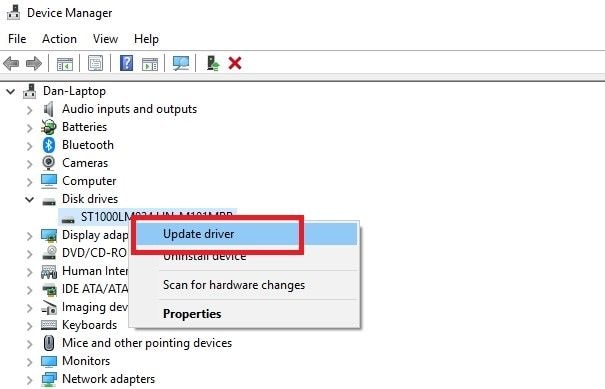
Step 1. In the search bar, type Device Manager and click on it.
Step 2. Go to Disk Drives and right-click on the drive to choose Update Driver.
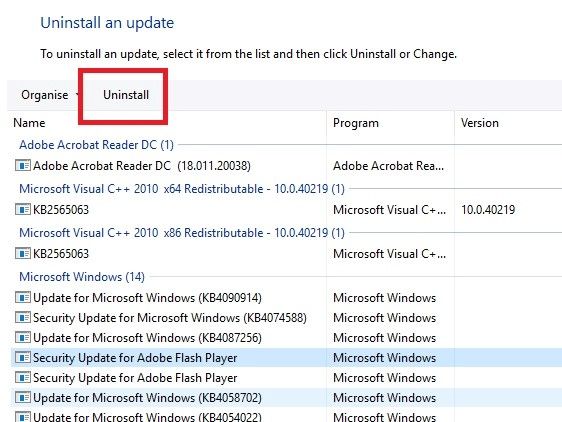
Method 6. Uninstall recently downloaded updates
In a situation where you noticed the error soon after downloading a recent update, consider uninstalling it to see if the issue will be resolved. To do this,
Step 1. Open Settings and navigate to Update and Security > Windows Update > History > Uninstall updates.
Step 2. Choose the exact update you want to uninstall by clicking the Uninstall button.
Method 7. Clean Boot
Another option you can explore is to perform a clean boot. Clean boot mode uses few drivers and programs, so it may work. To clean boot your device, follow the below steps:
Step 1. Open the search box and type this System Configuration, then tap Enter.
Step 2. Click Services
Step 3. Uncheck the box next to Hide Services> Disable all.
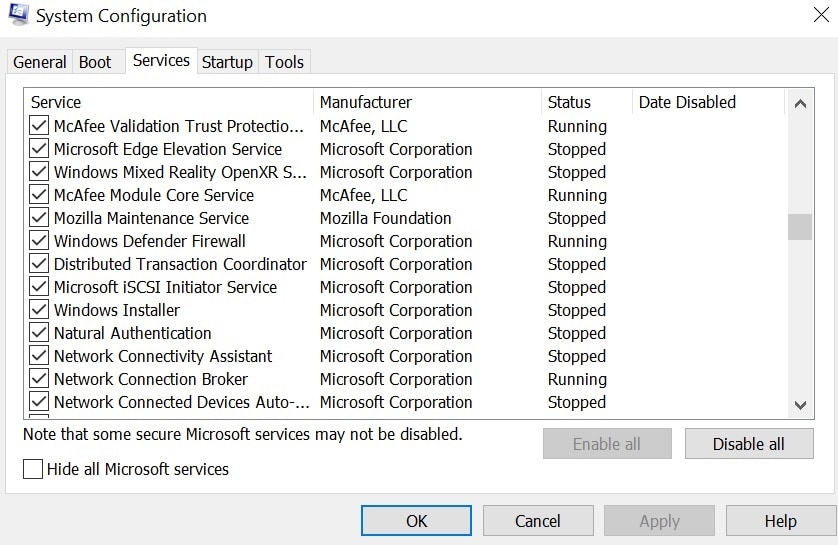
Step 4. Choose Startup> Task Manager
Step 5. In new windows, open Startup again and then Disable all items
Step 6. Restart the computer
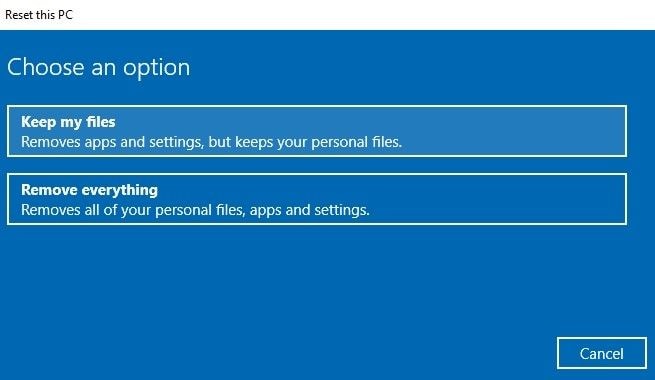
Method 8. Restore system to a previous state
Try taking your device back to its previous state with the Restore tool. You can only use this tool if the creation of a restore point was enabled before the stop code started.
Step 1. To use the Restore tool, open Settings> Update and Security>Recovery>Reset this PC> Get started>Keep Files.
Step 2. From this point, follow the instructions on the screen to restore the system to the original state.
Method 9. Update Computer BIOS
Finally, you can update the computer BIOS and see if it works. Different devices have different processes on how to update their BIOS, so you will need to follow the instructions unique to your device to get this done.
Method 10. Restart Your Computer in Safe Mode
There are times when such an error can cause multiple issues in your laptop or PC. So, you need to restart your computer in order to fix all those issues. Whenever you restart your computer, you will get the same problem every time. Therefore, in that case, you can consider restarting your computer in Safe Mode.
Restarting your computer in Safe Mode is a quick way of turning on your computer, which may prevent you from getting the same error while starting up your computer. So, to restart your computer in Safe Mode, you need to follow the below-mentioned steps, which are as follows:
Step 1. Restart your computer
Step 2. Press the Shift+F8 key before Windows 10 starts loading so that you can start it in recovery mode. You can now boot your PC into Safe Mode.
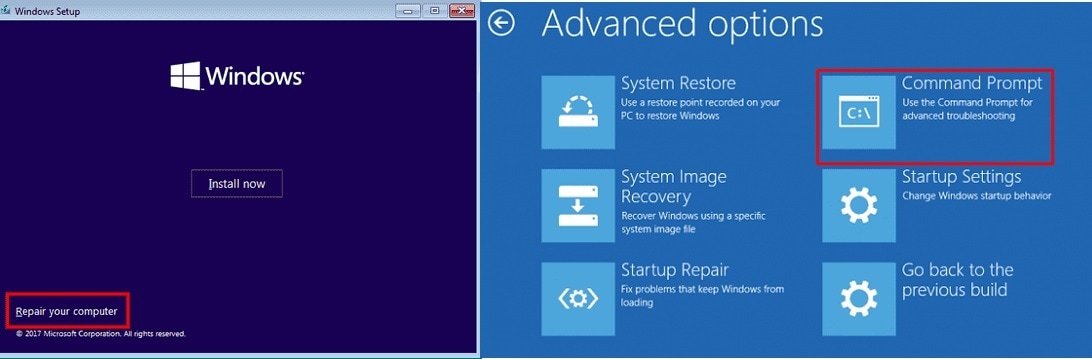
Step 3. Now, go to Advanced Boot Options, and here, you need to set the boot mode as Safe Mode to open your computer. Apart from this method, there is another way to enter Safe Mode on your computer. For this, you need to:
Step 1. Use an installation disc or restart your computer multiple times to boot to WinRE.
Step 2. Now, go to Troubleshoot > Advanced Options > Startup Settings and click on Restart.
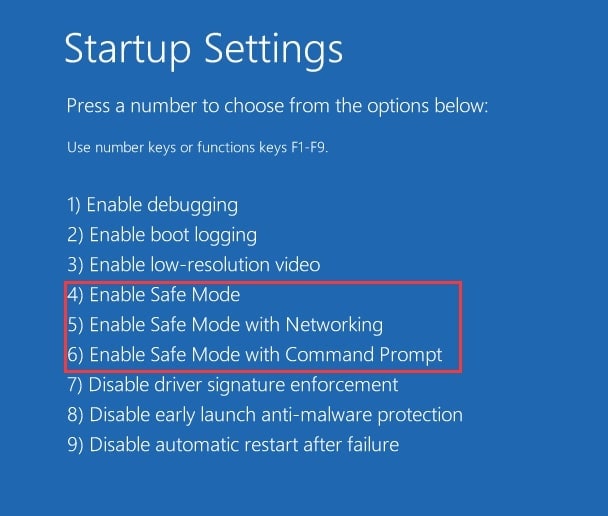
Step 3. Here, press the key as shown in the picture, and this will enable the Safe Mode in your computer.
That’s all! You can now check if the error is fixed or not. If the error still exists, then you can try fixing it by switching to the following method.
Method 11. Check Your Disk for Errors
Sometimes the error in your disk can cause the Critical Process Died error in your computer. So, if this is the real reason behind the issue, then you need to check your disk for errors immediately so that the issue can be resolved within no time.
For checking your disk for errors, you need to:
Step 1. Start Command Prompt as an administrator, type the chkdsk C: /f command and hit the Enter button. Here, replace the letter C with the letter of your hard drive partition.
Step 2. For a quick reminder, if you don’t use the /f parameter, the chkdsk will display a message that reads like- the file needs to be fixed, but it does not fix any errors. The chkdsk D: /f command will detect and repair all the logical issues and errors that affect your drive.
- In order to repair the physical issue, you must run the /r parameter also.
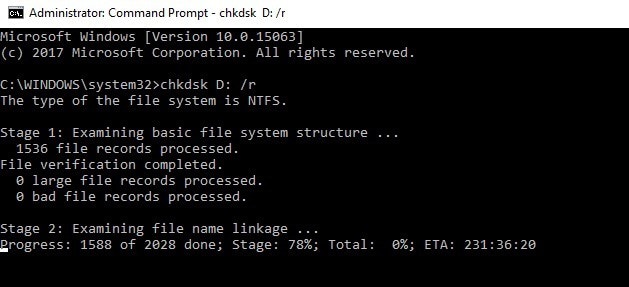
By running a chkdsk scan from Command Prompt, you can quickly fix the Critical Process Died error in Windows 10.
Recover Lost Data after Fixing the System Error with Recoverit:
Once we have fixed Windows 10 BSOD memory management error, we need to make sure that the files inside the system are intact. However, users often end up losing files while fixing such errors. But no more worries as Recoverit Data Recovery software is here to rescue your files. It is the ultimate solution for all kinds of data loss scenarios. Whether it is the lost partitions or memory management errors, Recoverit supports data retrieval from worst situations like system crash.
Conclusion:
Tracing the exact cause of a Critical Process Died BSOD Error is almost impossible but with any of these solutions provided, we are sure that at least one of them will fix the error and get your system running again.
Also Read
Partition Recovery
- Partition Management
- Partition hard drive
- Partition manager
- USB flash drive to NTFS
- remove GPT partition
- Partition SD card on Android
- Recover GPT partitions
- Delete partition in Windows
- Solve Partition Problems
- Partition Tips


David Darlington
staff Editor