Partition Recovery
Perform Partition Data Recovery With High Success Rate
- √ Supports exFAT, FAT16, FAT32, NTFS, ReFS, HFS+, Encrypted HFS, HFSX, APFS,
BTRFS, XFS, BFS, EXT4 partition - √ Capable of recovering data regardless of the causes of your partition data loss
- √ Retrieves partition data with zero technical knowledge
Partition Data Loss Causes
How to Recover Lost Partition With Recoverit
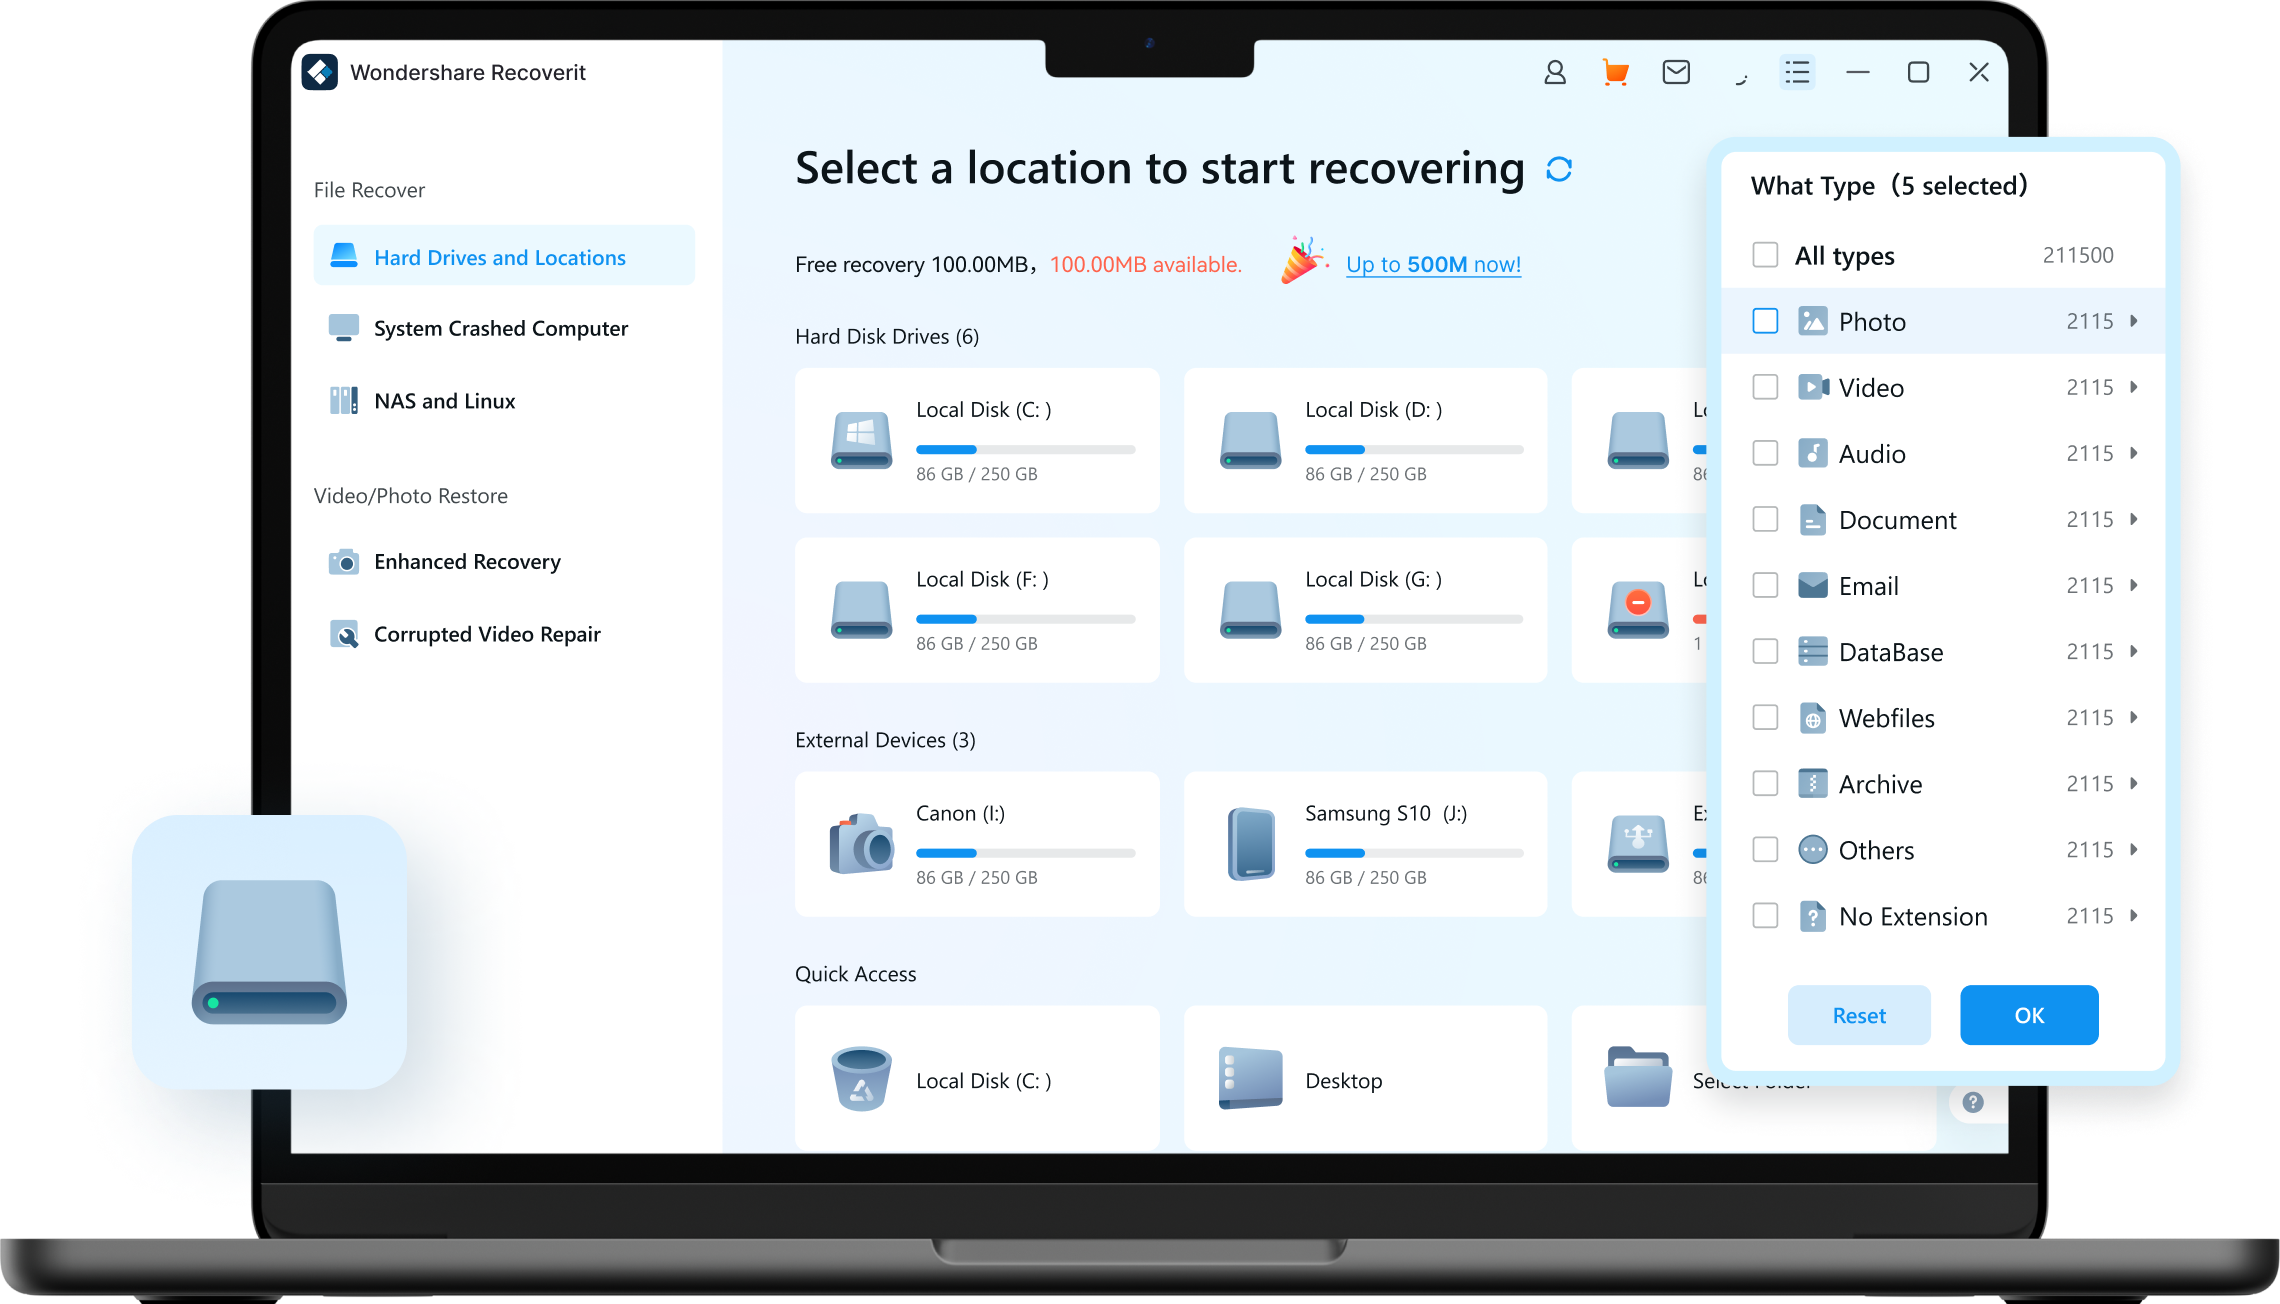
Performing a partition file recovery with Wondershare Recoverit is a simple process that requires zero technical knowledge. You just need to follow the steps below. Before that, make sure that you have downloaded and installed this app on your computer.
Tech Specs of Wondershare Recoverit
-
Supported OS:
Windows 11/10/8.1/8/7/Vista
Windows Server 2003-2022
macOS 10.10 or later -
Supported File Systems:
exFAT, FAT16, FAT32, NTFS, ReFS, HFS & HFS+, APFS, RAID, JFS, BTRFS, XFS, BFS, EXT4, and any RAW disk -
Hard Disk Space:
56MB minimum space for installing
Recoverit Can Retrieve Virtually All Files Types in Partition


Recoverit Can Recover Deleted Partition From Various Storage Devices
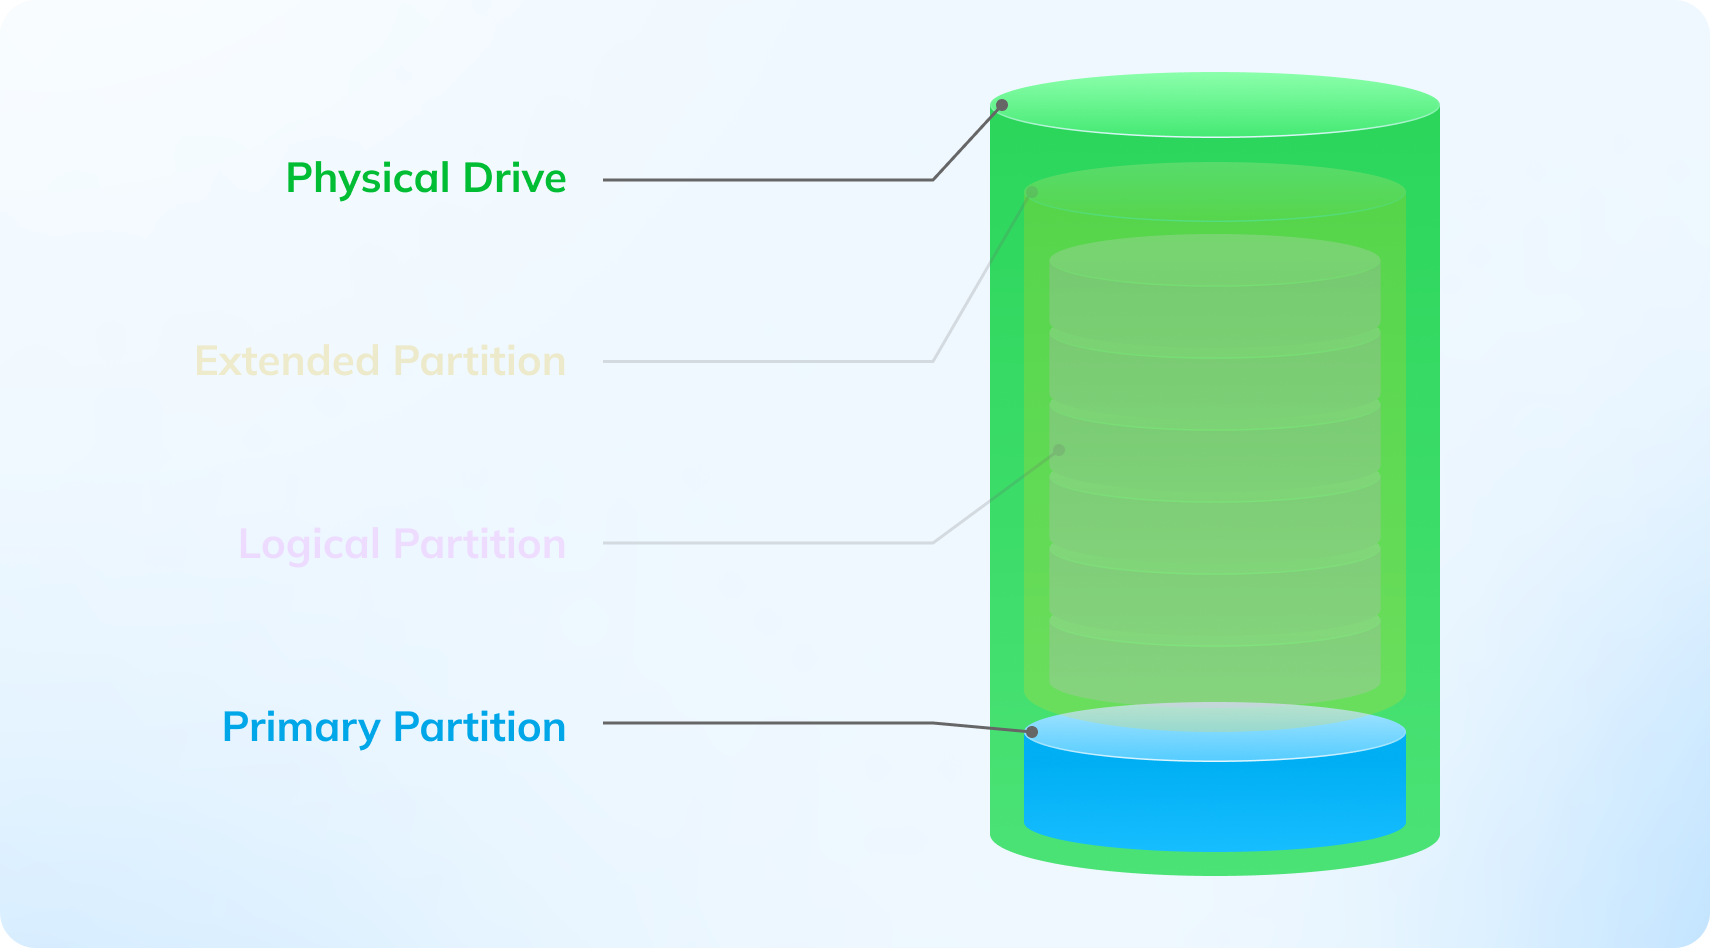
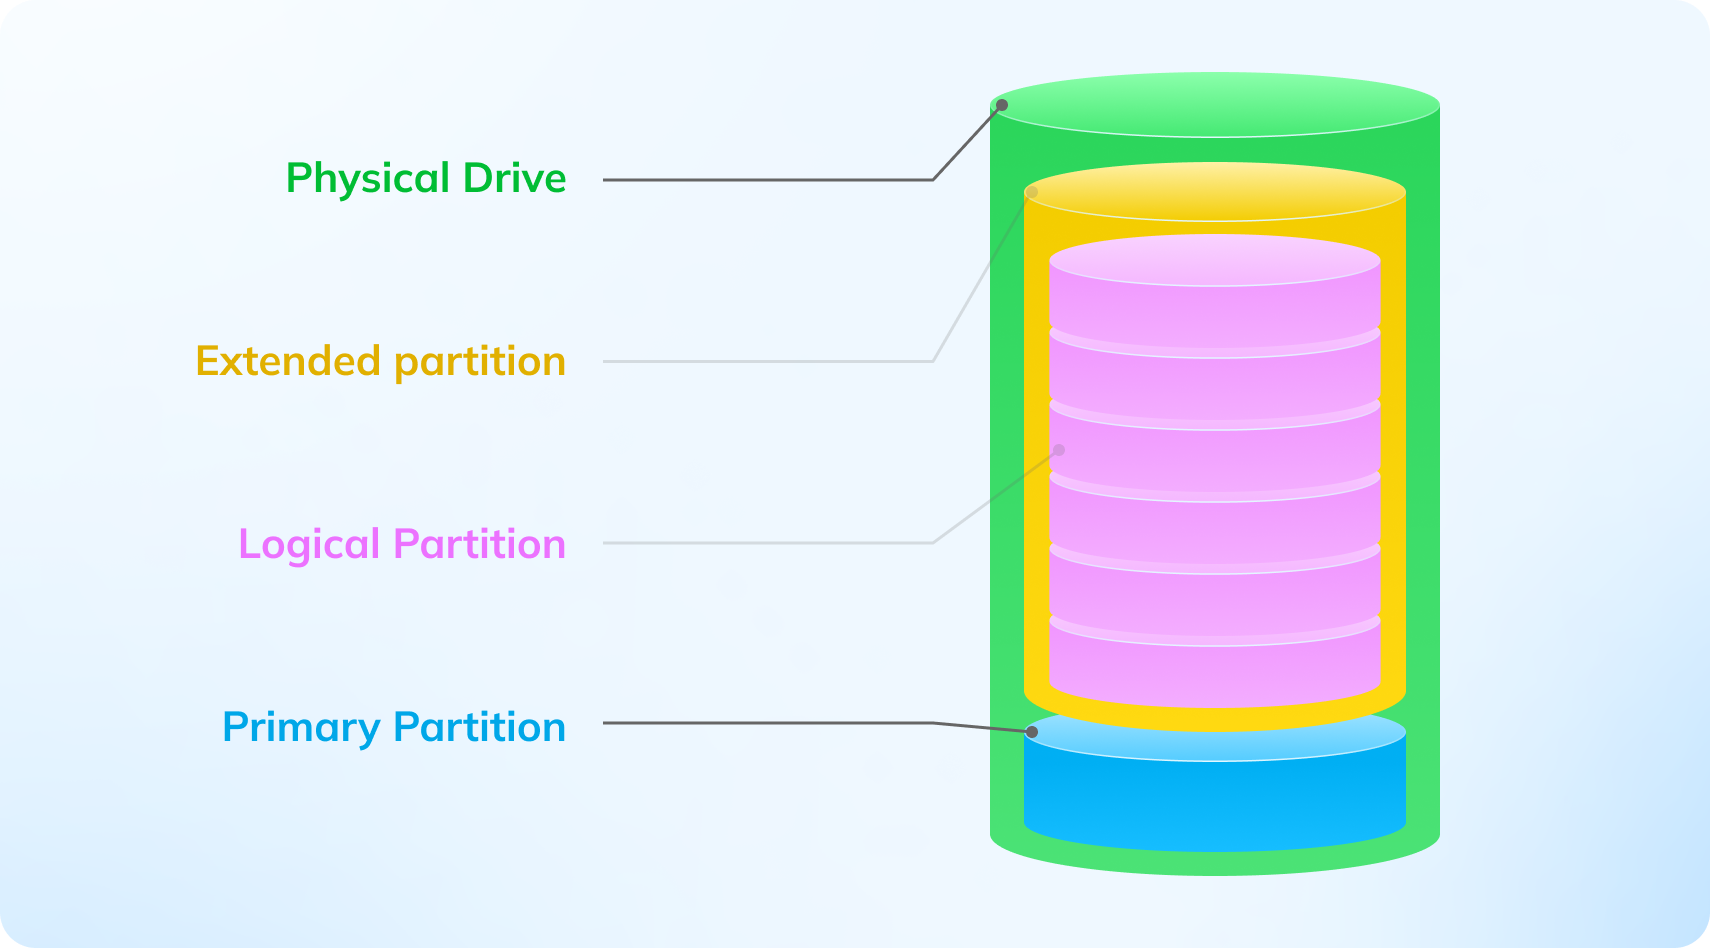
Recoverit Supports Main Partition Types

A Comparison Table: Different Partition Recovery Software

Wondershare Recoverit
|
|
|
|
|
|
|---|---|---|---|---|---|
| Supported OS | |||||
| Supported file systems | exFAT, FAT16, FAT32, NTFS, ReFS, HFS+, Encrypted HFS, HFSX, APFS, BTRFS, XFS, BFS, EXT4 | exFAT, FAT16, FAT32, NTFS, HFS+, APFS, EXT2/3/4 | FAT16/32, NTFS, NTFS, Ext2/3 | exFAT, FAT16, FAT32, NTFS, EXT2/3/4 | FAT12, FAT16, FAT32, exFAT, NTFS, HFS, HFS+, HFSX, JFS, BTRFS, XFS, EXT2/3/4 |
| Supported File Types | 1000+ | 400+ | / | 50+ | 100+ |
| Partition recovery | |||||
| Quick and deep scan | |||||
| File Preview | Limited support | ||||
| Resume scanning process |
|||||
| Decument / PH / oto / video / repair |
|||||
| Ease of use | |||||
| Pricing plans | Starts at $59.99 | $89 | Starts at $49.99 | Starts at $24.95 | Free and open source |
User Reviews/Comments/Story
How to Recover Lost Partition Without Software
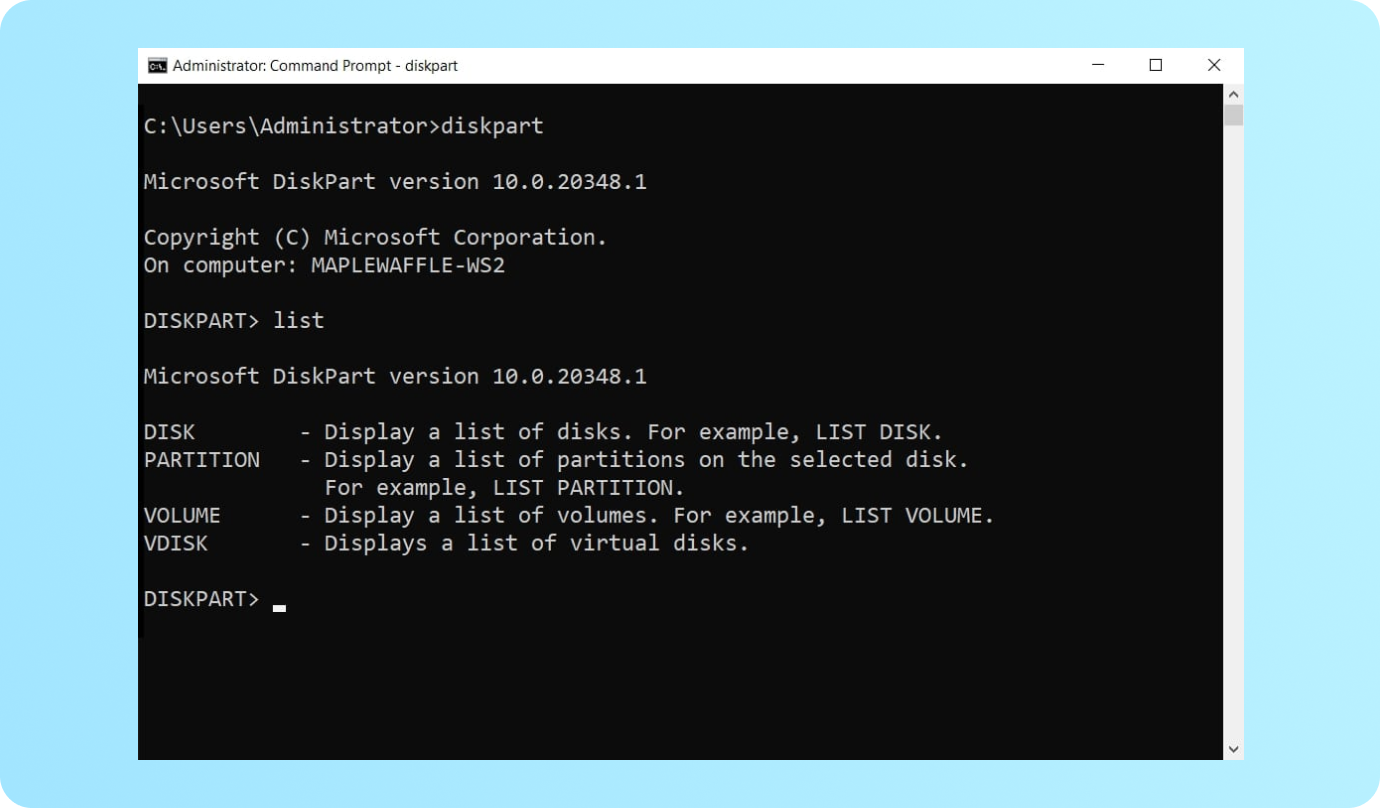
Partition
2. Select Run as administrator and open Command Prompt.
3. Type in diskpart and press Enter.
4. Type in list disk and press Enter.
5. Type in select disk * and press Enter. (* refers to your hard disk drive number).
6. Type in list volume and press Enter.
7. Type in select volume * and press Enter (* refers to the number of your lost
partition).
8. Type in assign letter * and press Enter (* refers to the drive letter).
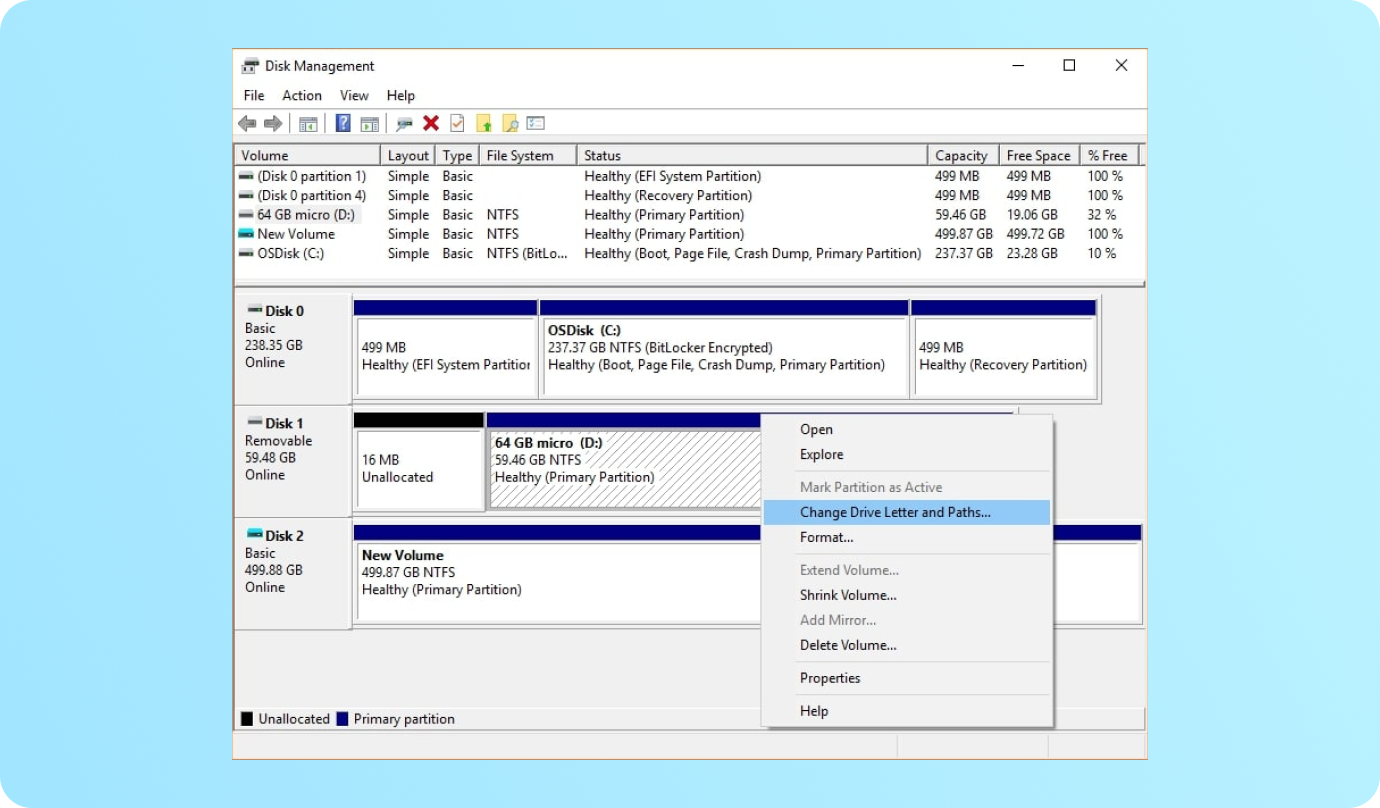
Management
2. Find the partition with a missing letter and right-click on it.
3. Select the Change Drive Letter and Paths option.
4. Click Add and select a new drive letter. Then, click OK.
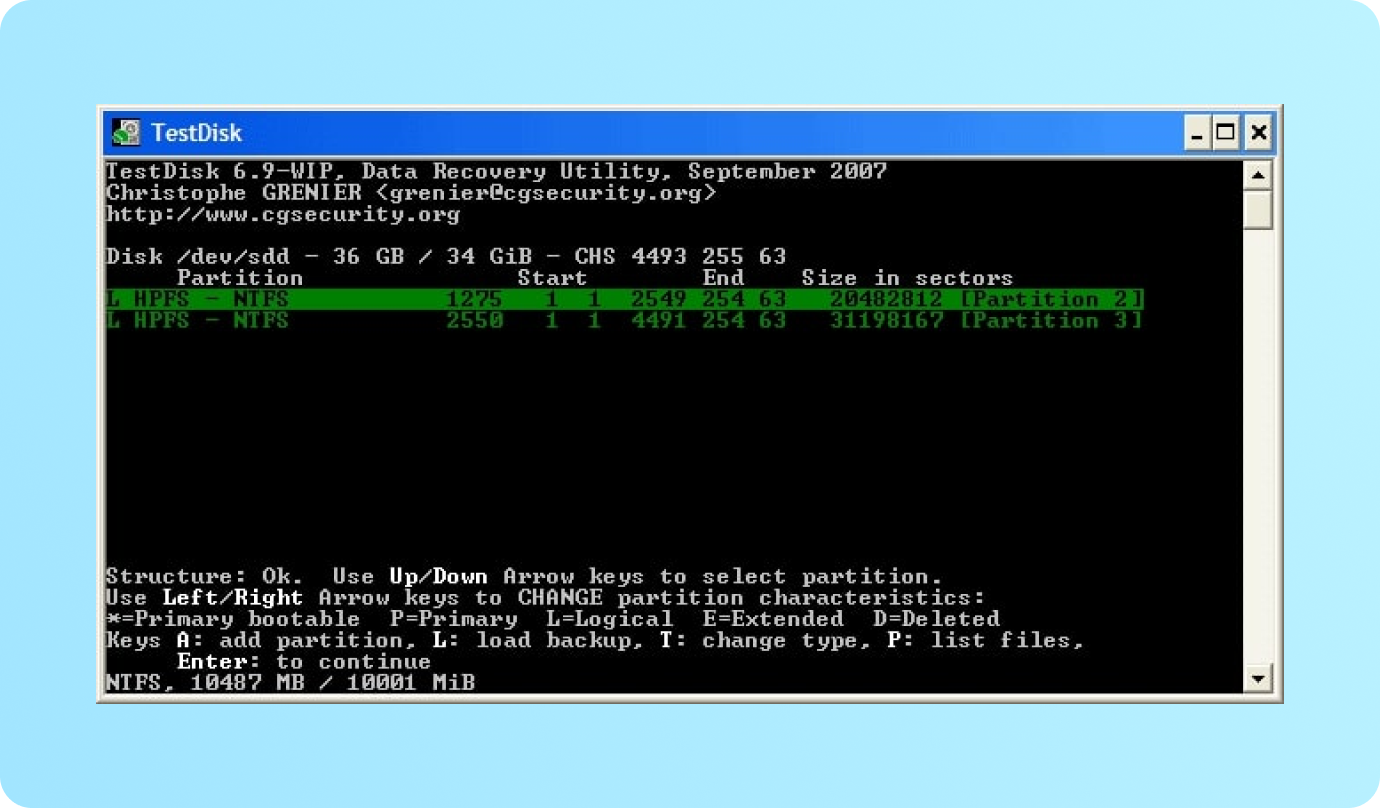
TestDisk
2. Press Enter to create a new log file.
3. Select your drive using the Up and Down keys and press Enter.
4. Select your partition table type and press Enter.
5. Hit Enter once more to start analyzing the current partition structure. Select your lost partition and press Enter.
Last Resort: Professional Partition Recovery Service
a lost partition yourself), you should contact a professional recovery service.

Bonus: How to Prevent Partition Data Loss
Despite our best intentions, no storage device is immune to data loss. That still doesn’t mean we shouldn’t do our best to prevent data loss with proper care and responsible user practices. Prevention is the best measure against irreversible data loss. We’ve compiled a list of tips and tricks to help you take good care of data.
-
Tip 1: Perform Regular Backups
You should always have a backup copy of your valuable data if something happens to the original files. Today, you have a plethora of solutions that allow you to manage, schedule, and automate backups in a safe and user-friendly way.
-
Tip 2: Think Twice Before You Click
Caution is the best cure against accidental data loss. Whether you’re inexperienced or simply in a rush, take a moment to think twice before deleting or formatting a partition. It might contain files or critical applications that you cannot afford to lose.
-
Tip 3: Carefully Partition Your Disk
Many users don’t have the technical skills and experience needed for safe disk partitioning. If you plan on partitioning your disk regardless, we recommend you watch a tutorial online or use a disk partitioning tool for beginners.
-
Tip 4: Keep Virus Attacks at Bay
A single virus-infected file can destroy an entire partition or render it inaccessible. The good news is that an updated anti-virus can keep most infections at bay. In addition to this, you should be very careful when opening email attachments, downloading files from unknown sources, and clicking on suspicious links.
-
Tip 5: Handle Devices with Care
It is often impossible (and regularly costly) to save data from a physically damaged device. Although mistakes like these can happen to anyone, you should always try to keep your device safe from high temperatures, spillage accidents, and other preventable disasters.
-
Tip 6: Safely Remove External Drives
It may seem obvious to safely remove external drives and storage devices when you’re finished using them, but many people don’t know how to do this properly. To prevent device damage and partition loss, remember to click “Safely Remove Hardware and Eject Media” before removing the drive.
FAQ
-
How do I recover a disk partition?You can recover a deleted or missing disk partition using Wondershare Recoverit. Follow these steps:
1. Download the app from the official website and install it on your computer.
2. Launch it and choose the disk or location you want to scan for your lost partition.
3. Recoverit will initiate a comprehensive scan that you can pause or stop any time you want.
4. Use filters to browse recoverable files from the lost partition and preview them before recovery.
5. Select the files you want to keep and click the Recover button.
6. Choose a safe location to store recovered files.
7. Wait for the recovery process to finish.
-
How can I recover my lost partition for free?You can recover files from a lost partition for free with the free version of Wondershare Recoverit:
1. Download Recoverit Partition Recovery Free and install it on your computer.
2. Launch the program and choose a location to start recovery.
3. Search for lost files using filters or by typing in a keyword.
4. Preview and select the partition files that you want to restore.
5. Click the Recover button and choose a safe location to save them.
-
How to recover a deleted partition in Windows 10 for free?You can restore a deleted partition in Windows 10 for free using several methods: by changing the drive letter in Disk Management, executing the DiskPart command, using TestDisk, or using the free version of Wondershare Recoverit Partition Recovery.
However, you should know that the first method is not always successful, while DiskPart and TestDisk require experience with command-line interfaces. The easiest way to do this is with a disk partition recovery software like Recoverit. -
How can I recover data from a RAW partition for free?A partition may become RAW when its file system becomes unreadable to the operating system due to corruption or damage. In many cases, RAW partition recovery is possible with capable recovery software. You can use the free version of Wondershare Recoverit to perform RAW partition recovery for free.
-
How to recover a formatted partition for free?You can recover a formatted partition on your storage device for free using an open-source solution like TestDisk or with free disk partition recovery software. Unfortunately, successful results can not be guaranteed when you use free partition data recovery software. Alternatively, you can use a free version of more advanced disk partition recovery software like Wondershare Recoverit.
-
Is there a free partition recovery tool?There are several free recovery software solutions for partition recovery. Active Partition Recovery, MiniTool Partition Recovery, and Hetman Partition Recovery are widely considered the best freeware partition recovery software, but these solutions usually come with certain limitations.
If a free tool fails to recover your data or meet your expectations in another way, you should opt for a free version of professional disk partition recovery software such as Wondershare Recoverit. -
What is the difference between data recovery and partition recovery?Data recovery and partition recovery are two related but distinct processes. We use data recovery to scan hard disks, SSDs, memory cards, and other storage devices for files that have been deleted or lost due to corruption. In this case, we are looking for individual files.
In contrast, partition recovery is used when an entire partition with all its contents becomes lost or inaccessible. Rather than individual files, partition recovery helps locate and restore entire disk partitions. -
Can data be recovered after partitioning?Yes, it is still possible to recover data after partitioning a storage device. Although it may appear lost and you can not access it, partition data is still on your device. In this case, a professional disk partitioning recovery tool can help you find and restore it safely. You should stop using your device to prevent lost partition files from being overwritten by new data.
-
How do I fix the damaged partition?There are several ways to approach a damaged partition, including built-in repair tools and utilities such as CHKDSK in Windows computers, third-party software, and professional repair services.
Please remember that fixing a damaged partition requires technical skill and experience, and any failed attempt may result in further loss. Unless you are confident in your abilities to perform a partition repair, you should leave this to a professional software or service.
Quick Tips
