How to Transfer Video from iPhone to PC Without Corrupting Videos
With the popularity of watching videos on iPhones, it’s quite easy to run out of storage space. This is the reason why you need a computer not only to free up some space but also to back up your precious video files.
I have a large video file for my project and want to transfer it to my computer. But, how can I transfer this video file from PC to iPhone without iTunes? Please help!
Most people face this challenge, thankfully, there are multiple ways of doing it. This post will show you how to transfer a video from iPhone to PC without corrupting videos.
Part 1: Tips Before Video Transfer from iPhone to PC
The iPhone is probably one of the leading smartphones around. Most people love this phone because it allows you to store and play high-quality videos. But, the only drawback is that these videos can use up a lot of space.
1. Benefits of Transferring Videos from iPhone to PC
There is no doubt that you can’t keep all the large video files on your iPhone. Besides this, there are various benefits of transferring videos from iPhone to PC as listed below:
- With the limited memory in your iPhone, transferring videos to your PC can free up space. This is a better option than deleting some of your favorite video files to create space.
- Watching experience is greatly affected when you view videos on your iPhone because of its small screen. Therefore, transferring the videos to your PC can improve the watching experience.
- It’s easier to watch videos with friends or family members on the computer because of its large screen. Hence, it improves the sharing experience with other people.
- Transferring video files from your iPhone to PC also helps you to back up the video files. This will prevent you from losing your video files in case of something going wrong with your iPhone, like physical damage.
2: Important Tips for Video Transfer
- Before you start transferring the video files, make sure that you select the Trust This Computer prompt on your iPhone. This will help you to transfer the video files smoothly.
- If your phone has an enabled iCloud, you can’t download and transfer video files. This is because the video files are not on your phone. Therefore, you should use the iCloud desktop app to import your videos to the PC.
- While transferring video files from your phone, don’t eject the Memory Card to prevent video corruption. You can only remove it once you complete transferring the video files.
- Don’t allow your phone or computer to shut down while transferring the video files. You can only shut it down when your video files have all been transferred.
Part 2: Top 4 Free Ways to Transfer Videos from iPhone to PC
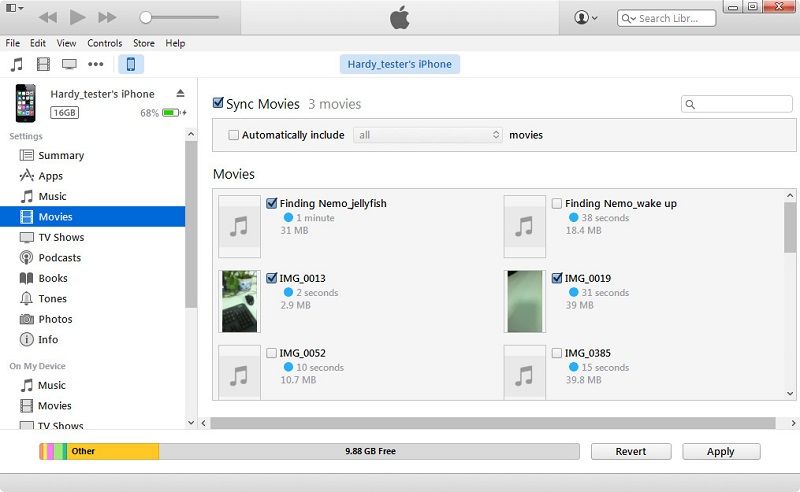
If you intend to transfer video from iPhone to PC, there are various free methods you can use. You should note that you have two types of videos stored on your iPhone, one is recorded by your iPhone and the other is imported by iTunes. If you have run out of space, you can transfer your videos to your computer to create more storage space. You can go to the below methods and decide which one to use to transfer your video files.
Solution 1: Use Photos App to Transfer iPhone Videos to PC
Windows 10 has an App known as Photos, which you can use to import video files and photos from your iPhone to your PC. You may be wondering if the Photos App found on PC and the Photos App on App are the same thing. The truth is that they are different apps. So, to transfer video files from your iPhone to the PC, take the following steps:
- Firstly, connect the iPhone to your PC using a USB cable.
- Then, you need to unlock your iPhone by entering your password. If you’re requested, tap on the Trust to continue importing.
- From the Start menu, run the Photos App. You can then select the Import > From a USB device. The Photos app will then automatically search for videos on your iPhone.
- You can now tap the Import Settings. Here, you can decide to change the transfer destination by selecting the videos based on the date/month/year. You can also choose to delete some video files from your iPhone after transferring them to the PC. Once you make a decision, confirm your settings, and tap Done.
- Choose the video files you’d like to import and set the transfer destination. Then you can click the Import Select to start transferring the videos.
Solution 2: Transfer iPhone Videos to PC Using AutoPlay
Windows 7 features AutoPlay which allows you to transfer video files and pictures from your iPhone to PC. Take the steps below to import videos from your iPhone to your computer.
- Connect your iPhone to the computer. When you do this, the AutoPlay is displayed automatically.
- Click on the Import pictures and videos button in the AutoPlay window.
- In the Import Settings, select a folder or you can create a new folder to save the video files you want to transfer.
- Choose the video files you want to transfer to your PC. Then you can click Import to start transferring video files from the iPhone to your computer.
Solution 3: Use File Explorer to Transfer Videos from Your iPhone to the PC
Windows Explorer found in Windows 7 is now known as the File Explorer in Windows 8 and Windows 10. With File Explorer, you can view and transfer video files from your iPhone to your PC. All you have to do is to take the following steps:
- Use a USB cable to connect your iPhone to the PC.
- If you’re asked for a password, go ahead and type in your passcode to unlock the iPhone. Then tap on the Trust on the iPhone to confirm that you trust the PC.
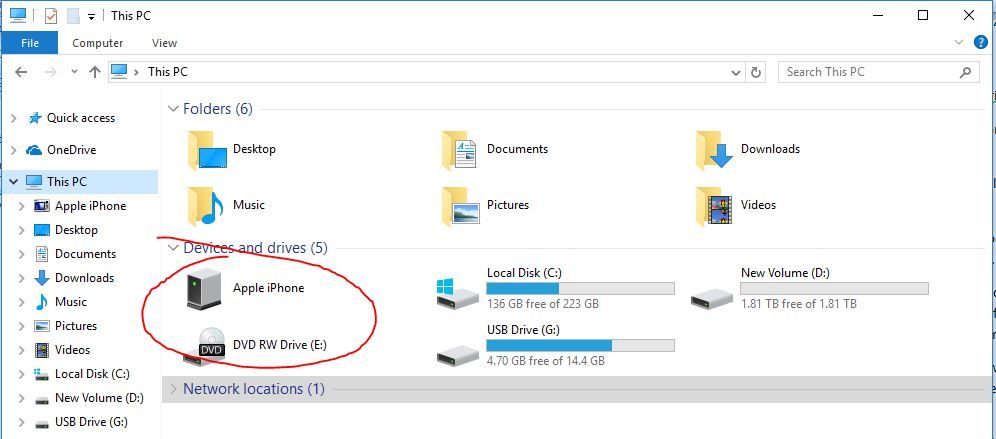
- Go to open This PC to identify your iPhone. You can right-click your iPhone’s name and then select the Import Pictures and Videos.
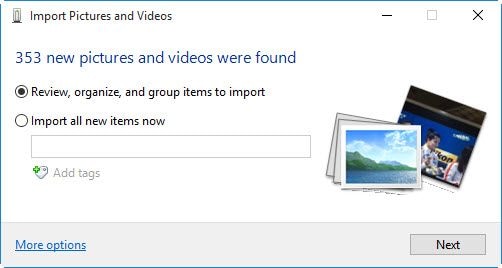
- Select the Review, Organize, and Group Items to Import. You can also choose the Import All New Items Now. You can then tap on the Next icon to continue transferring the video files.
- Choose the videos you want to copy to your PC and click the Import button to begin transferring the selected video files.
Alternatively, you can transfer the videos by doing the following:
Go to this: This PC > [your iPhone name] > Internal Storage > DCIM > 100APPLE and transfer the video files from your iPhone to the PC.
Solution 4: Use Dropbox to Transfer Video Files from Your iPhone to PC
As you can see, all the above solutions involve transferring videos from your iPhone to PC via a USB cable. However, with Dropbox, you don’t need any wired connection because you can do it over the air as it’s a cloud service. The Dropbox solution is possibly the easiest method you can utilize to import videos from iPhone to PC. Here are the steps to transfer video files from iPhone to PC:
- First of all, download and install the Dropbox app on your iPhone.

- Then press the “+” button to upload your videos. You can also upload folders in the same way.
- Next, your iPhone will open a browser where you can choose the videos you want to transfer to the PC and go on importing them.
When you complete transferring the video files from your iPhone to the PC, you can use the DropBox app on your computer to access your videos.
Part 3: How to Prevent Video Corruption During Video Transfer
Video corruption during video transfer to your PC usually happens due to several reasons. These could be incomplete download, iTunes malfunction, use of unreliable third-party tools, and many others.
1. Prevent Video Corruption on iPhone
Although you can’t run away from video corruption during video transfer, there are various ways you can prevent this from happening. Below are some ways you can avoid video corruption during video transfer:
- Make sure there is no power shut down while recording a video. Therefore, if your iPhone is indicating a battery low message, try to power it up. This is because if it suddenly switches off, then the video files will get corrupted.
- Protect your iPhone video files from a virus attack. You can do it by keeping your phone up-to-date with the latest updates. Besides, don’t download apps from unreliable sources.
- Your Android device can also malfunction due to inexplicable reasons. In anticipation of such cases, make sure to back your video files and other data. This will prevent corrupting your video files.
- Don’t download video files on slow internet. This can lead to improper downloads, causing video corruption on your iPhone.
2: Prevent Video Corruption When Moving to PC
Video corruption when moving videos to a PC can also happen in many ways. Below are ways you can prevent this from happening:
- Avoid abrupt disconnection during video transferring from your iPhone to the PC. If you’re using a USB cord, ensure that it’s securely connected to both of your devices.
- Keep the Windows software updated so that the transferred video files don’t get corrupted.
- Don’t interrupt the video transfer process until it’s complete. For example, don’t switch off your iPhone while transferring the video files.
- If the videos you are transferring from iPhone to PC are on the SD card, then don’t remove the card while the video transfer is in progress. Removing it can cause video corruption.
Part 4. How to Repair Corrupted iPhone Videos After Transfer
If you see that you have corrupted iPhone videos after transferring them to your PC, there is no need to worry. Wondershare Repairit Video Repair is the easiest solution to restore the corrupted videos on your Windows and Mac. This tool stands out because it supports various video formats, like MOV, MP4, M2TS, MKV, MTS, 3GP, AVI, and FLV.
Here are more features and functions of Wondershare Repairit:
- It features two video repair options, which are the quick repair mode and the advance repair mode.
- The quick repair mode repairs various video error issues while the advance repair mode fixes the severely corrupted videos.
- You can use the advance repair mode which requires a sample video to repair your severely corrupted video files. This sample video is needed for the repair tool to analyze the data and technology before repairing the corrupted video.
- The Wondershare Repairit supports various corruption incidences, like video errors, corruption caused by improper system shutdown, virus attacks, improper download, computer system crash, and many others.
Video Tutorial on How to Fix Damaged or Corrupted Video?
So, why wait? You can repair your corrupted video files using Wondershare by taking the following steps:
Step 1: Add Video Files
First of all, you should download and install the Wondershare Repairit on your Windows or Mac. When you install it, select the Repairing Video which is on the home page.
You can load the corrupted videos you transferred from iPhone to the Drag and Drop Videos Here to continue repairing them.

Step 2: Repair the corrupted video file
You can use the Quick Repair mode to repair various corruption issues.
At this point, the repair tool will scan and restore the corrupted video files. This is a quick process.

Step 3: Preview the recovered video file
The software will let you know when it completes restoring the corrupted video files. Then you can preview the recovered videos before saving them by clicking the OK icon.

However, if you see that the videos are not properly restored, take the next step.
Step 4: Add the sample video
The Advance Repair option will restore the video files that couldn’t be restored by the Quick Repair mode. In other words, these video files are severely corrupted and require the Sample File for the software to repair them.
This sample file is a healthy and working file with the same format and taken from the same device as the severely corrupted video file. Add the Sample File to the Add Sample Video to begin restoring the corrupted file.

After adding the Sample Video, you can press the folder icon, to add and begin the repairing process.
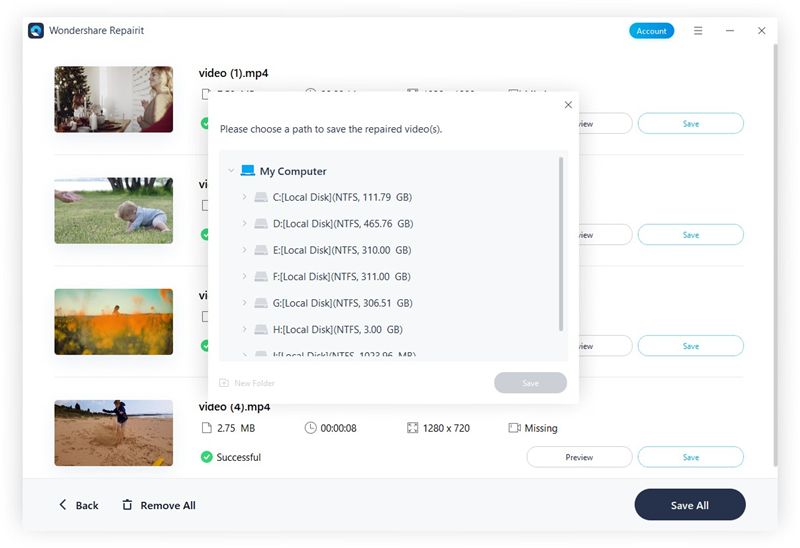
You can save the restored video file to your desired location after previewing it.
Closing Words
Anything can happen while transferring videos from iPhone to Windows and Mac. Video corruption due to improper system shutdown, inappropriate SD card removal, and many others have been the major culprits. However, if the video files are corrupt, software like Wondershare Repairit Video Repair is an effective solution. You can repair corrupted video files on Windows and Mac.
Solve Media File Problems
- Recover & Repair Photos
- Recover & Repair Videos
- Recover & Repair Audio
- Recover & Repair Cameras


Eleanor Reed
staff Editor