
 TL;DR:
To fix a Dell "hard drive not detected" error, you must first determine if the storage drive is completely missing from the BIOS, failing hardware diagnostics, or merely requiring specific Intel RST drivers to appear during Windows Setup.
● Press F12 at startup to run Dell pre-boot diagnostics before altering BIOS settings; if the system returns ePSA Error 2000-0155, reseat the drive following your model's service manual, but halt immediately if physical damage symptoms like clicking or grinding occur.
● If the BIOS detects the drive but Windows Setup shows no available storage, the motherboard likely relies on an Intel VMD controller, which strictly requires you to manually load the exact Dell-provided Intel RST driver via USB at the installation screen.
● When the drive is detected but Windows fails to boot, verify that Windows Boot Manager is prioritized in the UEFI boot sequence, and avoid initializing, formatting, or running CHKDSK to ensure files remain accessible for bootable software like Recoverit.
Ask AI for a summary
 ChatGPT
 Perplexity
 Gemini
 Claude
 Grok
Grok
“I have a dell latitude 3420 notebook and yesterday I switched my old 512GB M2 nvme to a new 1TB M2 Nvme. After cloning the whole plate by image I started working the whole day normally…” - Comfortable_Onion318
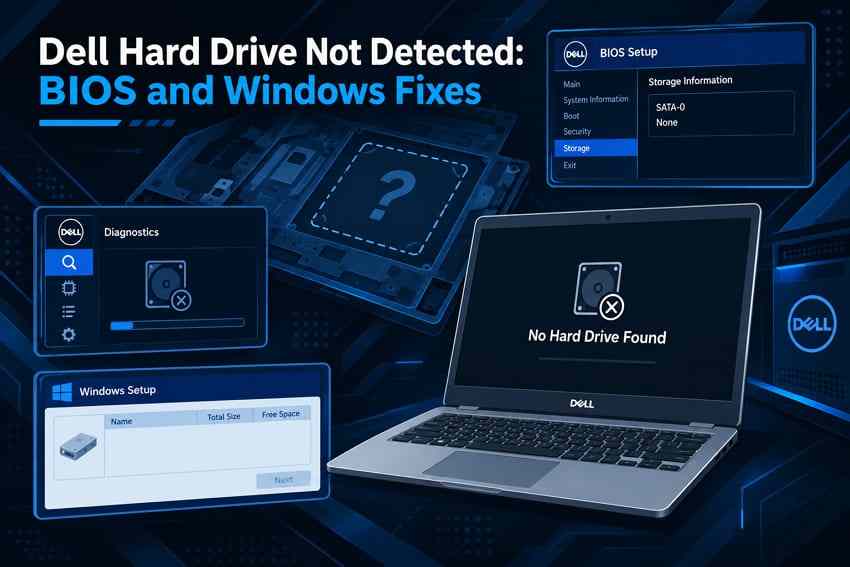
Dell hard drive not detected means your system cannot recognize internal storage. Dell systems may show different messages for the same drive detection problem. These messages do not confirm that the internal HDD or SSD has failed. First, determine whether the drive is missing from BIOS, fails Dell diagnostics, or appears there but is missing only from Windows or Windows Setup.
Loose connections, storage-controller settings, firmware issues, or hardware faults can prevent drive detection. Boot-order problems can cause separate startup errors even when the drive remains visible. Dell diagnostics help identify the problem before hardware or BIOS changes begin. Recoverit helps recover files when the affected drive remains detectable during troubleshooting.
Note: Do not initialize, format, or reinstall Windows before protecting important files from a drive that remains detectable.
In This Article
Part 1. Identify Where Dell Drive Detection Fails
A Dell computer no hard drive detected error can appear across different environments. The table below identifies where detection fails and helps narrow the possible cause:
| Where It Fails | What That Suggests | Data Likely Intact | Continue With |
| BIOS Setup | Connection, SATA mode, or hardware | Depends on the fault | Part 4 |
| Dell Diagnostic | Hardware fault with an error code | Often, if still detectable | Part 5 |
| Windows Setup Only | Possible storage-controller or driver issue | Yes | Part 6 |
| Windows Will Not Boot | Boot-loader, Windows, or storage-access problem | Yes | Part 7 |
Drive Missing in Dell BIOS or UEFI
If the HDD or SSD does not appear in Dell BIOS or UEFI, the issue may involve its connection, storage interface, controller, or hardware. Run Dell pre-boot diagnostics before changing storage settings or replacing the drive.
Drive Detected but Windows Will Not Boot
If BIOS detects the drive but Windows does not start, the problem may involve Windows startup files, boot configuration, or storage access. Treat this as a no-boot issue rather than assuming the Dell hard drive not detected error means drive failure.
No Drives Found During Windows Installation
If BIOS detects the SSD or HDD but Windows Setup shows no available drives, a storage-controller or driver issue may be responsible. Some Dell systems require the correct Intel RST driver for VMD-managed storage before Setup can detect the drive.
Hard Drive Not Installed and Error 2000-0155
Dell identifies ePSA code 2000-0155 as a “Hard Drive - Not Installed” error. This code indicates the expected storage drive is not detected in the laptop. Record the error and validation codes displayed after the Dell diagnostic test completes.
The error does not prove the storage drive itself has failed for good. Dell advises reconnecting the drive, updating the BIOS, and repeating the diagnostic test afterward. If diagnostics return error 2000-0155, use the dedicated Dell “Hard Drive Not Installed” guide for the complete troubleshooting path.
Part 2. Protect Data Before Troubleshooting the Drive
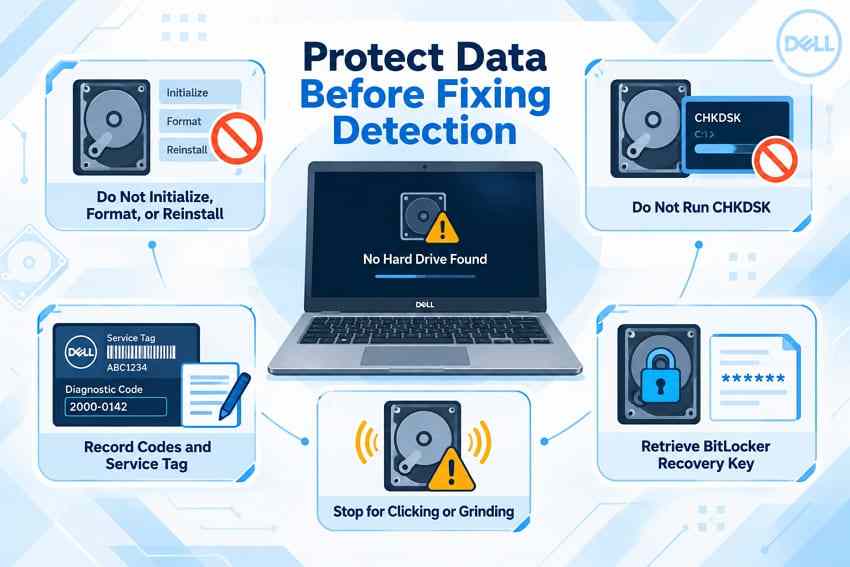
A “No hard drive detected” Dell error can put recoverable files at risk. Protect important data before attempting repairs that could overwrite or remove files.
- Do Not Initialize, Format, or Reinstall Yet: Avoid initialization, formatting, or Windows reinstallation while important files remain on the drive. These actions can modify disk structures or overwrite recoverable data, reducing recovery options.
- Do Not Run CHKDSK on Unstable Storage: CHKDSK can modify filesystem structures while repairing detected logical errors. Avoid repair writes when an unstable drive contains important files that may require data recovery.
- Record Every Code and Your Service Tag: Note the Dell diagnostic error code, validation code, and Service Tag. Keep these details available when checking Dell documentation or contacting support about the storage problem.
- Retrieve Your BitLocker Recovery Key: Hardware or firmware changes can trigger a BitLocker recovery prompt during startup. Save the 48-digit recovery key somewhere separate before changing BIOS, boot, or storage settings.
- Stop for Clicking, Grinding, or Intermittent Detection: Clicking or grinding can indicate mechanical HDD failure, while a burning smell may signal electrical damage. Stop using the drive if detection becomes unstable or physical-failure symptoms appear.
Part 3. Start With Dell’s First-Line Checks
Dell recommends diagnostics first when a Dell hard drive not detected problem appears. This check identifies hardware faults before users change BIOS settings or inspect components.
Check 1. Remove Everything Attached
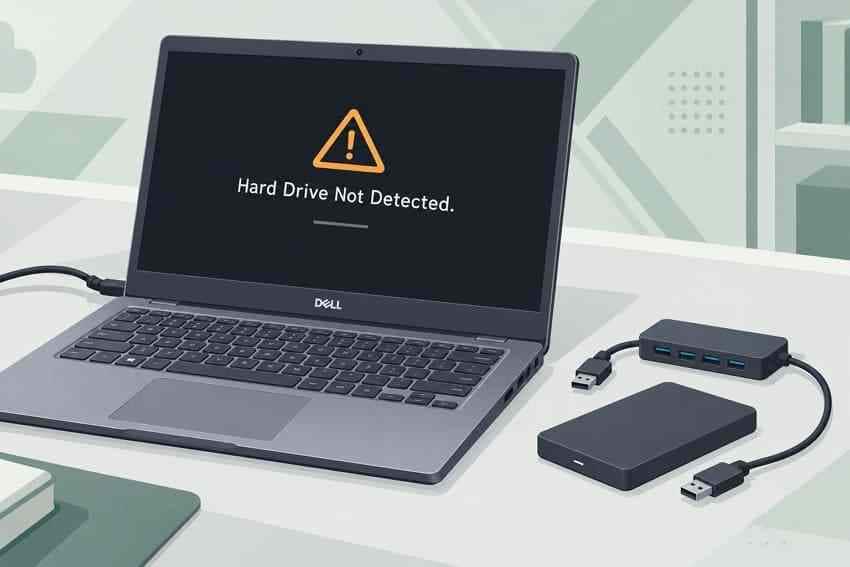
External storage can change boot-device selection or make startup errors harder to isolate. Docks and USB hubs can also make the source of detection problems unclear. Shut down the Dell computer before removing any devices connected to its ports.
Disconnect external drives, docks, hubs, memory cards, and other unnecessary connected USB devices. Keep only the display, keyboard, mouse, and power cable connected for this test. Restart the computer and check whether the hard drive detection error still appears.
Check 2. Perform a Dell Hard Reset
A hard reset can address a Dell hard drive not found error. It drains residual power and can resolve some temporary startup or hardware-detection problems. Here is how to perform this hard reset:
Instructions. Power off the computer, disconnect external devices and AC power, and remove the battery only when Dell documents it as removable or user-serviceable. Hold the “Power” button for 15 to 20 seconds > Reconnect only the adapter > Start the computer.
Check 3. Run the Pre-Boot Diagnostic
Dell pre-boot diagnostics check whether the hard drive has a hardware fault. The test results help determine which troubleshooting action should come next for you. To run this diagnostic, follow these simple steps:
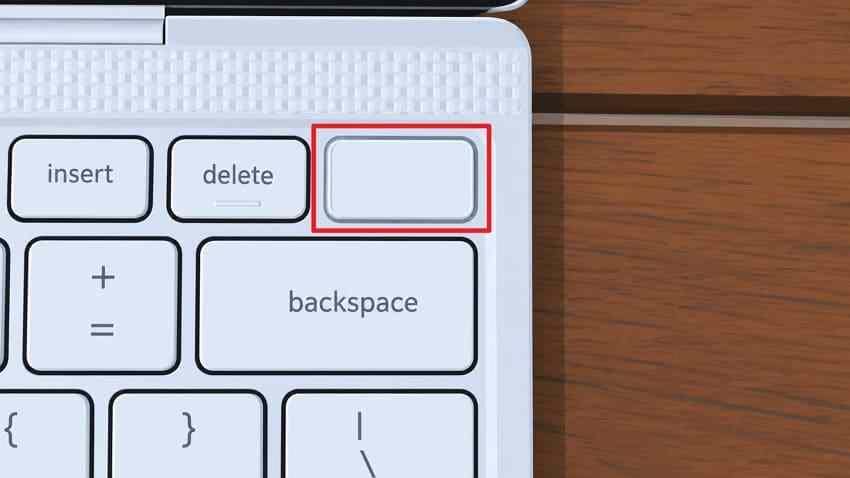
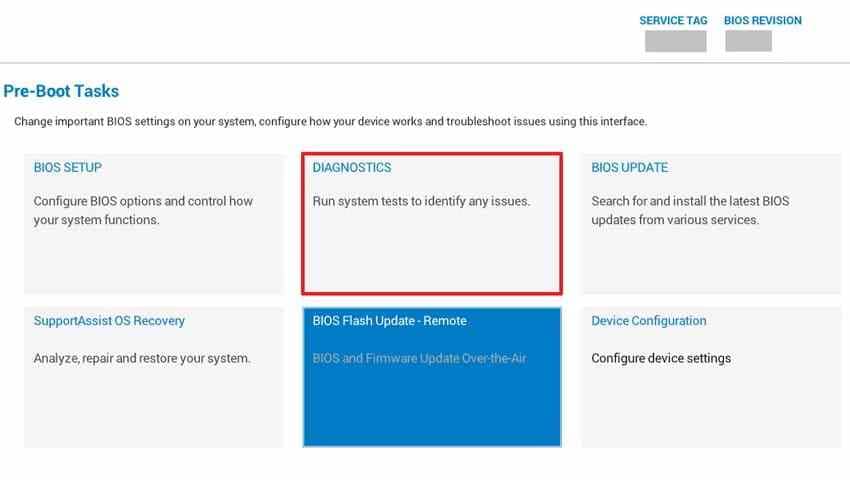
Step 1. Turn on or restart the Dell computer and press “F12” at the Dell logo. In the One-Time Boot Menu, select “Diagnostics > Enter.”
Step 2. Let the “SupportAssist Pre-Boot System Assessment” complete the hardware test, then note any errors and validation codes shown.
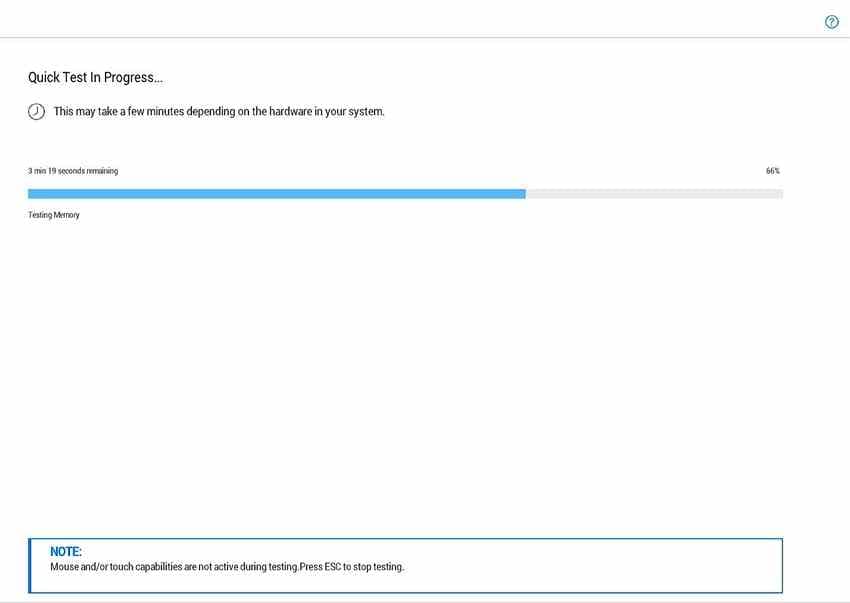
Note: Depending on the Dell model, the tool may appear as SupportAssist Pre-Boot System Assessment, On-board Diagnostics, or ePSA.
Check 4. Branch on the Result
Diagnostic results show which issue may cause the Dell hard disk not found error. A failed storage test strongly suggests a drive, connection, or storage-hardware problem. If diagnostics pass, continue with BIOS, storage-controller, and Windows checks. BIOS detection with Setup non-detection can point to a missing storage driver.
Part 4. Verify Drive Detection in Dell BIOS
If diagnostics pass but the drive remains missing, check its status inside Dell BIOS. BIOS checks can reveal detection, boot order, or storage configuration problems affecting the drive.
Check 1. Confirm the Drive Appears
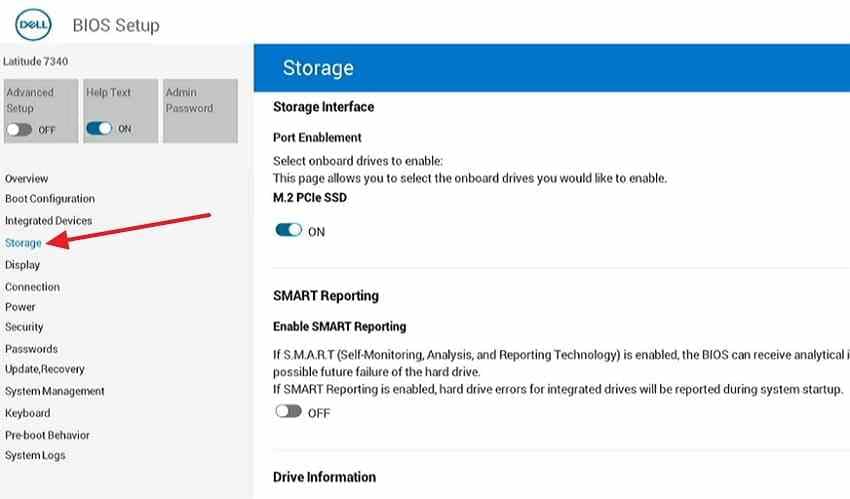
Dell BIOS menus differ across models, making the correct system manual useful during checks. Use your Dell Service Tag to find BIOS guidance for your specific computer model. This guidance helps you locate the storage information needed to confirm drive detection. Here is how to confirm the drive appears:
Instructions. Restart the Dell computer and press “F2” at the Dell logo. Open “Storage” or “System Information” > Confirm the HDD or SSD appears under the drive information.
Check 2. Check Boot Order and Boot Mode
Correct boot settings can prevent a “Dell hard drive not found” startup error. Windows Boot Manager is enabled in the UEFI boot sequence for Windows startup. Follow these instructions to check the boot settings:
Instructions. Access “System Setup > Boot Configuration > Boot Sequence.” Confirm “UEFI” is enabled and “Windows Boot Manager” appears in the boot sequence. Move it higher if needed, then select “Apply Changes > Exit.”
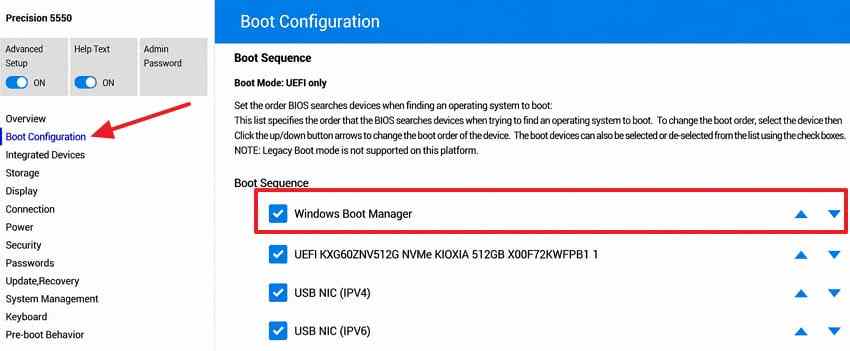
Note: If Windows is already installed in UEFI mode, confirm that Windows Boot Manager appears in the boot sequence.
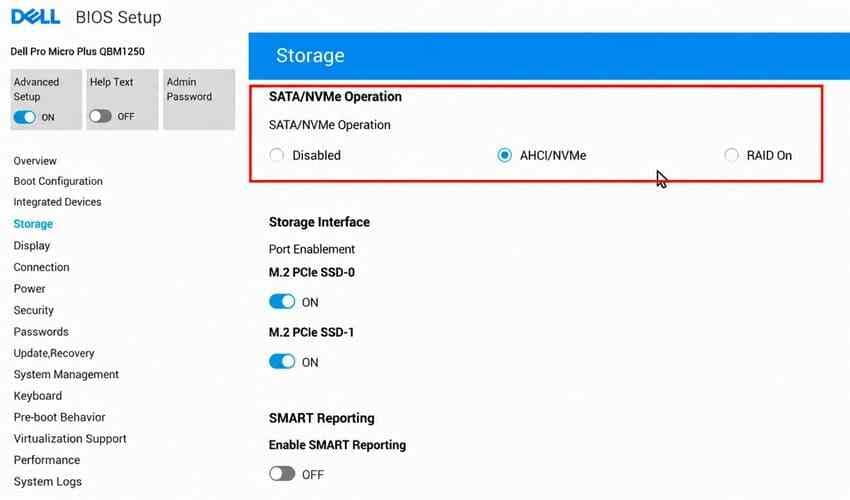
Check 3. Review SATA Operation Carefully
Dell systems may expose settings such as “RAID On,” “AHCI,” or “AHCI/NVMe,” depending on the platform. Changing the SATA mode without checking system requirements can prevent Windows from starting. Keep the existing setting unless your Dell model instructions require a change.
Dell warns that changing storage controller modes can trigger INACCESSIBLE_BOOT_DEVICE errors during Windows startup. Check your model documentation before changing SATA Operation settings.
Part 5. Fix a Missing or Failing Dell Drive
A failed diagnostic with a Dell “No hard drive found” error can indicate a drive, connection, cable, or storage-controller problem. If the drive is user-serviceable, reseating it may restore detection when the connection is loose or poorly seated.
- Follow the Service Manual for Your Model: Use the Dell service manual for your exact computer before opening the chassis. Model-specific instructions help identify user-serviceable components and reduce the risk of damage during disassembly.
- Reseat a User-Serviceable Drive: Shut down the computer, disconnect power and peripherals, and follow Dell’s electrostatic-discharge guidance. Reseat the SATA or M.2 drive only if the service manual identifies it as user-serviceable.
- Test Desktop Cables and Ports: On supported desktops, test another SATA data cable, available power connector, or SATA port to isolate a connection problem. Follow the service manual before moving internal connections.
- Repeat the Diagnostic Once: Run the Dell pre-boot diagnostic again after reseating the drive or checking its connections. Avoid repeated testing if the drive remains unstable or shows signs of physical failure.
- Replace or Arrange Service: If the drive remains undetected or fails diagnostics again, arrange Dell service or replace the drive when hardware failure is confirmed. Stop using drives that click, grind, smell burnt, or appear intermittently if important data remains.
Part 6. Fix a Drive Missing in Windows Setup
A “No hard drive detected” Dell message during Windows Setup does not always mean the SSD or HDD has failed. If BIOS still detects the drive, the problem may involve the storage controller, a missing driver, or the installation environment.
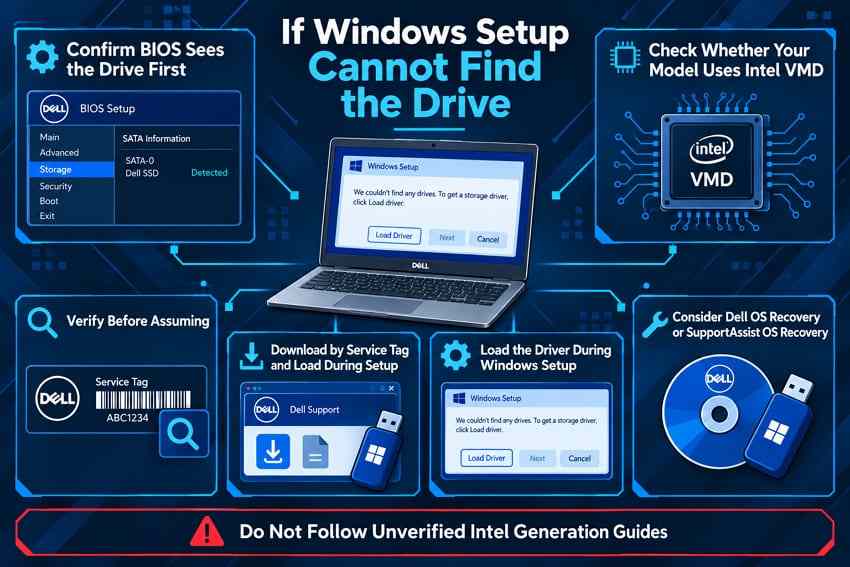
- Confirm BIOS Sees the Drive First: Check whether the internal HDD or SSD appears in Dell BIOS or UEFI. If BIOS detects it, a Windows Setup storage-controller or driver issue becomes more likely.
- Check Whether Your Model Uses Intel VMD: Some Dell systems use Intel Volume Management Device (VMD) to manage NVMe storage. On supported models, Windows Setup may require the correct Intel Rapid Storage Technology (RST) driver to access drives behind that controller.
- Verify Before Assuming: Storage-controller requirements vary by Dell model, processor generation, and BIOS configuration. Use the Service Tag to confirm whether your system requires Intel VMD/RST storage drivers.
- Download by Service Tag and Load During Setup: Get the Dell-provided storage driver for the exact model. Extract the package to a USB drive before starting Windows installation.
- Load the Driver During Windows Setup: At the drive-selection screen, choose “Load driver,” browse to the extracted Intel RST/VMD driver folder, and load the matching storage-controller driver.
- Consider Dell OS Recovery or SupportAssist OS Recovery: Supported Dell recovery tools can provide model-specific recovery media and required storage drivers. Protect important data before using recovery or reinstall options that may remove files.
- Do Not Follow Unverified Intel Generation Guides: Avoid applying an Intel 11th–14th generation VMD/RST procedure unless your Dell model, processor platform, and storage-controller configuration match that guidance.
Part 7. Fix Windows When the Drive Is Detected
Drive detection and Windows startup are separate stages that can fail for different reasons. If BIOS detects the drive and diagnostics pass, focus on Windows startup rather than treating the disk as physically absent.
At this point, focus on Windows startup instead of replacing the detected drive. Protect important data before using Windows recovery tools to repair startup issues first.
Repair the Boot Configuration
Startup Repair checks Windows boot problems and repairs damaged startup files when possible. Here is how to run Startup Repair:
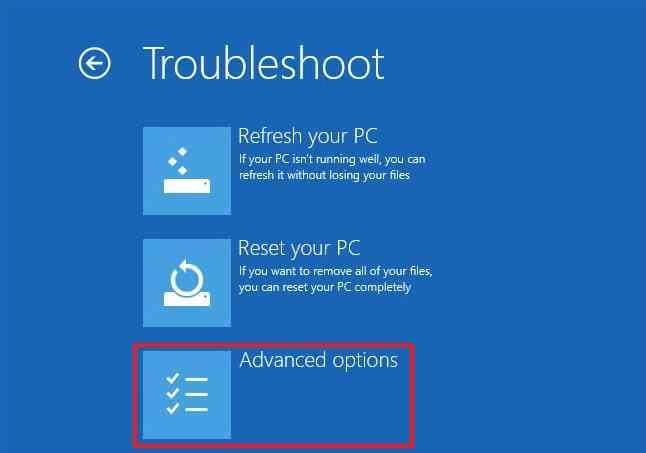
Step 1. Access “Windows Recovery Environment > Troubleshoot > Advanced options.”
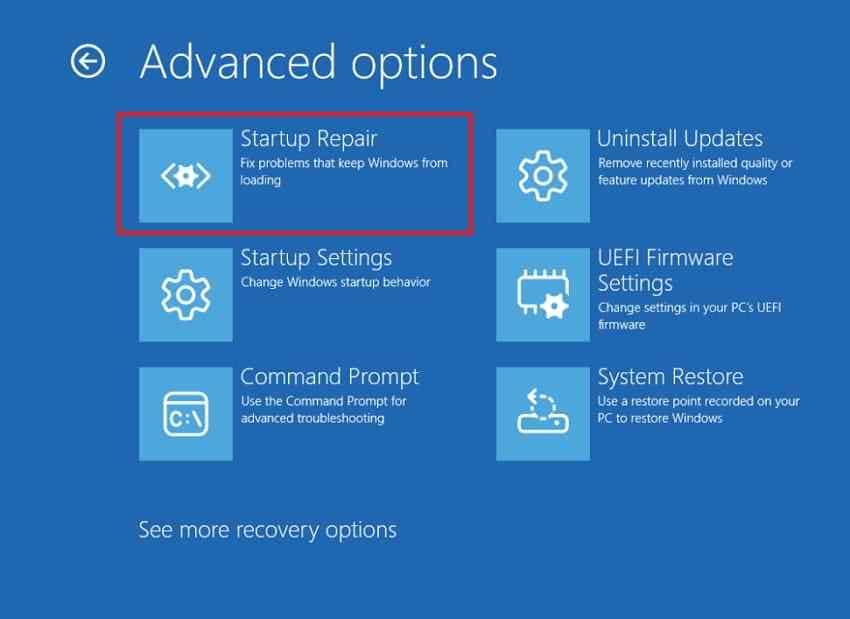
Step 2. Select “Startup Repair”, choose the Windows installation if prompted, and follow the on-screen instructions to complete the repair.
Treat a reset or reinstall as the final option rather than a diagnostic step. These actions can remove data or applications, so protect important files beforehand. If Windows still cannot start, follow Dell’s no-boot guide for further operating-system troubleshooting.
Part 8. Recover Data From a Detectable Dell Drive
Protect important data before repairs when the affected drive remains detectable. If the drive opens reliably, copy important files to a different physical drive first. A Dell computer no hard drive detected problem becomes more serious when normal file access fails. In that case, Recoverit can scan a detectable HDD or SSD and recover inaccessible files.
Its bootable recovery media can also help when Windows will not start, but the internal drive is still visible to the recovery environment. Recovery success depends on drive condition, later writes, SSD TRIM, and BitLocker access. If the drive is missing from BIOS, clicks, grinds, or shows other physical-failure signs, professional recovery may be necessary.

Key Features
- Broad Filesystem Support: Recovers files from NTFS and exFAT storage, including inaccessible RAW volumes on detectable Dell HDDs and SSDs.
- Lost Partition Recovery: Detects and scans lost partitions to recover files when storage problems make a partition disappear or become inaccessible.
- AI Search for Scan Results: Uses natural-language search and file filters to help locate specific recovered files more quickly after scanning the drive.
- Recovery Without Windows: Creates bootable USB recovery media to access a detectable internal drive when the Dell computer cannot start Windows.
- Safe File Restoration: Saves recovered files to a different physical drive instead of the affected source, helping avoid additional writes to unstable storage.
Ultimate Guide to Recover From a Detectable Dell Drive
Adhere to the steps below to recover files from your detectable Dell drive using Recoverit:
Step 1. Choose the Bootable Recovery Option
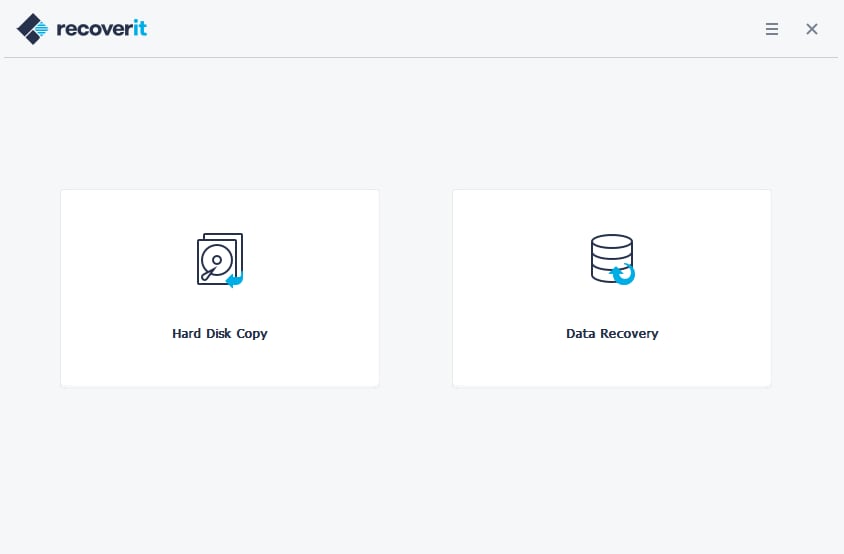
Install and launch Recoverit on a working computer. Access “Other Tools > Computer Not Bootable” > Click “Start.”
Step 2. Create the Recoverit USB
Connect a USB drive with at least 4 GB of available space. Select the USB drive from the list > Click “Start” to create the bootable recovery media.

Step 3. Recover Files From the Dell Drive
Boot the affected Dell computer from the Recoverit USB. Select “Data Recovery” > Scan the detectable internal drive > Choose the required files and recover them to a different physical drive.
Try Recoverit to Recover From a Detectable Dell Drive
 Security Verified. Over 7,302,189 people have downloaded it.
Conclusion
In conclusion, Dell computer no hard drive detected problems should be diagnosed before repairs begin. BIOS checks and Dell diagnostics help separate hardware detection issues from Windows startup or Setup problems. If BIOS detects the drive but Windows Setup does not, check the storage controller and required drivers before replacing hardware. Recover important files with Recoverit before reset or reinstallation when the drive remains detectable.
FAQ
-
Why does my Dell computer say no hard drive detected?
The computer cannot recognize its internal hard drive or SSD during startup. A loose connection, storage-controller setting, firmware problem, or drive failure can prevent the system from recognizing the internal HDD or SSD. -
Why is my Dell hard drive not detected in BIOS?
A loose drive connection, disabled storage interface, controller problem, or failed HDD/SSD can prevent BIOS detection. Run Dell pre-boot diagnostics and follow the model-specific service manual before replacing hardware. -
Why does Dell BIOS detect my SSD but Windows installation does not?
Windows Setup may lack the model-specific Intel RST storage driver required for a VMD-managed controller. Loading the correct Dell-provided driver can make the SSD visible. -
Can data be recovered from a Dell hard drive that is not detected?
Recoverit can recover files when the affected drive remains detectable by the system. Drives missing from the BIOS may require professional recovery services instead of recovery software.