How to Format USB to NTFS
Sometimes when you insert a new USB drive into your computer, Windows will prompt you to format the drive before you can use it. But when you try to format the drive, you only get the FAT or FAT 32 file system options. Yet, formatting the drive in NTFS format offers more benefits. For example, formatting a USB to NTFS offers you the unique ability to add "Allow" or "Deny" permissions on individual files and folders, something that you will not be able to do with the FAT file system.
In this article, we are going to be looking at exactly what the NTFS format is and how you can format USB to NTFS.
Part 1: What is NTFS Format for a USB Drive?
NTFS is a file system that was introduced in Windows XP. One of its major characteristics is that has such a huge file size and partition size difference that it is almost impossible to run up against them. Format NTFS also comes packed with better features than FAT32. Some of these features include file permissions, a change journal that can be very useful when the system crashes and you want to recover a previous version, disk quota links, and many other features.
Not sure which file format you should use? Check this related article on which format to choose? FAT32, NTFS, or exFAT?
To get all these benefits on your USB drive, you need to perform format USB drive NTFS windows 10. The next section describes how to do that in different ways.
Part 2: How to Format USB Drive to NTFS in Windows 10?
Before we get to the different ways you can format a USB drive to NTFS in Windows 10, we must point out that formatting a drive always causes data loss. So, you might want to back up all the data on the drive before attempting any of the two methods below.
With that said, you can format the USB drive to NTFS in Windows 10 using one of the following methods;
Method 1: Format Flash Drive to NTFS with Disk Management
Follow these simple steps to format a USB drive to NTFS with Disk Management;
Step 1: Right-click on "My Computer" or "This PC" and select "Manage"
Step 2: Open the "Device Manager" and under "Disk Drives", locate the USB drive you would like to format.
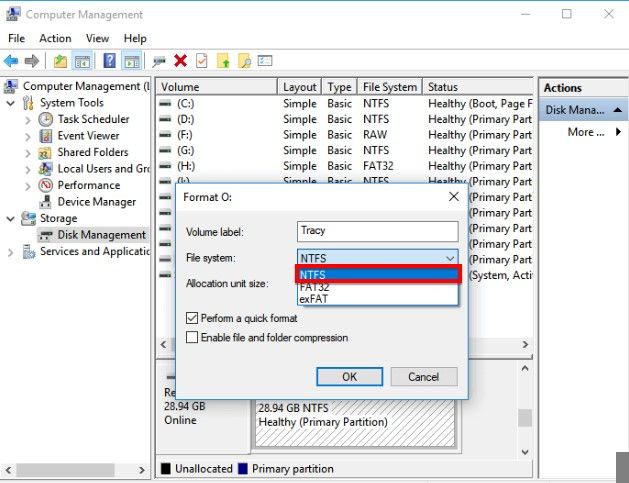
Step 3: Right-click on the drive when you find it and then choose "Format"
Step 4: In the "File System" section, name your partition and then choose "NTFS" as the file system you would like to use in the "File System" field. Click "OK" to complete the process.
Method 2: Format USB Stick to NTFS with Command Line
Command-Line can be very useful for creating a partition, formatting an existing partition, or even deleting a partition. To use the command line to format the USB to NTFS, follow these simple steps although we must point out that once a command is executed, you will not be able to cancel it;
Step 1: In the search bar, type in "CMD." Right-click on the result that appears and then selects "Run as Administrator."
Step 2: Once the command window appears, type in the following commands, hitting enter after each one to execute them;
- diskpart
- list disk
- select disk X
- clean
- create partition primary
- format fs=ntfs
Please note that "X" denotes the number of the drive you are trying to format.
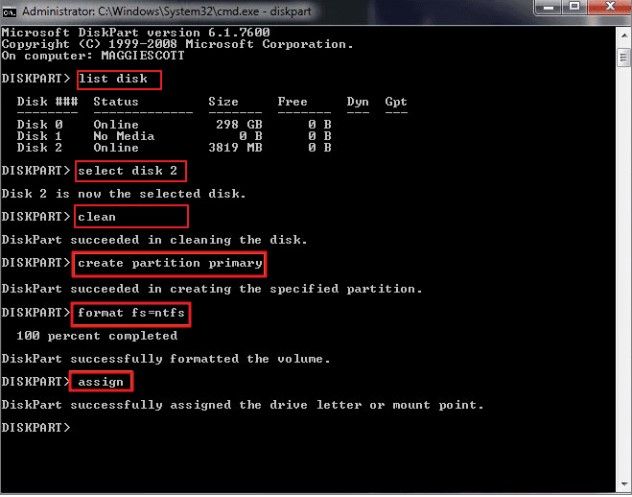
Step 3: Type "Assign" to create a drive letter for the USB drive.
Method 3: Format USB Thumb Drive with File Explorer
Step 1: Plug in the USB into the computer and wait for it to be detected.
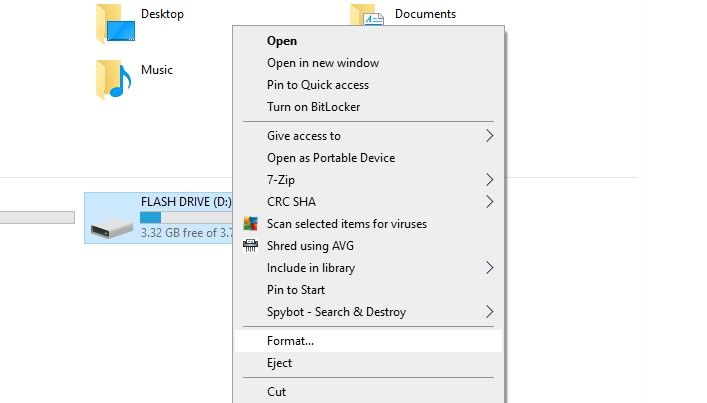
Step 2: Once it's recognized, open Windows File Explorer and navigate to the disk location. Locate the USB drive under This PC. Right-click and select Format.
Step 3: Click on File System and select exFAT from the dropdown. Check the Quick Format checkbox if it isn't already ticked.
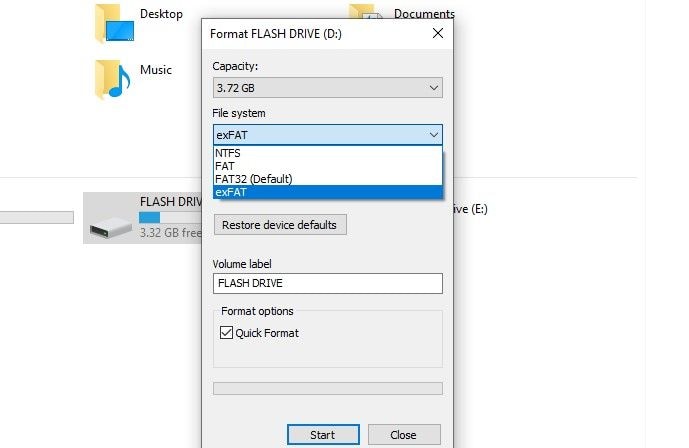
Step 4: Click Start to begin the process. You will get a pop-up warning you that, "Formatting will erase ALL data on this disk. To format the disk, click OK. To quit, click CANCEL." Click "OK" and wait for the progress bar to finalize. If the format is successful, you will get prompt as shown below. Click "OK" and begin using the drive or eject it safely.
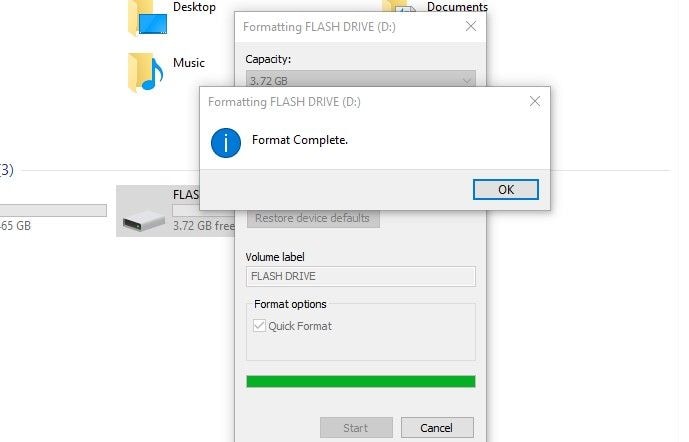
In 95% of scenarios, your flash drive is now successfully formatted to NTFS format. Howerver, it may happen that you could fail on the USB stick format process. Here is an article that teaches you how to fix can't format USB flash drive error.
Part 3: How to Recover Lost Data after Formatting the USB Drive
Formatting any kind of drive will often cause data loss and sometimes you can format the drive without fully backing up the data on it, causing the loss of some important files or folders. If this happens, you need a data recovery tool that will help you easily recover the missing data. The best tool in this case is Recoverit Data Recovery. Its biggest advantage is that it is very easy to use and can recover data from just about any storage device very quickly.
- It can be used to recover up to 1000 different file formats including the popular photos, audio, videos, documents, emails, and many more.
- It also supports all file systems including NTFS, FAT, and others.
- It has one of the highest recovery rates in the industry and can recover data regardless of how the data was lost in the first place.
- It is also very easy to use and you can recover the lost data in just 3 simple steps as we shall see shortly
 Security Verified. 3,591,664 people have downloaded it.
The following simple steps will guide you to use Recoverit Data Recovery to recover any files you may have lost during formatting;
Step 1: Install Recoverit to your computer and when the installation is complete, double-click on the program's icon on the Desktop to launch the program. Once the program is open on your computer, select the USB drive with the missing data on the main window. Click "Scan" to begin the process.
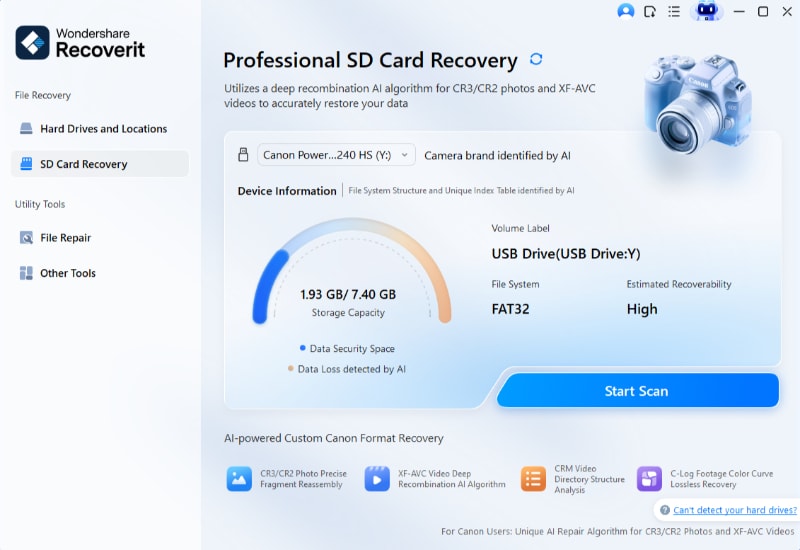
Step 2: Recoverit will immediately begin scanning the selected USB drive for the missing data. Depending on the size of the files and folders on the drive, the process may take some time, so, you may want to be patient. You can also pause or stop the scanning process at your convenience in case you see the file you are looking for.
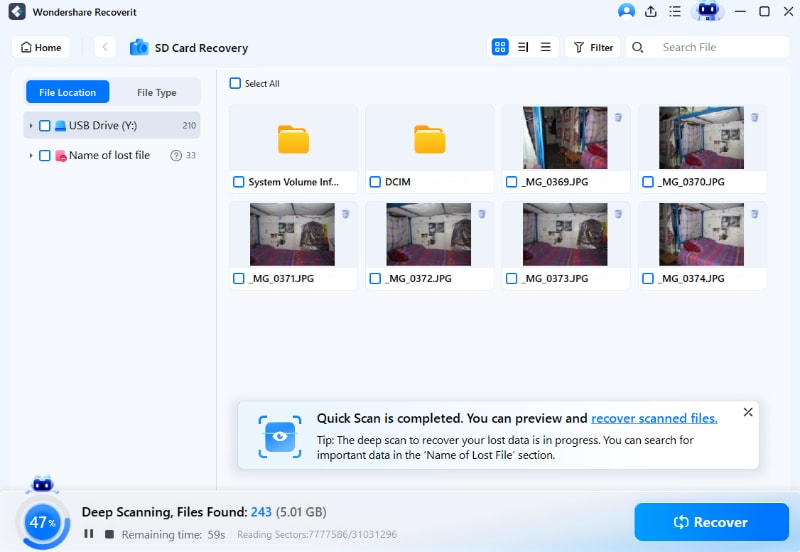
Step 3: You can click on a file to preview it and make sure it is the one you want. Click "Recover" to save the file to your computer.

We hope that the solutions above will help you easily format a USB drive to NTFS and recover any data that you may lose in the process. If you have any questions regarding the processes described above or any other data recovery issue, don't hesitate to let us know in the comments section below and we'll do our best to help.
USB Solution
- Recover USB Drive
- Format USB Drive
- Fix/Repair USB Drive
- Know USB Drive





 ChatGPT
 Perplexity
 Google AI Mode
 Grok
Grok


Sue Wayne
staff Editor