Jun 03, 2026 • Filed to: USB Recovery • Proven solutions
TL;DR:
Formatting a USB flash drive to the exFAT file system is the recommended solution for storing individual files larger than 4GB and transferring data with full read and write compatibility between Windows and Mac computers. ● Choose exFAT over FAT32 to bypass the 4GB file size limit on external media, while reserving NTFS strictly for Windows internal hard disks since NTFS files can only be opened in read-only mode on Mac. ● You must possess administrator rights to format the drive, and while Windows File Explorer and Disk Management work for smaller drives, using Command Prompt or Windows PowerShell is recommended for drives over 32GB to avoid completion errors or to force a full format. ● Format failures caused by write-protected disks require you to clear the restriction using the diskpart utility and the attr disk clear readonly command, whereas data lost to unexpected power shutdowns or corrupted formats can be retrieved using Wondershare Recoverit.
If you work in an environment where you constantly use a flash drive between a Windows and Mac computer, you may find that you constantly have to format USB drive. One way to permanently solve this problem is to format usb flash drive to exFAT, a platform-independent file system.
Before we get into the actual process of formatting USB drive to exFAT, we need to understand exFAT and other files systems, specifically, FAT32 and NTFS.
FAT32: FAT32 is the oldest file system. FAT is an acronym for File Allocation Table. FAT32 was introduced way back in Windows 95 and was the successor to the older FAT16 that was used on Dos and Windows 3. It currently works on all Windows versions, Mac and Linux. This is the reason it is also one of the most ubiquitous file systems and comes pre-installed on almost all USB you buy at a store. Unfortunately, FAT32 comes with limitations. One of the biggest drawbacks is a maximum file limit size of 4GB. In today's world where video files can often be larger than that, FAT32 is often impractical. FAT32 also limits partition sizes to 8TB.
NTFS: NTFS or NT file system is the default file system used by Windows. NTFS has a huge file size and partition limits that are theoretically impossible to surpass. It originally debuted in Windows NT and later in Windows XP. NTFS is compatible with Windows but files can only be opened in read-only mode in Mac and some Linux distributions.
exFAT: exFAT is an acronym for the Extended File Allocation Table. It was created by Microsoft to replace FAT32 and address its limitations. The system has a file limit size of approximately 16 exabytes (over 1 billion gigabytes!) and is compatible with both Windows and Mac. exFAT formatted USB drive has no realistic partition size limits.
From the above descriptions of the three of the main file systems, it becomes immediately apparent why you would need to format a flash drive to exFAT. The most common reasons include:
Store large files. As already mentioned, the FAT32 file system has a file limit size of 4GB. In such a situation, you need to format the USB to exFAT to accommodate large file sizes.
You continuously use a flash drive between Windows and Mac. In such a situation, your USB drives need to use a file system that is compatible with both operating systems. ExFAT formatted USB drive solves this problem beautifully.
The nature of your work requires you to have large partitions for different types of data. For example, you may want to create a different partition for media such as images and videos.
How to Format flash drive to exFAT?
As mentioned earlier, the exFAT system is ideal for large files and partitions. If your USB is small, for example, 4GB, it may not make sense to format it to exFAT because you will never be able to store files larger than 4GB, unless you have the need to transfer files between macOS and Windows devices. For small USB drives of under 32 GB, you can format flash drive to either FAT32 or exFAT.
Method 1: Using the File Explorer
Step 1: Plug in the USB into the computer and wait for it to be detected.
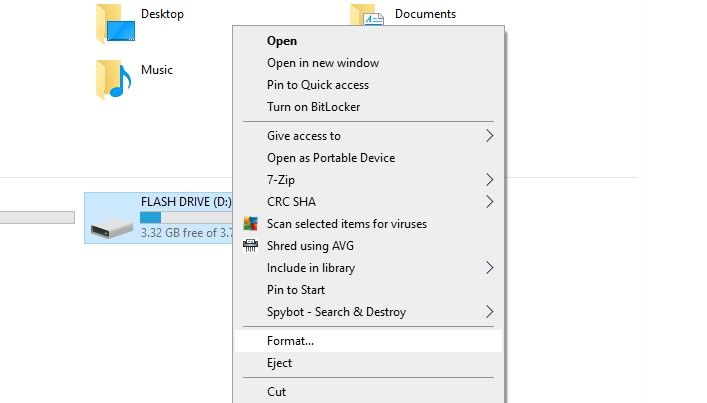
Step 2: Once it's recognized, open Windows File Explorer and navigate to the disk location. Locate the USB drive under This PC. Right-click and select Format.
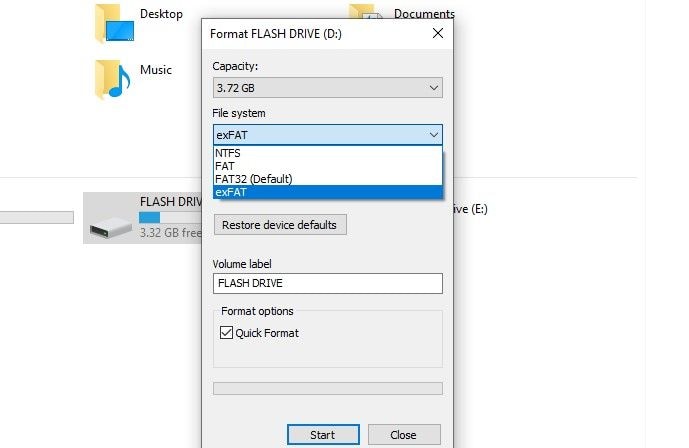
Step 3: Click on File System and select exFAT from the dropdown. Check the Quick Format checkbox if it isn't already ticked.
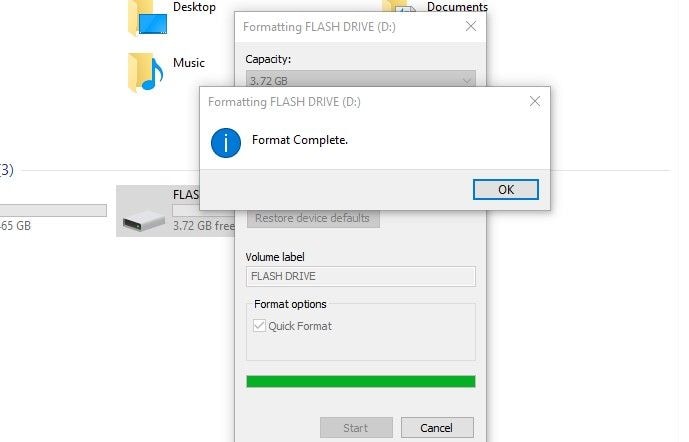
Step 4: Click Start to begin the process. You will get a pop-up warning you that, "Formatting will erase ALL data on this disk. To format the disk, click OK. To quit, click CANCEL." Click "OK" and wait for the progress bar to finalize. If the format is successful, you will get prompt as shown below. Click "OK" and begin using the drive or eject it safely.
Method 2: Using Disk Management
Disk Management is a Windows utility tool that helps you manage all your drives from one area. It is packed with several features that allow you to format thumb drive, change drive letters and paths, add mirrors, extend, shrink and delete volumes, and much more.
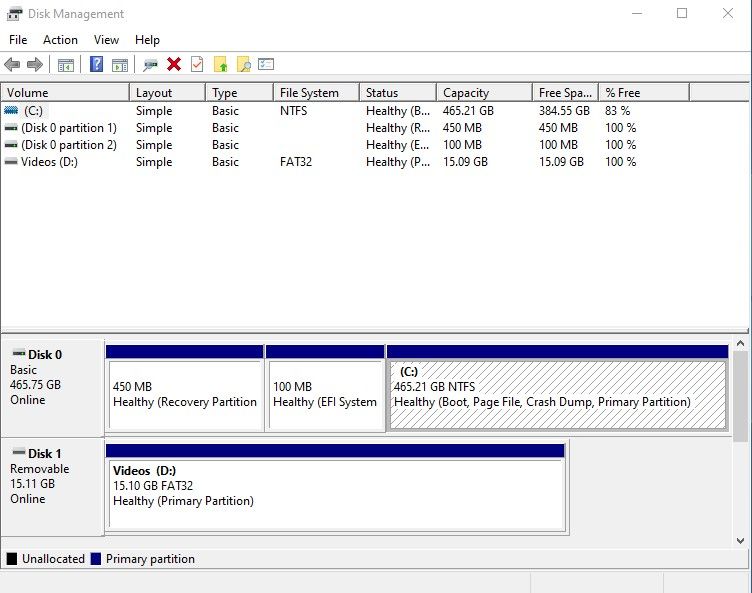
Step 1: Plug in your USB drive and wait for it to be detected. Once detected, type Disk Management in the Windows Search bar and click "Create and format hard disk partitions" to launch the Disk Management Utility.
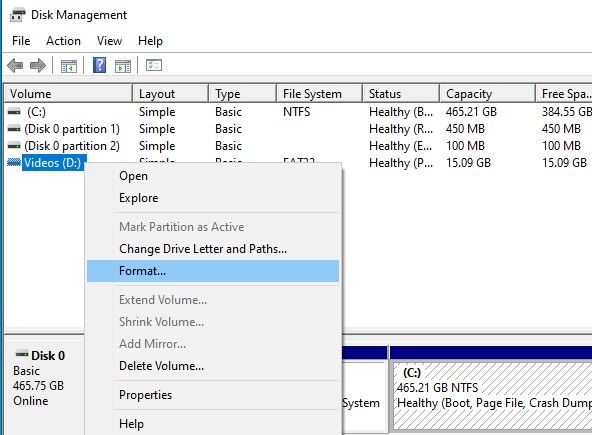
Step 2: Right-click the flash drive and select the Format option.
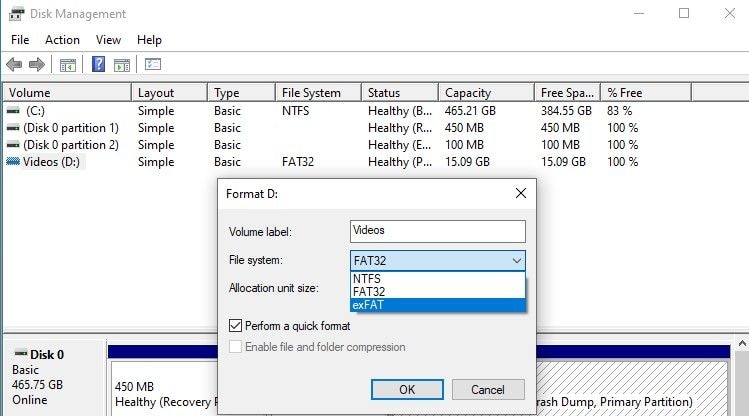
Step 3: Type a name in the Volume Label field to help you quickly identify the drive in File Explorer.
Step 4: In the File System drop-down menu, select NTFS, FAT32, or exFAT, and tick the Perform a quick format option.
Step 5: Click OK and wait for the process to complete. Once complete the drive has been formatted to exFAT. You can now use it or unplug it safely from the PC.
The process to format larger drives, that is, above 32 GB is more or less the same. You can use both methods outlined above. But, to ensure you don't encounter any errors, the additional two methods below are recommended for larger flash drives.
Method 3: Using the Command Prompt
The Windows Command Prompt takes much longer but is the best way to format flash drive, and deal with any problems such as "Windows was unable to complete the format".
Step 1: As with Method 1, plug in the flash drive and wait for it to be detected.
Step 2: Once detected, type "CMD" in the Windows search bar and launch the Command Prompt.
Step 3: All drives on a Windows computer usually have letters assigned to them. For example, the hard disk is almost always C. Any additional drives connected to the computer are allocated subsequent letters. For example, D, F, and so on. E is usually reserved for the optical drive (CD/DVD) if the computer has one. For this example, our flash drive is letter D. You can find out the letter allocated to your USB by navigating to This PC and taking note of the letter in brackets.
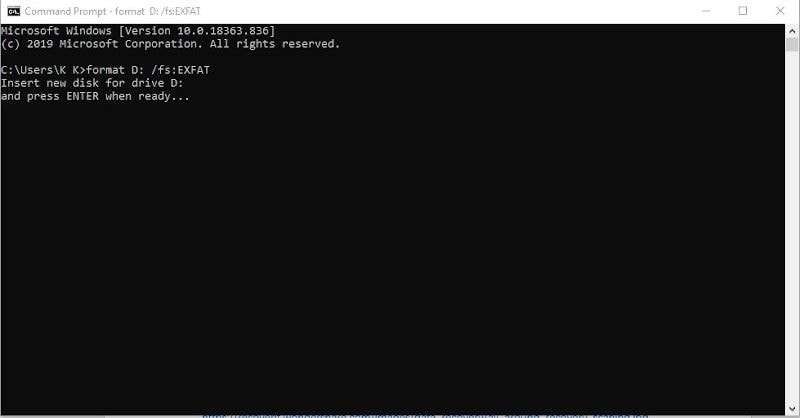
Step 4: Type "format D: /fs:EXFAT" and press enter. Remember to make sure the letter you type corresponds to the letter allocated to the USB drive plugged into your PC.
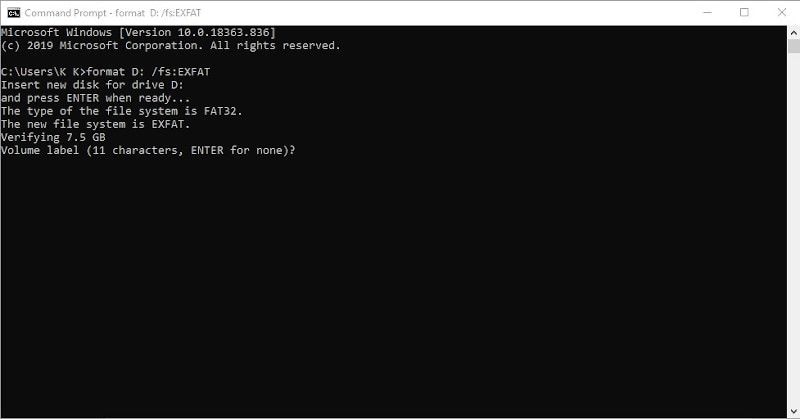
Step 5: Press Enter when ready and the process begins. When complete, you will be asked to enter a Volume Label to identify the drive. Enter a name and press Enter to complete. Begin using the flash drive or eject safely.
Do you know that Command Prompt can even help you recover deleted files! ⬅ Learn more about this cool trick!
Method 4: Using Windows PowerShell
The Windows PowerShell is similar to the command prompt and is effective at quickly formatting large USB drives to exFAT. It also has an extra feature to force a full format.
Step 1: Plug in your flash drive and ensure it has been detected.
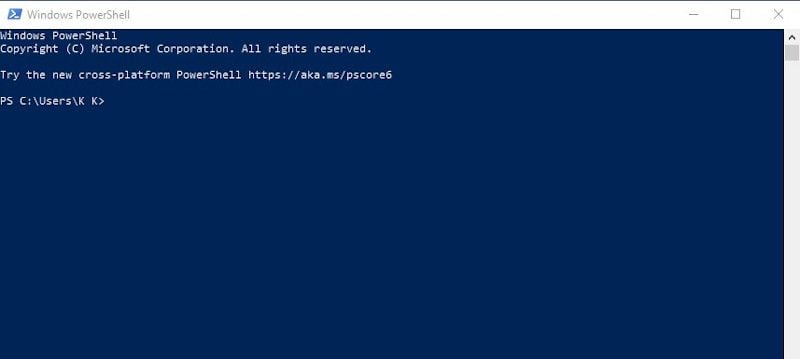
Step 2: Launch Windows PowerShell by typing PowerShell in the Windows search bar. Launch the Windows PowerShell application by clicking on it.
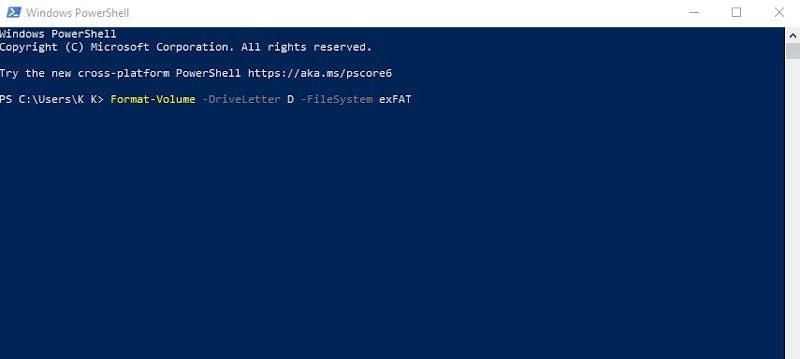
Step 3: To perform a quick format, type in the following command "Format-Volume -DriveLetter DRIVE-LETTER -FileSystem exFAT". Replace "DRIVE-LETTER" with the drive letter allocated to your flash drive by the PC. For this example, the command looks like this, "Format-Volume -DriveLetter D -FileSystem exFAT". To perform a full format, type "Format-Volume -DriveLetter D -FileSystem exFAT -Full -Force". Once again ensure the drive letter corresponds with your system.
Step 4: Press Enter. Once the process is complete begin using the USB or eject safely.
Part 3. Recover Lost Files from Formatted USB Drives
Finally, we need to address a common problem that you may encounter while format flash drive to exFAT. You may experience a situation where the format fails, the USB drive is accidentally ejected or there is an unexpected power shutdown. One of the things that may happen is that the disk may become corrupted and you lose your data. You may also format a flash drive and forget to make a backup or, mistakenly assume you have a copy of the files in some other place. The only to recover lost files from formatted USB drives is by using Wondershare Recoverit.
Wondershare Recoverit is a nifty data recovery tool that is compatible with both Windows and Mac. With Wondershare Recoverit, you can recover lost and deleted files in a few minutes from flash drives and all other types of external media, internal hard disks, recycle bins, and even crashed computers.
Connect the flash drive that contains the data you want to recover. Ensure that the device is detectable. If Windows offers to scan and repair the device, proceed and do so until the device is detectable.
Step 2: Launch Wondershare Recoverit on Windows
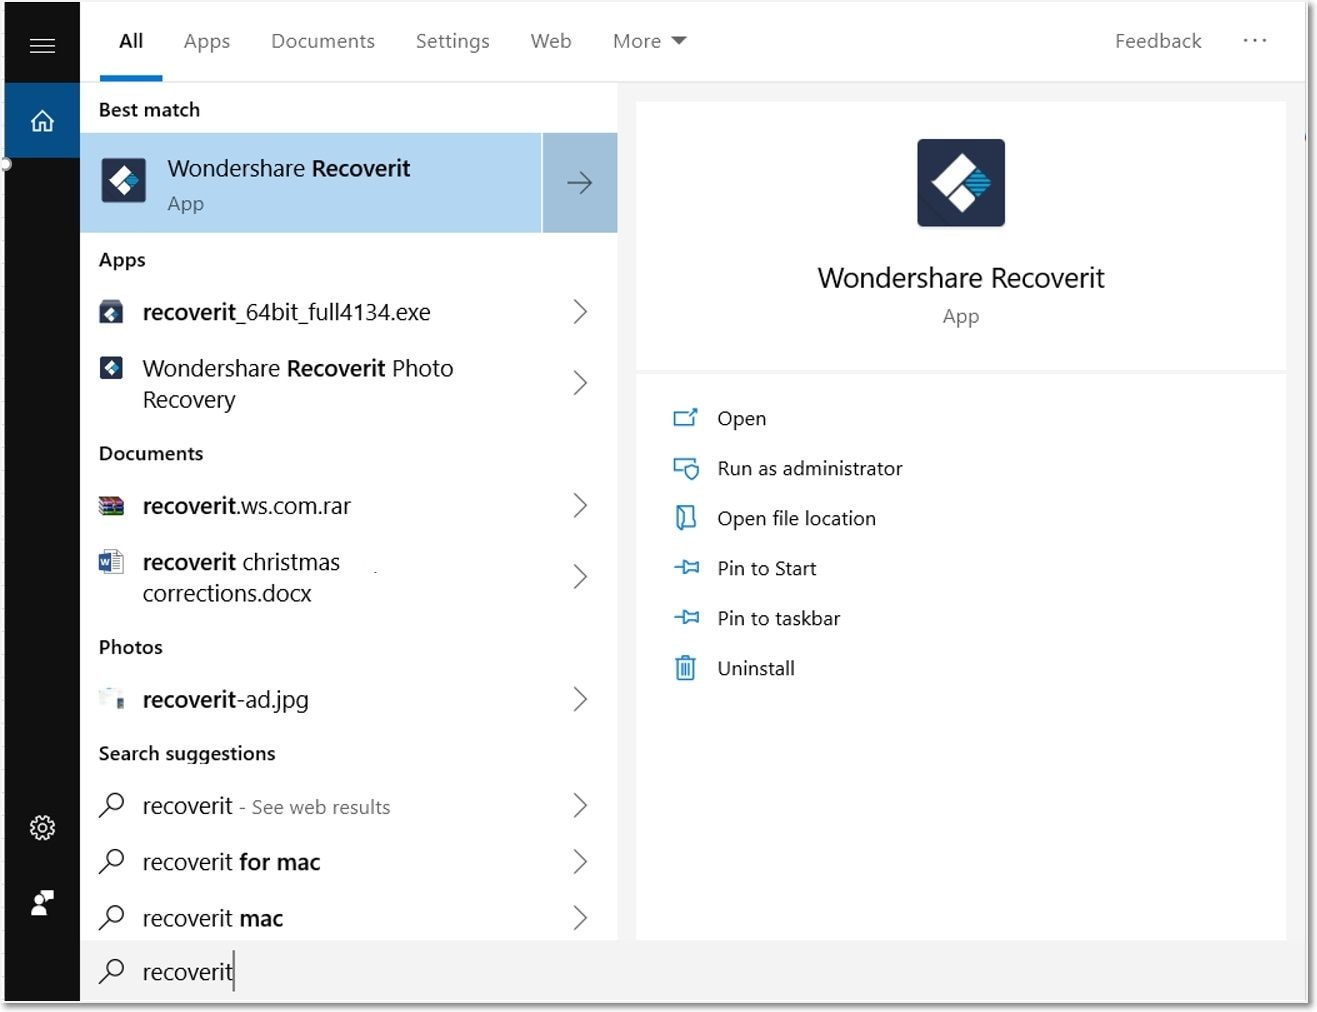
Next, launch the Wondershare Recoverit app on Windows. Click the Desktop icon or type "Wondershare Recoverit" in the Windows Search box, and click Open to launch it.
Step 3: Select the USB Drive
Next, select the USB drive from the External Devices section as shown below, and click the Start button to begin recovery.
Step 4: Scan the USB Drive
An all-around scan initiates on the USB drive. Give it a few minutes to complete. You can pause and continue the scan at any point. Once the process terminates, check the button against the files you want to recover. You can also select all files if needed by checking the box adjacent to the Name field.
Step 5: Preview and Recover
You can preview each file before clicking Recover. Once you click the Recover, you have the option of saving the files in another location on your computer.
Part 4. Common Errors That Lead to Format Failure
Before we explain how to format flash drive to exFAT, let's examine some of the reasons a flash drive will not format to exFAT on Windows. Understanding this will save you the unnecessary headache of having to troubleshoot later on.
Depending on the Windows operating system you are using, some of the most common errors you get when you can't format a thumb drive to USB exFAT include:
"There is a problem with this drive, scan the drive to fix it" – this usually happens if there was a problem due to unexpected power shutdown or removing the disk before it was safe to do so. A simple Windows scan usually fixes this problem. Simply follow the prompts to scan and repair if necessary, then proceed with the formatting instructions below.
"Windows was unable to complete the format" – there are several reasons you may run into such an error message. But, the main reason is usually that the thumb drive needs to be scanned and repaired.
"The disk is write-protected" – Some USD drives come with the option to write-protect the device. On some devices, this could be via a button, switch, or lever on the device. If your device doesn't have such a feature, you need to disable write-protect using the registry editor. Simply type "CMD" on the windows search bar and open the command prompt. Type "diskpart" and press enter. You should get a new window similar to the one shown below.
Next, type "list disk" and press enter. This will list all the active disks on the computer. Note the flash drive number then type "select disk" and select your flash drive. Type "attr disk clear readonly" to remove the write-protect settings. You should get a confirmation message stating, "Disk Attributes Cleared Successfully" as shown below. Type "exit" to exit Diskpart.
Closing Words
All the methods described above assume you have administrator rights on the PC. If you don't, you will need to log in with an administrator user account or know the administrator password. We hope you learned how to format the flash drive to exFAT and recover any data in case the process doesn't run smoothly for you. Please do not hesitate to send us your comments or questions.
People Also Ask
1. What is the best format for an SD card?
It depends on the file size that the SD card will hold. If your SD card is less than 4GB in size, you don't need to use exFAT. But if it is greater than 4GB then you may need exFAT formatted USB drive to store a single file of 4GB or greater.
2. Can I use exFAT instead of fat32?
Yes, USB exFAT is the newer version of FAT32. It was created to address the file size limit problems of FAT32 without the bulkiness of NTFS.
3. Which is better NTFS or exFAT?
exFAT is the best file system for external media. NTFS is best suited for Windows internal hard disks.
4. Can Wondershare Recoverit recover lost data from USB on Mac?
Yes, Wondershare Recoverit works on both Windows and Mac.


 ChatGPT
 Perplexity
 Gemini
 Claude
 Grok
Grok


Theo Lucia
chief Editor