

 TL;DR:
Windows natively formats SD cards using File Explorer for standard use, Disk Management for unlettered drives, or Diskpart for stubborn partition errors, provided you first verify the drive letter to prevent accidental data loss.
● Choose the FAT32 file system for SD cards up to 32GB, and select exFAT for larger storage capacities or when handling individual files larger than 4GB.
● Use Disk Management to assign new simple volumes when the card is detected but hidden from File Explorer, or apply Diskpart commands to completely wipe and rebuild partitions facing deep storage errors.
● A quick format leaves existing data temporarily recoverable using software like Recoverit until overwritten, while a full format actively checks for bad sectors and makes data restoration significantly more challenging.
Ask AI for a summary
 ChatGPT
 Perplexity
 Gemini
 Claude
 Grok
Grok
SD cards are small, but they hold important data. People use them in phones, cameras, drones, and laptops. Over time, these cards can slow down or show errors. Files may not open. Devices may stop reading the card. In such cases, formatting becomes necessary.
Many users search for how to format SD card with built-in SD memory card formatter because they want a safe and simple method. Windows already provides tools that can handle this task without extra software. Formatting an SD card removes old data and refreshes the file system. It helps fix errors and improves performance. Windows offers several built-in options to complete this task. You can use File Explorer, Disk Management, Command Prompt, Settings, or the official utility.
In this guide, you will learn how to format SD card with built-in SD memory card formatter using different methods. You will also learn how to recover lost data from accidentally formatted SD card if something goes wrong.

Table of Contents
How to Format an SD Card with Windows Built-in SD Memory Card Formatter
Windows provides several built-in tools. You do not need third-party software in most cases. Below are five methods. Each one explains how to format an SD card with the built-in SD memory card formatter in a clear and direct way.
Method 1: Use SD Card Formatter Utility (Right-click → Format)
Some Windows systems include an official SD memory card formatting utility. This tool is designed according to SD Association standards, which means it follows proper technical guidelines for SD and microSD cards. It is built specifically to handle SD storage devices instead of general drives.
The utility ensures correct alignment, partition structure, and file system setup. This can improve compatibility with cameras, phones, and other devices that use SD cards. It is a reliable choice when you want formatting that matches industry standards.
- Insert the SD card into your computer. Open This PC. Right-click on the SD card drive. Select Format from the menu.
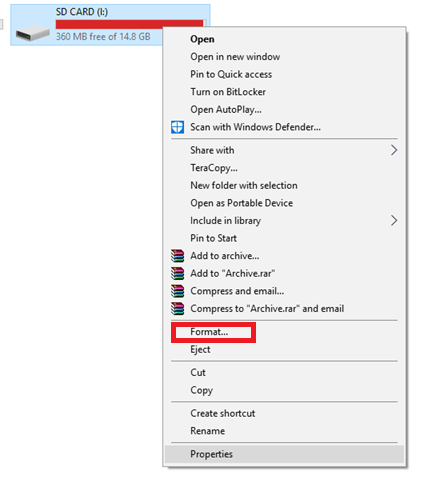
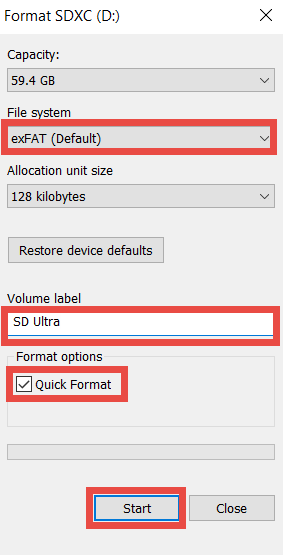
- Choose a file system. Keep Allocation Unit Size as the default. Check Quick Format. Click Start and confirm.
This explains how to use Windows Explorer to format an SD card in the easiest way.
Method 2: Use Disk Management Tool
Disk Management is a more advanced Windows tool. It is useful when the SD card does not show up in File Explorer but is still detected by the system in the background. In such cases, the card may not have a proper drive letter or may have minor partition issues. Disk Management helps you identify the exact status of the storage device.
This tool also allows you to create, delete, or modify partitions. If the SD card appears as unallocated space, you can create a new simple volume and then format it properly. It gives you better control over storage structure, which makes it helpful for fixing deeper formatting problems.
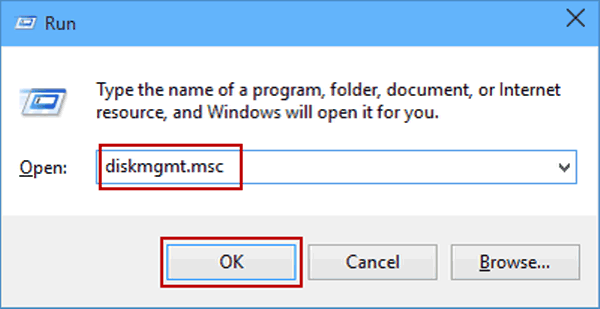
- Press Windows + R. Type diskmgmt.msc and press Enter. Locate your SD card in the list.
- Right-click on the SD card partition. Select Format. Choose a file system and click OK.
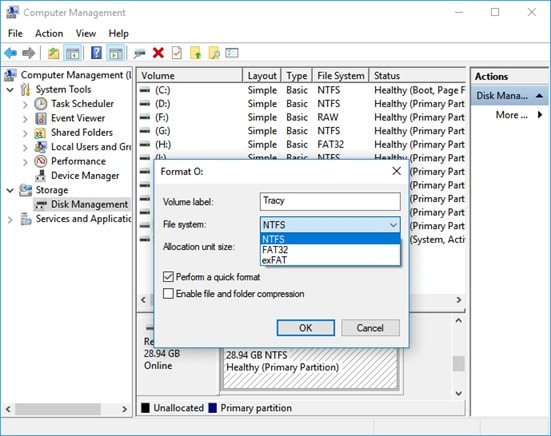
This is how to use disk management to format an SD card safely.
Method 3: Use Command Prompt (Diskpart)
Diskpart is a command-line utility built into Windows. It is usually used when other formatting methods do not work or when the SD card has deeper issues. Since it uses direct commands, it gives more control over the storage device. At the same time, it requires attention because selecting the wrong disk can lead to data loss.
This method removes existing partitions and clears the storage structure completely. After cleaning the card, you can create a new primary partition and format it from scratch. It is effective for fixing stubborn errors, but each command must be entered carefully.
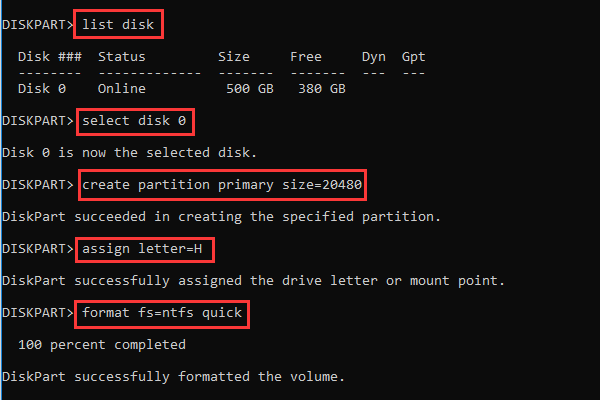
- Press Windows + X. Select Command Prompt (Admin). Type diskpart and press Enter. Type list disk and press Enter. Identify your SD card number. Type select disk X and press Enter.
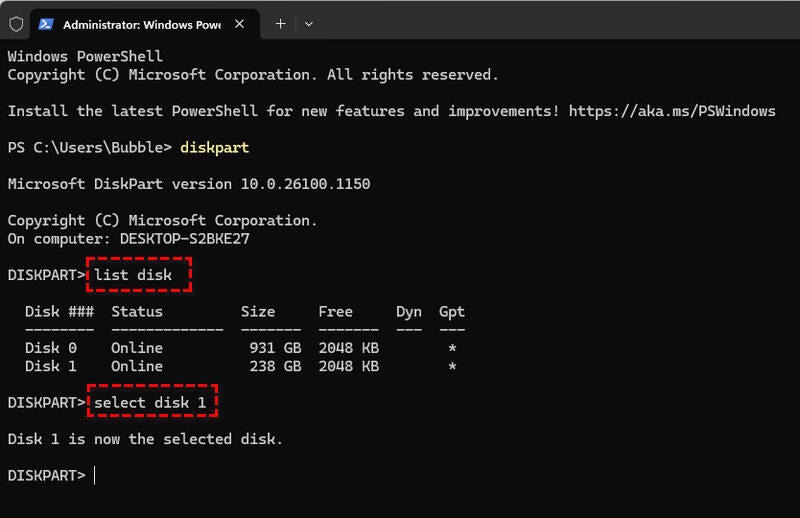
- Type clean and press Enter. Type create partition primary and press Enter. Type format fs=ntfs quick and press Enter. Type exit.
This explains how to use diskpart to format an SD card correctly.
Method 4: Use Windows Settings App
Windows Settings also includes basic storage management features. It is helpful for beginners who do not feel comfortable using advanced tools like Disk Management or Command Prompt. The layout is simple and easy to understand.
Through the Storage section, you can view connected drives and access formatting options. You do not need to open complex system panels. Everything is available inside the standard Settings interface, which makes the process more comfortable for new users.
- Open Settings. Click System. Select Storage. Click Advanced storage settings. Choose Disks and volumes.
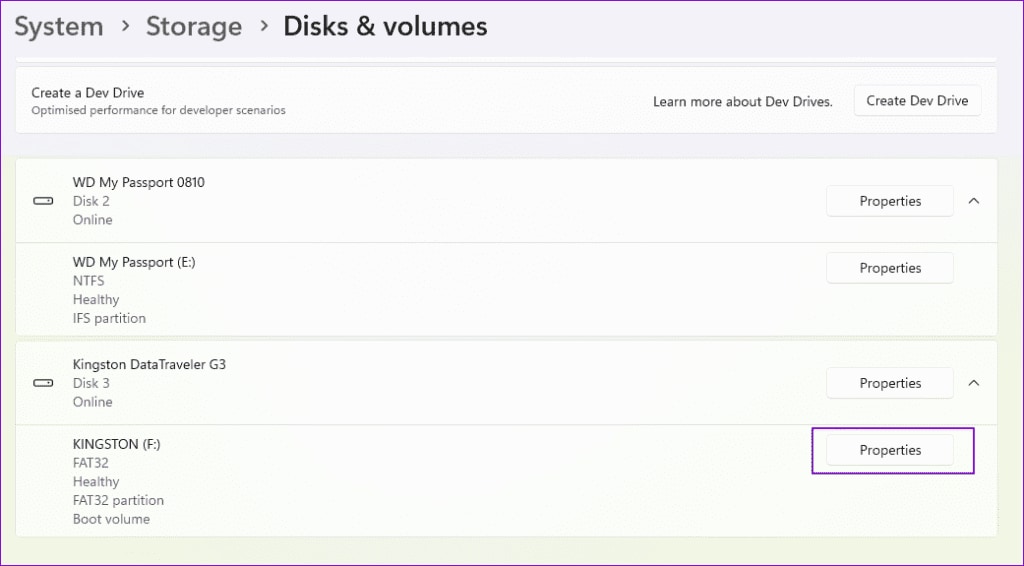
- Select your SD card. Click Format. Choose the file system and confirm.
This is another way to complete how to format an SD card with a built-in SD memory card formatter without third-party programs.
Lost Data While Formatting SD Card? Recover Lost Data Easily Using Recoverit
Formatting deletes data. Sometimes users choose the wrong drive. Sometimes they forget to back up files. This can cause panic. If you need to know how to recover lost data from an accidentally formatted SD card, recovery software can help.
Recoverit is a professional data recovery tool. It supports SD cards, hard drives, USB drives, and more. It performs deep scanning to locate deleted files. Even after formatting, data may still exist until overwritten. That is why quick action is important.
Recoverit supports photos, videos, documents, and many other formats. It works with both quick and full formats. It is suitable for beginners because it has a clear interface.
Why Use Recoverit?
- Supports formatted SD card recovery Recoverit can restore files even after a quick or accidental format. It scans the SD card deeply to locate hidden file traces that are not visible to the system.
- Deep scan technology The software performs a sector-level scan of the storage device. It checks every part of the SD card to find lost photos, videos, and documents.
- Recovers 1000+ file types It supports common formats like JPG, MP4, DOCX, and PDF. It also handles professional file types from cameras and editing tools.
- Preview before recovery You can view photos, documents, and some videos before restoring them. This helps you select only the files you truly need.
- Works on Windows and Mac Recoverit supports both major operating systems. You can use it on a home PC, office computer, or MacBook.
- High recovery success rate The software is built with advanced recovery algorithms. It increases the chances of restoring data, even from corrupted or formatted SD cards.
3 Simple Recovery Steps
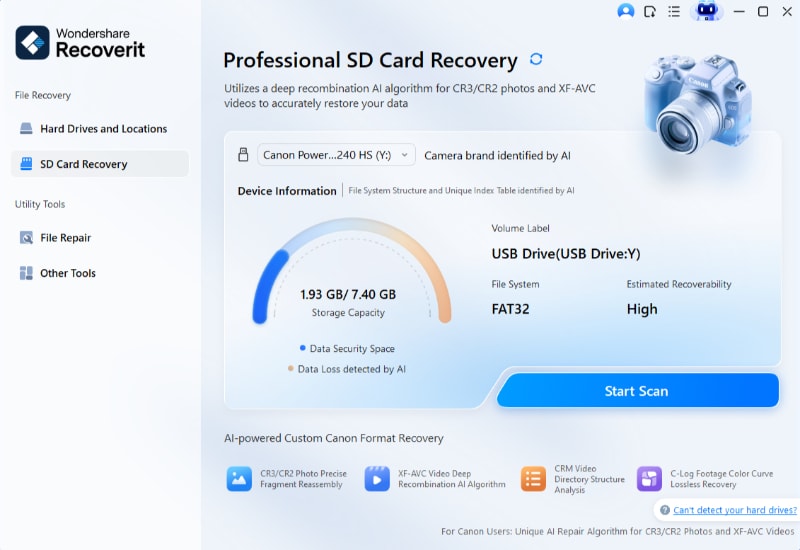
Step 1: Download and install Recoverit. Connect your SD card. Open the software.
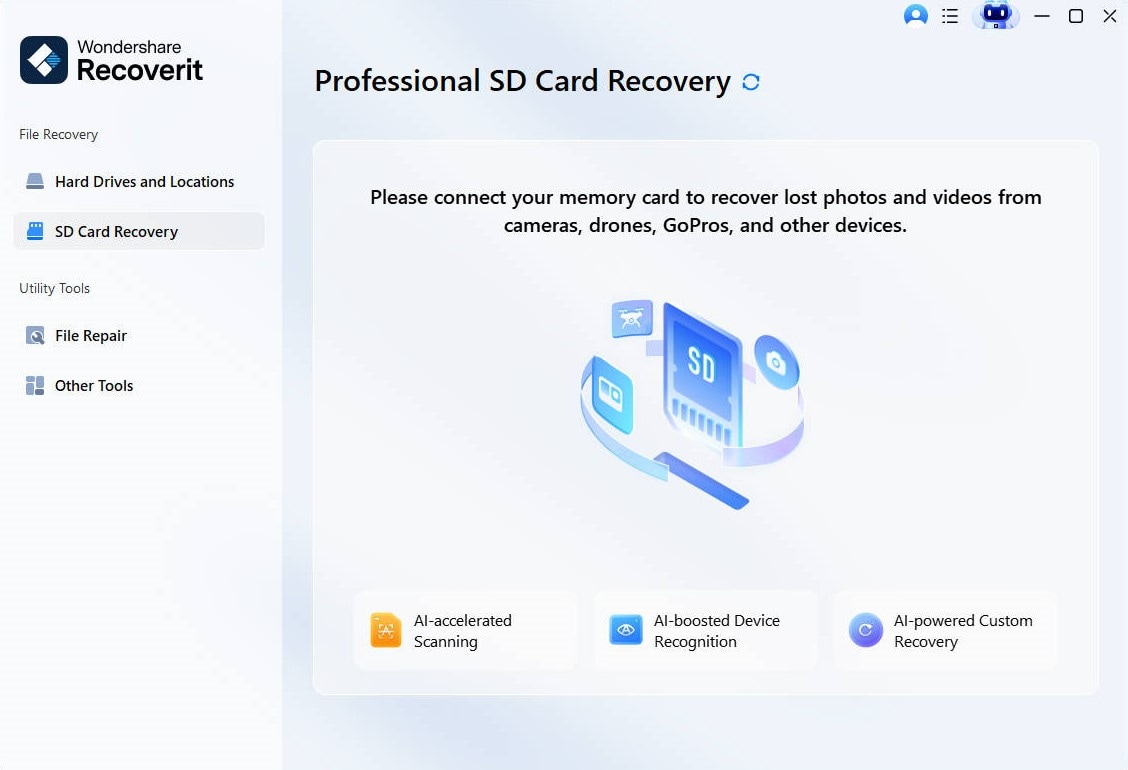
Step 2: Select the SD card location. Click Start Scan.
Step 3: Wait for the scan to complete. Preview found files.
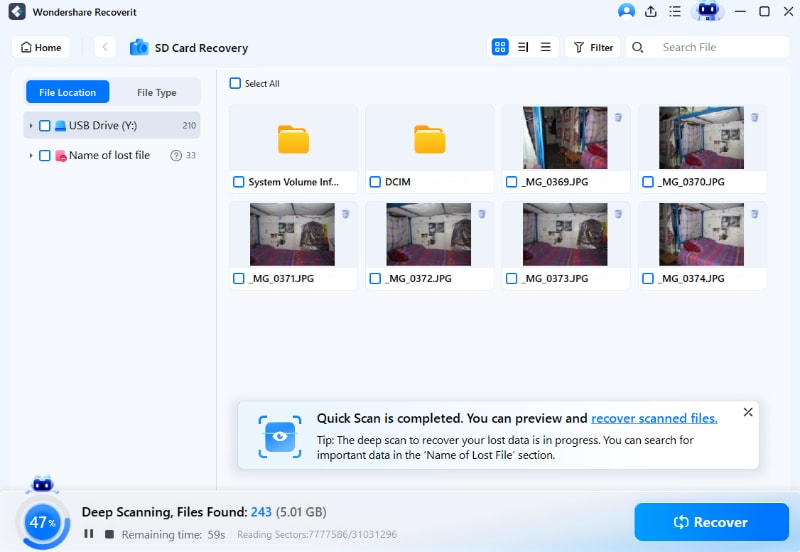
Step 4: Select the needed files. Click Recover. Save them to another drive.
This is how to recover lost data from an accidentally formatted SD card using Recoverit.

Smart Habits Before You Click Format
Formatting is simple. But mistakes can cause permanent loss. Before you proceed with how to format an SD card with the built-in SD memory card formatter, follow these smart habits.
- Backup Important Files Always copy your photos, videos, and documents to another device before you start. You can save them on your computer, an external drive, or cloud storage to prevent permanent loss.
- Check the Correct Drive Carefully confirm the drive letter of the SD card. Many users accidentally format the wrong drive because they do not double-check the name and storage size.
- Choose Correct File System Select the file system based on your card size and device needs. FAT32 works well for smaller cards, while exFAT is better for large storage and high-quality video files.
- Avoid Interrupting the Process Do not remove the SD card or shut down the computer during formatting. Interruptions can damage the card and make it unreadable.
- Scan for Errors First Run the built-in error checking tool before formatting. Sometimes Windows can fix minor issues without needing a full format.
- Remove Write Protection Check the physical lock switch on the SD card adapter. If it is locked, Windows will not allow formatting.
- Use Safe Eject Option After formatting, right-click and select Eject before removing the card. This reduces the risk of file system corruption.
Conclusion
Formatting an SD card is not difficult. Windows provides many built-in tools. You can use File Explorer, Disk Management, Diskpart, Settings, or the official utility. Each method helps complete How to format SD card with built-in SD memory card formatter, depending on your situation.
However, always back up data before formatting. If you forget and lose files, do not panic. Recovery tools like Recoverit help explain how to recover lost data from an accidentally formatted SD card safely and efficiently. Take careful steps and choose the method that suits your needs.
FAQs
-
1. Does formatting delete everything permanently?
Not always. A quick format removes the file table, which means the system no longer shows your files. However, the actual data may still remain on the card until new data replaces it. A full format performs deeper cleaning and checks for bad sectors. It removes more traces, which makes recovery more difficult. -
2. Which file system should I choose for the SD card?
The choice depends on the card size and how you plan to use it. FAT32 is suitable for SD cards up to 32GB and works with most devices. exFAT is better for larger cards and for storing big files such as long videos. It supports files larger than 4GB, which FAT32 cannot handle. -
3. Can I recover data after full format?
Recovery after a full format is more challenging because more data is erased during the process. Still, in some cases, parts of the original data may remain if they have not been overwritten. Professional recovery tools can scan the card and attempt to rebuild lost files, but success is not guaranteed.


