Partition Data Recovery
In this page, we will explore why partition gets lost, the recovery rate of partition data loss, 6 free methods to recover partition and how to recover lost partition data with the most reliable tool - Recoverit, key features are as follows;


99.5%
recovery rate

5min
average scan time

21 years
data recovery experience

100%
secure & virus-free
Trusted All Over World in Recovering Lost/Deleted Partitions

Why Does Partitions Get Lost or Deleted?
Before performing partition data recovery, understanding data loss causes can help you better recover lost partition data. Here are the reasons why partitions get lost or deleted.


Power failure
Sudden power loss can interrupt important data transfer processes and compromise the integrity to such an extent that an entire partition disappears.

Accidental deletion
All hard drives look more or less the same, and the non-descriptive names Windows assigns to them don’t help prevent accidental formatting.

Partitioning error
Not all partitioning software is user-friendly, intuitive, and reliable. With the wrong solution, it’s easy to make an error and cause a partition to become inaccessible.

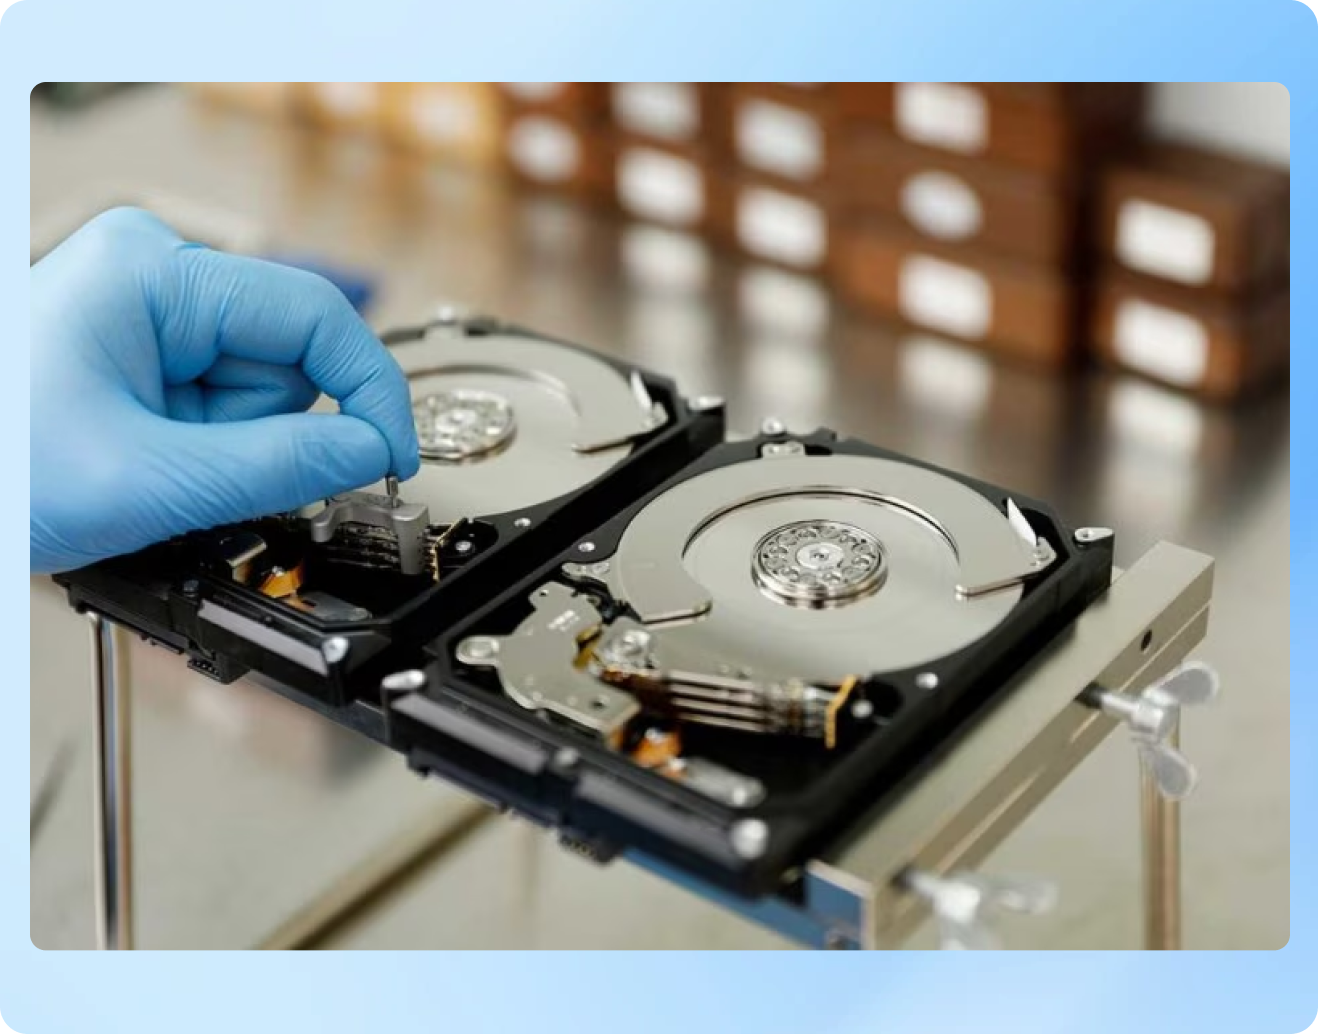
Hardware failure
All storage devices have limited lifespans, which can shorten dramatically when exposed to excessive heat, humidity, or vibrations.

Partition table corruption
All information about partitions and their structure is stored in a small storage area, whose corruption can lead to serious issues.

OS update
Every year, many users around the world lose one or more partitions after performing a major OS update, such as upgrading from Windows 10 to Windows 11.


How to Recover Lost Partition Data with Reliable Tool?
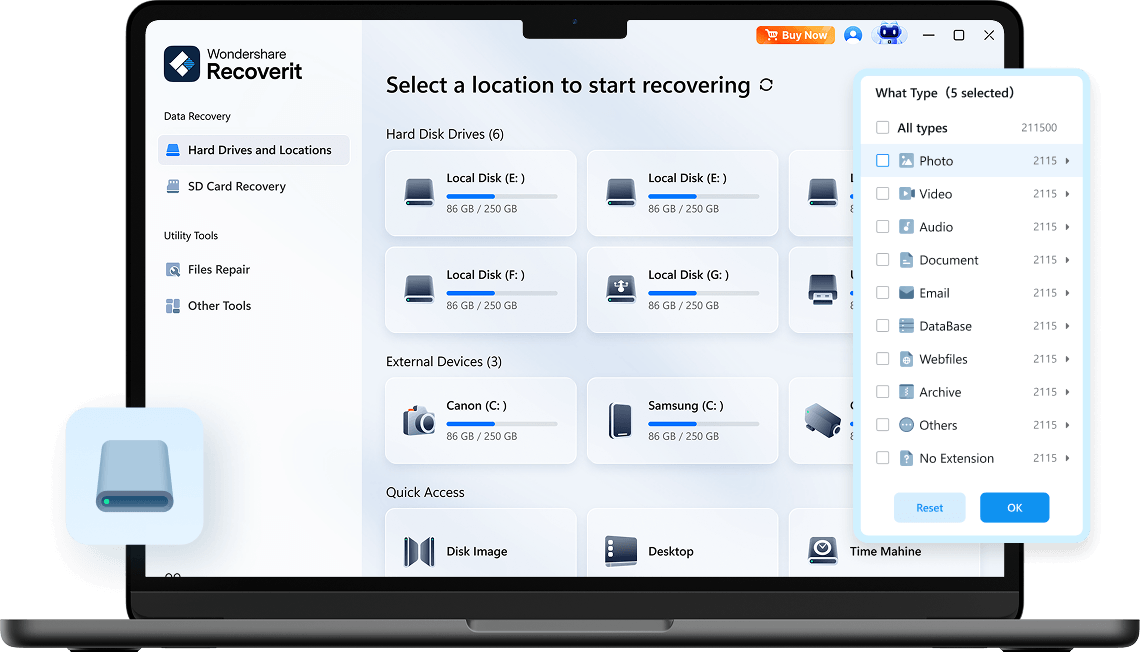
Easily recover lost partition data with the most reliable partition data recovery software - Recoverit. 100% secure and virus-free. Performing a partition file recovery with Wondershare Recoverit is a simple process that requires zero technical knowledge.


Why Choose Recoverit to Recover
Lost Partition Data?
Explore why Recoverit is your best choice to recover lost/deleted/RAW/encrypted/corrupted partitions. Recoverit not only can help you recover lost data from partitions, but also supports partition management, such as system migration and converting MBR to GPT etc.
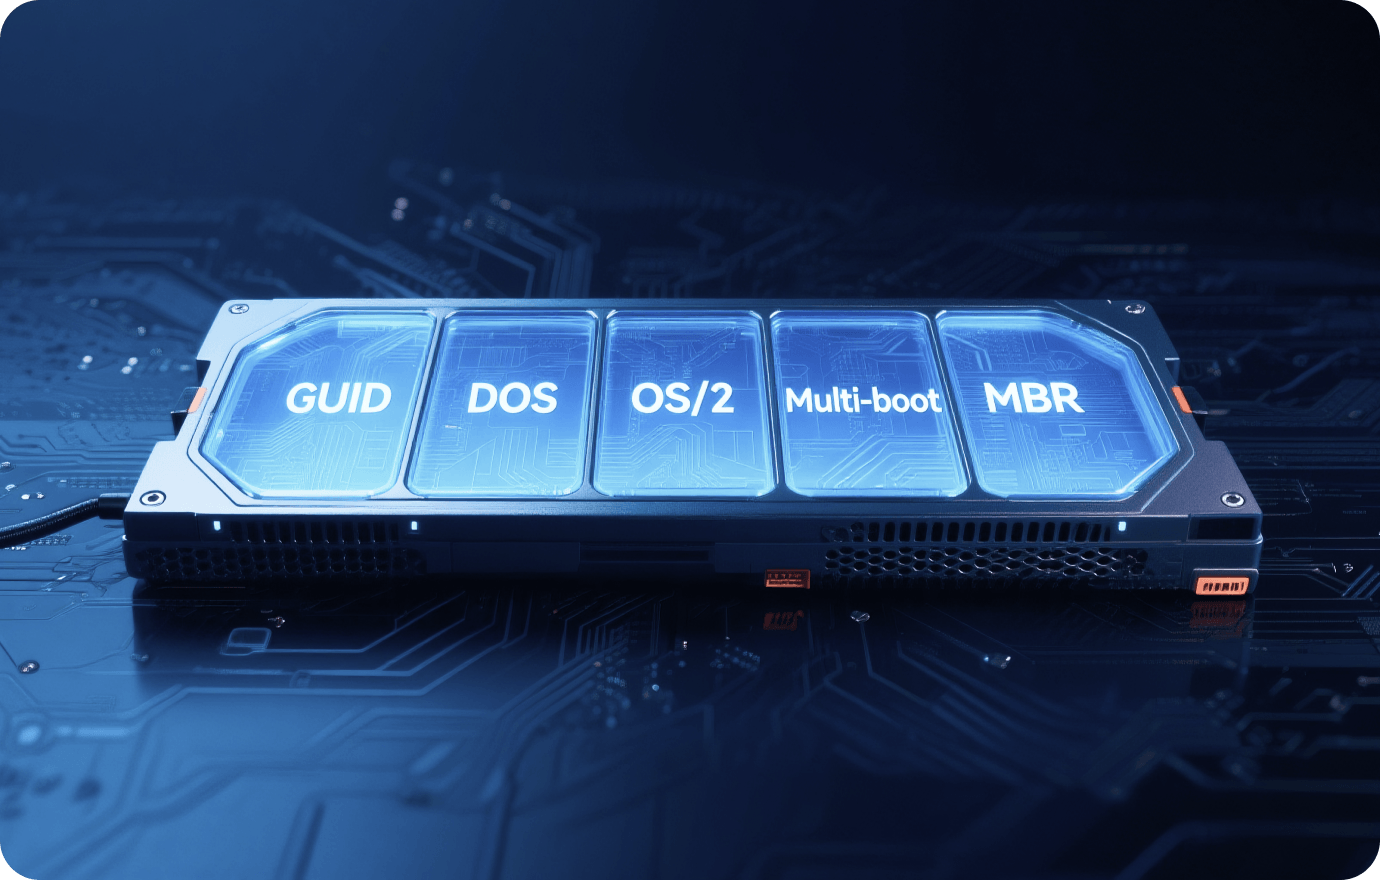
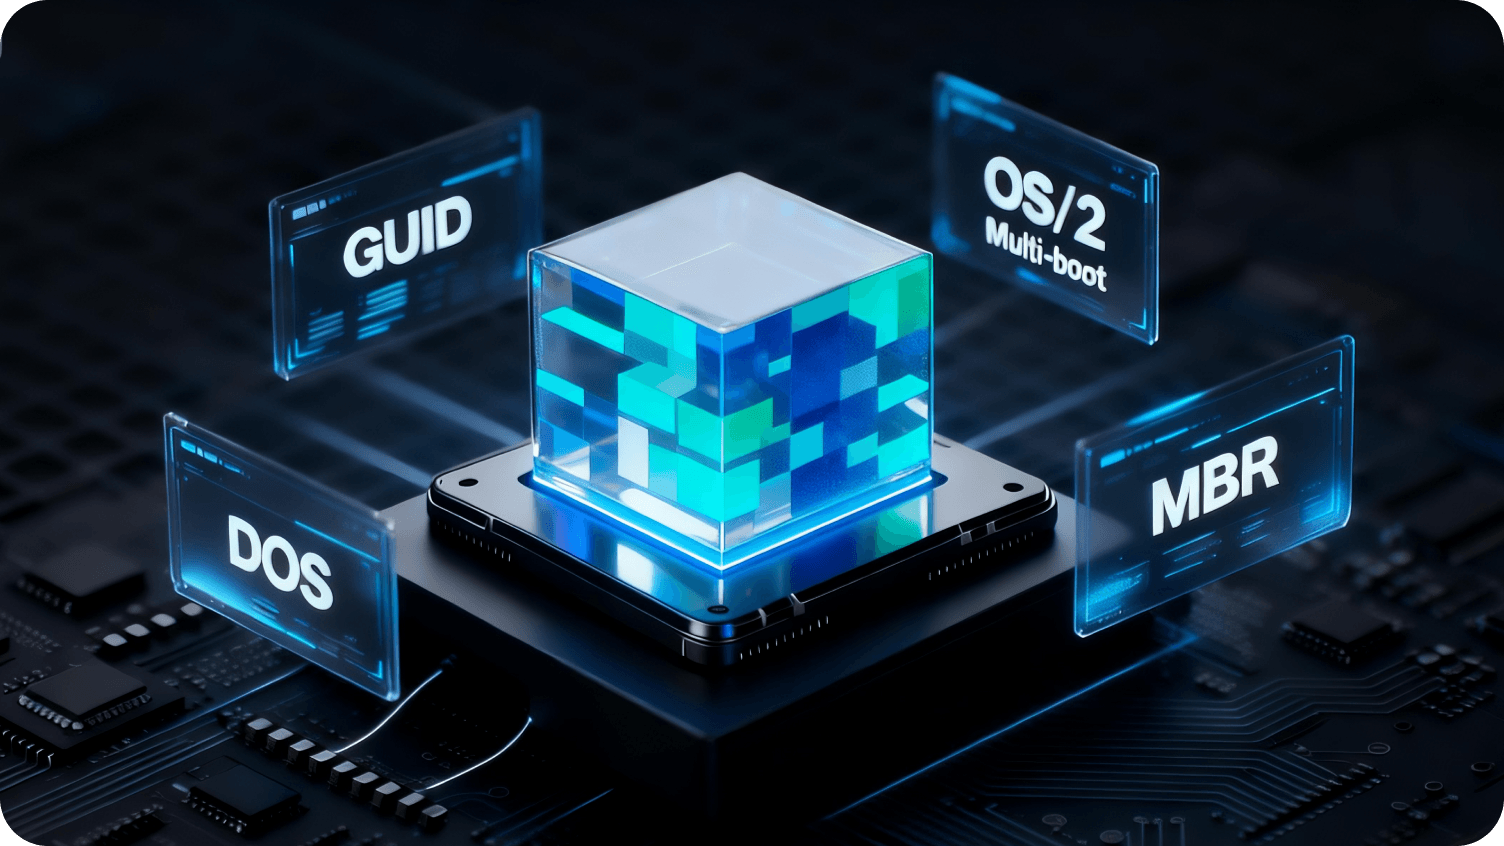
Recover lost Data from Any Partition
No partition type is fully immune to data loss, which is why Recoverit can recover all partitions commonly used today, including: PC partition types, Master boot record (MBR), GUID Partition Table, Primary partition, Extended partition, DOS, Windows, and OS/2, Unix-like systems, Multi-boot and mixed-boot systems and Logical partition.
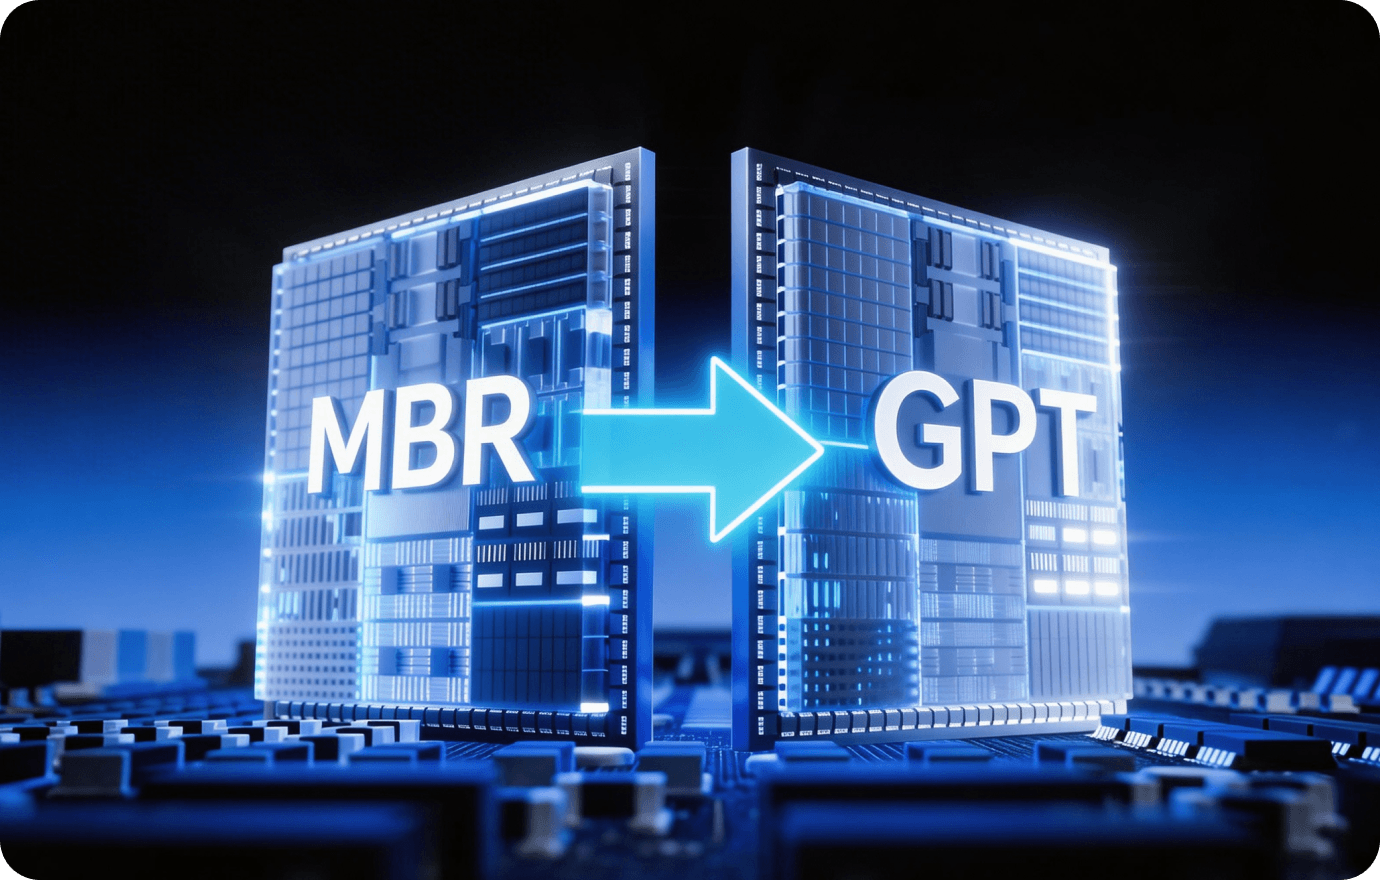
System Migration & Convert MBR to GPT Partition
Recoverit supports to migrate the current computer’s windows system environment (including system partition, boot partition and system configuration) to another disk (such as SSD or a larger capacity hard drive) without reinstalling the system.
Without emptying the disk or reinstalling the system, Recoverit supports to convert the disk partition table from MBR to GPT, helping the system meet the boot requirements of Windows 11 and UEFI.

Recover Formatted/Corrupted/RAW/Encrypted Partitions
Recoverit supports to recover data from formatted/corrupted/raw/encrypted partition (including BitLocker etc.).
Our software uses an intelligent matching algorithm to identify optimal samples for formatted/corrupted/raw/encrypted partition recovery and structural video/image recovery and repair. We provide solutions for a variety of common issues, from disk corruption, accidental formattion to permanent deletion.

Permanently Deleted/Lost Data Recovery & Corrupt Data Repair
Recoverit supports to recover deleted/lost partition data and repair corrupted videos/photos/document files.
Our software uses an intelligent matching algorithm to identify optimal samples for structural video/image repair. We provide solutions for a variety of common issues, from blurry footage to low-resolution photos, supporting output resolution up to 8K.
Recover Deleted/Lost Data from Hard Drive
Anytime Any Scenario
Recover all partitions in different devices.
Recoverit supports to recover lost data from almost all devices, including PC, USB, SD card, hard drive, portable storage devices etc.
PC/Mac
even with BitLocker or T2, M1/M2 chip-enabled, Dell®, HP®, Acer®, Asus®, MacBook Pro®, MacBook Air®, Apple iMac® and more
HDD/SSD
internal hard drive; external hard drive; nas hard drive. HP®, Samsung®, Seagate®, Toshiba®, WD®, LaCie®, Intel®, Adata® and more
Storage Arrays
RAID0, RAID1, RAID5, RAID6, RAID10, JBOD, and Windows Storage Spaces

USB Flash Drive
SanDisk®, Samsung®, Kingston®, Corsair®, Patriot®, PNY®, Verbatim®, Silicon Power® and more

SD Card
SanDisk®, Transcend®, Toshiba®, Lexar®, Integral®, SP®, PNY®, Kingston® and more

TF/CF card
SanDisk®, Transcend®, Toshiba®, Lexar®, Integral®, SP®, PNY®, Kingston® and more
Camera
Samsung, HP, Sony, GoPro, Canon, Sigma, Nikon, Epson, Panasonic etc.
Other Partitions
Primary partitions, extended partitions and logical partitions.
Effortlessly Retrieve Any File Types From Partitions
Supporting over 1000 distinct file signatures during a deep scan, Recoverit partition data recovery tool guarantees comprehensive recovery of your documents, photos, videos, and other vital data on your HDD or SSD, ensuring no essential files are left behind.

Images
CRW, JPEG, JPG, PNG, PSD, RAW, RGB, 3DM, 3DMF, 3FR, ABM, AFX, ANI, ART, ARW, BIZ, BLD, etc.

Videos
MP4, MOV, AVI, FLV, M4V, WMV, MXF, AVI, MKV, MPEG, MPEG4, MPG, MTS, AVCHD, BRAW, R3D, etc.

Audios
MP3, AAC, FLAC, OGG, WAV, WMA, AA3, AAC, AC3, ACC, AFC, AIF, AIFC, AIFF, AM, AMR, APE, etc.

Office Files
DOC, DOCX, RTF, DOT, DOTX, DOTM, ODT, WordML, XLS, XLSX, XLTX, PPT, PPTX, PPSX, PDF, PDF/A, etc.

Archives & Outlook
EDB, EML, EMLX, MAIL, MBX, MSG, OEB, PAB, PST, WAB, 7Z, BZ, BZIP, CAB, JAR, WAR, ZIP, ZIPX, etc.

Other Files
BQY, BTR, CAP, HTM, HTML, ASPX, ACM, ACP, ADT, AFM, API, ARX, MHT, MHTML, PHP, etc.
Comparison with other Partition
Recovery Tools
Explore why Recoverit outperforms other partition recovery tools.
| Partition Recovery Tool |
|
Disk Drill | Acronis Disk Director | Recuva | TestDisk |
|---|---|---|---|---|---|
| Supported file systems | exFAT, FAT16, FAT32, NTFS, ReFS, HFS+, Encrypted HFS, HFSX, APFS, BTRFS, XFS, BFS, EXT4 | exFAT, FAT16, FAT32, NTFS, HFS+, APFS, EXT2/3/4 | FAT16/32, NTFS, NTFS, Ext2/3 | exFAT, FAT16, FAT32, NTFS, EXT2/3/4 | FAT12, FAT16, FAT32, exFAT, NTFS, HFS, HFS+, HFSX, JFS, BTRFS, XFS, EXT2/3/4 |
| Supported OS | Windows, Mac, Linux | Windows, Mac | Windows, Mac | Windows, Mac | Windows, Mac |
| Supported File Types | 1000+ | 400+ | / | 50+ | 100+ |
| Partition recovery |
|
||||
| Quick and deep scan |
|
Partial support | Partial support | Partial support | Partial support |
| Disk Image Recovery |
|
||||
| Unbootable Hard Drive Recovery |
|
||||
| Document/Photo/Video Repair |
|
||||
| File Preview |
|
Partial support | Partial support | ||
| Resume Scanning Process |
|
||||
| Video Fragments Match |
|
||||
| AI-powered Recovery |
|
|
Tech Specs of Wondershare Recoverit
-
Supported OS:
Windows 11/10/8.1/8/7/Vista
Windows Server 2003-2022
macOS 10.10 or later -
Supported File Systems:
exFAT, FAT16, FAT32, NTFS, ReFS, HFS & HFS+, APFS, RAID, JFS, BTRFS, XFS, BFS, EXT4, and any RAW disk -
Hard Disk Space:
56MB minimum space for installing

Quick Recovery
Both Quick and Deep Scan modes supported

Free Preview
Free preview of all recoverable files before recovering

AI + S.M.A.R.T.
Recoverit supports to AI recovery and S.M.A.R.T. monitoring (Mac).

Recover RAW Hard Drive
Easily recover lost data from RAW hard drives.

Deleted Partition Recovery
Recover accidentally deleted partitions and unallocated partitions
BitLocker Partition Recovery
Recover BitLocker encrypted partitions, including locked, corrupted and raw BitLocker partitions.
Lost Partition Recovery
Recover lost, unallocated, unrecognized partitions
Restore Partitions Windows/Mac
Recover partitions on both Windows and mac
Bonus: Some Other Methods to Recover Lost
Partition Data
These are some other methods to recover lost partition data without software installed. Some methods success rate is not guaranteed. Only for your interests.
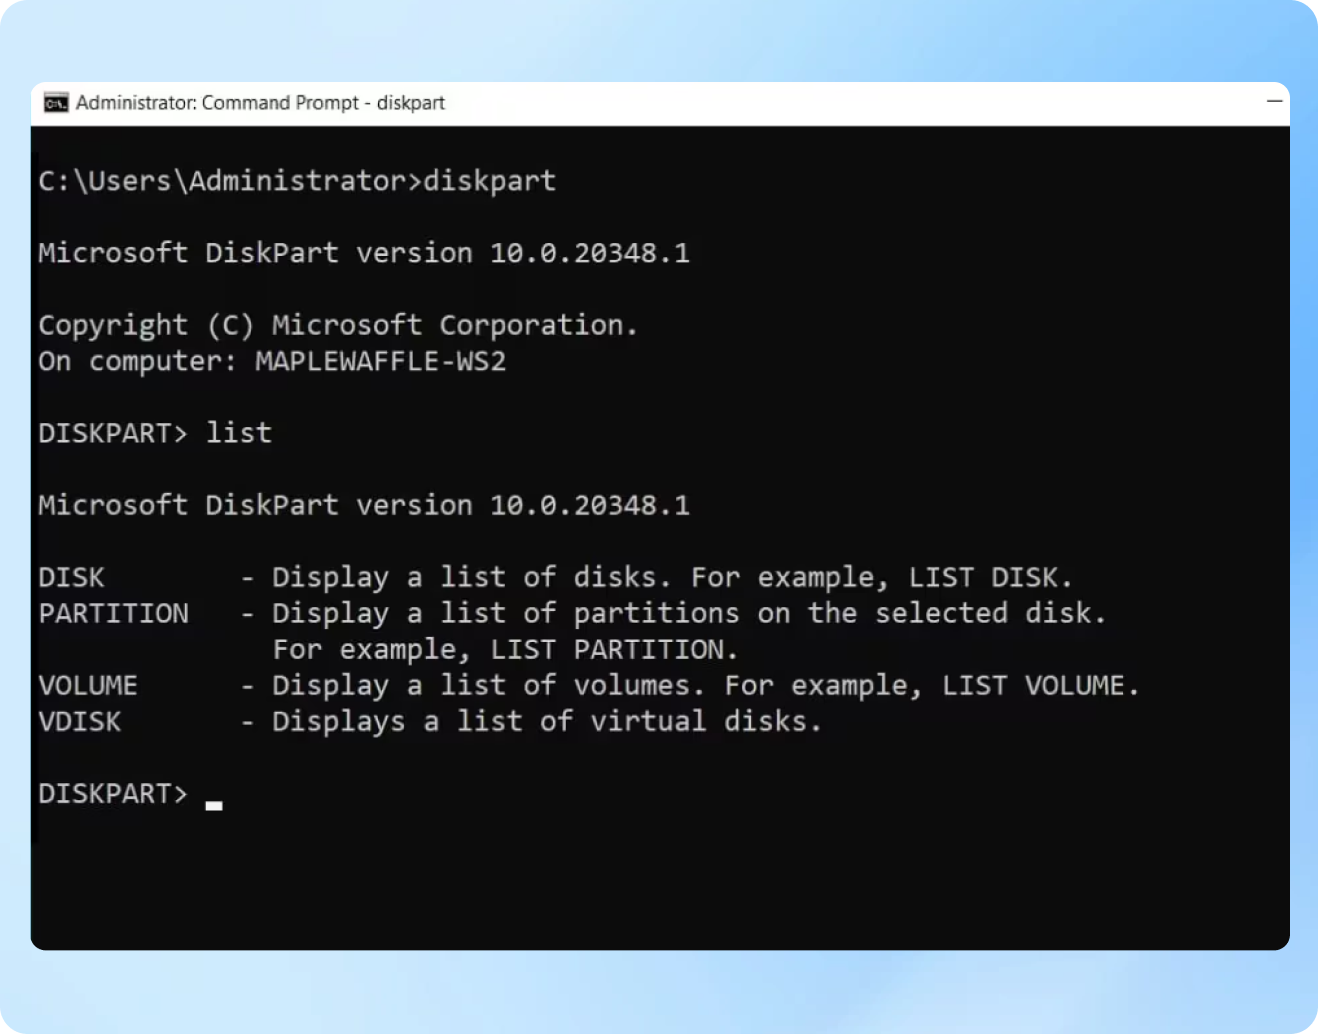
You can use Diskpart to undelete a lost partition;
Free and native
Fast recovery
High risk of data loss
Technical knowledge required
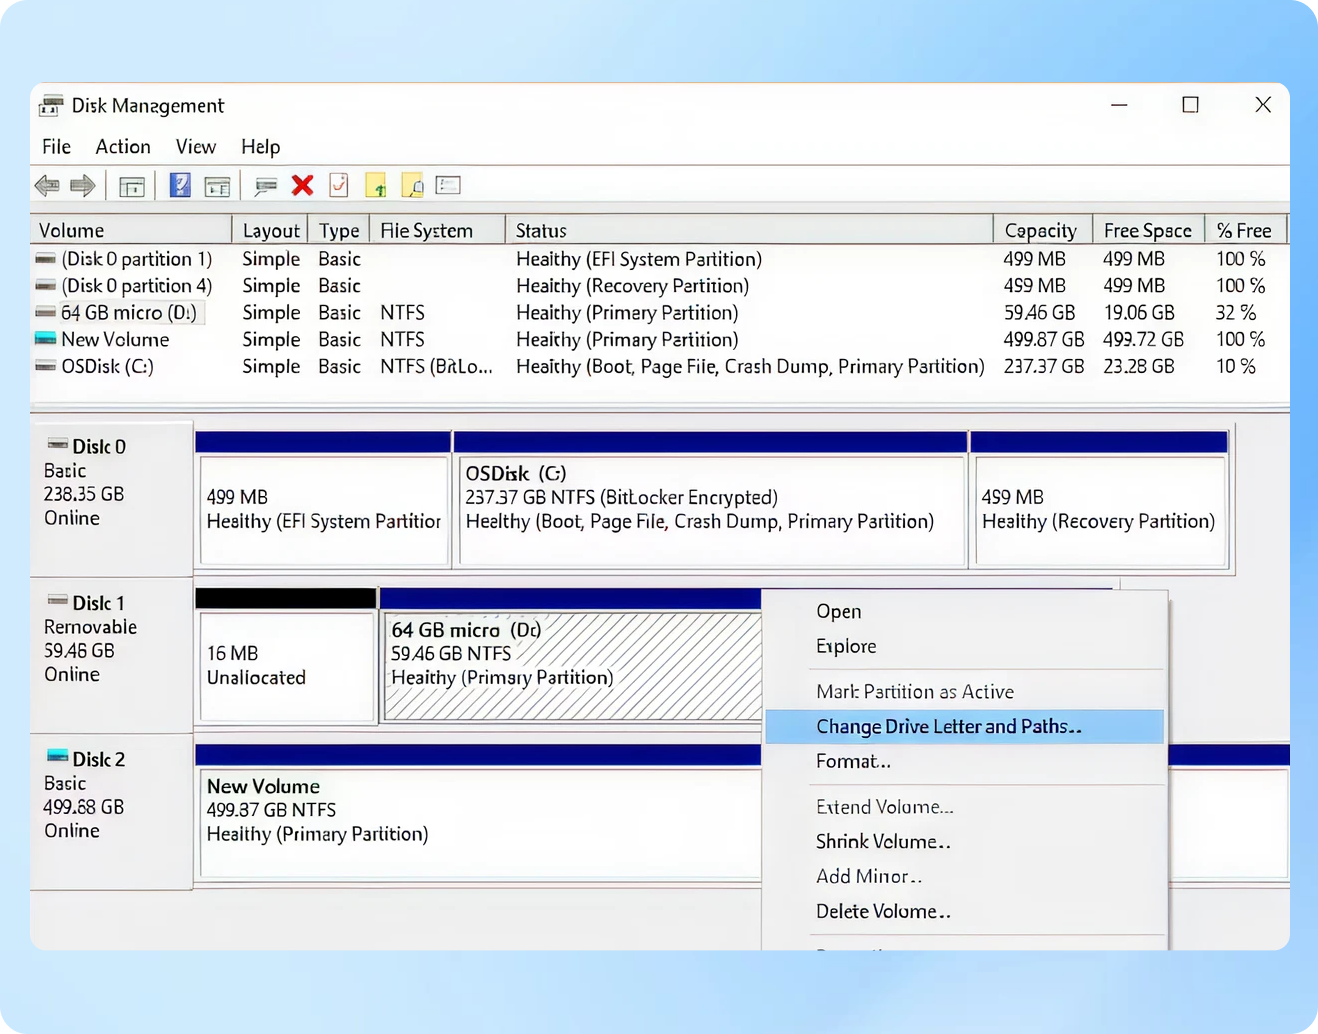
You can change drive letter in disk management
Accessible
File recovery
Broken recovery process
System instability
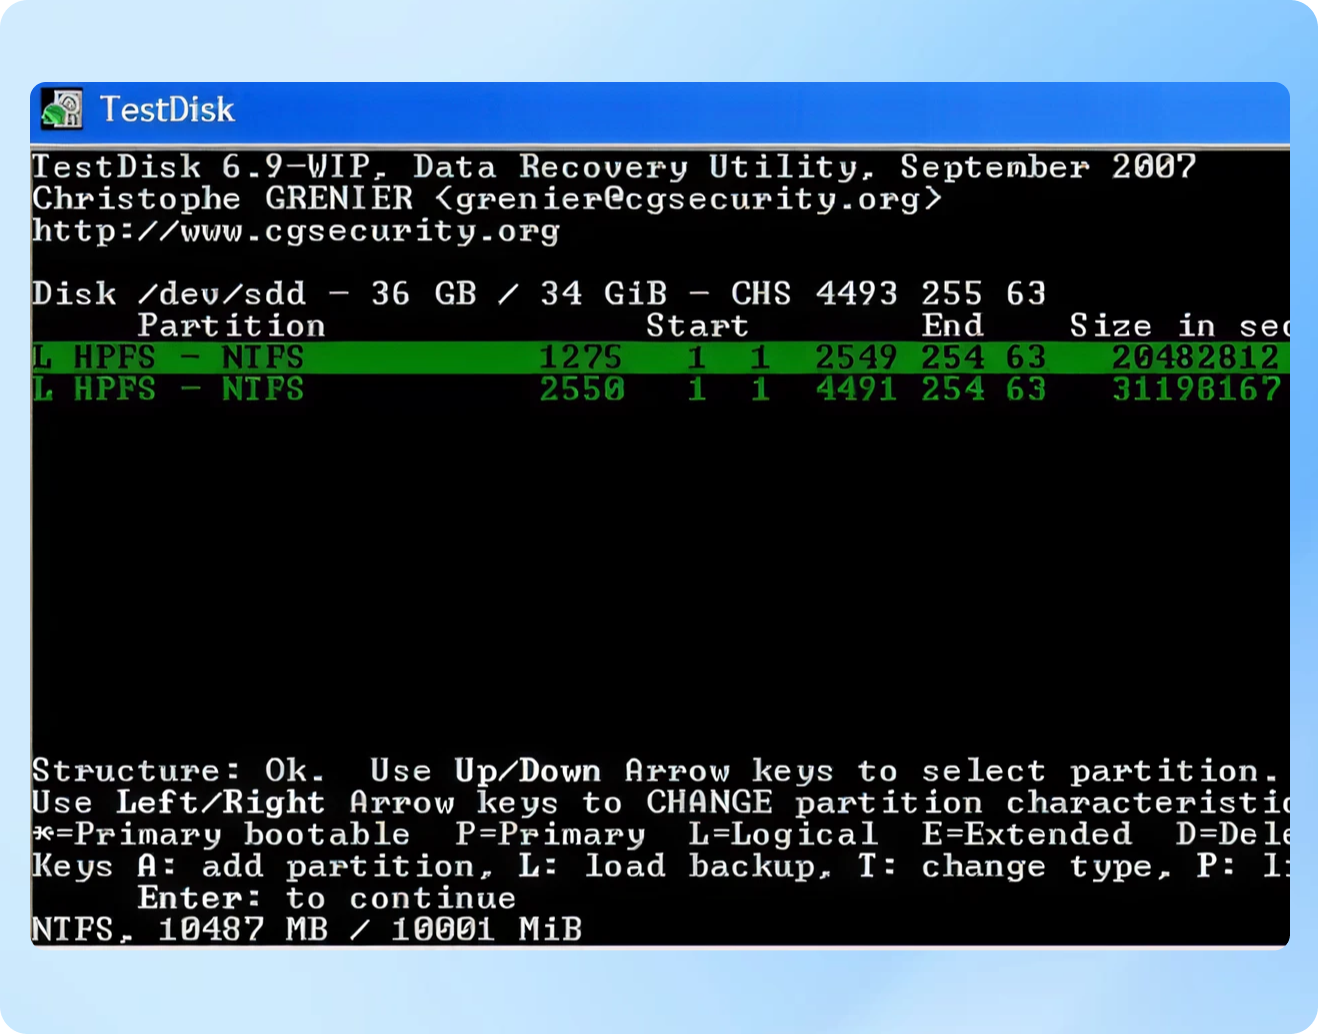
You can recover a missing partition with TestDisk
Free and open source
Versatile platform support
Risk of further damage
Steep learning curve
Just because you can't access a partition from Windows doesn't always mean the partition is deleted. It's possible that the partition is simply using an unsupported file system, Linux etc.
Access without booting
No dependency on system drive
Risk of further corruption
Steep learning curve
Contact Data Recovery Professionals
Recover damaged devices
High success rate
Expensive
Time-consuming
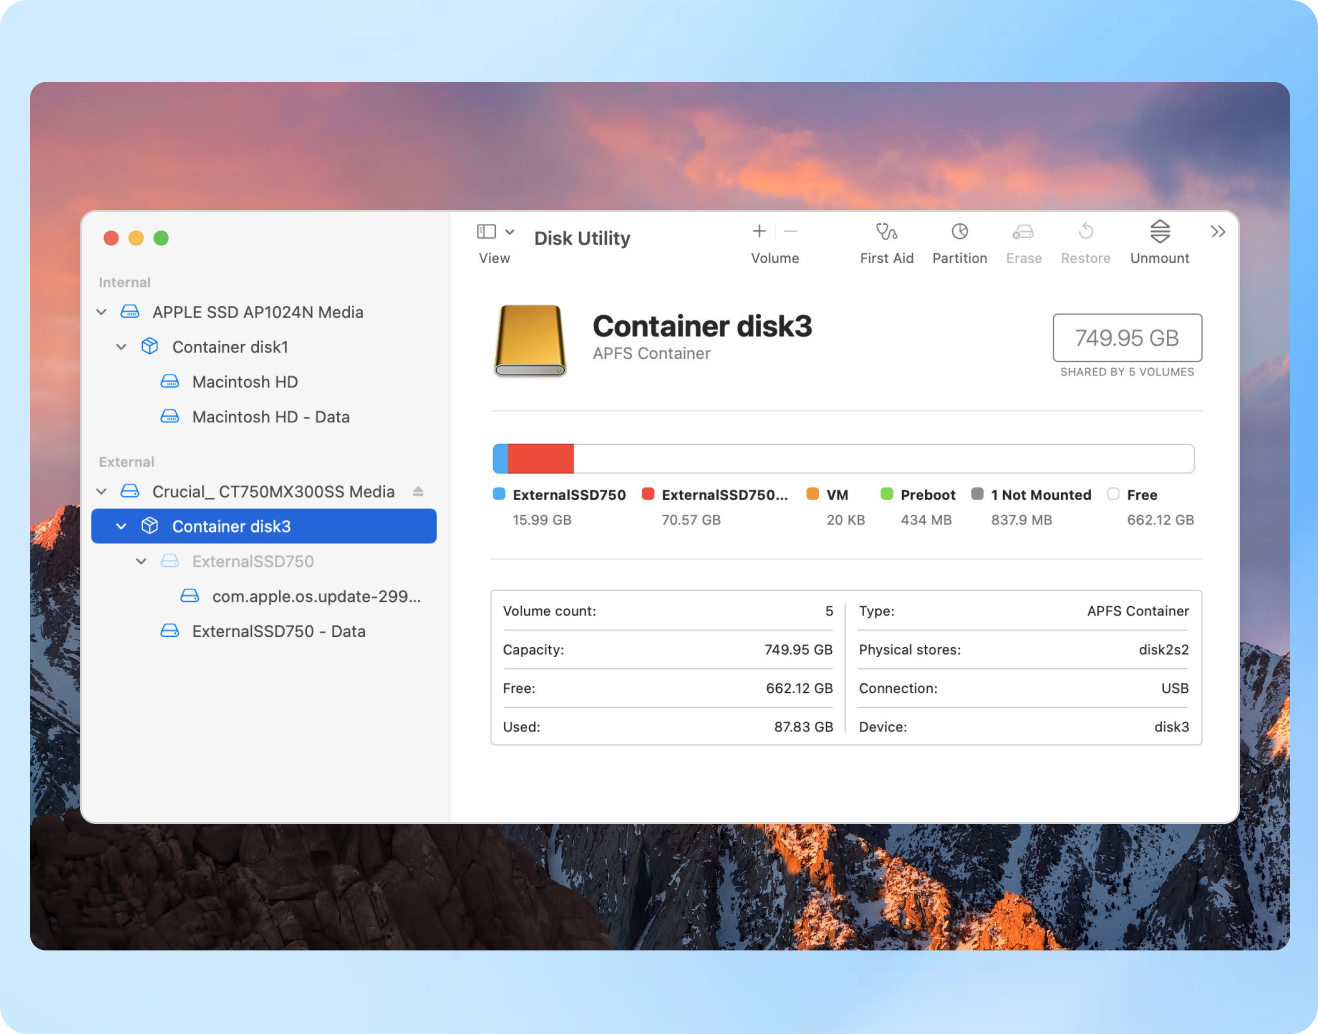
You can use Disk Utility to recover partition on mac;
Requires no backups
Fixes non-booting systems
Limited capability
Can get stuck
Tips and Video Tutorials about Partition Recovery
Partition Recovery Success Estimation
Data recovery chances can vary greatly according to what kind of data loss situation to solve. Less serious causes of data loss (such as accidental deletion) can be solved easily without data loss, while more serious causes (such as hardware damage) may be impossible to solve. The following overview of common data loss scenarios should give you at least some general idea of what your data recovery chances are:


FAQs about Partition Data Recovery
How do I recover a disk partition?
How can I recover my lost partition for free?
How to recover a deleted partition in Windows 10 for free?
How can I recover data from a RAW partition for free?
How to recover a formatted partition for free?
How do I fix the damaged partition?
What is the difference between data recovery and partition recovery?
Recoverit's Other Features


One-stop Tool for partition recovery
With a success recovery rate of 99.5%, Recoverit can completely recover lost or deleted data from different partitions.