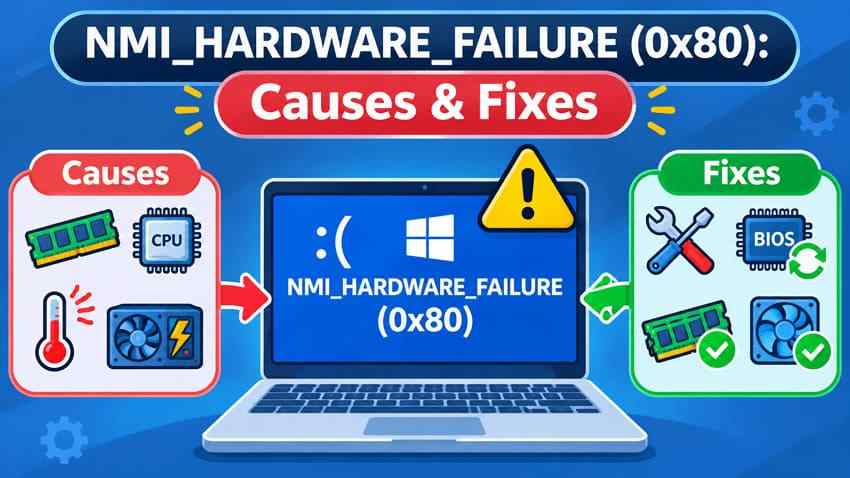
NMI_HARDWARE_FAILURE (bug check 0x00000080) is a Windows blue-screen stop code associated with a non-maskable interrupt (NMI). It can indicate a hardware malfunction, but the code alone does not identify a faulty RAM stick, graphics card, or motherboard. On some systems, an NMI can also be triggered deliberately for diagnostics. The safest way to troubleshoot it is to confirm the code, check what changed, and follow the evidence rather than immediately reinstalling Windows.
If Windows still starts, back up important files and begin with reversible checks. If it keeps restarting, avoid repeated stress tests or firmware changes until you have assessed the hardware and protected the data on any readable drive. The steps below apply to Windows 10 and Windows 11; firmware menus and hardware tests depend on the PC model.
In This Article
-
- What Is NMI_HARDWARE_FAILURE (0x00000080)?
- Recognize the Exact Stop Code and When the NMI Was Triggered
- Determine Whether the PC Still Boots or Reboots Continuously
- Before Stress Tests or Firmware Updates: Back Up Accessible Files and Record Symptoms
- How to Identify the Cause of NMI_HARDWARE_FAILURE
-
- First Decide Whether Hardware Diagnostics Are Safe to Run
- Fix 1. Disconnect Recently Installed Hardware and External Devices
- Fix 2. Roll Back Recently Updated Hardware Drivers
- Fix 3. Test Your RAM for Hardware Errors
- Fix 4. Reset BIOS Settings and Disable Overclocking
- Fix 5. Run Manufacturer Hardware Diagnostics
- Fix 6. Check CPU Temperature, Cooling, and Power Connections
- Fix 7. Update BIOS, Chipset Drivers, and Hardware Firmware
- Fix 8. Replace or Repair the Faulty Hardware Component
- When to Stop DIY Troubleshooting and Use Professional Hardware Repair
- If Windows Cannot Boot: Protect Files Before Reset or Replacement
- Verify Stability Under Normal Use
Part 1. What Does NMI_HARDWARE_FAILURE (Bug Check 0x80) Mean?
Start with the exact error and the circumstances around it. A stop code describes the failure Windows detected, not necessarily the component that caused it. Your boot behavior, recent changes, and diagnostic results are more useful than guessing from the name alone.
What Is NMI_HARDWARE_FAILURE (0x00000080)?
An NMI is a high-priority interrupt that Windows cannot simply ignore. Microsoft's bug check 0x80 documentation says that various hardware malfunctions may produce this stop code and that its exact cause can be difficult to determine. Bug check 0x80 has no documented parameters that identify a failed part.
However, not every NMI means a component has physically failed. On certain workstations and servers, a service processor or NMI switch can intentionally trigger the same stop screen to capture diagnostic data. Microsoft's NMI troubleshooting note documents this behavior. On an ordinary home PC without an intentional NMI event, treat the code as a reason to investigate hardware and platform stability, not as proof of one specific failure.
Recognize the Exact Stop Code and When the NMI Was Triggered
Write down NMI_HARDWARE_FAILURE or 0x00000080 as displayed. Note the date, whether the PC was gaming, streaming, idling, or starting, and any recently installed hardware, drivers, or BIOS settings. Other blue screens can occur alongside it; do not assume they share one cause.
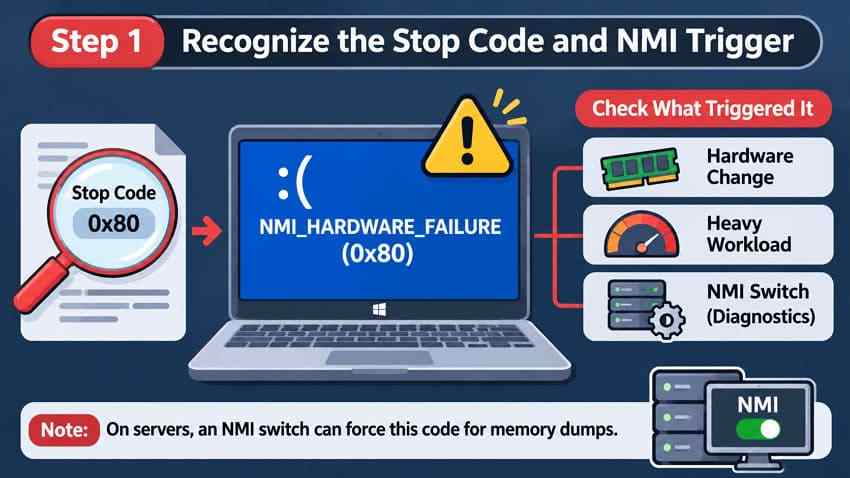
For example, a Reddit troubleshooting thread describes crashes while gaming and streaming, yet the dumps shared in that thread did not capture the reported NMI event. This is a useful reminder: the activity that preceded a crash is a clue, not a diagnosis. If the device belongs to an organization or is a managed server, ask its administrator whether an NMI was intentionally generated.
Determine Whether the PC Still Boots or Reboots Continuously
If Windows boots, open System Properties > Advanced > Startup and Recovery > Settings and, if helpful, temporarily clear Automatically restart so you can read the next stop code. For a boot loop that reaches Windows Recovery Environment, use Troubleshoot > Advanced options > Startup Settings > Restart, then select option 9, Disable automatic restart on system failure, if that option is available. This changes how the error is displayed; it does not fix the underlying fault. See Microsoft's Startup Settings guidance.
| Observed behavior | Possible direction, not a diagnosis | Safer next move |
| Windows loads, but crashes after a new device or driver | Recent hardware, connection, or driver change | Back up files; undo one recent change at a time |
| Crashes mainly during demanding work | Cooling, power delivery, or another load-sensitive issue | Check temperatures and cooling without starting a stress test |
| Random crashes, including at idle | RAM, expansion hardware, firmware, or other platform instability | Record system events and use targeted OEM diagnostics |
| Restarts before sign-in | Possible hardware or firmware fault during startup | Stop repeated boot attempts if unsafe; use OEM preboot tests if stable |
| Crashes in BIOS or during preboot tests | Failure outside the normal Windows environment | Stop DIY testing and seek qualified hardware service |
Before Stress Tests or Firmware Updates: Back Up Accessible Files and Record Symptoms
If the PC is currently stable enough to access documents, photos, and work files, copy them to a separate healthy drive or trusted backup location before extended testing, BIOS changes, Windows Reset, or hardware replacement. Do not treat crash dumps or a recovery program as a replacement for a usable backup. If a drive clicks, disconnects repeatedly, or disappears from firmware diagnostics, stop attempts to read it and consider professional data recovery instead.
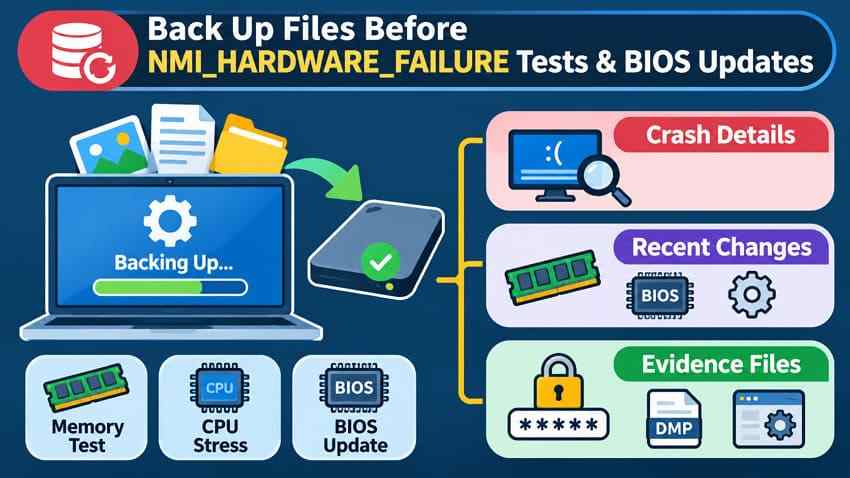
- Crash details: Save the exact stop code, crash times, and what the PC was doing.
- Recent changes: Record new RAM, PCIe devices, cables, drivers, BIOS versions, and overclock or undervolt settings.
- Recovery information: Keep the legitimate BitLocker recovery key available, along with any existing diagnostic reports and photos of firmware settings.
- Accessible evidence: If Windows is stable, preserve relevant Event Viewer entries and crash dumps, when present. Do not repeatedly force crashes to create new ones.
How to Identify the Cause of NMI_HARDWARE_FAILURE
On a PC that starts, right-click Start, open Event Viewer > Windows Logs > System, and compare warnings or errors near the crash time. WHEA-Logger events, when present, may provide hardware-related information; their absence does not rule out a problem. Microsoft's WHEA event documentation explains how such events are recorded.
If you have an existing crash dump and know how to use WinDbg, the !analyze -v command may provide context. Do not assume that a driver appearing in a stack trace caused the NMI. The dump may be incomplete or may not include the NMI event itself.
| Clue | What to investigate | How to check it |
| Crash began after adding RAM or a PCIe card | Compatibility, seating, or the new component | Return to the previous known-good configuration if safe |
| XMP, EXPO, or manual overclocking is active | Memory training and overclock stability | Document settings and test supported defaults |
| Crash follows a driver update | Changed device driver or related device | Roll back the specific driver if the option exists |
| Fans are unusually loud or the system shuts down under load | Cooling or power issue | Inspect airflow and compare readings with device specifications |
| OEM test reports an error code | Component named by the manufacturer | Save the code and contact manufacturer support |
Part 2. How to Diagnose and Fix NMI_HARDWARE_FAILURE on Windows
These eight fixes are diagnostic options, not a checklist to complete blindly. Choose the first one supported by the symptoms. After each safe change, observe whether the same stop code returns. A failed hardware test or an unsafe electrical condition takes priority over further software troubleshooting.
First Decide Whether Hardware Diagnostics Are Safe to Run
Do not run memory stress tests, repeatedly start a failing PC, or attempt a BIOS update if you notice smoke, a burning smell, liquid damage, a swollen battery, sparking, a visibly damaged cable, or severe overheating. Shut down, disconnect external power if safe, and consult the manufacturer or a qualified technician. A drive that is repeatedly disappearing, clicking, or reporting mechanical problems needs a data-preservation decision before more tests.
If there are no such warning signs, save your work, keep the system on stable power, and start with the low-risk checks below. For laptops with sealed cases, avoid internal disassembly unless the manufacturer explicitly documents it as user-serviceable.
Fix 1. Disconnect Recently Installed Hardware and External Devices
When to try it: The first 0x80 crash followed a new USB device, dock, graphics card, RAM upgrade, or another hardware change. Microsoft specifically recommends checking recently installed hardware or drivers for bug check 0x80.
Step 1. Shut down the computer and disconnect external power. Unplug nonessential external devices, leaving required input and display equipment connected. On a user-serviceable desktop, consider removing only the newly added internal part, following the device manual and anti-static precautions.
Step 2. Boot with the previous configuration. If the system becomes stable, check the suspected device's compatibility, firmware, connections, and warranty before reconnecting it. Test only when there are no electrical or overheating warning signs, and do not repeatedly reinstall a part that appears damaged.
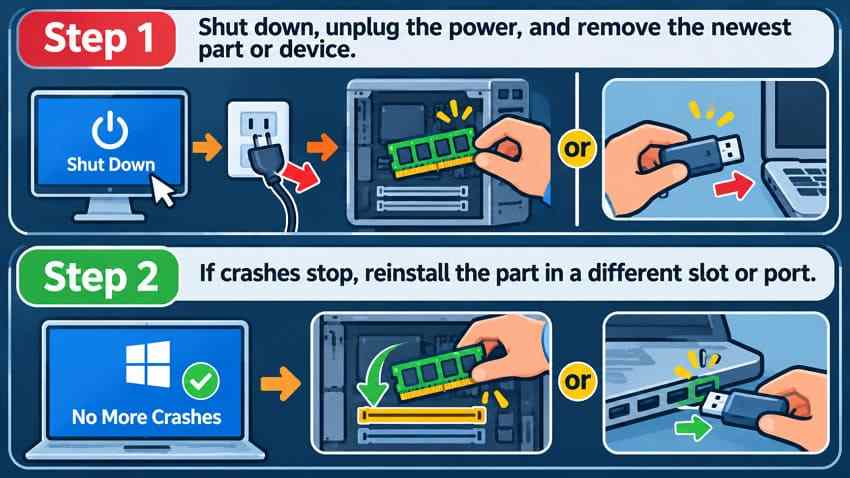
Expected result: Crashes stop after one identifiable change. If not: Restore a safe configuration and move to the diagnostic clue that best fits the symptoms; unchanged behavior does not prove the removed part is healthy or faulty.
Fix 2. Roll Back Recently Updated Hardware Drivers
When to try it: Windows still starts and the problem began immediately after a driver update. Focus on the device whose update matches the timeline rather than rolling back every driver.
Step 1. Right-click Start > Device Manager, expand the relevant category, right-click the device, and choose Properties.
Step 2. On the Driver tab, select Roll Back Driver if available. Follow the prompts and restart if requested. Microsoft documents this procedure in its driver management guidance.
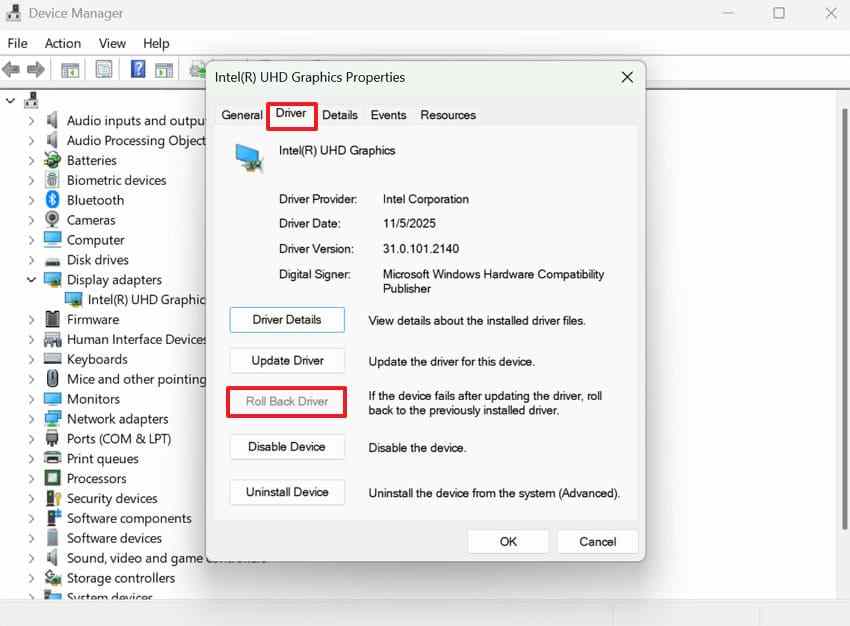
Expected result: The previous driver version appears and the crashes stop during ordinary use. If not: If the button is unavailable, a previous driver may not be stored. Check the device maker's official instructions and compatible driver package; do not install random drivers from third-party sites. Continued NMI events warrant hardware checks even if a driver was recently changed.
Fix 3. Test Your RAM for Hardware Errors
When to try it: The PC is stable enough for a memory test and crashes began after a memory change or recur without a clear driver pattern. First confirm that the installed memory is compatible with the system. A failed memory test is evidence of a memory-subsystem problem, not automatic proof that one particular module is defective.
Step 1. Save work, press Win + R, enter mdsched.exe, and choose Restart now and check for problems (recommended). Windows will restart to run its memory diagnostic.
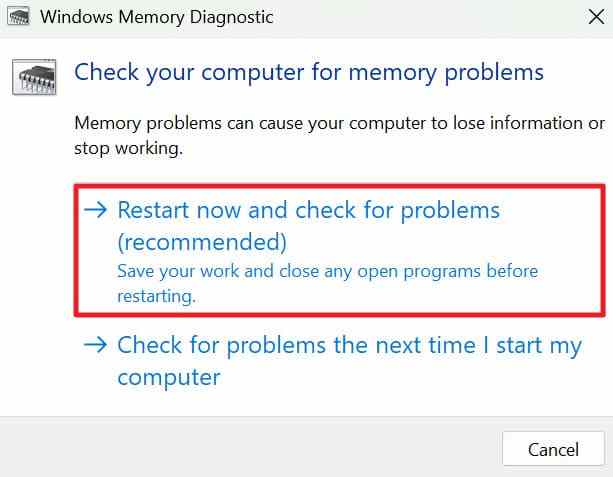
Step 2. Let the default test complete. If the PC is safe to test further, the Windows Memory Diagnostic screen may offer F1 to choose an Extended test and F10 to apply it. Extended testing takes longer; do not use it on an overheating or electrically unstable device. For deeper checks, follow your PC manufacturer's memory-test instructions.
Step 3. After Windows restarts, review the result notification. If it is missing, open Event Viewer > Windows Logs > System and look for MemoryDiagnostics-Results entries, or use the manufacturer's recorded diagnostic report.
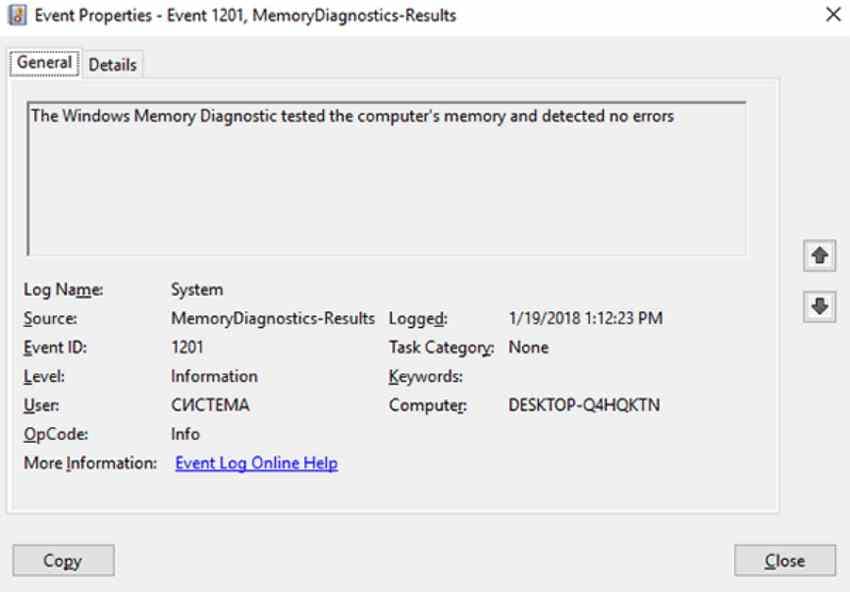
Expected result: A recorded pass or failure helps guide the next action. If an error is reported: Stop heavy use, save the diagnostic details, and seek vendor support. On compatible user-serviceable desktops, one-module-at-a-time testing can sometimes isolate a problem; do not attempt this with soldered RAM. If the test passes: Intermittent RAM, slot, controller, or platform faults are still possible.
Fix 4. Reset BIOS Settings and Disable Overclocking
When to try it: The crashes started after enabling XMP, EXPO, undervolting, manual memory timings, or CPU/GPU overclocking. Unsupported or unstable settings can make diagnosis harder.
Step 1. Before touching firmware, photograph the current settings. Record boot order, storage controller mode, security settings, and any custom values. Make sure you have the legitimate BitLocker recovery key; changing firmware settings can prompt recovery at the next startup.
Step 2. On a stable PC, enter BIOS/UEFI using the manufacturer's documented startup key or Windows advanced startup path. Disable the specific overclock or memory profile first. If needed, load the system's documented defaults, carefully review any changed boot or storage settings, then save and restart. The screenshot below is a motherboard-specific example; your menu may look different.
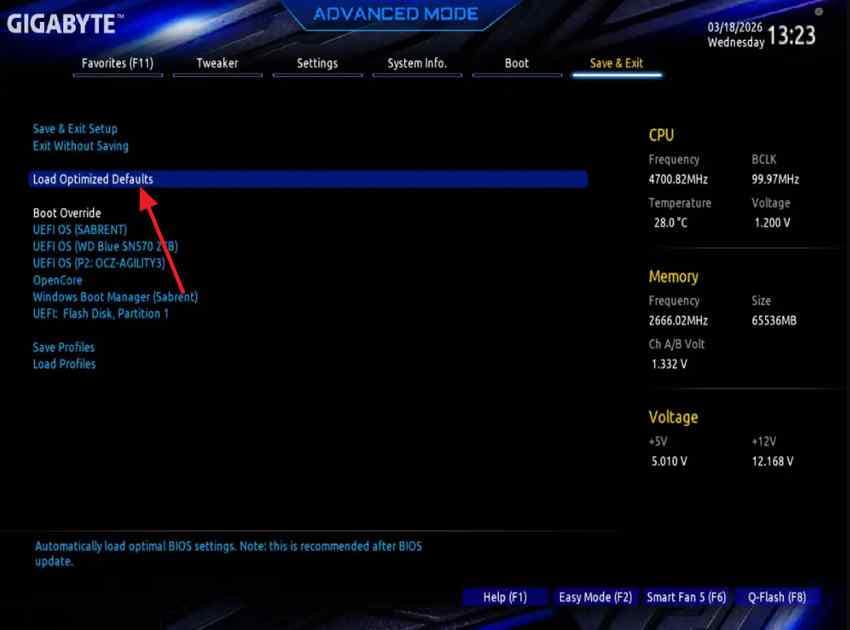
Expected result: Windows starts using supported settings and remains stable during normal tasks. If not: Avoid repeatedly changing unrelated firmware options. If the system will not boot after a change, use the manufacturer's documented recovery procedure or professional support. Do not reset TPM keys or change storage controller mode simply to troubleshoot this stop code.
Fix 5. Run Manufacturer Hardware Diagnostics
When to try it: Crashes persist, occur before Windows starts, or a particular component is suspected. Start with an OEM quick test rather than a long stress test. A result code tied to a component is more useful than a generic stop-code guess.
| PC maker | Typical supported diagnostic path | What to keep |
| Dell | On supported Dell systems, press F12 at the Dell logo and select Diagnostics (Dell guide) | Error and validation codes |
| HP | On supported HP PCs, press Esc at startup and then F2 to open hardware diagnostics (HP guide) | Failure ID and test name |
| Lenovo | On supported models, prepare Lenovo Diagnostics UEFI USB on another PC and choose it from the F12 boot menu (Lenovo guide) | Test result and error code |
Step 1. Identify the exact PC model and follow the relevant manufacturer's quick-test instructions. Prepare any diagnostic USB on a different, working PC and be aware that creating it may erase the USB drive.
Step 2. Run the targeted test only if the hardware is safe to operate. Record the component name, test type, device serial or service tag where appropriate, and any failure code.
Expected result: A failure code gives the manufacturer or technician a concrete starting point. If tests pass: Intermittent faults can still occur; compare the result with crash timing and other evidence instead of assuming the PC is repaired. If a drive appears physically damaged, avoid extended storage tests.
Fix 6. Check CPU Temperature, Cooling, and Power Connections
When to try it: The system shuts down under load, fans behave abnormally, or overheating is suspected. Intel's overheating troubleshooting guidance lists sudden shutdowns, throttling, and excessive fan noise as possible symptoms, but those signs do not establish that overheating caused this NMI.
Step 1. With the PC running normally, check temperatures using BIOS/UEFI or the manufacturer's monitoring software and compare them with the CPU and system specifications. Shut down and disconnect power before clearing dust from accessible vents or checking whether external airflow is blocked.
Step 2. On a desktop designed for user servicing, check the CPU cooler mounting and visible 24-pin motherboard and CPU power connections only when fully powered off and disconnected. On laptops, use the manufacturer's approved adapter. Never open a power supply unit or work inside a powered device.
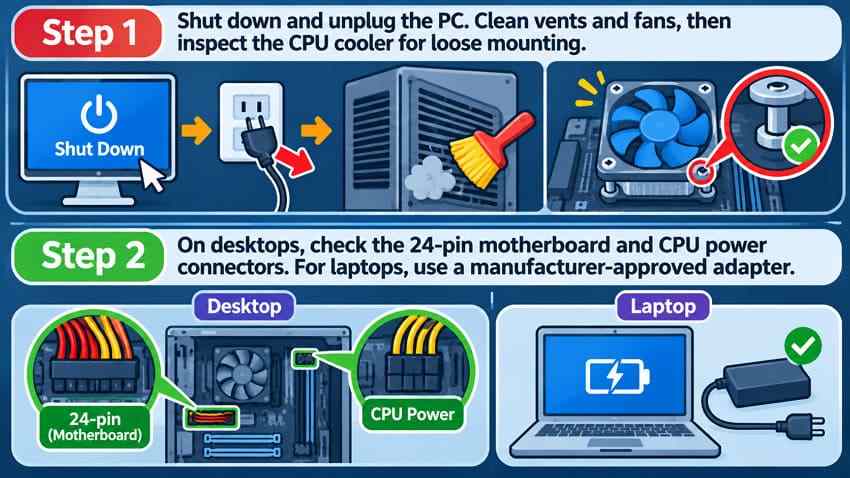
Expected result: Fans operate normally, connections are secure, and temperatures remain within model specifications during routine use. If not: Stop testing and seek service for failed cooling, suspected PSU problems, or abnormal heat. Do not run stress benchmarks to reproduce an electrical or thermal fault.
Fix 7. Update BIOS, Chipset Drivers, and Hardware Firmware
When to try it: The manufacturer's release notes identify a compatibility or stability fix relevant to your exact model. Firmware updating is not an automatic first response to NMI_HARDWARE_FAILURE, especially on a machine that already restarts unpredictably.
Step 1. On the device maker's official support site, enter the exact PC or motherboard model. Read the BIOS, chipset, and device firmware release notes and confirm hardware revision, operating-system compatibility, and prerequisites. Do not use an update meant for a similar-looking model.
Step 2. Back up important files and locate your BitLocker recovery key. Follow the manufacturer's guidance on whether BitLocker protection needs to be temporarily suspended for this particular firmware change. Microsoft's BitLocker FAQ describes why some firmware changes can prompt recovery. Use stable power and the OEM's exact procedure; do not interrupt an update.
Expected result: The vendor tool confirms the intended version is installed and the PC remains stable. If an update is not clearly relevant, or power and hardware are unstable: Do not flash the firmware. Ask the manufacturer or a technician to evaluate the failure first.
Fix 8. Replace or Repair the Faulty Hardware Component
When to try it: A manufacturer's diagnostics, documented compatibility issue, or qualified technician has identified a likely failed part. The 0x80 stop code by itself is not enough reason to buy replacement RAM, a CPU, or a motherboard.
Step 1. Record the diagnostic results and check the manufacturer's service or warranty instructions before opening the computer. Back up accessible files and save any encryption recovery information before a drive or board is replaced.
Step 2. Replace only a confirmed, compatible, user-serviceable part or arrange authorized service. Soldered memory, power-supply faults, liquid damage, and motherboard problems generally warrant a professional.
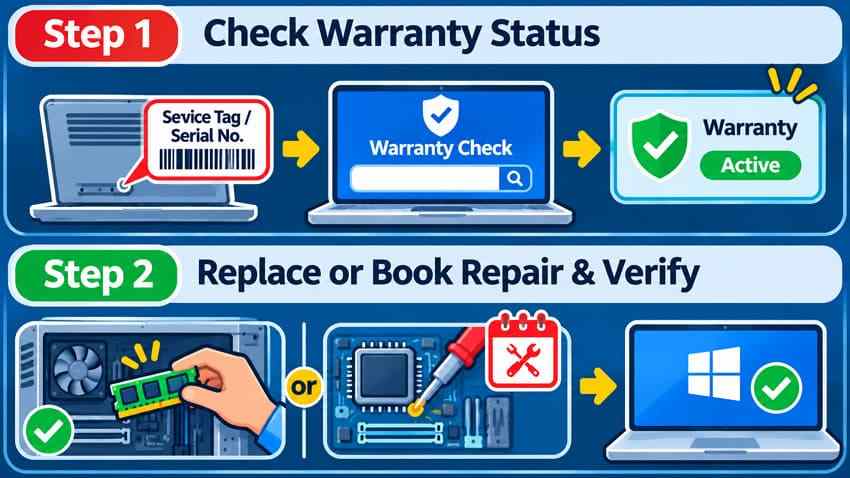
Expected result: The system passes relevant OEM checks and remains stable during normal use after the repair. If not: Return to the vendor with the previous diagnostic codes rather than replacing further parts without evidence.
When to Stop DIY Troubleshooting and Use Professional Hardware Repair
Stop and arrange professional help if you detect smoke, a burning smell, electrical arcing, liquid damage, a swollen battery, severe overheating, or repeated unexpected power loss. Also stop if the computer fails preboot diagnostics, repeatedly disappears from the drive list, or crashes inside BIOS/UEFI setup. Those situations cannot be solved reliably by a Windows reinstall or data recovery software.
| Red flag | Safer action |
| Smoke, electrical smell, visible damage, or swollen battery | Power off; disconnect safely; seek qualified repair |
| Specific failed OEM component test | Keep failure code and contact manufacturer service |
| Repeatedly disappearing or clicking storage device | Stop reads and consider professional data recovery |
| Crash in firmware setup or preboot diagnostics | Stop repeated testing; request platform diagnosis |
If Windows Cannot Boot: Protect Files Before Reset or Replacement
If Windows is stuck in a restart loop but the original storage drive is still detectable and stable, recovering files may be possible before OS repair. First check the BIOS/UEFI storage list or manufacturer diagnostics. A detected disk is not automatically healthy: clicking sounds, repeated disconnects, or diagnostic failures are reasons to stop. On BitLocker-encrypted drives, you need the legitimate recovery key or another authorized way to unlock the data.
Step 1. If the drive is designed to be removable and the computer is safe to service, shut down, disconnect power, and follow the manufacturer instructions to connect it to a working PC through a suitable adapter. Do not force open a sealed laptop or keep powering a potentially damaged drive. If the PC can safely boot from recovery media, leaving the original disk installed may be preferable.
Step 2. Unlock an encrypted volume with your authorized BitLocker key if prompted. If the files are readable, copy them to a different healthy drive before attempting Reset, a clean installation, or a major hardware change.
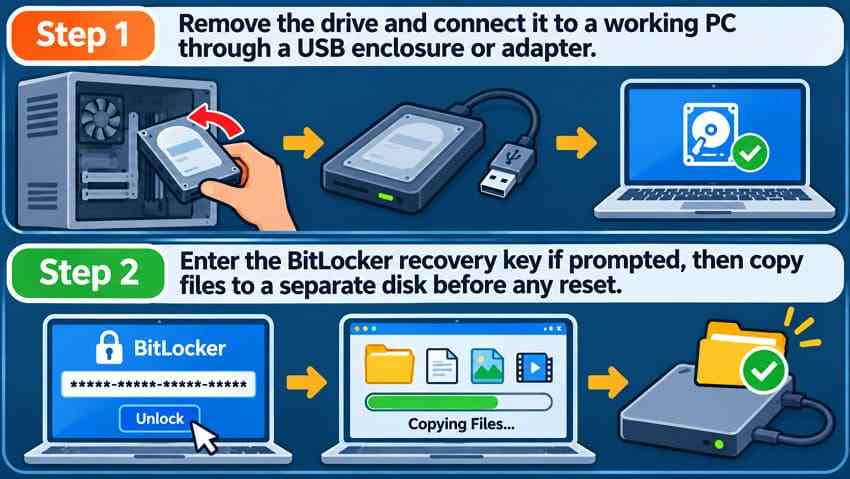
If ordinary file copying is not possible but the drive remains detected and stable, Recoverit Windows System Recovery describes creating a bootable USB on a healthy Windows PC, booting an otherwise unbootable computer, scanning a readable drive, previewing recoverable files, and saving selected results to another drive. This is a file-recovery option, not a remedy for NMI_HARDWARE_FAILURE. The approach may not work if the PC's hardware is unstable, the disk is physically damaged, or encryption cannot be legitimately unlocked. If the original computer is not safe to power on, use a stable system for accessible storage or consult a professional recovery service.
Note: Do not install recovery software on the affected disk or save recovered files back to it. Recoverability depends on the condition and detectability of the drive, encryption access, and whether the data has been overwritten.
Verify Stability Under Normal Use
One successful boot does not prove that an intermittent NMI fault is gone. After the suspected issue has been addressed, use the PC normally and watch for repeated errors rather than deliberately applying maximum load. Do not resume stress testing if the original hardware safety concern remains unresolved.
Step 1. Note whether routine work that previously caused crashes now completes without unexpected restarts. If the problem was tied to gaming and no specific NMI appears anymore, the related Windows 11 gaming-freeze guide covers a different, broader diagnostic path.
Step 2. Press Win + R, enter perfmon /rel, and review Reliability Monitor for new critical events. Check Event Viewer > Windows Logs > System for related errors recorded after the change.
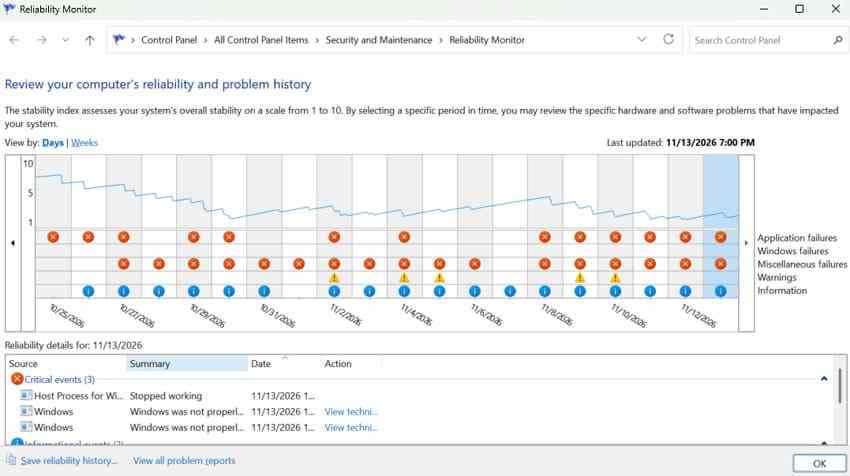
Expected result: Ordinary tasks complete without recurring NMI stop codes or new matching diagnostic errors over an appropriate observation period. If the crash returns: Keep the timestamps and test results, undo only safe recent changes, and request manufacturer support; avoid claiming success from one uneventful session.
Conclusion
NMI_HARDWARE_FAILURE (0x80) should lead to evidence-based hardware diagnosis, not a rushed Windows reinstall. Start with the exact stop code, recent hardware and driver changes, boot behavior, and a backup of accessible files. Next, use safe reversible checks, targeted memory and OEM diagnostics, and cooling or power inspections. Consider firmware updates only when they are relevant, model-specific, and safe to perform.
Stop DIY troubleshooting when the computer shows electrical damage, fails preboot tests, or cannot remain stable. If the system will not boot but its storage is detectable and healthy enough to read, protect important files before repair. Recoverit may help recover eligible files; it cannot repair the RAM, motherboard, or NMI trigger.
FAQ
-
Does NMI_HARDWARE_FAILURE always mean my RAM is bad?
No. RAM faults are one possibility, but bug check 0x80 does not identify a specific component. Recent hardware changes, expansion devices, firmware, and other platform issues also deserve investigation. A passing memory test does not exclude intermittent problems. -
Can NMI_HARDWARE_FAILURE be caused by firmware or an overclock?
Unstable overclocking or memory profiles can contribute to system instability. Check whether the error began after changing XMP, EXPO, voltages, or firmware settings. Return relevant settings to supported defaults only after recording the original configuration; install firmware updates only when the manufacturer documents a relevant compatible fix. -
What should I do if Windows keeps restarting with NMI_HARDWARE_FAILURE?
Record the stop code and disconnect nonessential external devices if it is safe to do so. If Windows Recovery Environment opens, Startup Settings may let you disable automatic restart to read the next error. Avoid repeated boot attempts if the PC overheats or shows electrical damage. Protect accessible files and use the manufacturer's preboot diagnostics or qualified service. -
Will reinstalling Windows fix NMI_HARDWARE_FAILURE?
Not if a faulty component or platform problem is causing the NMI. A reinstall may resolve a separate Windows or driver problem, but it cannot repair defective RAM or a motherboard. It may also remove data depending on the installation method, so back up or recover readable files before considering it.


