
 TL;DR:
Upgrading to Windows 11 requires a strictly compatible 64-bit system and offers a direct update path for Windows 10 devices, whereas older operating systems demand a complete clean installation process.
● Minimum hardware requirements mandate an Intel Eighth-Generation or AMD Ryzen 3 processor, 4 GB RAM, 64 GB storage, and enabled TPM 2.0 and UEFI Secure Boot, which must be verified using the Microsoft PC Health Check app before proceeding.
● Windows 10 systems can install the upgrade directly by turning on optional diagnostic data, joining the Windows Insider Program under the Dev Channel, and downloading the build via the standard Windows Update menu.
● Windows 7 and Windows 8.1 lack an in-place upgrade option and strictly require a clean installation by downloading a Windows 11 ISO file, mounting it to a virtual drive, and running the setup manually, making prior data backup mandatory to prevent data loss.
Ask AI for a summary
 ChatGPT
 Perplexity
 Gemini
 Claude
 Grok
Grok
With the technology advancement every subsequent hour, people are adjusting their lives accordingly and enjoying new features. As announced by Microsoft, Windows 11 upgrade is near, and users cannot wait any longer.
It is crucial to have basic information before getting into the preliminary update process. The information includes minimum system requirements and checking the compatibility status of the system to handle Windows 11 updates. With this article, the user will fix Windows 11 compatibility issues in Windows 10/8.1/8/7 PC and know ways to upgrade Windows 10/8/7 to Windows 11 for free.
Part 1: Learn Windows 11 Requirements
Every upgrade demands specific requirements that let the system accept the alterations and features. Without meeting the minimum system requirements, it would be pretty impossible to make the update successful. Similarly, Windows 11 has some essential restrictions to keep the operating system up to date. The section covers those items effortlessly.
- Processor: 64-Bit Architecture at 1 GHz or Faster; Intel: Eight-Generation or Newer; AMD Ryzen 3 or Better Qualcomm Snapdragon 7c or Higher
- RAM: 4 GB or Higher
- Storage: 64 GB or Larger Storage Device
- System Firmware: UEFI, Secure Boot Capable
- TPM: Trusted Platform Module (TPM) Version 2.0
- Graphics Card: Direct X12 or Later Capable; WDDM 2.0 Driver or Newer
- Display: High-Def (720p) Display, Larger than 9" Diagonal in Size, 8 Bits Per Color Channel (or Better)
- Internet Connection/Microsoft Account: Windows 11 Home Edition needs internet connectivity and a Microsoft Account to conclude the device setup. A stable internet connection is also required to download updates and features. Switching out of Windows 11 Home in S Mode also needs access to the active internet network.
Part 2: See If Your PC Is Compatible with Windows 11
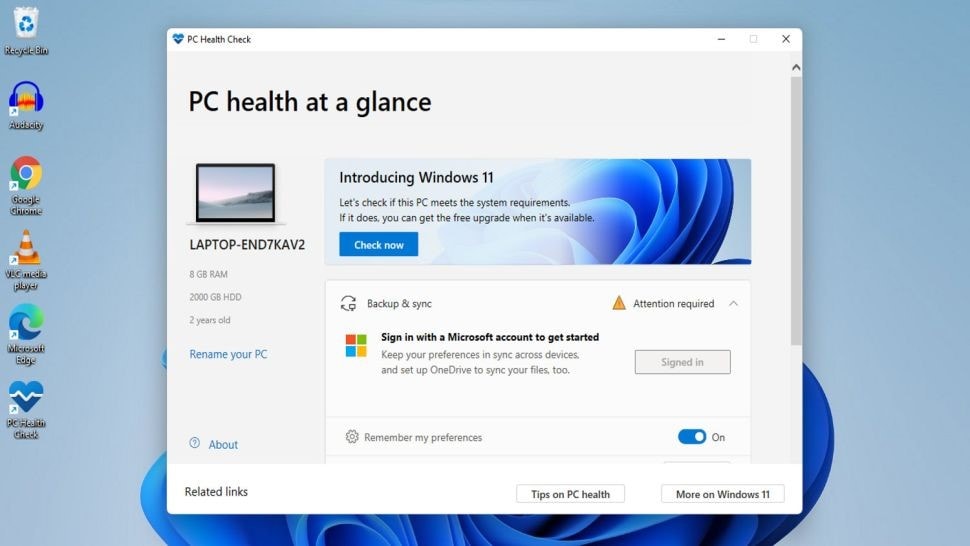
If you are looking for a disaster, you can install the new update without checking if the system can manage it. It is always good to make the device ready before unleashing new features and changes to the system. One can check the compatibility status of Windows 11 through the PC Health Check app.
This check helps the user find out the efficiency of the system once the new upgrade is installed. It minimizes lag and avoids improper working of features. To perform the PC Health Check app, the following are some guidelines to do so viably.
Step 1: Downloading the Software
To begin, download the software using the official link of Microsoft. After the process is concluded, launch PC Health Check on your system.

Step 2: Undergoing the Check
Tap on “Check Now,” located under “Introducing Windows 11.” The user is suggested to wait for a couple of minutes until the check is completed.

Step 3: Final Results
After some time, a window pops up. It informs the user if the system is compatible to run with the new update. One can hit “Learn More” to know more about the results.
Part 3: Fix Windows 11 Compatibility Issues in Windows 10/8.1/8/7 PC
In most scenarios, the systems lack abled UEFI Secure Boot and TPM 2.0. It causes real issues with the compatibility of the Windows 11 upgrade. The need of the hour is to enable a secure boot on a supported computer with UEFI and work on TPM 2.0 as well. The section reflects upon the detailed procedure to fix such Windows 11 compatibility issues.
Enable TPM 2.0 on System
The user is recommended to follow the steps below to enable TPM 2.0.
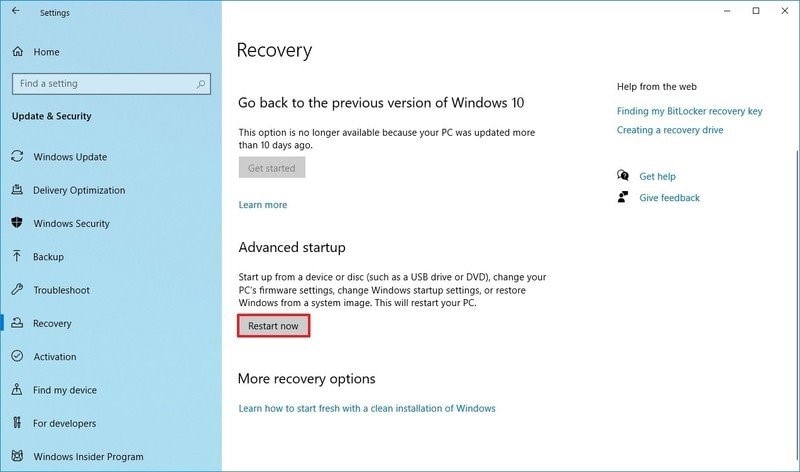
Step 1: Recovery Process
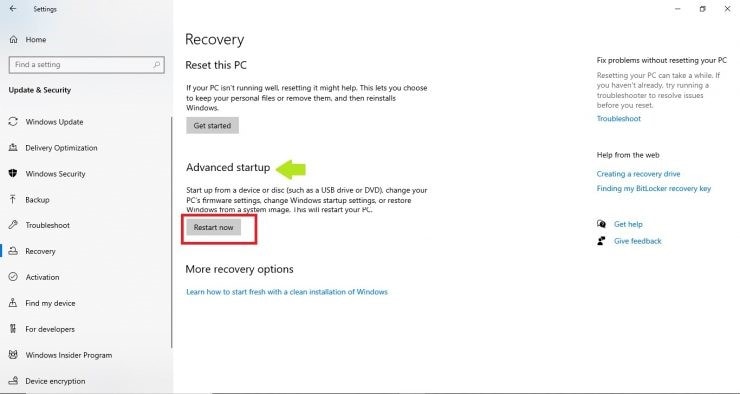
The user has to press the Windows+ I key to launch “Settings.” Tap on “Update and Security,” and from the left panel that pops up, click on “Recovery.” After that, choose “Restart Now,” situated under “Advanced Startup.”
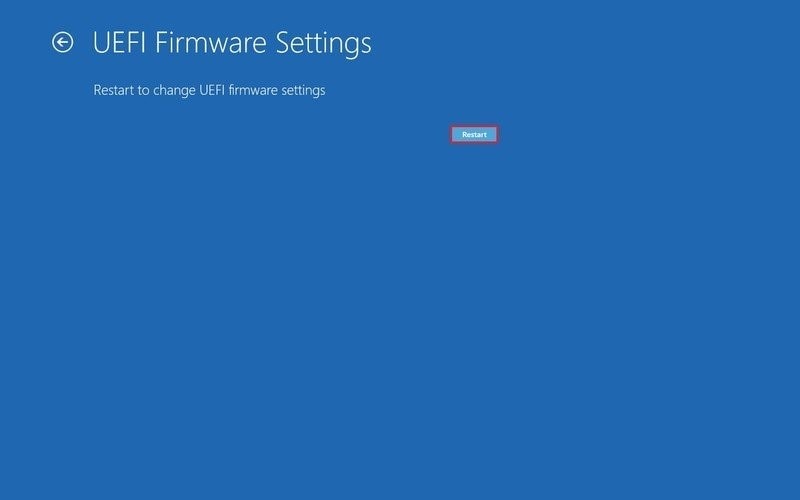
Step 2: Restarting Firmware Settings
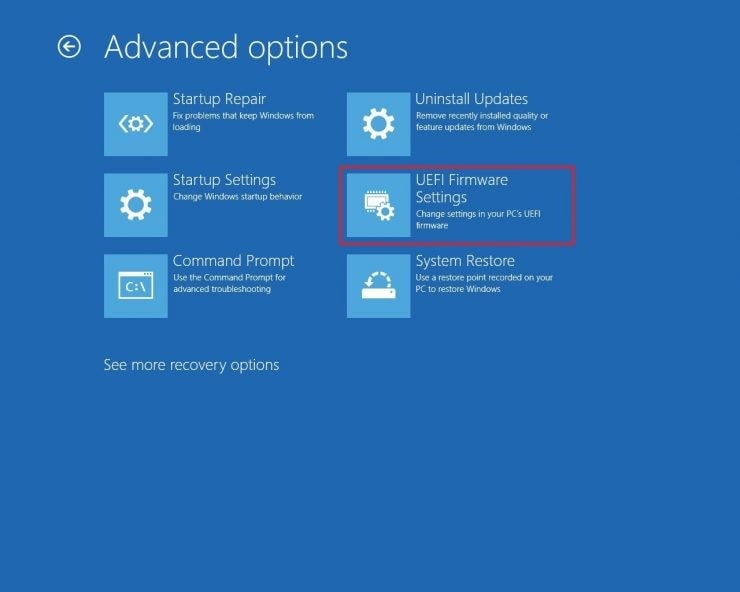
A blue screen appears. Click on “Troubleshoot” from there. Next, hit on “Advanced Options” and “UEFI Firmware Settings” afterward. Tap on “Restart.”
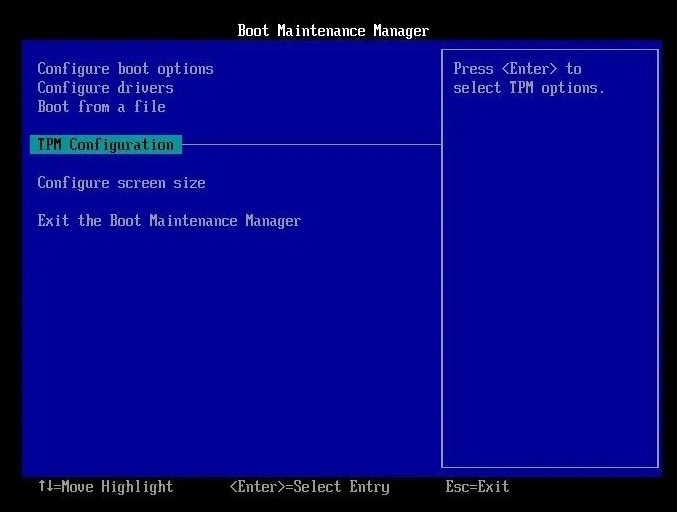
Step 3: Enabling TPM 2.0
Now, go to the “Security Settings” and choose “TPM Configuration Settings.” Enable TPM if it was disabled. Leave the “Settings” and restart the system.
Enable UEFI Secure Boot on System
To enable UEFI Secure Boot on your system, have a look at the guidelines below.
Step 1: Restarting the Recovery from Settings
The first and foremost step is to launch “Settings.” From the “Update and Security” section, hit on “Recovery.” After that, click on “Restart Now.”
Step 2: Restarting UEFI Firmware Settings
From the blue screen that appears, choose “Troubleshoot” and “Advanced Options” after that. Moving on, tap the “UEFI Firmware Settings” and select “Restart.”
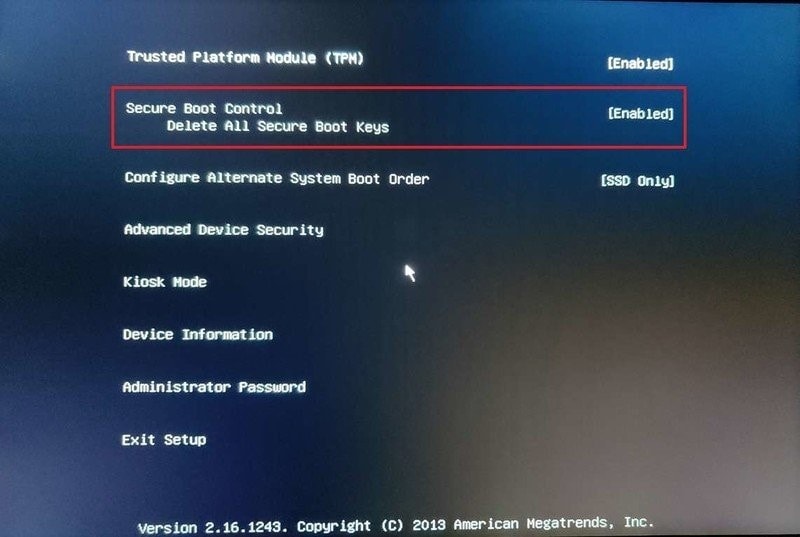
Step 3: Enable the Settings
Launch the “Security Settings” and click on the “Secure Boot” option when that appears. Tap “Secure Boot” afterward and hit “Enter.” Now, select the “Enabled” option and press “Enter” from the keyboard.
Step 4: Restarting the Computer
Exit the UEFI Firmware Settings and confirm all the changes done. Restart the system after that.
Part 4: Upgrade Windows 10/8/7 to Windows 11 for Free
Upgrading to a better version has always been a choice for most users. It is because advanced features help in enhancing the pace of the workplace and other personal matters. The update shall be facile for Windows 10 users as they can install the new update from Settings.
However, it shall not be pain-free for the users of Windows 7 or Windows 8.1. There are two reasons why the whole process is complicated.
- The users of Windows 7 and 8.1 cannot install the update from their Settings. They have to undergo clean installation of Windows 11 as they cannot upgrade the system from Windows 7 and Windows 8.1 to Windows 11.
- Most Windows 7 and Windows 8.1 systems are old, which means that they don’t meet the hardware requirements of Windows 11.
For Windows 10 upgrade to Windows 11, there are two hassle-free ways. Find those methods carefully sketched out for the users below. Before upgrading, it's better to backup your data to avoid severe data loss damage.
Video Tutorial on Microsoft Windows 11 Upgrade for Free [Step by Step Guide]
For Windows Vista/7/8/10/11
For macOS X 10.10 - macOS 13
Method 1: Download and Install Windows 11 through Windows Updates
The first method offers a chain of steps so that the user can go through the upgrade successfully. The user is suggested to download and install Windows 11 through Windows Updates.
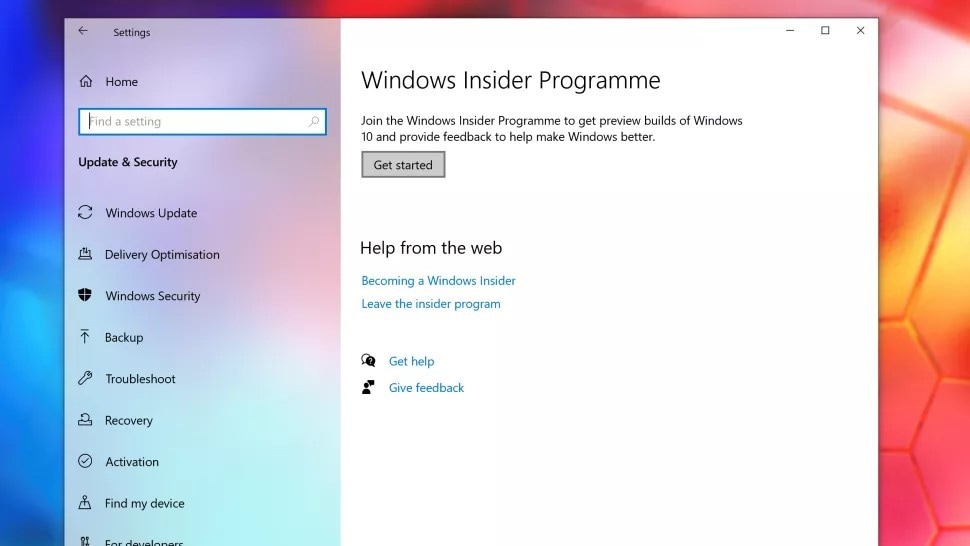
Step 1: Joining the Windows Insider Program
To access the Windows 11 update, the user has to join the Windows Insider Program. To do so, launch the “Settings” and tap “Update and Security. Click on “Windows Insider Program” afterward. If you are unable to access this option, you should turn on optional diagnostic data.
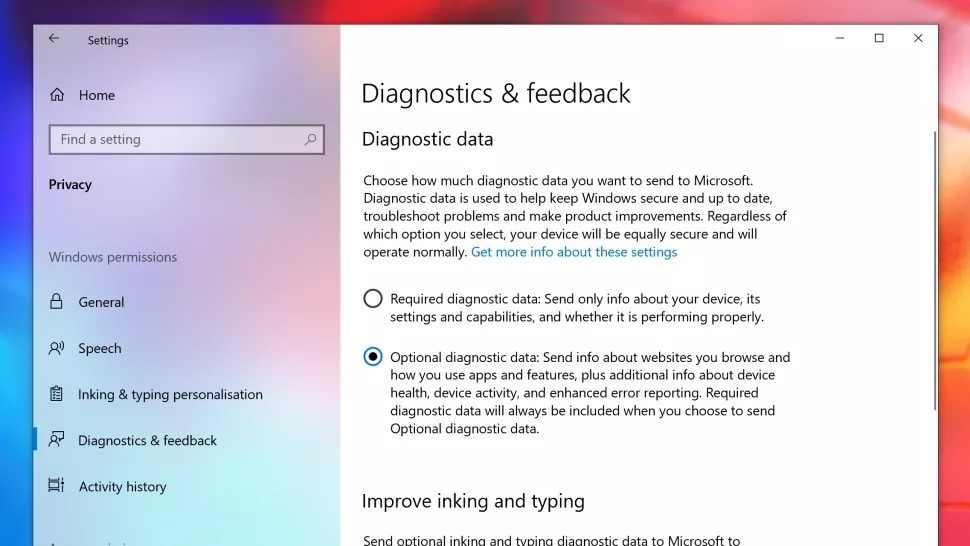
Step 2: Turning on Optional Diagnostic Data
To do so, go to the “Settings” and hit “Privacy.” After that, click on “Diagnostics and feedback” and “Optional diagnostic data” afterward.
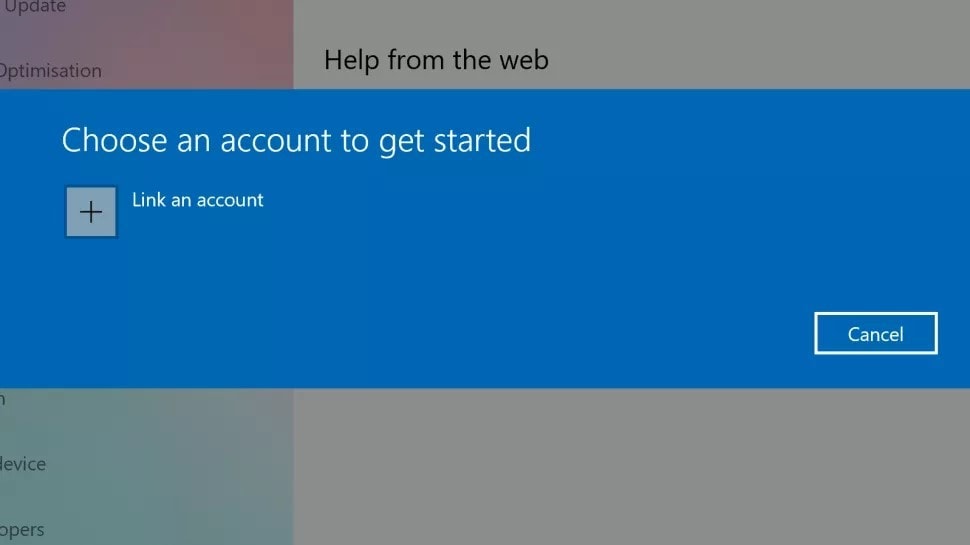
Step 3: Linking and Account
The “Windows Insider Program” window pops up. Tap on “Get Started” to join it. Hit “Link an account” and tap “Continue.”
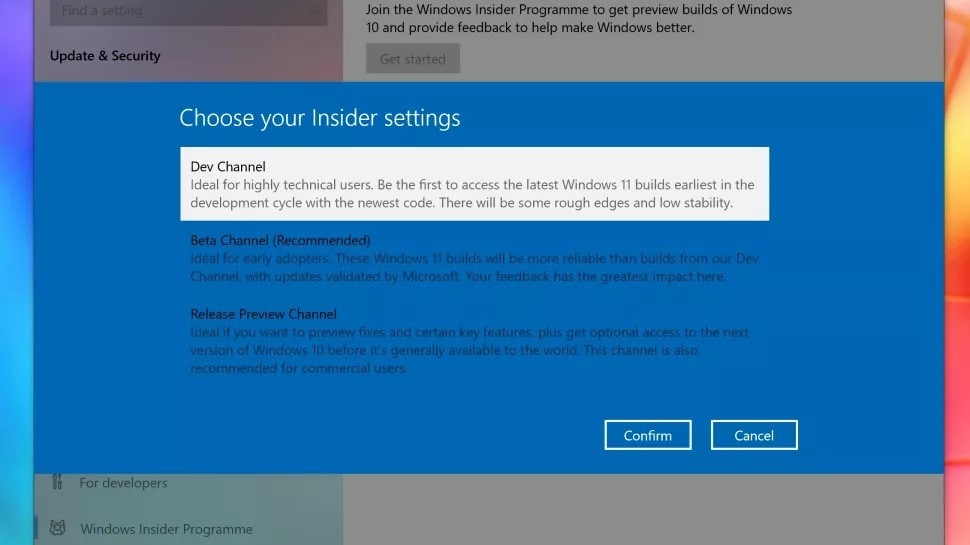
Step 4: Joining the Dev Channel
From the “Pick your Insider Settings” page, the user is instructed to click on “Dev Channel.” Hit “Confirm” afterward. Tap “Confirm” again if you are OK with the early build of Windows 11.
Step 5: Opening the Windows Update
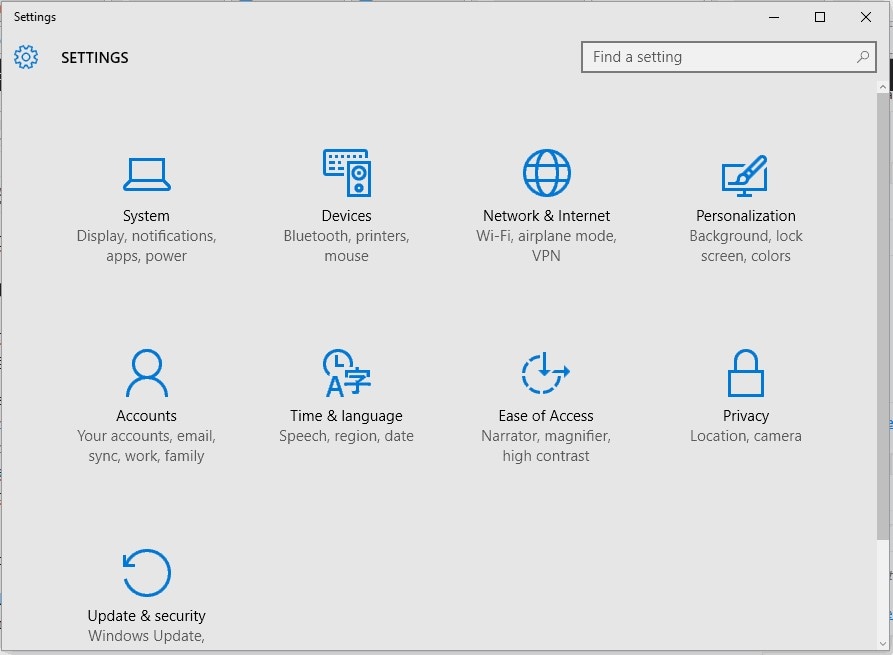
Now, restart your system. After the computer comes back, you have to navigate to the “Windows Update app.” To do so, launch “Settings” and hit “Update and Security.” After that, click on “Windows Update.”
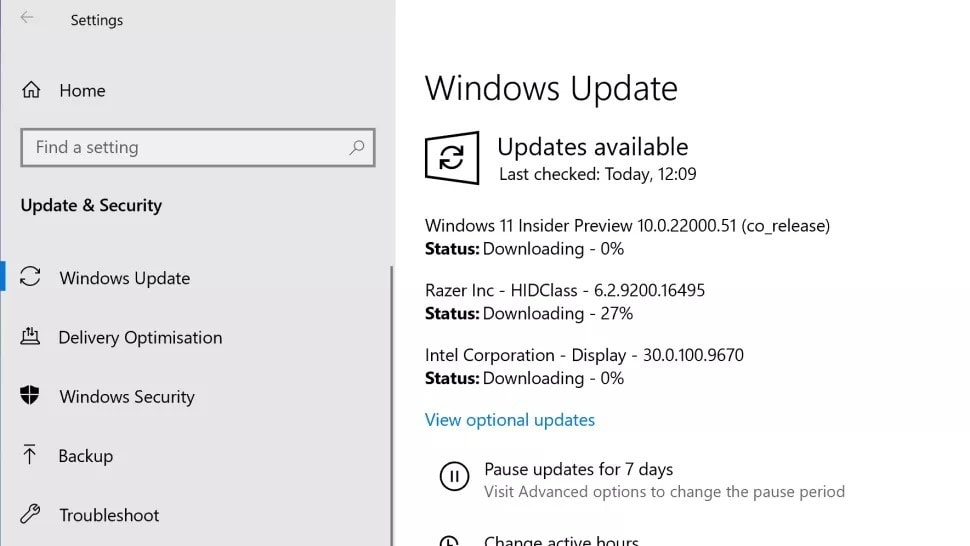
Step 6: Installation Process
A window appears. Select “Check for Updates.” The Windows 11 Insider Preview Build pops up. Download and install it and get done with the process.
Method 2: Download and Install Windows 11 From an ISO File
Method 2 revolves around the user being instructed to download and install Windows 11 using an ISO file. The technique might be a little tricky. Therefore, the reader is suggested to follow and review the steps in detail.
Step 1: Launching Windows 11 ISO Page
For starters, log in to your Microsoft Account. The user has to register themselves on Windows Insider as well. They can do so through the web for free. Now, navigate to the Windows 11 ISO page.
Step 2: Confirming the Download Process
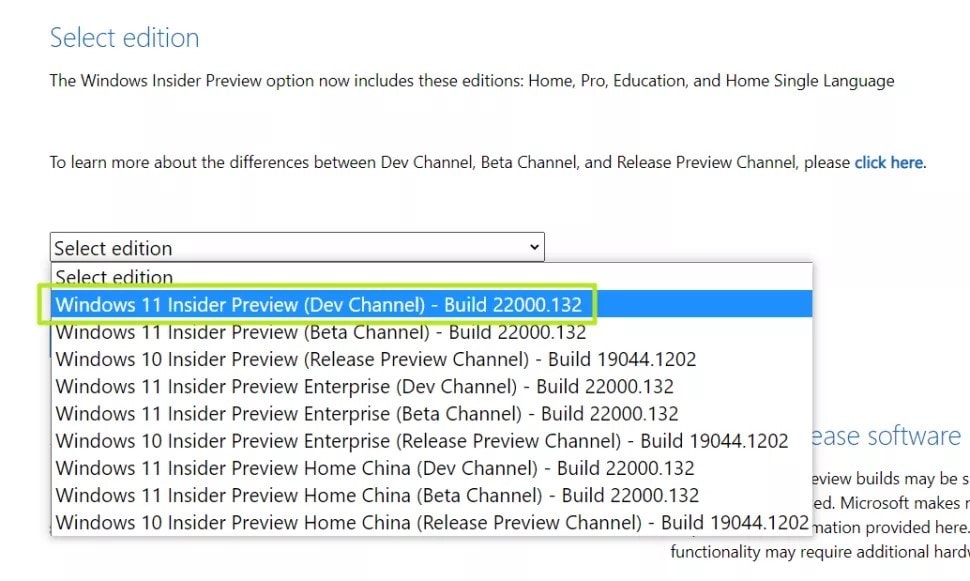
Navigate down to the page and pick an edition. To access the latest build, tap on “Dev Channel.” Hit “Confirm” after that. The user is expected to choose the product language to move on to the download process. Hit “Confirm.”
Step 3: Downloading ISO File
A “Download” option appears. Click on it and initiate the process. After the procedure is concluded, the ISO file will be downloaded to the system.
Step 4: Mount Option
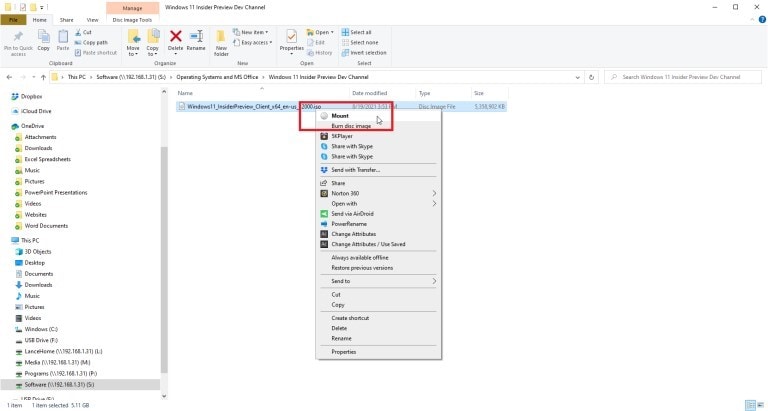
After downloading has been completed, right-click on the Windows 11 ISO file, and tap “Mount” from the menu that appears. In some cases, the mount is disabled.
Step 5: Enabling the “Mount” Command
To enable mount, launch the “Settings” and open “Apps.” From the “Default Apps,” navigate to the bottom of the page. Click on the “Set default by app” link. Tap on “Windows Disc Image” from the list of apps. Tap “Manage” afterward. The mount command will be enabled.
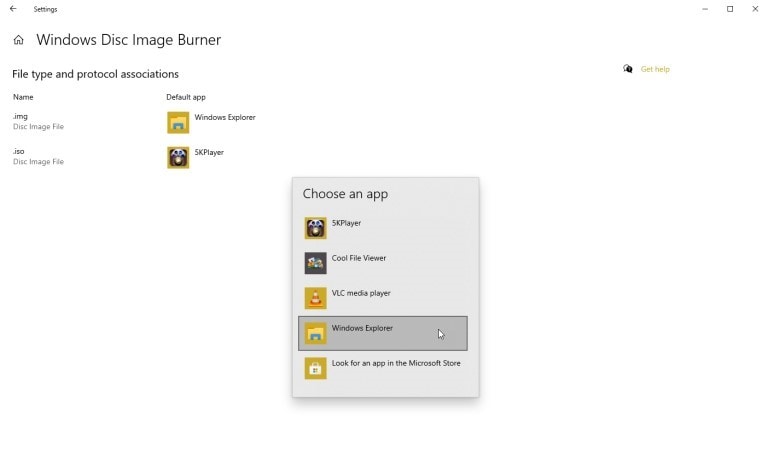
Step 6: Running the “Mount” Command
Now, run the “Mount” command. It opens a virtual drive shown in the File Explorer sidebar. Install the software as this virtual drive consists of a setup.exe file.
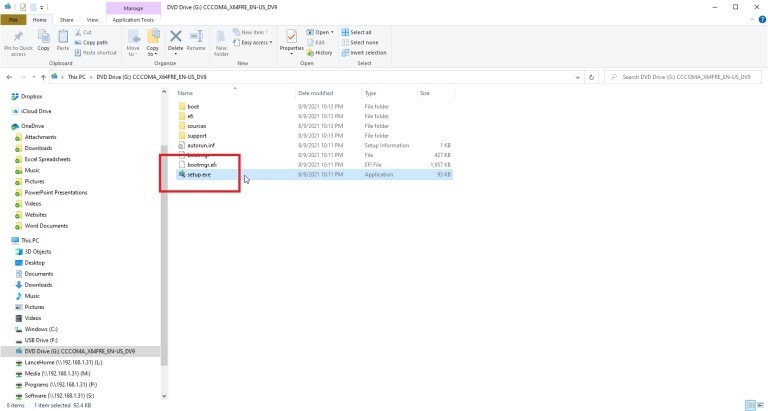
Step 7: Installing Windows 11
The user is directed to double-click the file to download Windows 11. After it is done, right-click on the virtual drive and tap the “Eject” command. The virtual drive will be removed, and the ISO file will remain intact. Choose the current default app for .iso and alter it to Windows Explorer.
If the user has Windows 7 or Windows 8.1, it is suggested that they use method 2 to perform a clean installation. It means that one has to download the ISO file and install Windows 11 with the ISO file afterward.
More Related:
Windows Installation Failed in Safe OS Phase With an Error
Format Hard Drive on Windows 11
Backup Files Before Reformatting
Conclusion
People are desperate to use Windows 11 and the mesmerizing features it is bringing to the table. However, before installing the update, the user must perform a full background check at the minimum system requirements and compatibility status.
The article covered methods to fix the Windows 11 compatibility issues in Windows 10/8.1/8/7. With that, two straightforward ways were provided to upgrade Windows 10/8/7 to Windows 11 for free. The user is recommended to go through the PC Health Check app to ensure if the system can handle the latest update.


