Considering the wide range of benefits that NAS Navigator Buffalo offers, it might just become your go-to source for backup. However, you first need to backup Buffalo in your Windows device to ensure it happens correctly. This provides an added advantage thereby ensuring proper performance of your business.
Buffalo NAS is a high-performance NAS device used by many people, considering the wide range of benefits that it has to offer. Not only does it provide fast data transfer, but it is also secure. Buffalo NAS offers an additional level of security, proving to be efficient for businesses of all sizes. However, there are chances that the system may stop functioning correctly. As a result, you need to perform a backup. Let's understand how to take Buffalo NAS Backup to prevent any major risks later on, especially regarding data loss.
Join us on March 31st, as we celebrate World Backup Day, Take a moment to back up your data and prevent data loss!
Try Wondershare Recoverit to Perform Data Recovery

In this article
What Is Buffalo Cloud Backup?
Buffalo Cloud Backup is an online backup method. This is an enterprise-grade backup process. All the data will be backed up into the cloud and servers ensuring that the security of the backup is maintained.
Using Buffalo Cloud backup can offer protection to your data. It will safeguard your electronic devices, such as desktops, laptops, smartphones, and tablets, ensuring that the information is secure.

Buffalo Cloud Backup offers the benefit of backup and storage across different options like:
- Buffalo TeraStation
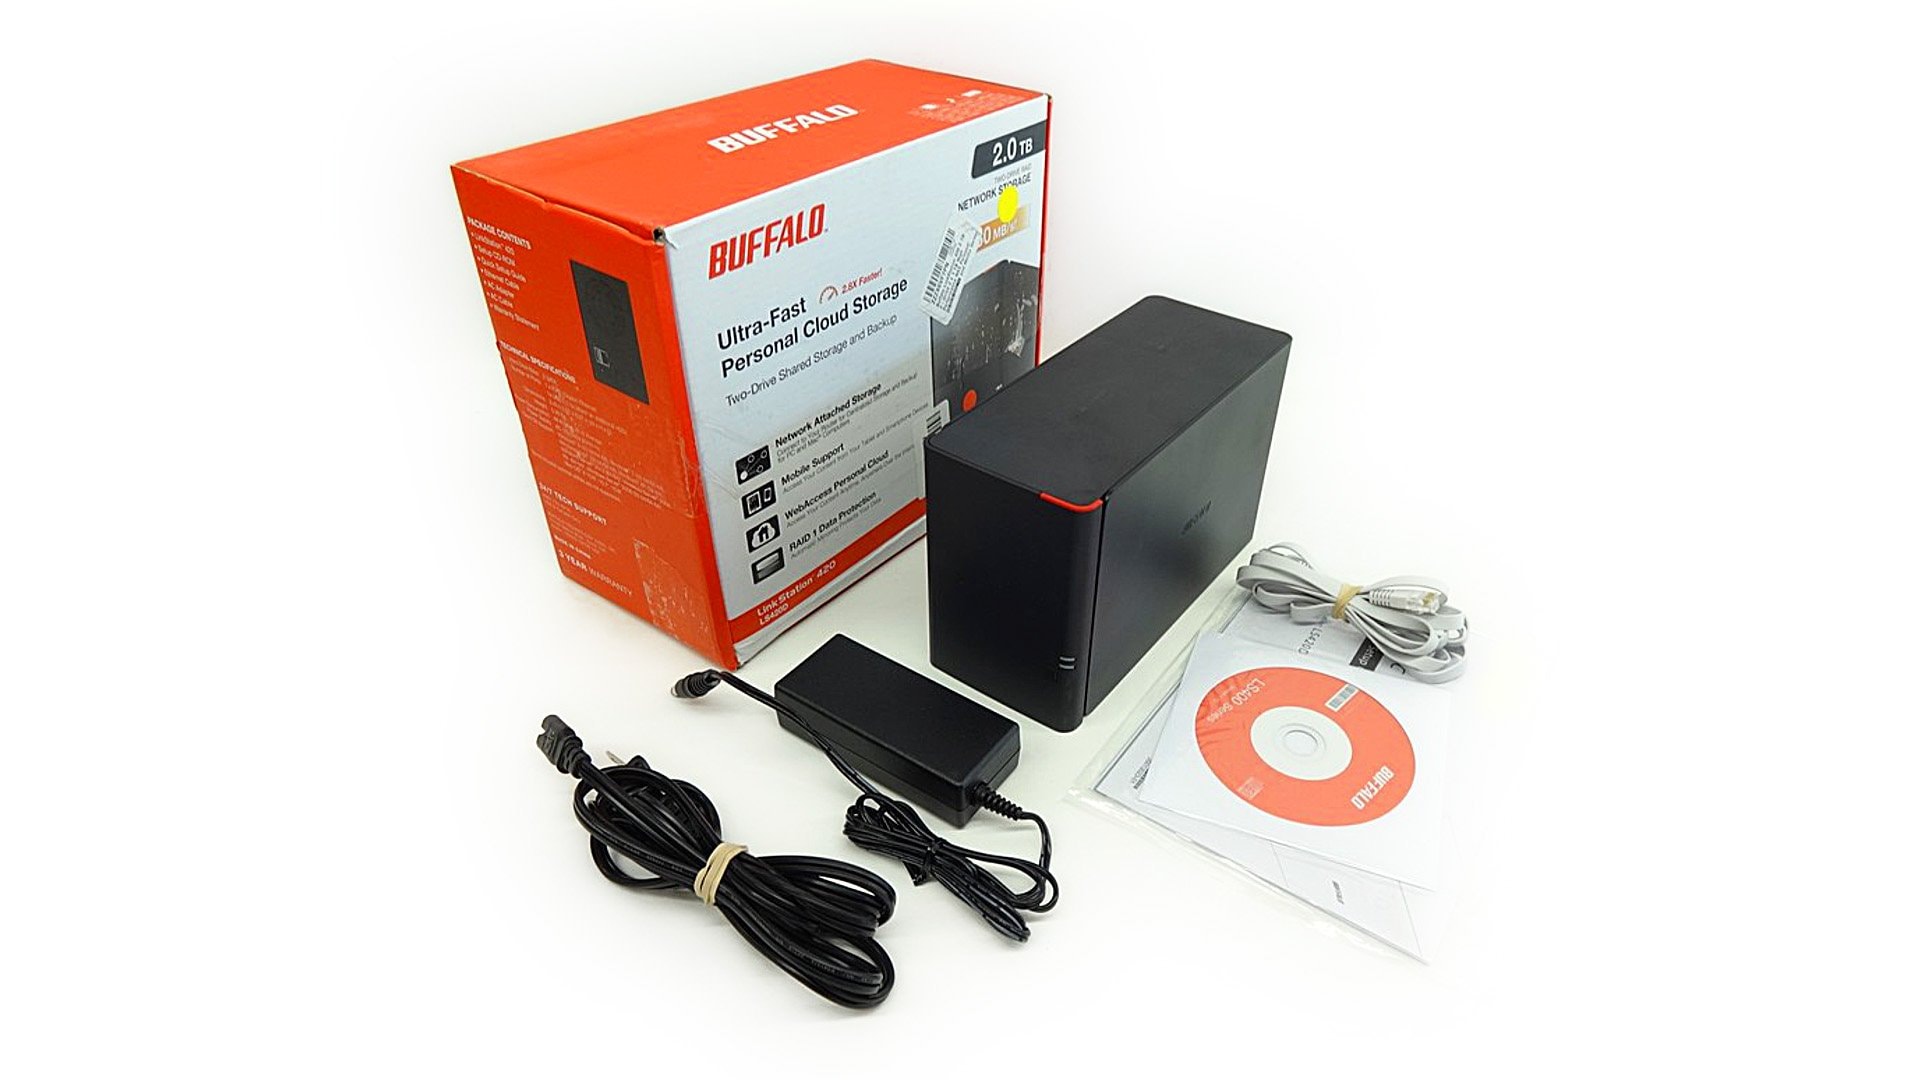
- Buffalo LinkStation 700
- Buffalo LinkStation 210
- Buffalo 8TB LinkStation 220
How to Backup Buffalo in Windows?
You can backup Buffalo in Windows and ensure it is compatible with the system and working fine. Some of the prominent methods through which backup Buffalo in Windows are as follows:
Way 1: Backup Buffalo NAS with Wondershare UBackit Data Backup
You can back up Buffalo using the software as well. Wondershare UBackit is a reliable Buffalo NAS Backup software that can help you streamline your entire backup process.
With the help of UBackit, you can backup the information to a safe space. Therefore, you will not have to struggle with any other information. The software is compatible with Windows OS and Mac OS. The paid version contains exclusive features. However, opting for a free version in the one-month trial period is advisable if you want to just take a backup of the NAS file.
The steps to backup Buffalo using Wondershare UBackit are as follows:
Step 1: You must download and install Wondershare UBackit in your system, depending on the instructions given by the Wizard. Once you have downloaded and installed the software, open it on your computer.

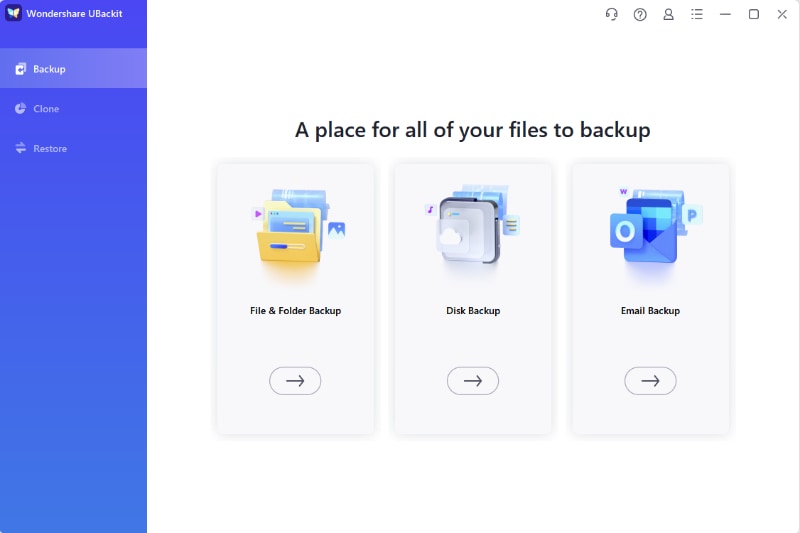
Step 2: The default settings of UBackit will appear on the screen differently. For the backup process, different options will be given. Since you are opting for Buffalo NAS Backup, you must choose the Disk backup option.
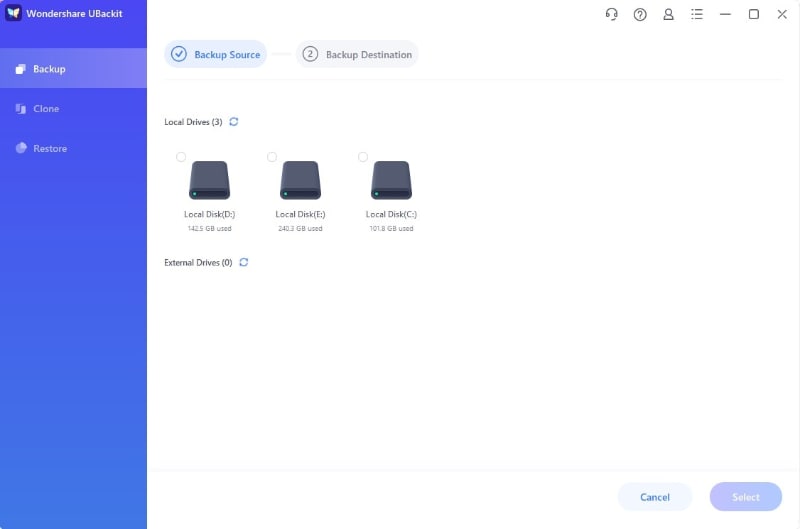
Step 3: Here, you will have to choose the backup source drive. Click on Select.
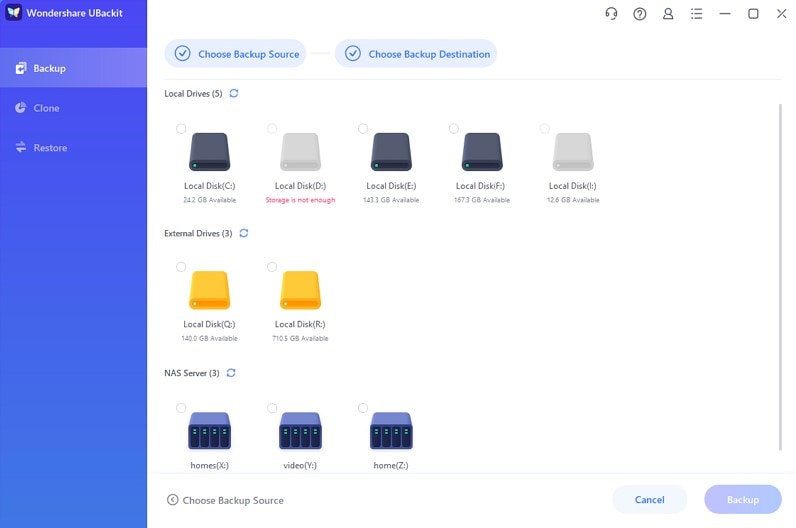
Step 4: Now, you must choose the destination drive for the files on your Buffalo NAS navigator. The NAS directory must be chosen as the backup option. Once you have selected the backup location, click on Backup to proceed.
Step 5: Wondershare UBackit will take some time to process the backup. The time taken will ultimately depend on the drive size. You will receive the confirmation message on your screen as soon as the drive recovery is complete.
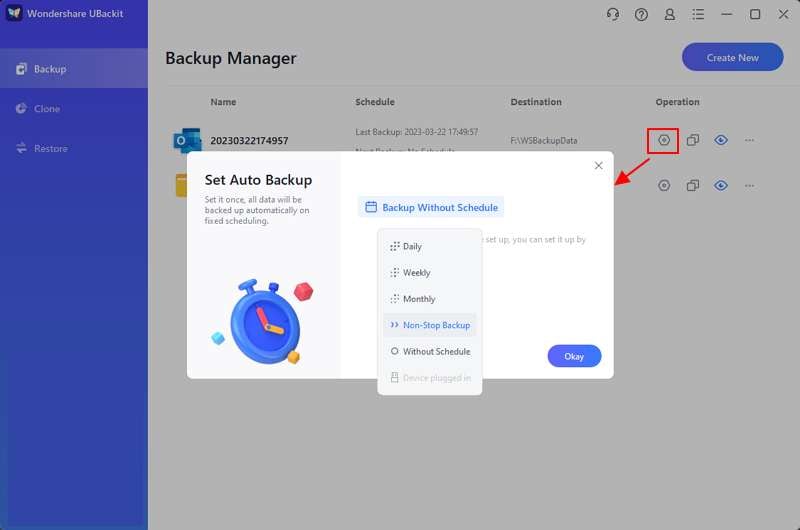
The backup taken for the drive will be available on Backup Manager. You can visit this section and change the name of the field if you want. Furthermore, you can also schedule automatic backups, while also setting the passwords.
Way 2: Via Buffalo NAS Built-in Tool
Buffalo NAS Backup allows you to use the built-in tool to fix the problem. The best part is that by using the NAS built-in tool, you may be able to fix the problem with a few easy steps. You can follow the step-wise procedure given below to backup Buffalo in Windows using the built-in too:
Step 1: Open Buffalo Settings and in the given box, enter the IP address.
Step 2: Now, you must choose the Advanced Settings option. Here, you will have to log in using your Admin account.
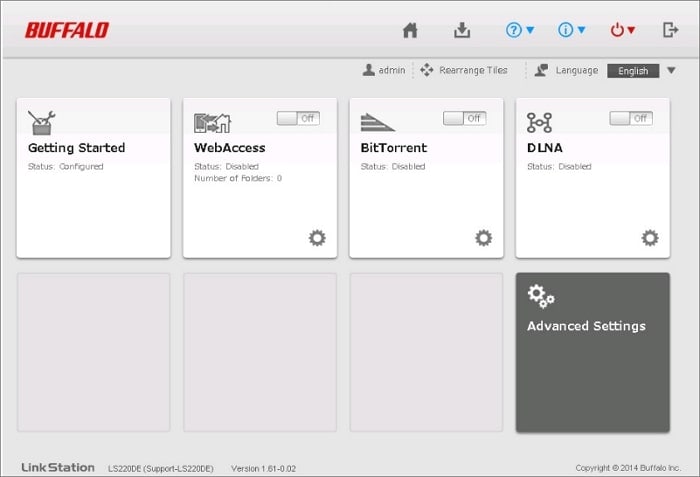
Step 3: Navigate to the Backup tab. Click on the configuration widget available next to the Backup option.

Step 4: Select Add under Create New Job. Now, choose the Browse option for setting up the Buffalo backup.
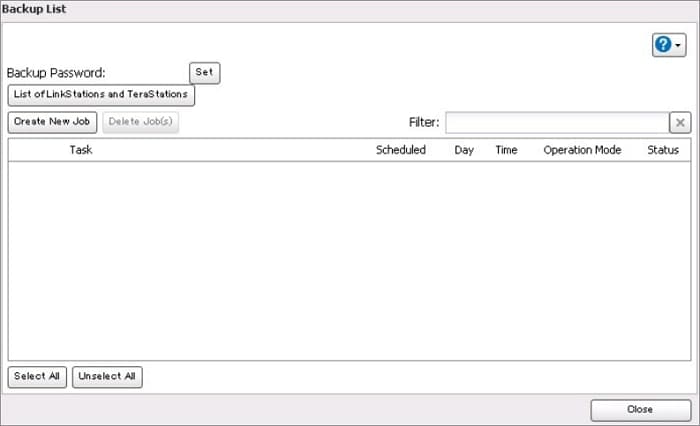
Step 5: The on-screen operations will contain much information to help further you back up Buffalo NAS.
Recover Data from Buffalo External Hard Drive with Wondershare Recoverit
Regarding Buffalo External Hard drive recovery, it is essential to use the right software. Wondershare Recoverit is one of the most reliable tools that can help complete the entire process. Wondershare Recoverit is a user-friendly and highly efficient tool that can assist with data recovery.
So, if you want to recover data from Buffalo External Hard drives, you must consider using this software. The free version of the software is available for Mac OS and Windows OS. You must download the latest version of Wondershare Recoverit to drive the benefits. Therefore, it can play an important role in ensuring the data is recovered.
Once Wondershare Recoverit is installed in your system, you may follow the steps given below to recover the data:
Step 1: You must connect the Buffalo External Hard drive to your computer while you are installing Wondershare Recoverit in your system. You must ensure that the connection is strong and secure.
Step 2: Launch Wondershare Recoverit in your system and check through all the available drives. You must select the Buffalo External Hard drive. Now, click on the Start button to initiate the process.

Step 3: Wondershare Recoverit will quickly scan the drive and help recover the recently deleted files. If the data isn't available via quick scan, opt for a deep scan, which can check through all the sectors and help in recovering the data.
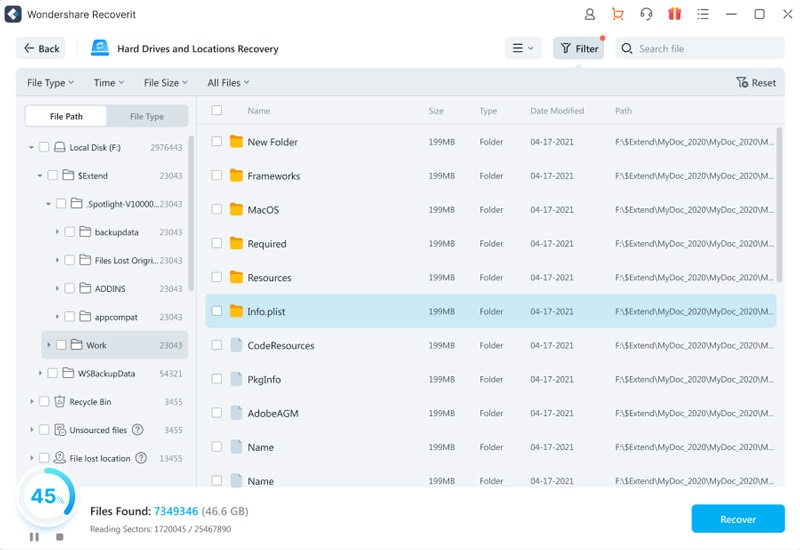
Step 4: As the scanning process goes on, the files that are being recovered will be displayed in real time. You may continue or pause the scan as per your preference and continue with the recovery process. You can apply the filters to thoroughly check for the files. Therefore, just pause the process if you don't want all the files to be scanned.
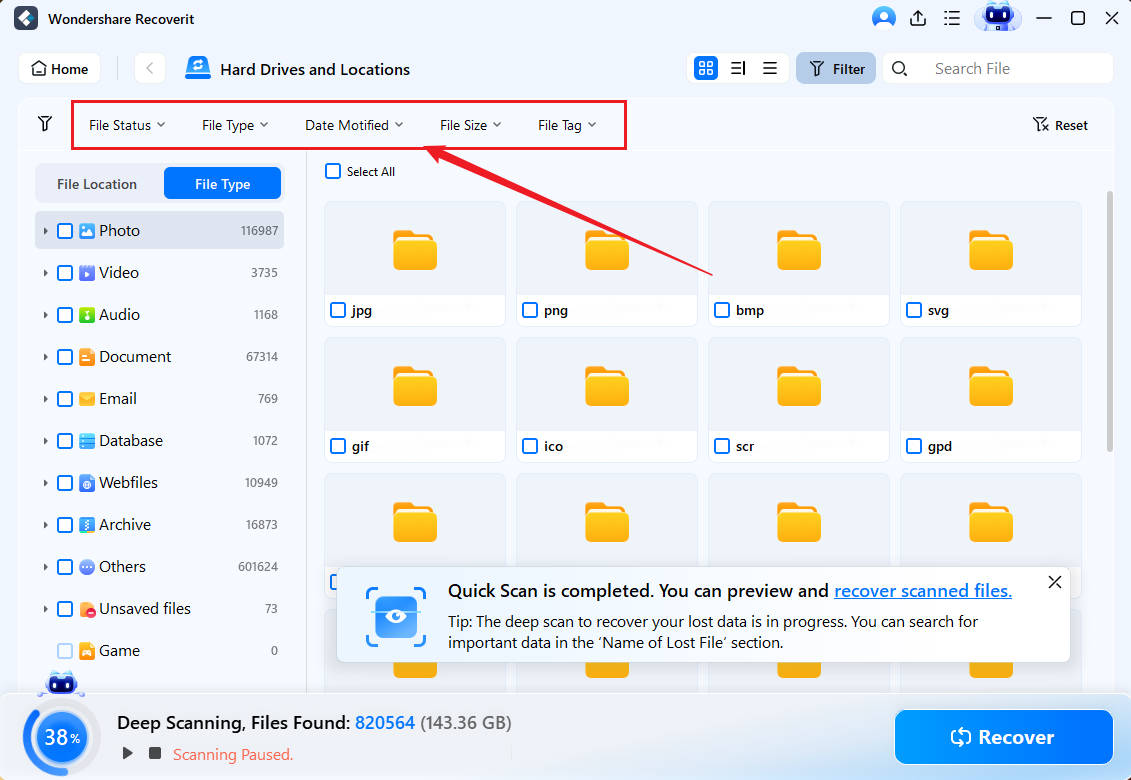
Step 5: Once you have discovered the files you want to recover, take a preview of those and then click on the Recover option. Now, you must choose the location where you want to save the files. The location you select must not be the Buffalo External Hard drive, as it increases the risk of data being overwritten.

Essential Tips to Prevent Data Loss on Your Buffalo Drive
You must adopt the necessary steps through which you can prevent the risk of loss on your Buffalo drive. This is one key step to ensuring that you don't face any problems in the long run. Some of the key tips for preventing data loss on Buffalo Drive are as follows:
- Regular Backups: You must conduct regular backups to keep the data safe. It helps in creating any additional copy of the data. You may use the different online storage services and physical hard drives for copying the data which are essential files. Therefore, even if the Buffalo Drive fails, you can recover the same efficiently when you have a backup.
- Monitor Drive Health: Always keep a check on how the disk drive is performing. Since you are using the Buffalo drive, you must be mindful of its performance and whether or not there are any problems with it. This is to ensure that your data is safe from any potential risks in the future. Furthermore, it also provides sufficient time for backing up data.
- Keep Your Drive Clean: If you want the Buffalo Drive to keep working correctly, you must clean the drive often. Several online tools can help you clean Buffalo Drive. Furthermore, ensuring that the risks are organized after being cleaned is essential. It ensures that the drive functions correctly while reducing any potential malfunction errors.
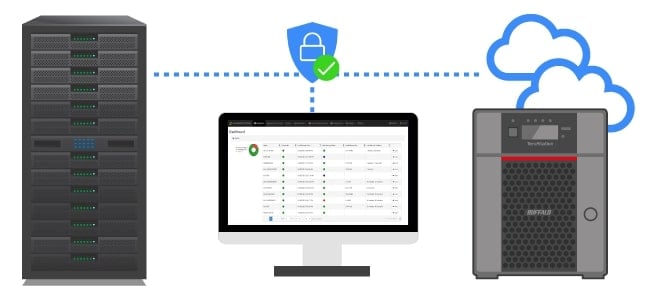
- Use Antivirus Software: One of the easiest ways to keep your Buffalo drive safe is to ensure it is virus-free. Therefore, you must install any antivirus system into the software. This is vital in ensuring the system is updated and not affected by any potential damages. However, even when you are using the antivirus software you must choose one only after research. This helps to avoid any potential damages and check for all malware and viruses.
- Safe Ejection: Many people just unplug the external hard drive once they're done using it. You should never do so. When using the Buffalo hard drive in your system, it is advisable to opt for safe ejection. You must check the Safely remove hardware option from the drive and then remove it. This prevents the risk of data being overwritten and also stops from any of the files malfunctioning in your device.
- Update Your Drivers: Never miss out on updating the drivers. When you are using Buffalo Drive, it is advisable to update the drive. Old drivers can be extremely problematic, creating numerous issues. Therefore, updating the drivers can significantly help overcome the problem and ensure that everything is updated.
- Handle with Care: Handling your Buffalo Drive with care is extremely important to overcome the risk of any physical damage. If you are not taking care of the drive, you may accidentally drop it or keep it somewhere near something very hot. Never let any of that happen, as it can permanently damage the hard drive, making it difficult to recover the data.
Using the tips mentioned above can be highly beneficial in recovering the data. As a result, it will also prevent the risk of any damage to your Buffalo hard disk drive. However, know that if you accidentally lose any data, there's still chances and scope for recovering it. However, it doesn't hurt to adopt preventive measures.
Conclusion
Buffalo NAS Backup isn't as difficult as it seems. As long as you follow the steps mentioned above, you should be able to do it properly. However, you will have to be slightly mindful of the Buffalo NAS backup software and data loss. You must always choose reliable software so as to avoid the risk of significant data loss. Nonetheless, if data loss happens, you must choose reliable data recovery software to help revive the data.
FAQs
-
1. What is a Buffalo TeraStation?
Buffalo TeraStation refers to a network-attached storage system. This NAS can be used for data storage, backup, and more. It can be used as a file server or even a private cloud for storing information. -
2. How do I connect my Buffalo NAS to my computer?
You can connect Buffalo NAS to my computer. However, for that purpose, you will need a NAS navigator. You can access the Buffalo Settings page from the NAS navigator and connect the same to your device. -
3. Can I backup NAS to Google Drive?
Yes, you have the option to backup NAS to Google Drive. To backup up your NAS to Google Drive, you must use tools like Wondershare UBackit, Synology Cloud Sync, and more.


 ChatGPT
 Perplexity
 Google AI Mode
 Grok
Grok


