
 TL;DR:
You can back up your Raspberry Pi to a Synology NAS over your network using RaspiBackup or Synology Hyper Backup, or create a complete system clone using Wondershare UBackit.
● Before initiating network-based backups, you must enable NFSv4 and map a shared folder to the Pi's IP address on the Synology NAS, then prepare the Raspberry Pi by installing the nfs-common utility, editing the fstab file to mount the NAS directory, and applying 777 permissions.
● For automated network transfers, RaspiBackup utilizes a command-line interface directly on the Raspberry Pi to perform rsync backups with hardlinks, whereas Synology Hyper Backup operates from the NAS DSM interface to manage rsync backup tasks and rotation settings.
● If you need an exact 1:1 replica of all settings, metadata, and filesystems, Wondershare UBackit can clone the storage drive to the NAS, but this specific method requires physically removing the Raspberry Pi SD card and connecting it to a PC running the UBackit software.
Ask AI for a summary
 ChatGPT
 Perplexity
 Gemini
 Claude
 Grok
Grok

Backing up your Raspberry Pi is essential, primarily if you use custom configurations. A backup lets you save your custom setups and all the data. With a Synology NAS, you can streamline your backup process.
How to back up Raspberry Pi to Synology NAS, though?
There are three ways to do it. Before we go through each and their steps, let’s see why you need backups and how to set up your Synology NAS and Raspberry Pi before performing the backup.
Table of Content
The Issue With Raspberry Pi
Raspberry Pi is an outstanding device. However, tweaking your setups or using the device with other systems can often backfire and corrupt its filesystem. Instead of doing everything from the ground up, you can simply restore your Raspberry Pi from a backup.
A Raspberry Pi backup can also be handy if significant changes to your system lead to failure. The same goes for those who like to do complicated projects with their Raspberry Pi or find experimenting with Raspberry Pi-based setups engaging and fun. Having a backup ready to go can save you precious time and, most importantly, prevent data loss.
Set Up Your Synology NAS and Raspberry Pi Before Performing the Backup
Before backing up your Raspberry Pi to a Synology over your network, you must make specific preparations. Let’s see what you must do with your devices to back up a Raspberry Pi over your network to a Synology NAS.
Setting Up a Synology NAS
You can prepare your Synology NAS for Raspberry Pi backups over a network in the following steps.
Step 1Enable NFS on your Synology NAS
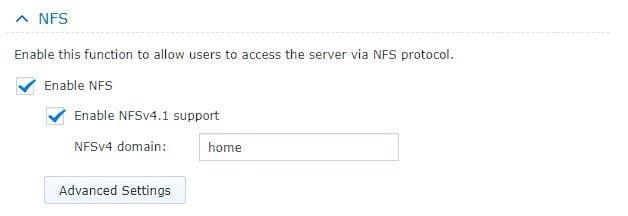
Access the Synology DiskStation Manager (DSM). Now click Control Panel > File Services. Select the SMB/AFP/NFS tab and enable NFS. Enter the NFSv4 domain name in the field.
Step 2Create a destination for Raspberry Pi backups
Go to the Control Panel in the Synology NAS DSM and select Shared Folders. You can create a new folder or choose an existing one. The folder you choose will be the storage location of your future Raspberry Pi backups. Once you choose the folder, click the Edit button at the top. It will open the next panel.

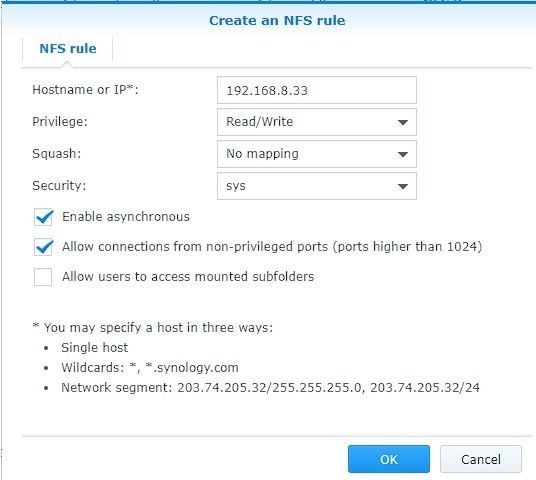
Navigate to the NFS Permissions tab and click Create. It will launch a new panel. Put your Raspberry Pi IP address into the Hostname or IP field. Select Read/Write from the Privilege drop-down list, No mapping from the Squash drop-down list, and sys from the Security drop-down list. Check the Enable asynchronous box and tick the Allow connections from non-privileged ports box. Click OK to complete setting up your Synology NAS.
Setting Up a Raspberry Pi
Now that you’ve prepared your Synology NAS, it’s time to do the same with your Raspberry Pi. Here is what you need to do.
Step 1Enable SSH on your Raspberry Pi
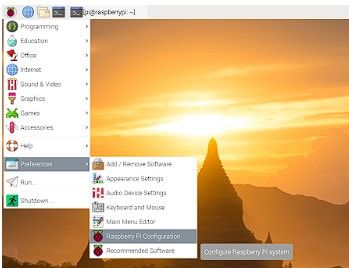
Connect your Raspberry Pi to a display, start it, access Preferences in the home menu, and select Raspberry Pi Configuration.
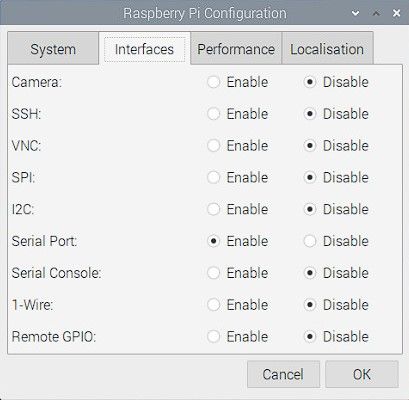
Find Interfaces and enable SSH to set up your Raspberry Pi for a backup to Synology NAS.
Step 2Update your Raspberry Pi
You must update the Raspberry Pi system and software package to the latest version to ensure backup apps work with your Raspberry Pi. After enabling SSH, open an SSH terminal on your computer to access the Raspberry Pi terminal.
To connect to it, type the following command:ssh username@<Your Pi’s IP Address>
To update your Pi, enter the following command:sudo apt-get update && sudo apt-get upgrade
Step 3Enable Raspberry Pi to read from NFS folders
Type the following command into the terminal:sudo apt-get install nfs-common
It will install and download a utility app that enables your Pi to read from shared NFS folders.
Step 4Create a backup directory and mount the NFS shared directory
To make a backup directory on your Pi, simply enter the following command:sudo mkdir /backup
Now you need to edit the fstab to mount the NFS shared folder. Here is a command:SYNOLOGY_NAS_IP_ADDRESS:/PATH/TO/NAS /PATH/TO/MOUNT/POINT nfs auto 0 0
Make sure to replace the values in the command with your values.
Step 5Give the necessary permission to the mounted NFS shared folder
Now you need to change the permission levels for your Pi to read and write the directory on your Synology NAS unit. Here are the commands you need to enter in the following order:
sudo mount -asudo -ichmod 777 /backupchown RASPBERRY_PI_USER:RASPBERRY_PI_USER /backupsu - RASPBERRY_PI_USERcd ./backup
Related tutorial: Enable SSH on Synology NAS
Congratulations! Now you can back up your Raspberry Pi to a Synology NAS.
Method 1: Back Up a Raspberry Pi to a Synology NAS With RaspiBackup
The first method to complete the backup revolves around using RaspiBackup. Here are the steps you need to take.
Step 1 Install RaspiBackup
To install RaspiBackup, access your Raspberry Pi terminal and type the following command: curl -L https://raspibackup.linux-tips-and-tricks.de/install | sudo bash
Step 2Configuring RaspiBackup
Now that you’ve installed RaspiBackup, you need to configure it. The safest method to use for the backup is a Raspberry Pi rsync Synology hardlink. Open a terminal and type the following:sudo raspiBackupInstallUI.sh
It will open the following screen, where you must select the first option: Backup with rsync and use hardlinks if possible.
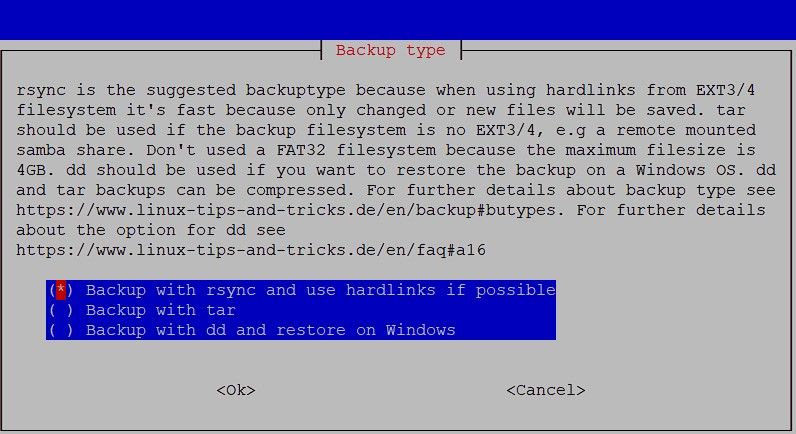
Click OK. In the next window, select all the recommended services to stop and start during the Raspberry Pi backup to Synology NAS.

Step 3Backup your Raspberry Pi to a Synology NAS
You’ve set up everything. Now you can back up your Pi by typing the following command in a terminal:sudo raspiBackup.sh -m detailed
It takes a couple of minutes to complete the backup, depending on the size of your Raspberry Pi system and additional services.
Method 2: Back Up a Raspberry Pi to a Synology NAS With Hyper Backup
You can also back up your Pi to a Synology NAS using either Synology Active Backup for Business or Hyper Backup. Hyper Backup is a straightforward solution to use. Here is how you can deploy it for Raspberry Pi backup purposes.
Step 1Install Hyper Backup
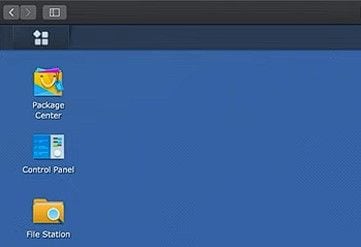
Log into your Synology DSM and start the Package Center. Search for Hyper Backup and install it.
Step 2Start Hyper Backup and initiate the backup
Once the installation is complete, you can start Hyper Backup from your Synology DSM. Select the rsync from the options.

Step 3Configure the backup job
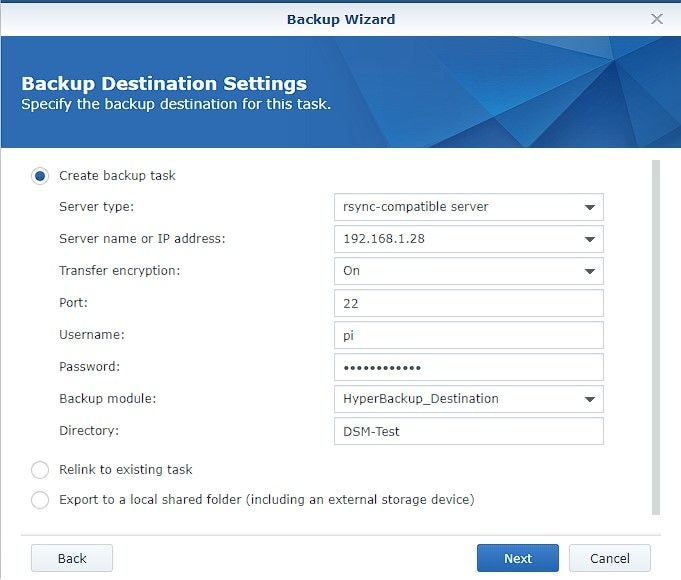
Now you need to configure the backup job. Enter the IP address of your Pi device and select the backup module from the drop-down menu. Select your Pi device as the source for the backup job and your Synology NAS as the backup destination.
Now configure the rotation settings if you want to automate the backup process.
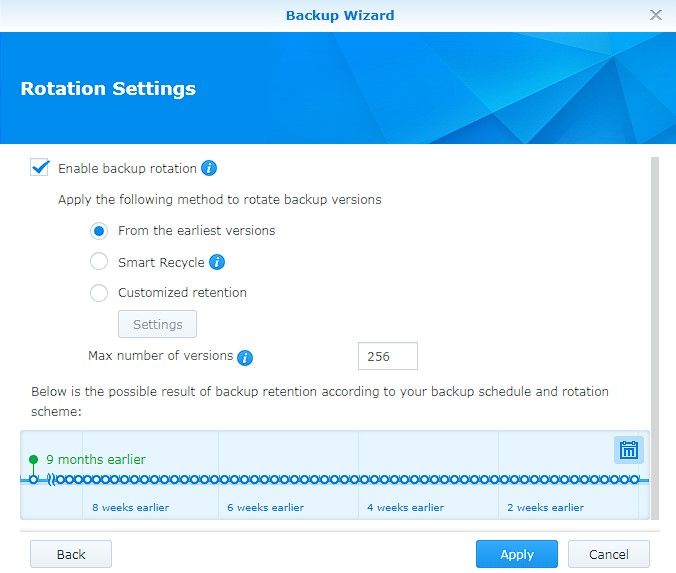
Click Next to complete the backup process.
Method 3: Clone the Raspberry Pi SD Card to a Synology NAS With Wondershare UBackit
Finally, you can back up a Raspberry Pi to a Synology NAS with Wondershare UBackit. UBackit is an intuitive backup and clone tool to streamline the backup process and make it as safe and secure as possible. With the clone function of UBackit, you can precisely backup your Raspberry Pi SD card to Synology NAS, including all files, settings, metadata, and filesystem. Here is how you can do it.
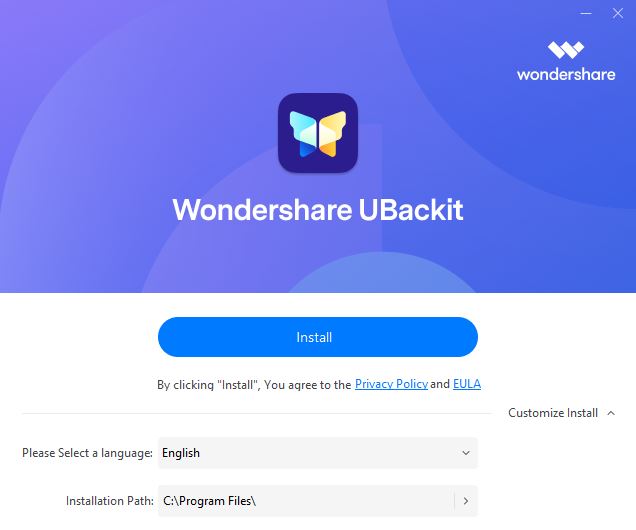
Step 1Install and Start Wondershare UBackit
Download Wondershare Ubackit from the official website or by clicking the dowlonad button given above and complete the installation following the installation wizard.
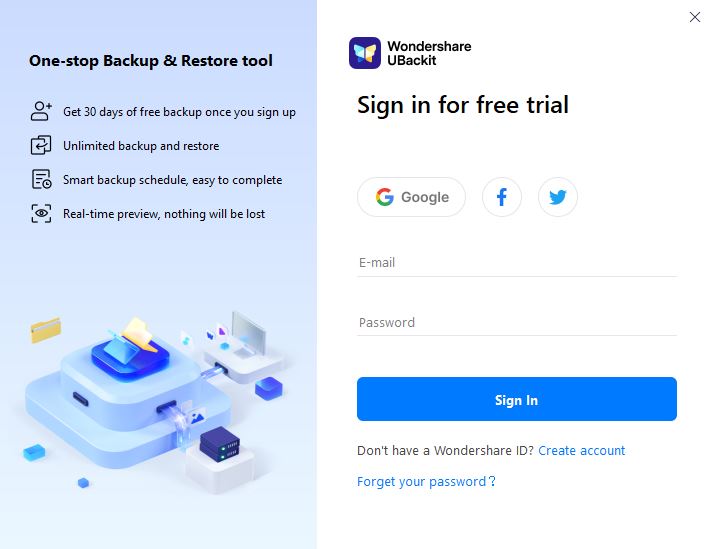
Step 2Start Your Free Trial
Wondershare UBackit enables you to use the app for free for 30 days. You can activate your free trial with your Google, Facebook, or Twitter credentials.
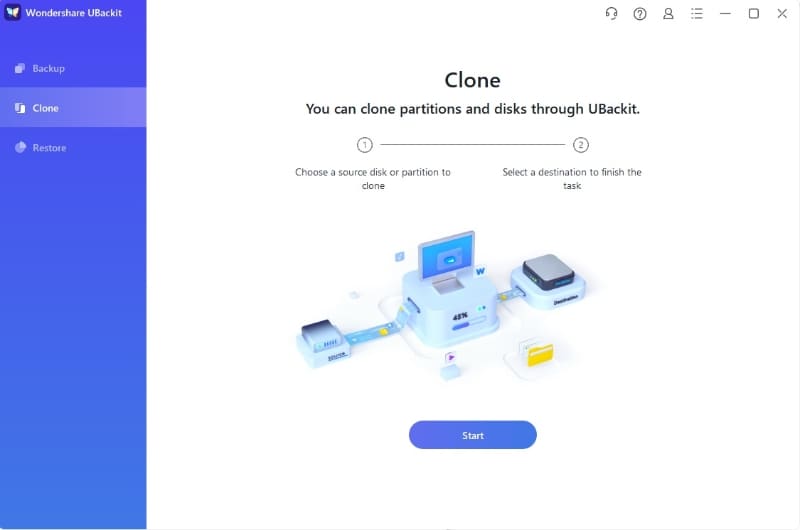
Step 3Start the Clone Process
Once you activate your free trial, you can start the Raspberry Pi to Synology NAS clone process. First, you need to connect your Raspberry Pi SD card to the computer with Ubackit installed. Then, select Clone from the left-side navigation pane.
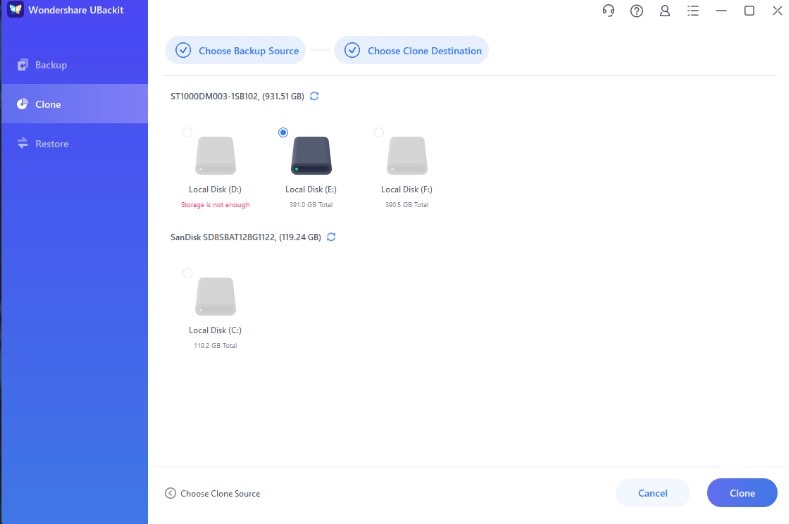
Step 4Select the Clone Source and Destination
Now, you need to select the backup source and destination. As a backup source, you should choose your Raspberry Pi.
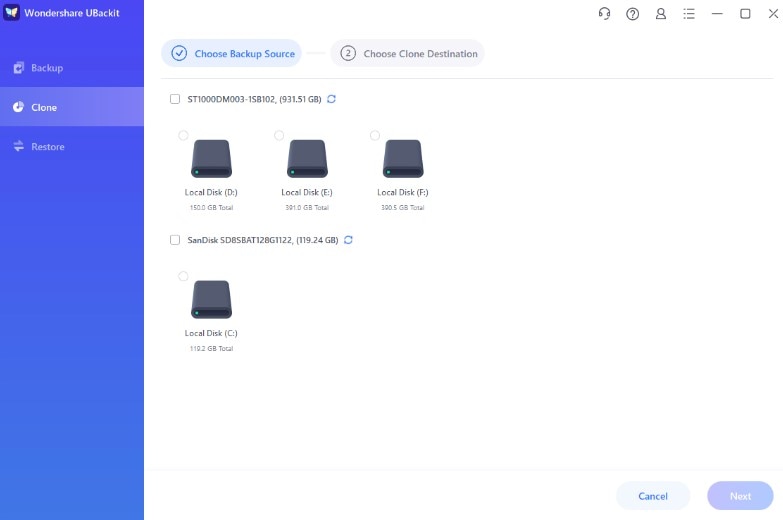
Select your Synology NAS as a backup destination.
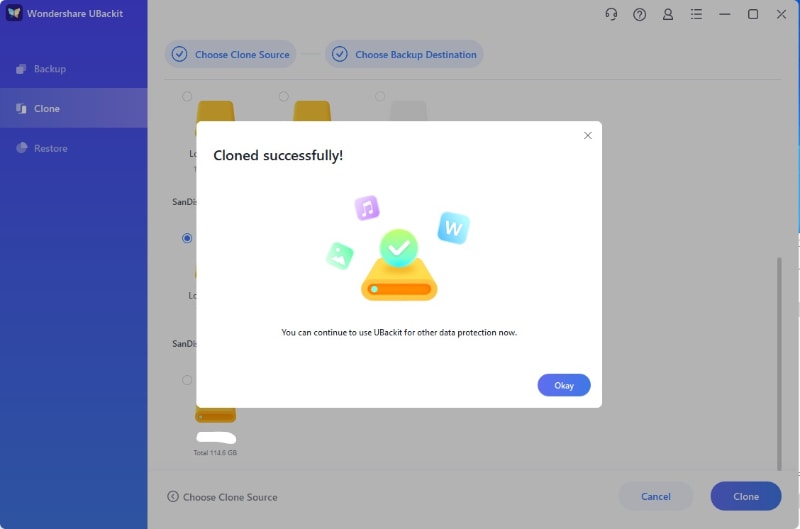
Step 5Complete the Clone Process
Click the Clone button to start replicating your Raspberry Pi to Synology NAS. Please hold on for a few seconds or minutes until the disk cloning process is finished. The duration of this process may differ based on the quantity of data being processed. After the completion of the process, a message will appear on your screen as shown below.
How To Recover Deleted or Lost Data on Linux-based Raspberry Pi Without Backup?
Losing important data on a Raspberry Pi can be a frustrating experience, especially if you don't have a backup. Luckily, there are ways to recover deleted files on your Raspberry Pi without a backup. One such way is to use a Linux data recovery tool like Recoverit Linux Recovery.
Wondershare Recoverit - Your Safe and Reliable Linux Recovery Software
5,481,435 people have downloaded it.
Recovers lost or deleted documents, photos, videos, music, emails, and other 1000+ file types effectively, safely, and completely.
Compatible with all mainstream Linux distros, including Ubuntu, Linux Mint, Debian, Fedora, Solus, Opensuse, Manjaro, etc.
Assists in 500+ data loss scenarios, such as deletion, disk formatting, OS crash, power outage, virus attack, lost partition, and many more.
The simple point-and-click interface allows you to recover data from Linux hard drives in just a few clicks.
Works through a remote connection. You can recover lost data even when your Linux device is crashed.
Follow the video tutorial or check the step-by-step guide below to get your deleted or lost files on your Raspberry Pi back quickly.
Step 1Select Linux Recovery
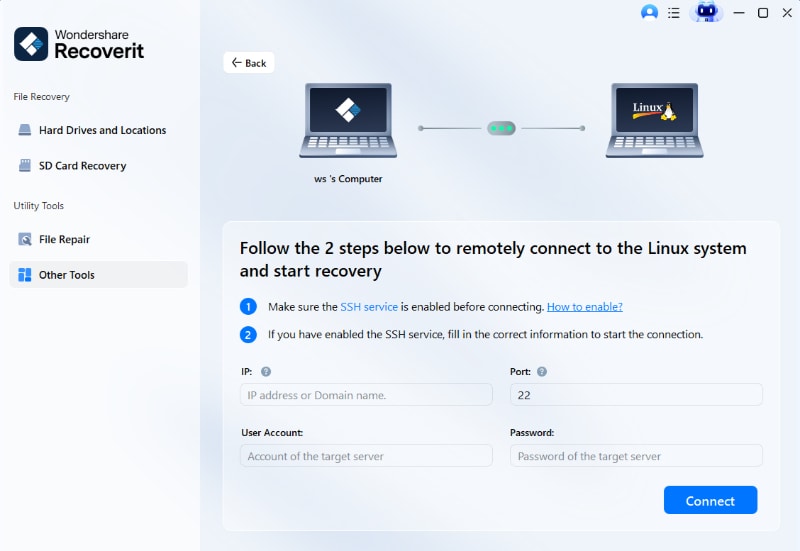
To get started, install Wondershare Recoverit on a Windows or Mac computer and open the program. Select the NAS and Linux option from the left side of the main interface. Then, simply click on the Linux Recovery button to continue.

A new window will appear on your screen. Fill in the necessary details for establishing a remote connection between Recoverit and your Raspberry Pi. After completion, tap on the Connect button.
Step 3Scan for Lost Files on Your Raspberry Pi
Once the connection is established, Recoverit will automatically scan your lost files on your Raspberry Pi computer. The scanning duration varies based on the amount of data being scanned. What makes Recoverit great is that you can stop the scanning process anytime you find the file that needs restoration. Moreover, the tool offers multiple filter options to help you easily locate the desired files.

Step 4Preview and Recover
After the scanning process is finished, Recoverit allows you to preview the files to confirm that they are the ones you wish to recover. Then, simply press the Recover button to restore the file on your computer.

Conclusion
Setting up a new Raspberry Pi takes time, especially if you need various services and apply a wide range of tweaks. Losing all your data to file corruption or malfunctions can set you back by hours. That’s why backups are crucial.
Fortunately, you can back up your Raspberry Pi to a Synology NAS. The three most common methods involve using RaspiBackup, Hyper Backup, and Wondershare UBackit. Choose the method you find the most convenient, do regular backups, and always park your Raspberry Pi data in a safe storage location – your Synology NAS unit.


