

If you are using a NAS device in your home or office network, such as Synology, QNAP, or others, you can benefit from many of its perks. One of the most convenient things you can do with your NAS is to use it as backup storage. In other words, you can streamline Windows backup to NAS.
Below you can find three ways to back up Windows 10/11 to NAS. Before jumping to the how-to’s, let’s see why to bother with Windows backups in the first place and how to prepare your OS for backup.
Things You Need To Do Before Performing Windows Backup to NAS
However, before you can perform Windows 10/11 backup to NAS, you must do a few things first. The most crucial step is to create a shared folder on your NAS unit. It will enable you to instruct your Windows to be able to store the backup on NAS. Here is an example of how to do it on Synology NAS. The process is similar to this one on other NAS units.
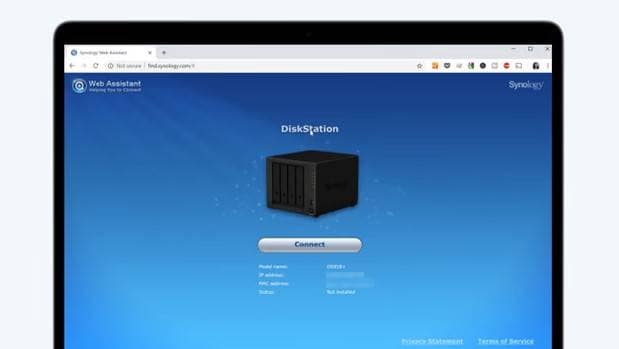
Step 1 Access your NAS unit
Open your favorite internet browser and access the NAS user interface. Synology NAS owners can type “find.synology.com” in the address bar. Click the connect button to gain access to the user dashboard. If you know the IP address of your NAS, you can use it to connect instead.
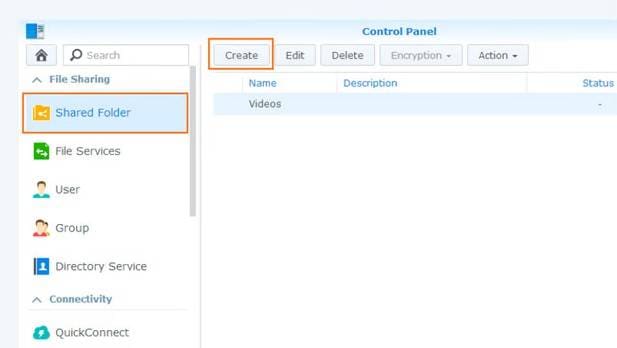
Step 2 Create a folder for backup
Now you need to create a folder on your NAS to store your Windows backups. It needs to be a shared folder if you want to access it from your PC. Click Create > Shared Folder. Name your folder how you want, being mindful that shared folders are case-sensitive.
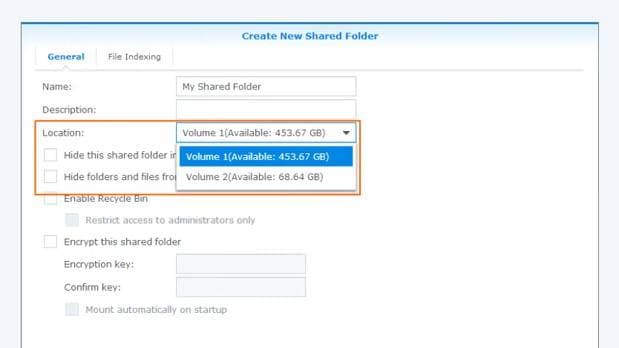
Step 3 Choose the storage volume and set user rights
Once you click to create a shared folder, the prompt will ask you to choose the storage volume. Select your NAS storage volume of choice.
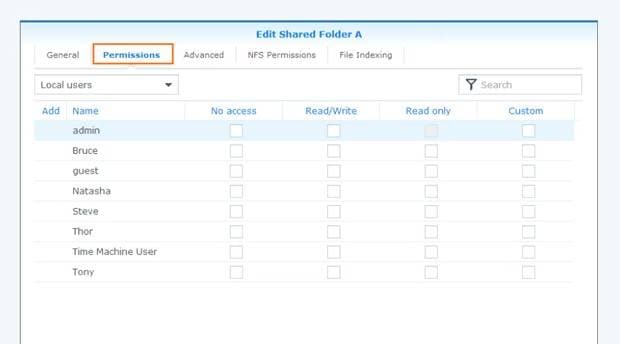
Next, check the permissions tab to allow users you select to read/write the folder you’ve just created. Check the permission box “Read/Write” for your user and click Apply.
Step 4 Map the NAS network drive in Windows
Open File Explorer, select This PC > Map network drive on the main menu ribbon.
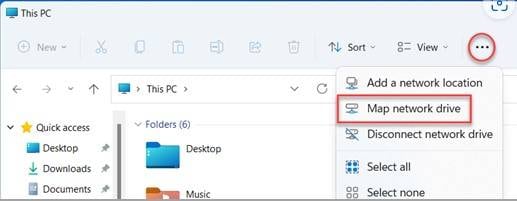
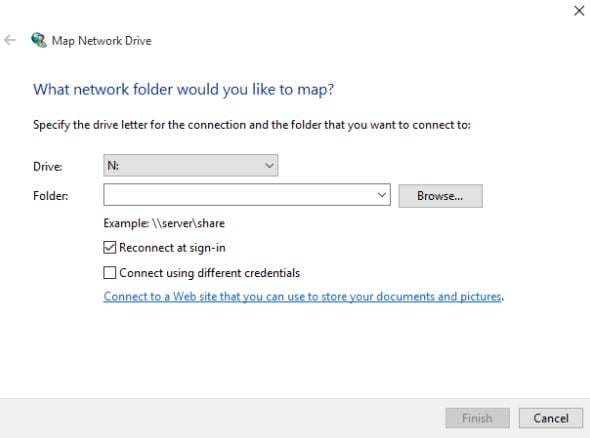
The new window will open. Here you need to select the drive letter from the dropdown menu. To choose your backup folder on the NAS unit, click browse and navigate to your network shared drive. Click Finish to complete.
Now that you’ve properly set up your NAS, you can back up Windows to it.
Pro Tip: How to Maximize Backup Speed Large system backups can take hours over standard Gigabit (1Gbps) connections. For the fastest performance in 2026, ensure your PC and NAS are connected via 2.5GbE Ethernet or a Wi-Fi 7 router. Using a wired connection significantly reduces the latency that often causes Windows "Backup and Restore" to hang. If your NAS supports SMB Multichannel, enable it in the NAS settings to allow Windows to use multiple network paths for even higher throughput.
You may also be interested in: Backup Windows Server to NAS
Different Ways You Can Backup Windows 11/10 to NAS
In the world of IT, one can achieve the same result in several different ways. The same applies to Windows backup to NAS. The built-in Windows backup capabilities enable you to use Backup and Restore and File History to back up your system.
However, you can also use third-party software such as Wondershare UBackit. This is the most reliable and convenient method as this tool is specifically designed to back up Windows 10/11 to NAS in a safe and secure way.
Method |
Best For... |
Key Advantage |
| Wondershare UBackit | Automated, scheduled, and encrypted backups. | Supports incremental backups and VSS (Open Files). |
| Backup and Restore | Creating full system images for disaster recovery. | Built-in Windows tool with no additional cost. |
| File History | Frequent versioning of personal documents and photos. | Easy to restore specific versions of individual files. |
| Manual SMB Mapping | Simple, one-time file transfers or manual control. | No software configuration or background services required. |
Way 1. With a Backup Tool (Wondershare UBackit)
Wondershare UBackit is a backup tool developed from the ground up to help Windows users streamline Windows backup process. It enables you to back up Windows to NAS in a few simple clicks.
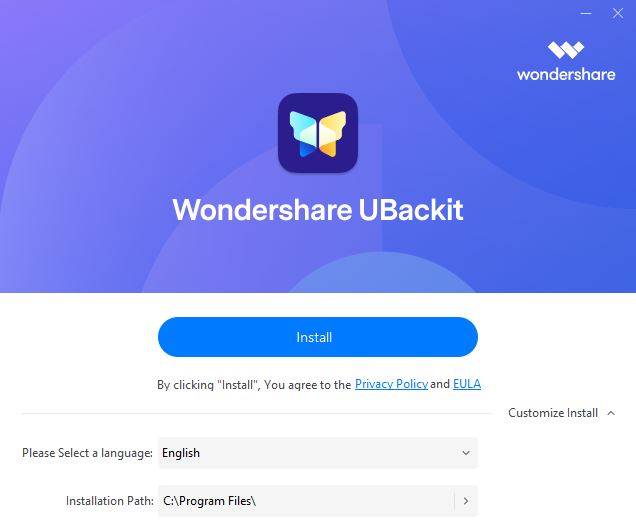
Step 1 Install and start Wondershare UBackit
Start the Wondershare UBackit installation process and follow the wizard to complete the installation. Once the installation is complete, you can start the backup tool.
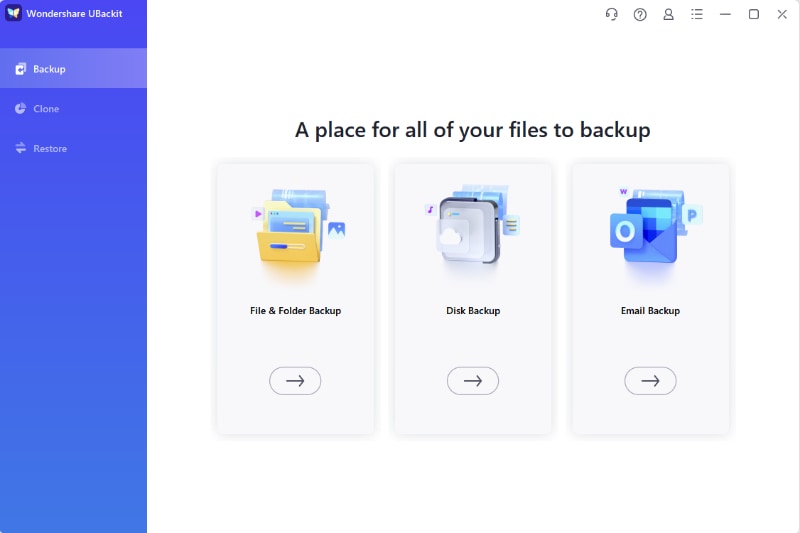
Step 2 Select the backup option
When you open the app, navigate to the Backup option in the sidebar menu and select File & Folder Backup, Disk Backup, or Email Backup according to your needs. Here we select Disk Backup as an example.
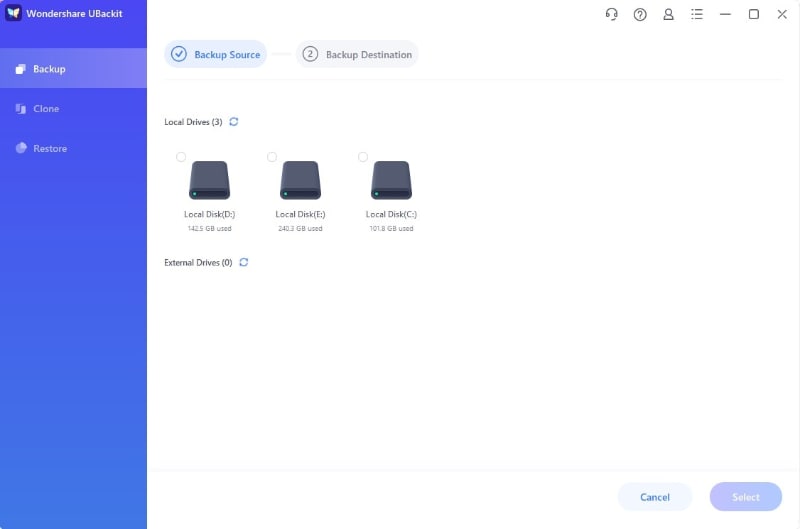
Step 3 Choose a backup source
Select a Windows drive that you want to back up and click Select.
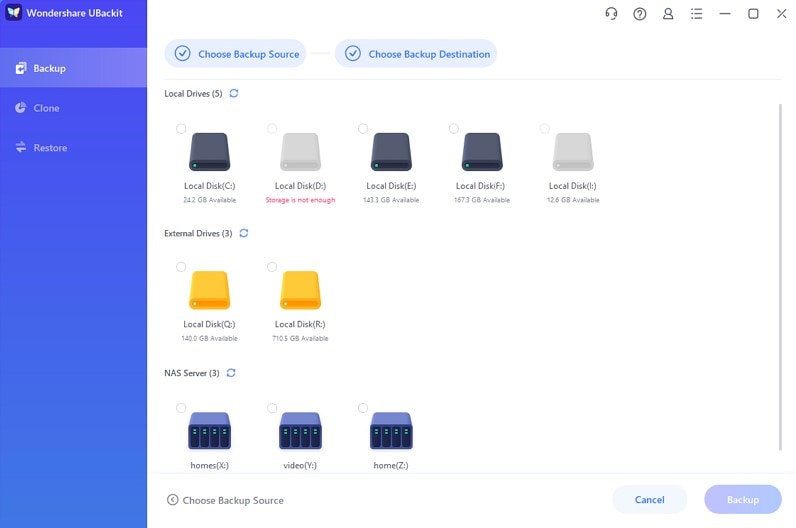
Step 4 Choose a backup destination
Now select the NAS shared directory by selecting the mapped drive letter as your Windows backup destination. Then, click Backup to start the backup process.
Step 5 Finish the Backup Process
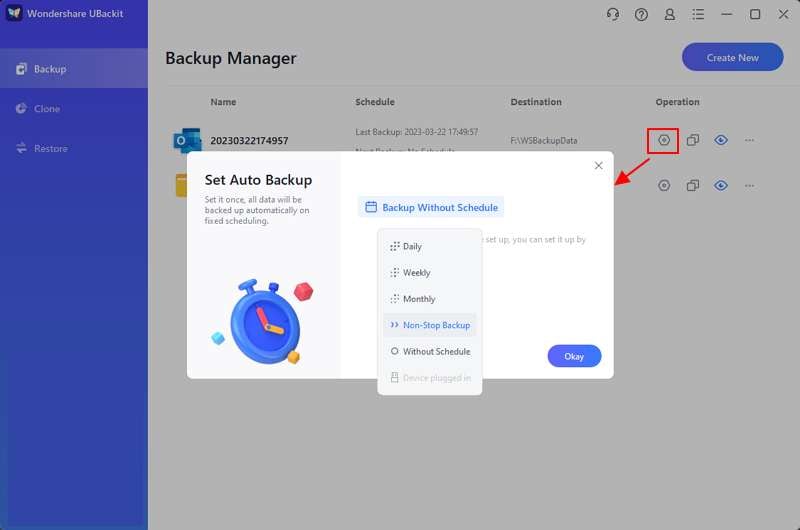
Depending on the drive size, the backup process may take some time. Upon completion, a pop-up message will appear. You can find the backups in the Backup Manager, where you can rename them, schedule automatic backups, set passwords, and perform other related tasks.
Way 2. With Windows Backup and Restore
Backup and Restore is a neat Windows functionality introduced in Windows 7 and is still available in Windows 10 and 11. The process of backing up Windows to NAS using back and restore is rather straightforward. Here’s what you need to do.
Step 1 Access Backup and Restore
Click Search icon on the taskbar, type Control Panel, and click on the Control Panel icon in the search results.
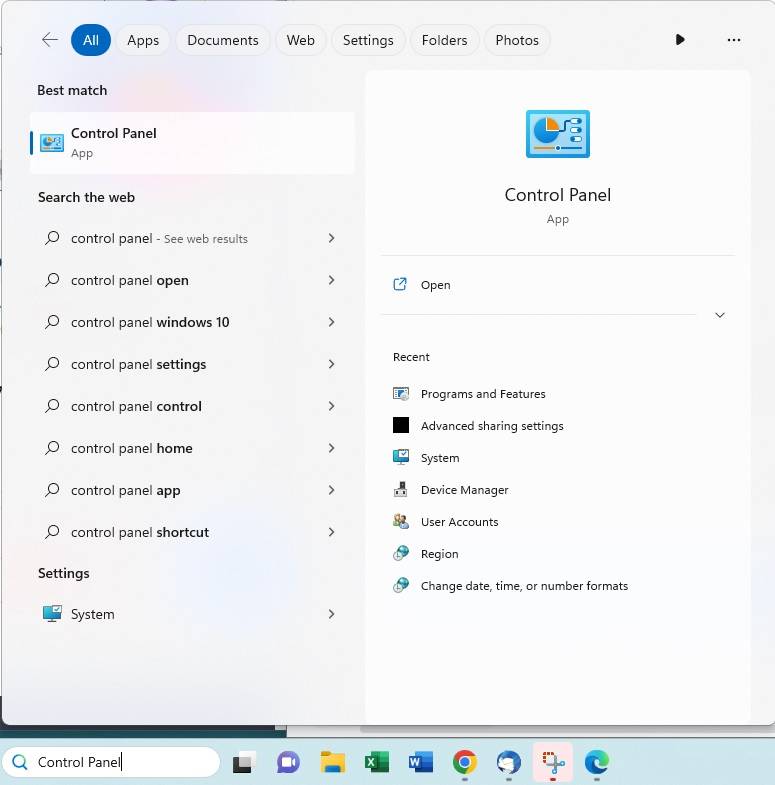
Click System and Security > Backup and Restore (Windows 7)
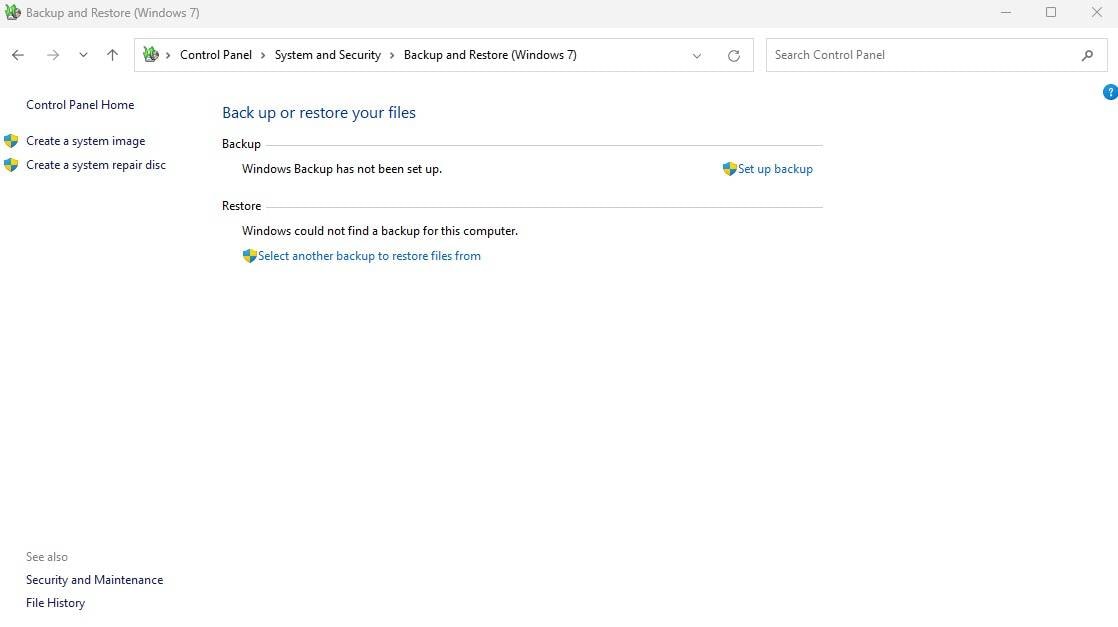
Step 2 Setup your backup
Next, click on the Set up backup button located on the right side.

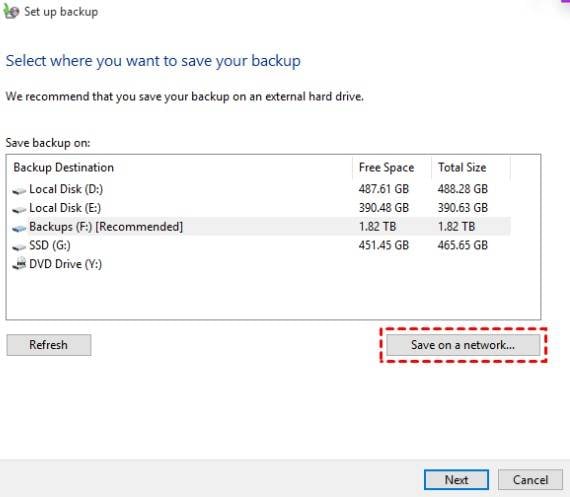
Step 3 Select where you want to back
If you’ve mapped your NAS storage as previously explained, you can select the drive letter you mapped your NAS to and click Next. If not, click Save on a network and go to the next step.
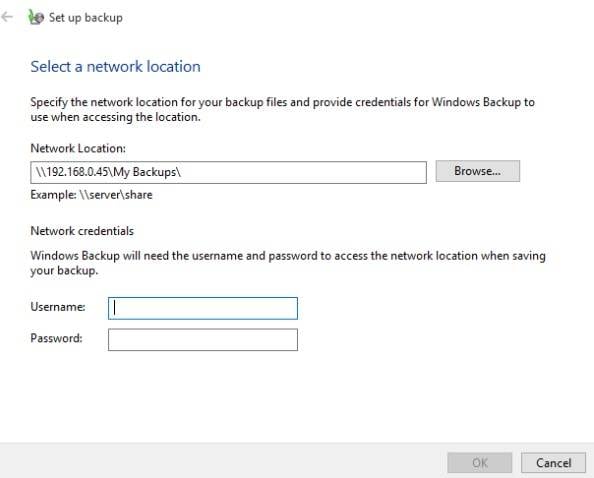
Step 4 Manually specify the location
In the Select a network window, click browse to add your shared network drive. Don’t forget to type in your username and password as well, then click Next.
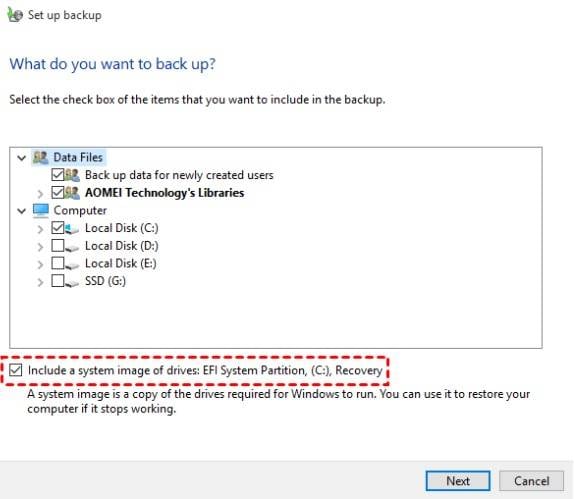
Step 5 Select backup options
Select which items you want Windows to backup to NAS and check the box in front of Include a system image of drives.
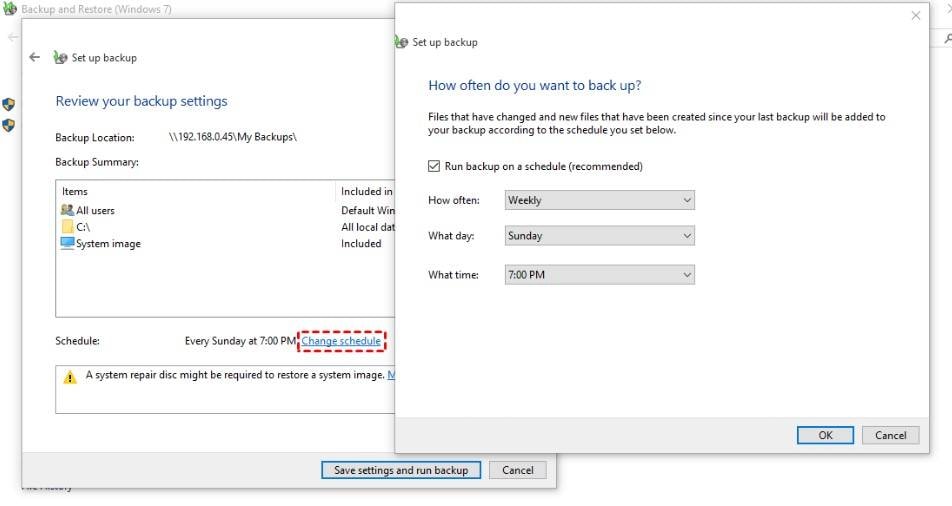
Step 6 Create a backup schedule
In the final step, the Backup and Restore tool will offer you to automate your Windows backup to NAS. Click Change Schedule and configure options to your own preferences, then Save settings and run backup.
Step 7 (Optional) Create a system repair disc
Once the backup is complete, Windows will offer to create a system repair disc. You can burn a DVD or create a system repair disc with your USB thumb drive.
Way 3. Using File History
File History is a neat Windows feature that allows you to back up all important user folders. You can use it to create a backup to NAS as well. Remember that, unlike the previous two methods, this one will not create image files, and you won’t be able to use your backup to restore your entire system.
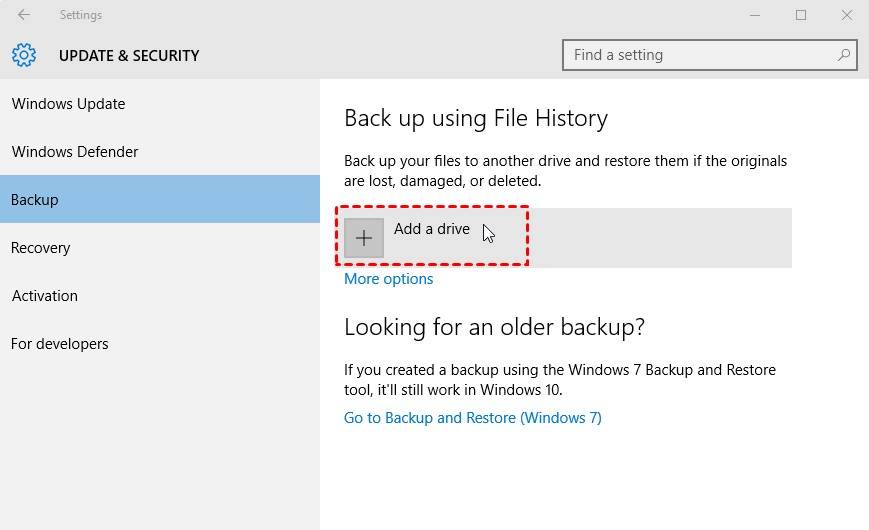
Step 1 Go to File History and add your network-shared NAS drive
To access this Windows 10/11 feature, go to Start Control PanelSystem & Security > File History. Now click Add Drive. Select your mapped NAS drive.
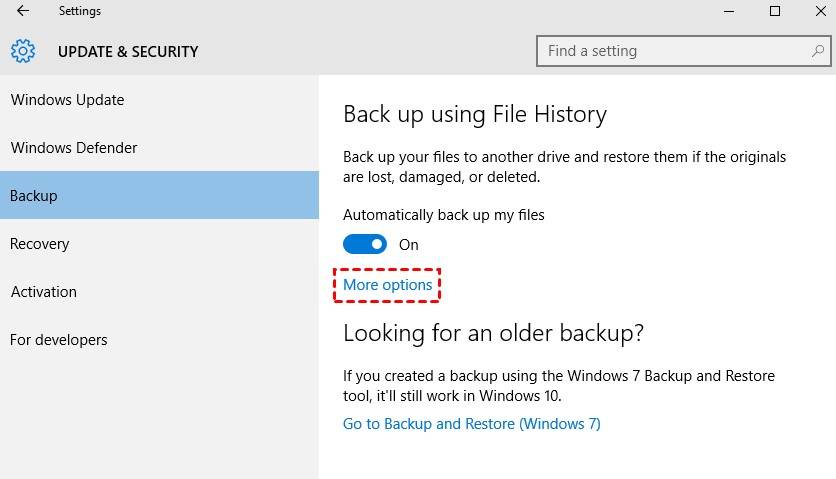
Step 2 Select folders you want to backup
Once you’ve selected a drive, you can customize your backup options. Click More options and select which user folders you want to backup, how frequently you want file history to back up your folders, and for how long to keep versions saved.
Way 4. Manual Backup via SMB Network Mapping (File Explorer)
If you prefer a manual, "no-software" approach, you can simply map your NAS as a local network drive. This method is perfect for users who want full control over which specific files or folders are backed up without configuring automated background services.
Step 1 Open "Map Network Drive" in Windows
Open File Explorer (Win + E), right-click on This PC in the left sidebar, and select Map network drive....
Step 2 Assign a Drive Letter and Path
In the pop-up window, choose an available drive letter (e.g., Z:). In the Folder box, type the network path of your NAS shared folder (e.g., \\192.168.1.100\BackupFolder or \\YourNASName\BackupFolder). Ensure Reconnect at sign-in is checked.
Step 3 Enter NAS Credentials
When prompted, enter the username and password you created for the NAS shared folder. Check Remember my credentials so you don't have to log in every time you restart your PC.
Step 4 Drag and Drop to Back Up
Your NAS will now appear as a local disk in This PC. You can now manually copy and paste or "drag and drop" important project files, photos, or documents directly into this drive.
Expert Note: While manual mapping is the simplest method, it does not support "Versioning" (keeping older copies of files). For automatic protection against accidental changes, we recommend using Wondershare UBackit alongside this manual method.
Advantages of Backing up Windows Files to NAS Instead of Local Drives
While local drives are suitable for storing Windows backups, they are not the best solution. If your local drive is attached to your computer, your backup can also get corrupted when something goes wrong.
What can go wrong, you may ask?
Well, malware attacks are really common today. The most vicious type is ransomware, which encrypts your data so you can’t access it and forces you to pay a ransom to get it back. You can misplace your local drive or have it stolen. Local drives can suffer a failure which leads to loss of data.
However, if you keep your Windows 10 and 11 backups on NAS, you can avoid losing your data to unforeseen circumstances. Plus, restoring your backup from NAS is much more convenient than looking through your local drives and searching for the most recent backup file.
Why Security Matters: The Air-Gap Advantage
Modern ransomware often targets connected network drives. To protect your Windows 11 backup, Wondershare UBackit offers password protection and encryption, ensuring that even if your PC is compromised, the backup files remain unreadable to unauthorized scripts. Additionally, most modern NAS units support Btrfs Snapshots—ensure you enable "Immutable Snapshots" on your backup folder. This creates a "read-only" version of your data that cannot be deleted or encrypted by ransomware.
Conclusion
With these three methods, you can easily back up Windows 10/11 to NAS. To ensure your system is properly backed up, consider using WonderShare UBackit. It’s an easy-to-use and, more importantly, reliable tool for Windows backup. Other options that you have at your disposal are using File History and Backup and Restore features.
1. Why can't Windows find my NAS during backup?
This is usually due to Network Discovery being turned off or mismatched SMB protocols. Ensure "SMB 1.0/CIFS" is disabled (for security) and that both your NAS and Windows PC are using SMB 2.0 or 3.0. Mapping the NAS as a drive letter first usually fixes this visibility issue.
2. Does Windows 11 Backup and Restore support Synology/QNAP?
Yes. Windows treats a mapped NAS drive as a local destination. However, the legacy Backup and Restore (Windows 7) tool can sometimes struggle with network credentials. For a more modern experience that handles network handshakes better, Wondershare UBackit is recommended.
3. Is File History better than a System Image for NAS?
It depends on your goal. File History is great for restoring a specific version of a Word document you deleted yesterday. A System Image is better if your hard drive fails completely and you need to restore your entire OS, apps, and settings to a brand new disk.
4. Can I back up my Windows laptop to NAS over Wi-Fi?
Yes, but it is much slower than a cable. For the initial backup (which is usually the largest), it is highly recommended to use an Ethernet cable. For daily incremental backups, Wi-Fi 6 or Wi-Fi 7 is perfectly sufficient.


