

 TL;DR:
Stop using the G-Drive first. Check Trash if the files were recently deleted, then open Disk Utility to see whether the drive is detected and mounted. If macOS detects the drive but files are missing, scan it with recovery software and save results to a different device. If the drive clicks, overheats, repeatedly disconnects, or is absent from Disk Utility, stop reconnecting it and contact a professional recovery service.
- Stop copying, deleting, formatting, or repairing the G-Drive.
- Check Trash and Time Machine or another backup.
- Check Finder and Disk Utility for the drive status.
- Recover files to a separate healthy destination.
- Use First Aid only after important data is protected.
Ask AI for a summary
 ChatGPT
 Perplexity
 Gemini
 Claude
 Grok
Grok
If important files disappear from a G-Drive Mobile USB-C connected to a Mac, do not format the drive, run repeated repairs, or copy new files to it. Data loss can result from accidental deletion, formatting, file-system corruption, an unsafe ejection, a failed cable, or physical damage.
First determine whether macOS detects the G-Drive in Finder or Disk Utility. If the drive is detected, recover or back up important files before using First Aid. If it is not detected, test one known-good cable, port, power source, or Mac before considering professional recovery.

This guide explains how to recover data from G-Drive Mobile USB-C on Mac and how to choose the safest next step for each drive state.
Try Recoverit to Perform G-Drive Data Recovery
 Security Verified. 3,591,664 people have downloaded it.
Part 1. Why Is Data Lost from G-Drive Mobile USB-C?

Understanding the cause helps you avoid making the situation worse. Common causes include:
| Cause | Typical Sign | First Safe Action |
| Accidental deletion | Files disappear after manual deletion | Stop writing and check Trash or a backup |
| Accidental formatting or initialization | macOS asks to erase the drive or shows an empty volume | Cancel and recover data before formatting again |
| Unsafe ejection or power interruption | Files become corrupted or the volume will not mount | Check the connection and protect data before First Aid |
| USB-C cable, port, hub, or adapter problem | Drive disconnects or is not detected consistently | Use a compatible cable and connect directly to the Mac |
| File-system or macOS error | Drive appears in Disk Utility but not Finder | Check the volume state and try Mount |
| Physical damage | Clicking, overheating, repeated disconnects, or no detection | Stop using the drive and seek professional help |
How to Check Whether Your Mac Detects the G-Drive
| What You See | What It Means | Recommended Action |
| Drive appears in Finder and files open | Drive is mounted and accessible | Copy important files to another location |
| Drive appears in Disk Utility but not Finder | Volume may be unmounted or unreadable | Check status and choose Mount if available |
| Mac asks to initialize or erase the drive | File system may be damaged or unsupported | Cancel and recover data first |
| Drive is absent from Disk Utility | Connection, power, enclosure, or hardware issue | Test one known-good setup, then stop repeated attempts |
Part 2. Basic Troubleshooting: Check the G-Drive Connection
Perform these checks before scanning or repairing the drive. If the G-Drive contains important data, avoid any step that writes to the source.
Check the USB-C Cable
A damaged or incompatible USB-C cable can interrupt read and write operations and make the drive appear unstable.
- Disconnect the G-Drive safely if it is mounted.
- Inspect the connectors for looseness, bent pins, or visible damage.
- Try a known-good data cable that supports the required speed and power.
- Test the cable with another compatible device when available.
Connect Directly to the Mac
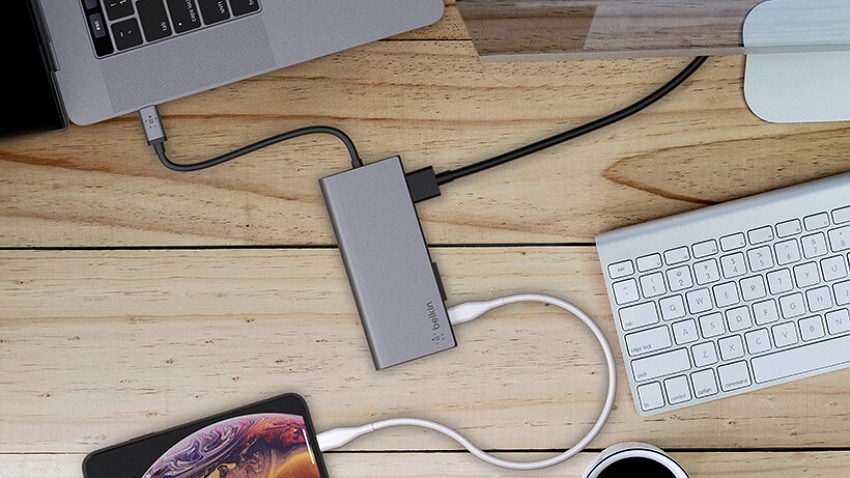
Hubs, docks, and adapters add connection points and may not provide stable power or data transfer.
- Disconnect unnecessary hubs and adapters.
- Connect the G-Drive directly to a compatible USB-C port on the Mac.
- For a portable drive, make sure the Mac has enough power and avoid unstable hubs.
Check Finder and Disk Utility
If the G-Drive is missing from Finder, open Applications > Utilities > Disk Utility and choose View > Show All Devices. If the physical disk appears, check whether its volume is mounted. Do not click Erase if important files are missing.
Part 3. How to Recover Data from G-Drive Mobile USB-C on Mac
If macOS still detects the G-Drive but files were deleted, formatted, or made inaccessible, Wondershare Recoverit can scan the available storage location. Recovery is not guaranteed, especially after overwriting, severe corruption, or physical failure.
Install the recovery software on the Mac or another healthy volume when possible. Do not install it on the affected G-Drive and do not save recovered files back to the source.
Recoverit Features for G-Drive Recovery
- Preview before recovery: Review supported files before saving them.
- Filter and search: Narrow results by file type, path, or name when supported.
- Batch recovery: Select multiple files in one recovery operation.
- Separate destination: Save results to the Mac's internal storage or another healthy drive.
How to Recover Files from the G-Drive with Recoverit
- Select the source: Launch Recoverit, open Hard Drives and Locations, and select the detected G-Drive.
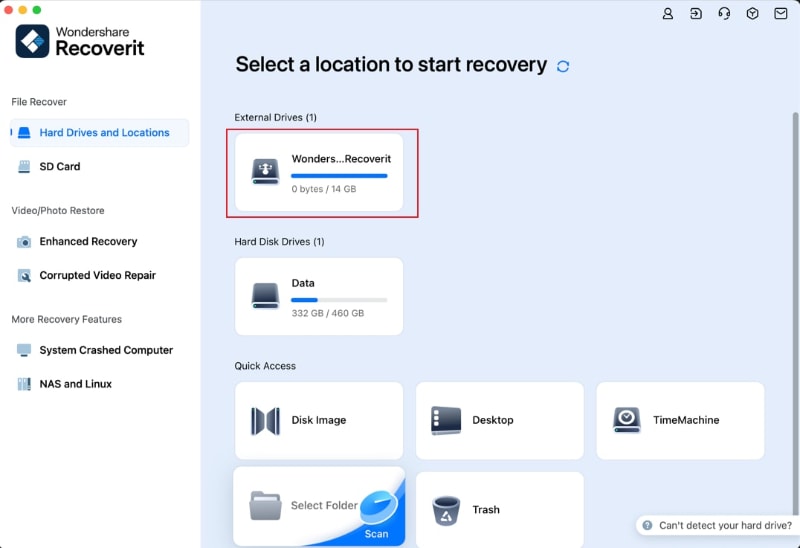
- Scan the drive: Start the scan and avoid disconnecting the G-Drive while it runs.

- Filter results: Use file type, path, or search filters to locate the missing files.
- Preview files: Preview supported files before selecting them.
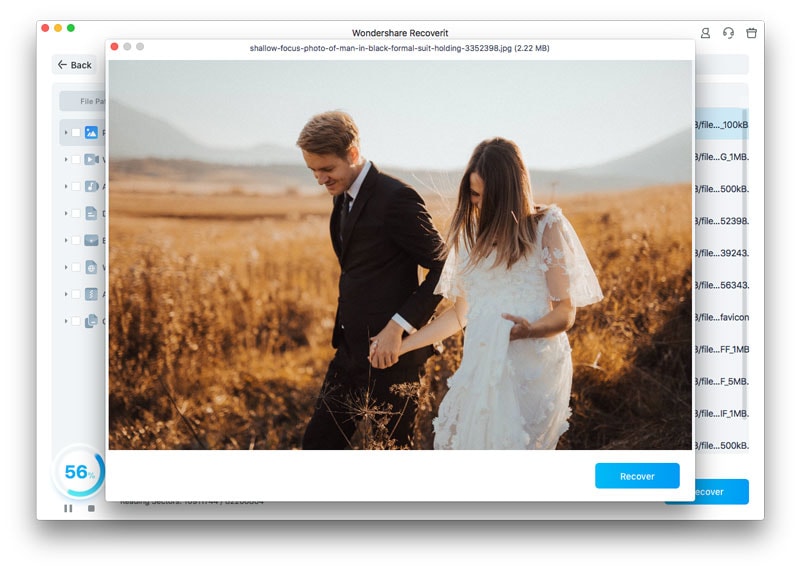
- Recover elsewhere: Click Recover and choose a different healthy destination.
- Verify the result: Open several recovered files before repairing or reformatting the source.
Part 4. Other Ways to Recover Data from G-Drive Mobile USB-C on Mac
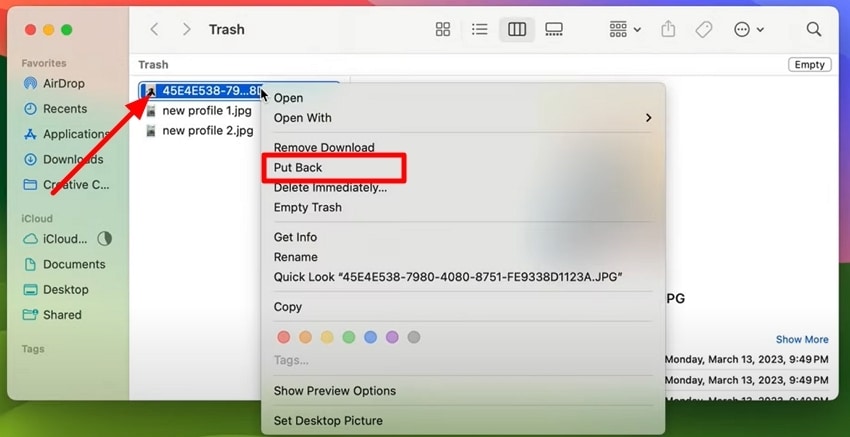
Solution 1. Recover Deleted Files from Trash
When files are deleted from an external drive through Finder, macOS may move them to Trash instead of removing them immediately. This depends on how the files were deleted and whether the volume was available.
- Open Trash on the Mac.
- Locate the deleted file or folder.
- Right-click it and choose Put Back.
- After restoring, copy the file to another healthy location.
Solution 2. Mount the G-Drive and Use First Aid Carefully
Disk Utility can help when the G-Drive is detected but its volume is not mounted. First Aid can repair some logical file-system problems, but it is not a deleted-file recovery tool. Recover or back up important data first.
Try Mounting the External Drive
- Open Disk Utility and choose View > Show All Devices.
- Select the G-Drive volume in the sidebar.
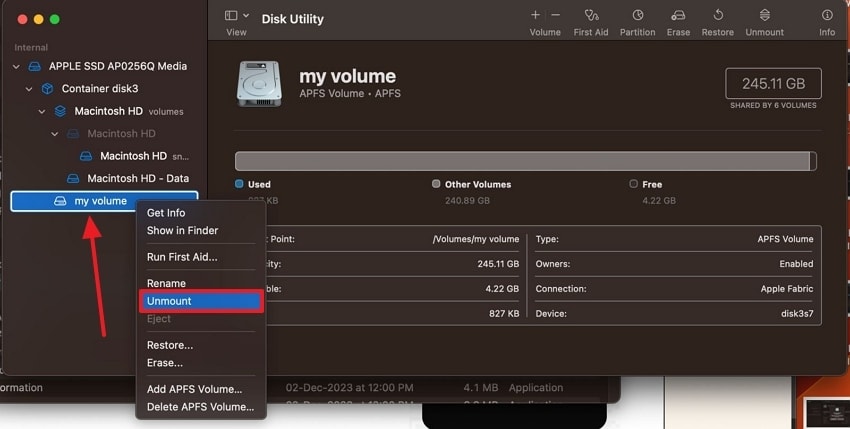
- Click Mount if the option is available.
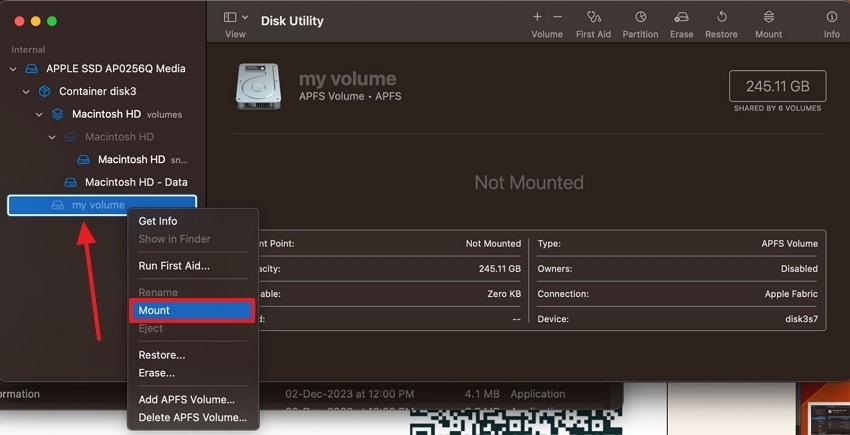
- Check Finder for the files.
Run First Aid Only After Data Is Safe
- Select the detected G-Drive volume in Disk Utility.
- Click First Aid and review the warning.
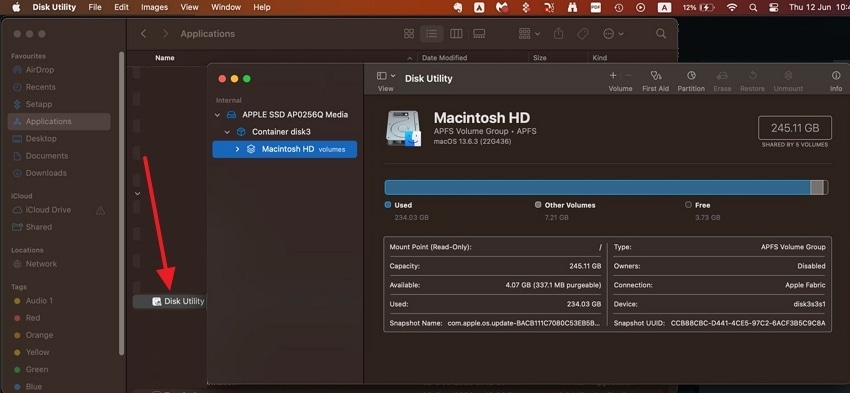
- Choose Run only after important files are backed up or recovered.
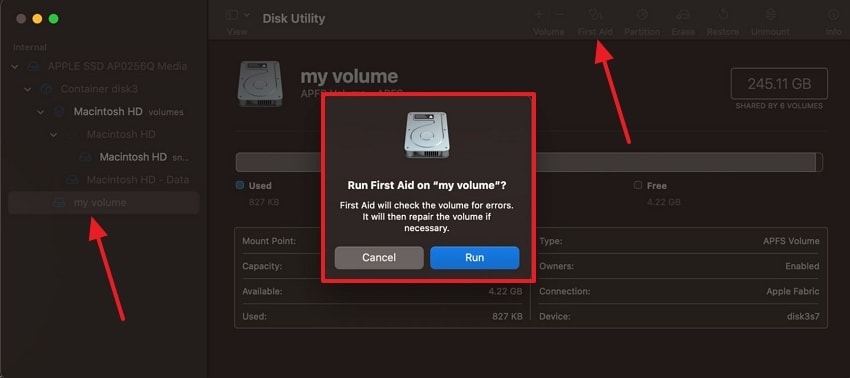
- Wait for the process to finish without disconnecting the drive.
Solution 3. Seek Professional Recovery Services
Contact a professional recovery service when the G-Drive clicks, overheats, repeatedly disconnects, is absent from Disk Utility after a known-good connection test, or has important data that software cannot access.
- Stop repeated power cycles and scans.
- Tell the provider whether the drive is encrypted or recently formatted.
- Provide the G-Drive model, symptoms, Mac model, cable, and adapter details.
- Choose a provider experienced with external HDDs, USB-C enclosures, and file-system recovery.

Professional recovery can be expensive and success is not guaranteed, but it is safer than opening the drive or repeatedly repairing a physically failing device.
Part 5. Best Practices to Prevent Future Data Loss from G-Drive Mobile USB-C
- Eject the G-Drive safely: Use Finder's eject control before unplugging the USB-C cable.
- Keep at least one separate backup: Use Time Machine, cloud storage, or another external drive for important files.
- Use reliable cables and ports: Avoid loose cables, overloaded hubs, and unstable adapters during transfers.
- Protect the drive physically: Keep it away from drops, moisture, heat, and strain on the USB-C connector.
- Update macOS and supported firmware: Back up first and follow the current G-Drive manufacturer guidance.
- Monitor drive health: Watch for slow access, repeated disconnections, unusual sounds, or mounting errors.
Conclusion
G-Drive Mobile USB-C data recovery on Mac depends on whether the drive is detected, whether the files were deleted or made inaccessible, and whether new data has overwritten them. Start with Trash and backups, then check Disk Utility before using recovery software or First Aid.
Stop writing to the source G-Drive and save recovered files elsewhere. If the drive is absent from Disk Utility, physically damaged, or repeatedly disconnecting, stop testing it and consider professional recovery.
FAQ About G-Drive Mobile USB-C Data Recovery
-
Should I save recovered files back to the G-Drive?
No. Save them to the Mac's internal drive or another healthy external drive. Writing to the source can overwrite recoverable data. -
Can Disk Utility recover files deleted from a G-Drive?
No. Disk Utility can mount a volume and repair some file-system problems, but it is not a general deleted-file recovery tool. -
Can I use a USB-C hub to recover data from the G-Drive?
Use a direct Mac connection first. Hubs and adapters can introduce power or connection instability, especially during a long scan. -
What does it mean if the G-Drive is visible in Disk Utility but not Finder?
The volume may be unmounted or unreadable. Check its status and try Mount if available, but do not choose Erase while important files are missing. -
Can Recoverit scan a G-Drive that Mac cannot detect?
Recovery software generally needs macOS to detect the storage device. Test one known-good cable, port, and Mac, then consider professional recovery if it remains invisible. -
When should I stop troubleshooting the G-Drive?
Stop when it clicks, overheats, repeatedly disconnects, or remains absent from Disk Utility. Repeated scans and power cycles can make a physical failure worse.


