

 TL;DR:
To remove write protection from an external hard drive, you must disable the physical hardware lock, clear system-level read-only attributes, or repair file system corruption.
● Inspect the drive's exterior for a physical write-protection switch and slide it to the unlocked position before attempting any software-based modifications.
● Use the Windows Diskpart utility by executing the `attributes disk clear readonly` command on the affected drive, or change the `WriteProtect` registry value to 0 under `HKEY_LOCAL_MACHINE\System\CurrentControlSet\Control\StorageDevicePolicies`.
● Formatting the drive is a last-resort solution for severe file system corruption that permanently deletes all data, necessitating a data recovery tool like Wondershare Recoverit if files were not backed up prior to the procedure.
Ask AI for a summary
 ChatGPT
 Perplexity
 Gemini
 Claude
 Grok
Grok
External hard drives are a popular choice for storing valuable data. People often rely on them to keep backups, work documents, family photos, videos, and project files. Their portability and simple connectivity make them convenient to use across different computers.
However, users may face a common problem. You may see an error message stating that the media is write-protected on the external hard drive. When this happens, you cannot copy files to the drive. You also cannot delete or edit existing data.
In this complete guide, you will learn how to remove write protection on external hard drive in clear and simple steps.
Try Recoverit to Recover Lost Data
![]() Security Verified. Over 7,302,189 people have downloaded it.
Security Verified. Over 7,302,189 people have downloaded it.
Table of Contents
Part 1: What is Write Protection on an External Hard Drive?
Write protection is a storage setting that prevents changes to a drive. When this feature is active, the system treats the drive as read-only. You can view files. You can open documents. But you cannot save new data or remove old files.
This protection may be intentional or accidental. Some drives include a physical switch. Others may become protected because of file system errors. In many cases, users are confused when the media is write-protected on the external hard drive appears on the screen. At that moment, they start searching how to unlock write-protected external hard drives to regain full access.
Write protection can also be triggered by system policies. Windows may block changes if it detects corruption. Antivirus programs may restrict access to prevent data damage. In rare cases, malware can modify disk attributes and force the drive into read-only mode. Understanding these factors helps when learning how to remove write protection on external hard drive correctly.
It is important to note that write protection is not always harmful. It exists to protect important files from accidental deletion. However, when it activates unexpectedly, it becomes a serious inconvenience. That is when you need to know how to fix external hard drive is write protected issues through proper troubleshooting steps.
Part 2: Common Causes of Write Protection Error
Write protection errors do not appear without reason. There is usually a specific cause behind the issue. Identifying the correct cause helps you apply the right solution. Below are common reasons for this problem.
- Physical write-protection switch enabled: Some external drives have a small hardware switch. If this switch is turned on, the device becomes read-only. Many users overlook this detail.
- Disk attributes set to read-only: Windows may mark a disk as read-only due to improper removal or system errors. This setting blocks any writing operations.
- Corrupted file system: If the file system becomes damaged, the system may prevent further changes. This protects data from additional corruption.
- Virus or malware infection: Malware can alter drive properties. It may trigger read-only mode as part of its harmful behavior.
- Registry settings misconfigured: The Windows Registry controls many device settings. Incorrect values can force write protection.
- Bad sectors on the drive: Physical damage can create unreadable sections. The system may restrict access to prevent data loss.
- Unsupported file system format: Some drives are formatted in systems not fully compatible with your operating system.
- Sudden power loss during transfer: If the drive is removed without safe ejection, errors can occur. The system may respond by locking the drive.
Understanding these causes helps you decide how to unlock write-protected external hard drives using the correct method.
Part 3: How to Remove Write Protection on an External Hard Drive (Step-by-Step)
If your external drive has become read-only, do not panic. There are several proven ways to resolve the problem. Each method addresses a different cause. Follow the steps carefully. Make sure you select the method that matches your situation.
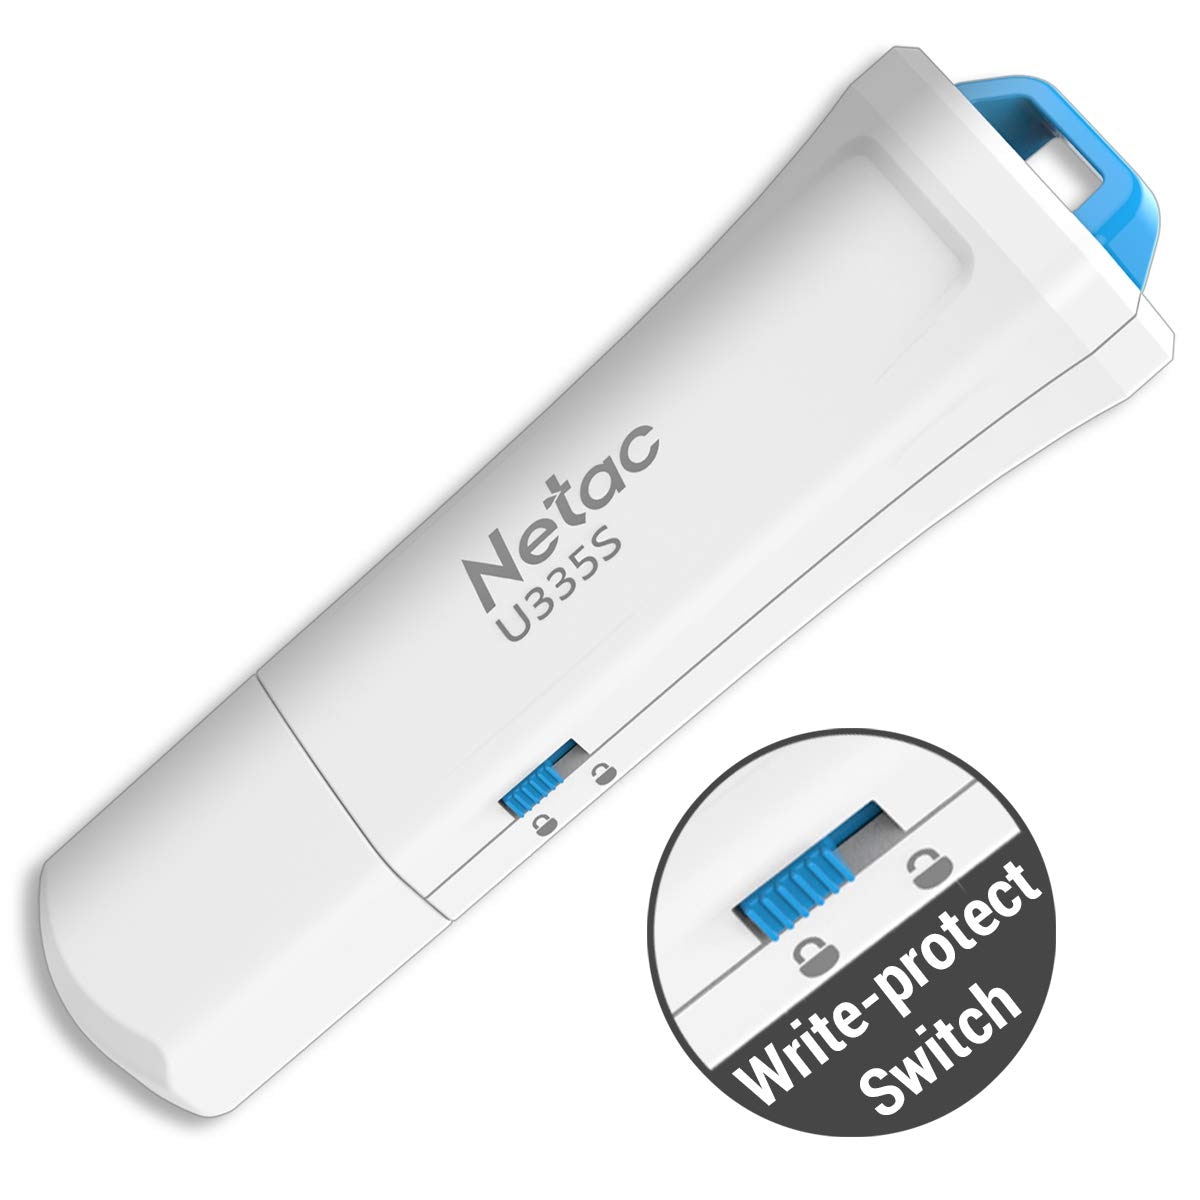
Method 1: Check for Physical Write-Protection Switch
Some external drives include a small switch on the side. This switch controls write protection directly at the hardware level. If the switch is on, software changes will not help. The drive will remain locked until the switch is moved.
Before using advanced tools, always inspect the drive body. This step takes only a few seconds. It is simple but often ignored.
Step 1: Disconnect the external hard drive from your computer. Check the sides carefully for a small lock or write-protection switch.

Step 2: If you find the switch, slide it to the opposite position. Reconnect the drive and test if writing works normally.
Method 2: Use Windows Diskpart Utility
Diskpart is a built-in Windows command tool. It allows you to manage disk properties. If the system has marked the drive as read-only, you can remove that setting using a command.
This method is useful when it becomes necessary to fix an external hard drive that is write-protected due to attribute errors. Diskpart directly modifies disk settings.
Be careful while using this tool. Selecting the wrong disk may cause serious data loss.
Step 1: Press Windows + R. Type cmd. Press Enter. In the Command Prompt, type diskpart. Press Enter. Then type list disk to display drives. Identify your external drive. Type select disk X, replacing X with the correct number.
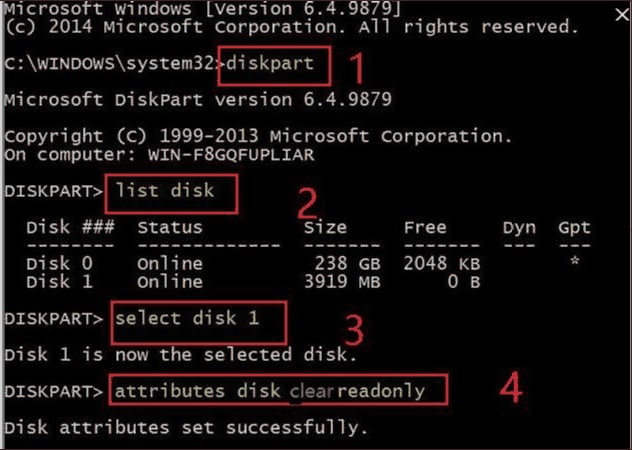
Step 2: Type attributes disk clear readonly and press Enter. After completion, type exit and reconnect the drive.
Method 3: Modify Windows Registry Settings
The Windows Registry stores system configuration values. If write protection is enabled through a registry entry, you can adjust it.
This method works when system policies enforce read-only behavior. Incorrect registry changes can cause problems. Follow instructions carefully.
Step 1: Press Windows + R. Type regedit and press Enter. Navigate to HKEY_LOCAL_MACHINE\System\CurrentControlSet\Control\StorageDevicePolicies.
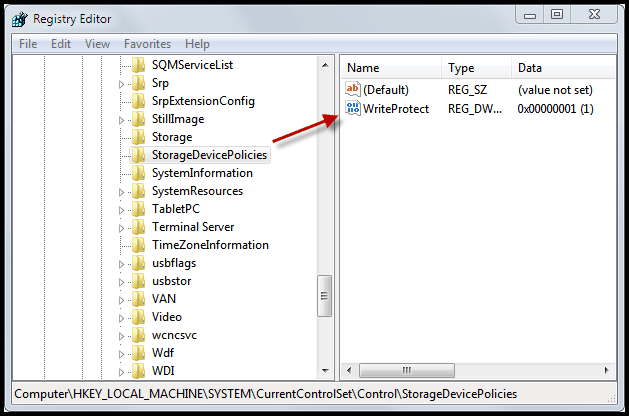
Step 2: In the right panel, locate WriteProtect. Double-click it and change the value to 0. Click OK and restart your computer.
Method 4: Run CHKDSK to Fix File System Errors
File system errors can lock a drive. Windows includes a tool called CHKDSK to scan and repair disk problems.
This method checks for logical errors. It also repairs minor corruption issues.
Step 1: Open Command Prompt as Administrator. Type chkdsk X: /f, replacing X with your drive letter. Press Enter.
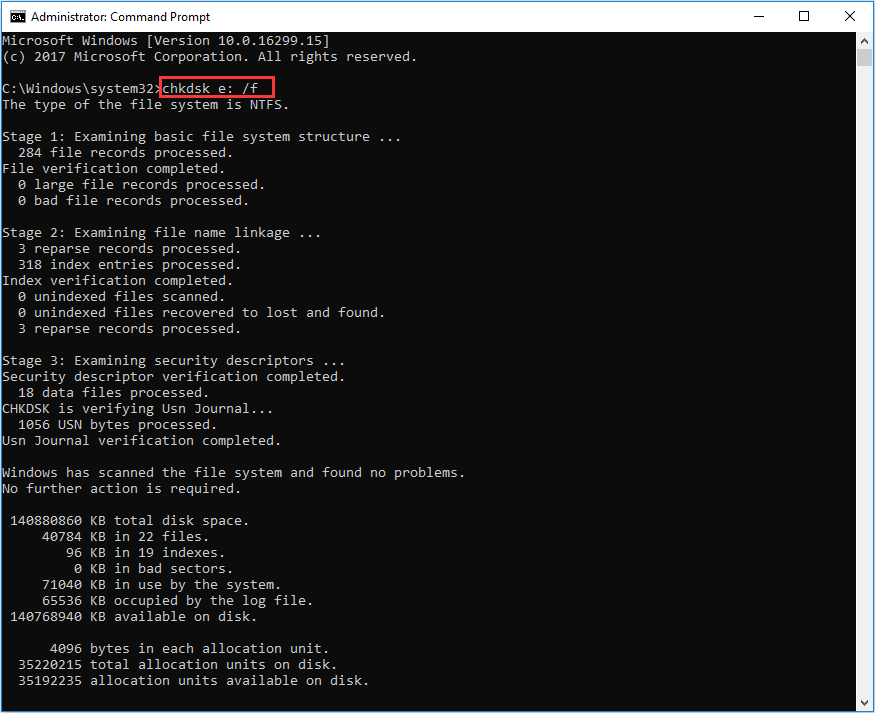
Step 2: Allow the scan to complete. Restart your computer after the process finishes.
Method 5: Format the External Hard Drive (Last Resort)
If none of the above methods work, formatting may be required. Formatting removes all data and rebuilds the file system.
Use this method only after backing up important files. Formatting permanently deletes existing content.
Step 1: Open File Explorer. Right-click the external drive and select Format. Choose a file system such as NTFS or exFAT.
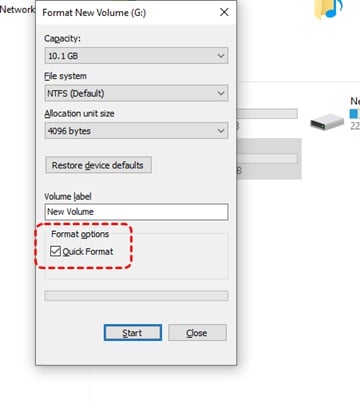
Step 2: Click Start and confirm. Wait until the process completes. After formatting, the drive should function normally.
If you are searching for how to remove write protection on external hard drive after trying every solution, formatting is often the final step. It is also helpful when learning how to unlock write-protected external hard drives that remain locked due to severe corruption.
Part 4: Pros and Cons of Removing Write Protection
Removing write protection restores normal functionality. However, there are benefits and risks involved.
Before proceeding, understand both sides clearly.
Part 5: Lost Data Due to Formatting Hard Drive? Use Recoverit Today!
Formatting may solve serious write protection issues. However, it also removes files. Many users realize too late that valuable data was stored on the drive. This is where recovery software becomes important.
Recoverit is a professional data recovery tool. It is designed to scan external storage devices deeply. It searches for lost, deleted, or formatted files. If you formatted the drive while trying how to remove write protection on external hard drive, this tool can help retrieve your data.
Recoverit is suitable for beginners and advanced users. It offers a clear interface and guided steps. It supports many file formats and storage types.
Recovery steps:
Step 1: Install and launch Recoverit. Connect your external hard drive. Select the drive from the list and click Start to scan.

Step 2: Wait for scanning to finish. Preview found files and select the needed ones.

Step 3: Click Recover and save files to a different location to avoid overwriting data.

Conclusion
Write protection can stop your work at an inconvenient time. It prevents adding, deleting, or editing files. The issue may result from hardware switches, corrupted file systems, or system settings.
By following this guide, you now understand how to remove write protection on external hard drive safely. You have learned how to fix external hard drive is write protected using multiple methods. You also know how to unlock write protected external hard drives if the problem appears again. With proper care and regular maintenance, your external storage device can remain reliable for years.
FAQs
-
Why does my external hard drive suddenly become write-protected?
An external hard drive can become write-protected for several reasons. Improper removal without using the safe eject option may cause file system errors. A virus infection can also change disk attributes. In some cases, a physical lock switch may be enabled. Windows may activate protection automatically to prevent further data damage. -
Is formatting the only solution?
Formatting is not the only solution. It should be considered the last option. You should first try tools like Diskpart to clear the read-only attribute. Checking the Windows Registry and running CHKDSK can also resolve the issue. Formatting is recommended only when other methods fail. -
Can I recover data after formatting the drive?
Yes, data recovery is possible after formatting in many cases. If the files have not been overwritten, recovery software such as Recoverit can scan the drive and retrieve lost data. It searches deep sectors to locate recoverable files. Quick action improves the chances of successful recovery.


