Jan 13, 2026 • Filed to: Photo/Video/Audio Solutions • Proven solutions
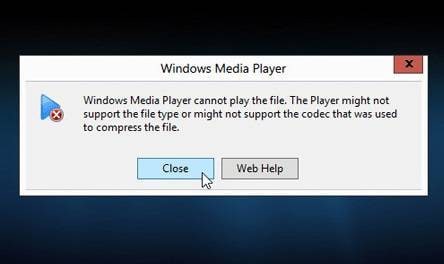
Behind every media file is a video codec program. The codec is responsible for compressing video data into various containers (.mp4, .3gp, .mp3, .mov, .avi, etc.…) and decompressing the same files whenever someone needs to play them. Media players require the content of these containers (which could be any format) to be read properly; If not read properly, your media player will throw an error such as "Unsupported Codec," "Audio Codec Not Supported," etc. Media players cannot support all codecs. If a media player doesn't 'understand' a file, it will throw an error.
Please continue reading to discover the various causes of these errors and the different ways to fix audio codec not supported or missing error.
- Part 1. What Are the Causes of Audio Codec Not Supported or Codec Missing or Unavailable
- Part 2. Fix Audio Codec Not Supported in Windows Media Player
- Part 3. Fix Unsupported Audio Codec Using VLC
- Part 4. Repair Video with Audio Codec Not Supported Error Through Video Repair Software

- Part 5. Repair Video with Audio Codec Not Supported Error Online

- Part 6. Fix Audio Codec Not Supported On Android Device
- Part 7. Fix Codec Not Supported Error On Samsung/LG Smart TV
Part 1. What Are the Causes of Audio Codec Not Supported or Codec Missing or Unavailable
Here are some of the well-known causes of unavailable or unsupported codecs for audio files.
1. Unsupported File Type
The result of a video file is data that has been compressed by certain codecs. When you attempt opening a video file with a media player, one of the first things done by the player is to check if it 'understands' the video data created by the particular codec; If it doesn't, it throws an error.
2. Unavailable Codec
Media players have many codecs built into them. Each time you open a file, it simply finds the appropriate codec file to decompress your video file before playing it. If no appropriate codecs are installed/found, your media player throws an error.
3. Corrupt Video File
While some media players will try to ignore/fix minor errors on videos, some don't –especially if the file is severely corrupt. File corruption can be caused directly by you or an infection on your device.
Part 2. Fix Audio Codec Not Supported in Windows Media Player
When, for example, your video plays with no audio or vice versa, you can be sure you're facing codec issues. Good thing, you don't have to manually do anything on Windows Media Player to fix this as it can be automated. You can fix this error using Windows Media Player. Just follow the steps outlined below:
- Launch Windows Media Player.
- Click the Tools menu and navigate to Options.
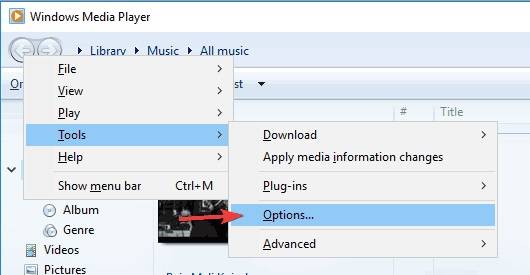
- Click on the Player tab to display options.
- Click on the "Download codecs automatically" checkbox and confirm your action by clicking "OK."
- Play your file again. You may be prompted to install the codec –click OK to confirm and install.
Note: Ensure that you have an active internet connection before clicking OK.
Part 3. Fix Unsupported Audio Codec Using VLC
VLC is a versatile media player. It comes with many built-in tools for handling media files. VLC makes actions like converting media files from one format to another very easily. While VLC, at most times, fixes minor media file errors automatically before playing it, you can also fix errors such as unavailable or unsupported audio codec files manually using the software. Please follow the steps below.
- Launch VLC Media Player.
- Click on "Media" from the top menu, then find and click on "Convert."
- Add your video files to the file selection panel.

- Click the "Convert" button at the bottom of the page or hit ALT+C on your device's keyboard to convert your video.
- Pick a directory to save your converted and specify your file name and extension. (e.g., your_choosen_name.mp4)
- Choose "Video – H.264 + AAC (MP4)" or "Video – VP8 + Vorbis (Webm)" or any of the options available to you.
- Click on the Start button.
Once the conversion process is finished, retry playing your video file.
If this doesn't fix your file, you should consider updating your VLC Media Player to the latest version and if the error persists after the update, visit this link to download codec files manually. The codec files on the page are compatible with Windows XP, Windows Vista, Windows 7, 8, 8.1 & 10. It is easy to install; all you need to do is follow the instructions displayed on the setup program. After successfully installing the codec files, restart your computer and try opening the video file again.
If none of the methods explained above worked for you, then your video file may have been compromised. Try using a video repair tool to fix your video.
Part 4. Repair Video with Audio Codec Not Supported Error with Video Repair Software
Many dedicated tools exist for fixing corrupt video files. However, the Wondershare Repairit is one of the best amongst the top video repair tools. You can repair video files with an unsupported audio codec easily with the Wondershare Repairit Video Repair software.
Video tutorial: How to Fix the Audio Codec Not Supported Error?
Please follow the detailed steps below to fix this error on your device.
- Install and Launch Wondershare Repairit Video Repair tool on your device.
- After launching the tool, drag the video from the location and paste it/them on the interface. This would start the fixing process of the damaged file(s).

- After dropping the file(s), tick the file(s) you want to fix and proceed.

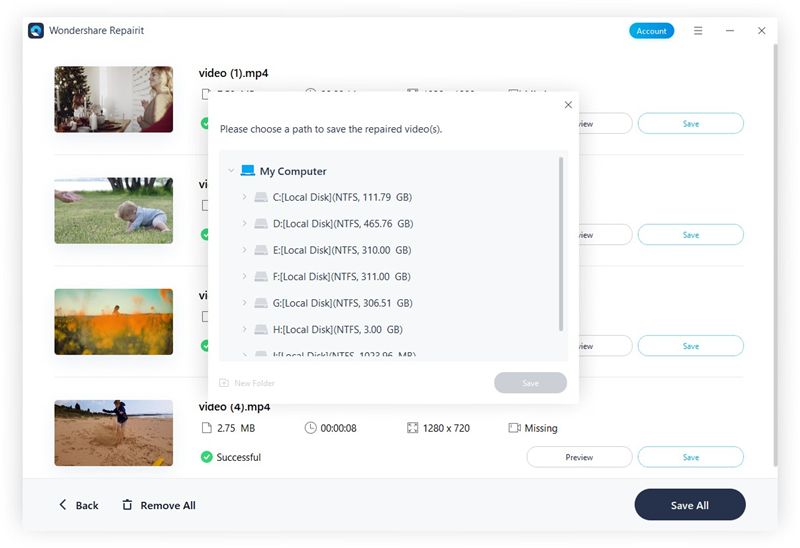
You can monitor the video fixing process through the progress bar. It will notify you when done. With it done, you can preview the repaired video.

If the Quick Repair Mode didn't fix your video, you should try the Advanced Repair Mode by clicking "Advanced Repair" in red behind the file.
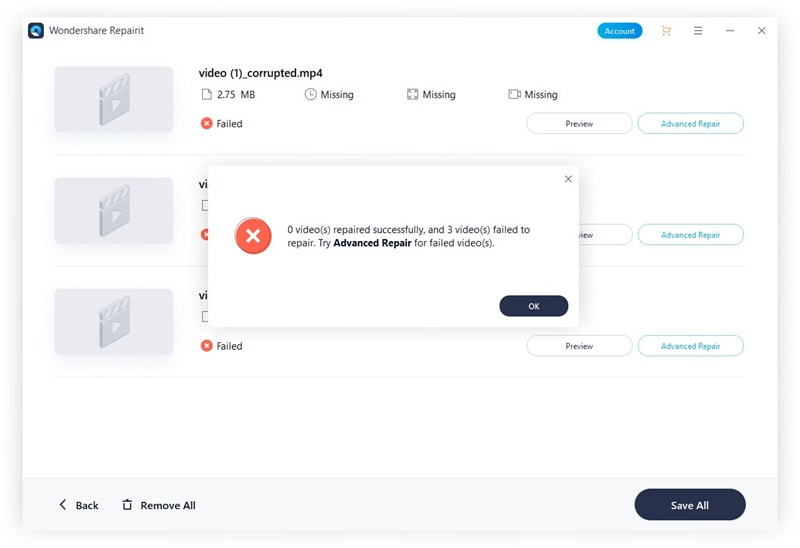
Follow these steps:
- Upload the video file again and click "Advanced Repair" and Upload a working file created by the same device. This mode uses complex algorithms to detect key things about the uploaded file and uses it to fix the corrupt file(s).
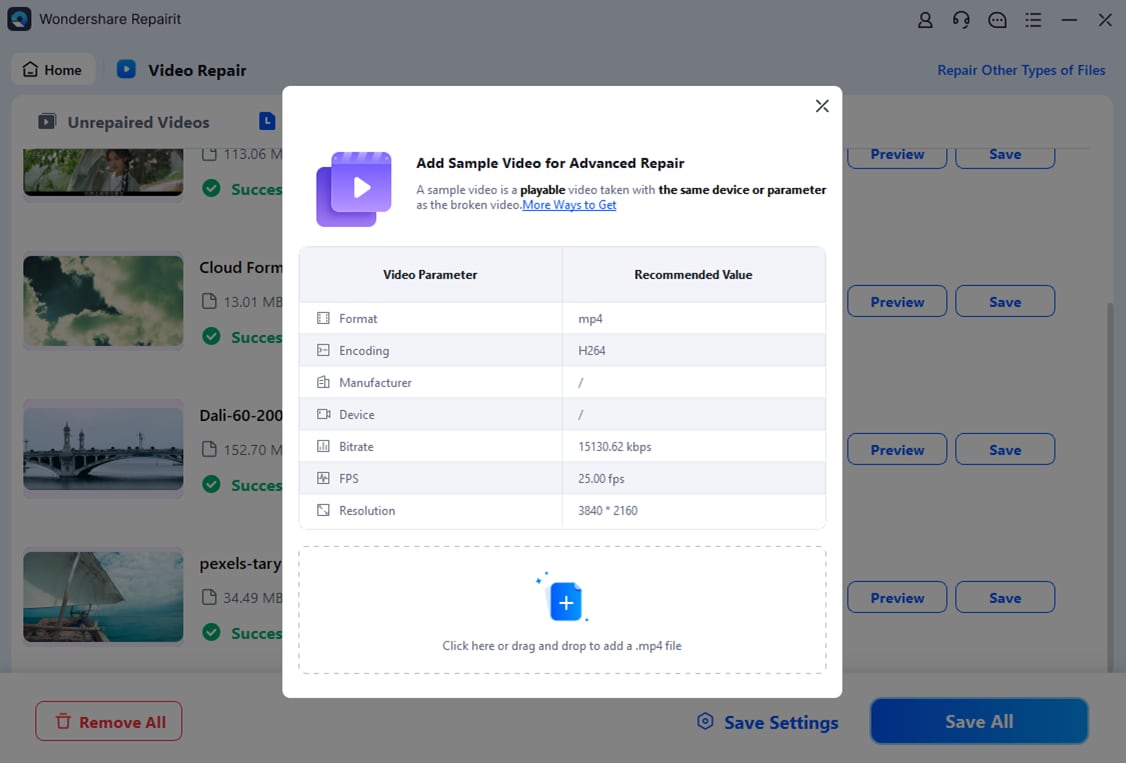
- Select a different path/directory to save the repaired files. Wait for the repair process to complete.
Part 5. Repair Video with Audio Codec Not Supported Error Online
Another effective way to get your corrupted video files repaired is to use the video repair online tool-Wondershare Repairit video repair tool. No need to download any programs to your computer, you can easily get your video with audio codec not supported error fixed with only 3 clicks. Here are the detailed steps to repair your corrupted videos online:
- Go to Repairit video repair online: https://repairit.wondershare.com/app/
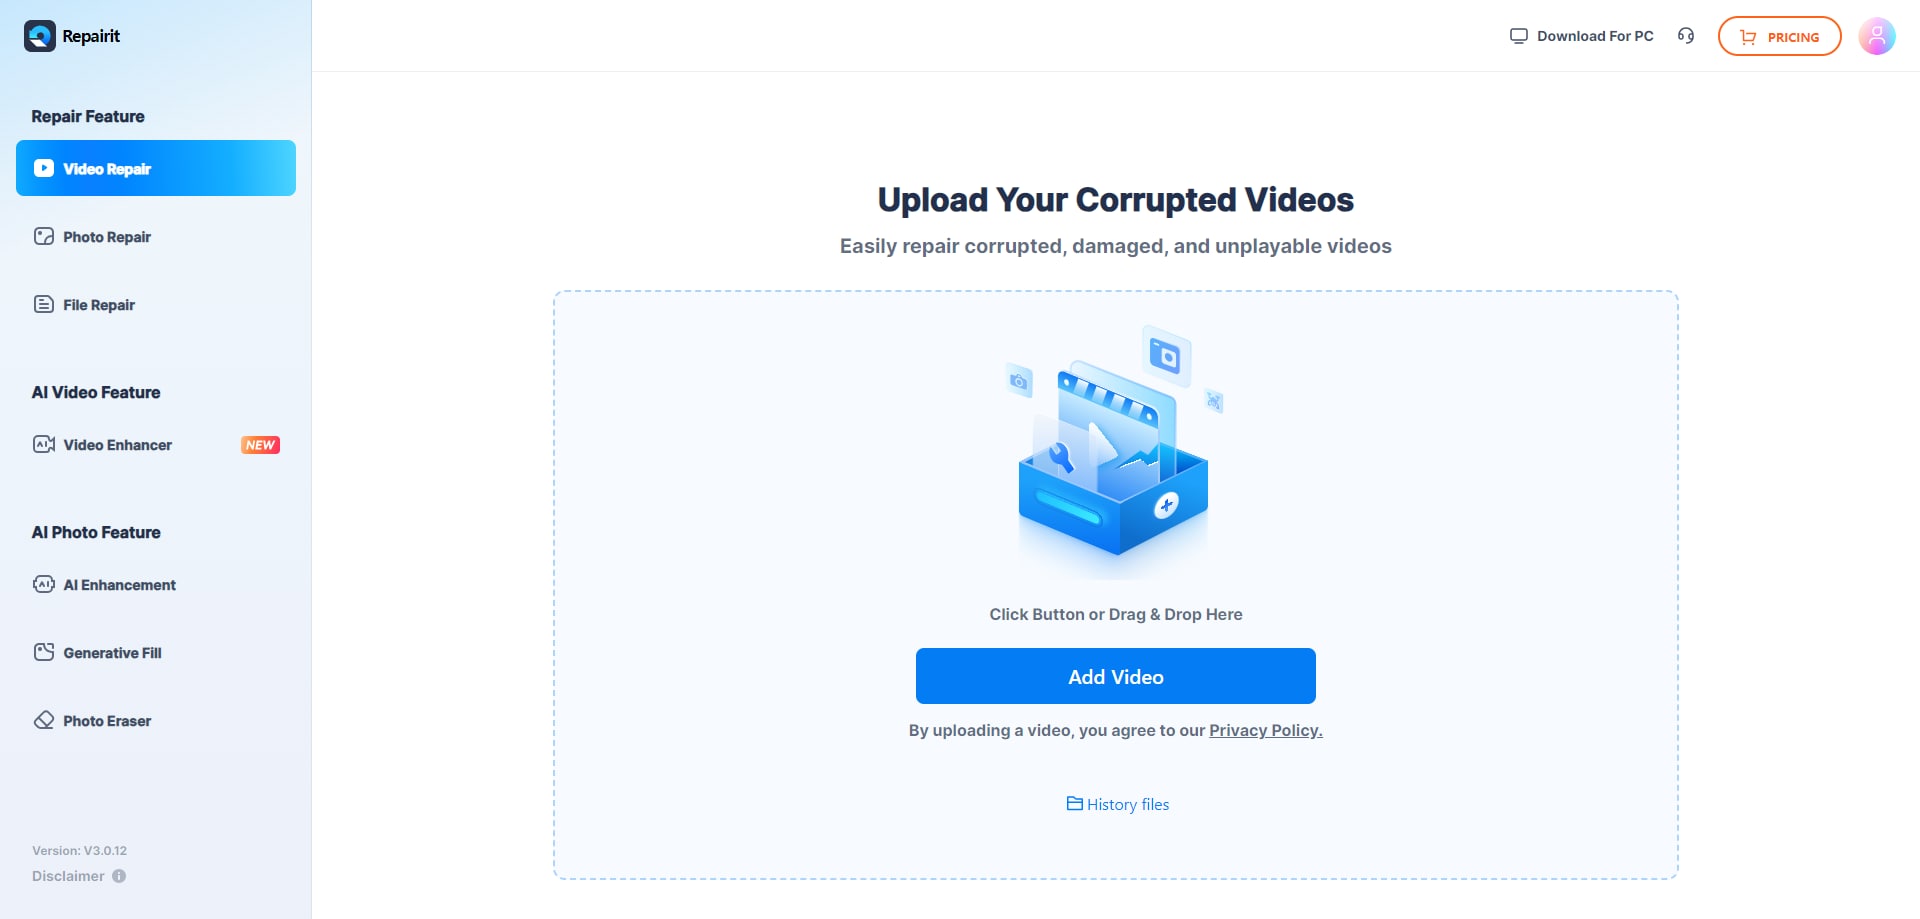
- Click Add Video in the Video Repair window. If you have several corrupted video files, you can upload them altogether and let Repairit repair them simultaneously.
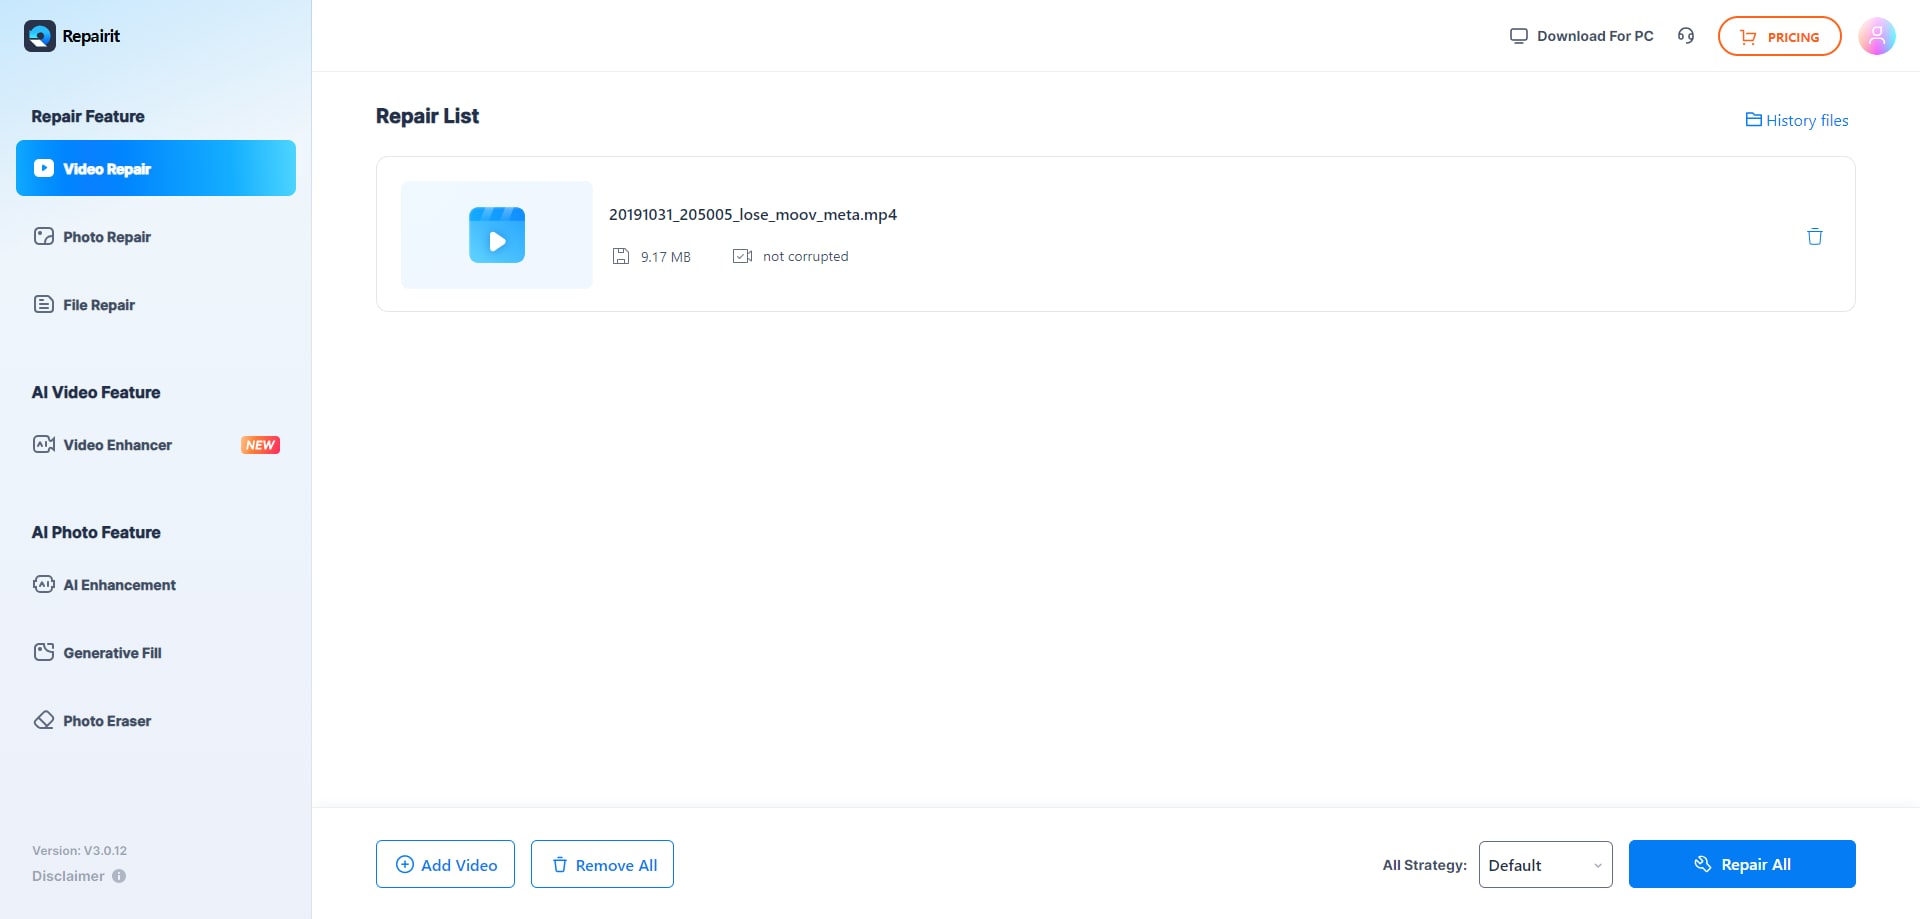
- Click Repair All and Repairit will start the repairing process. Now you just need to wait for the process to complete.
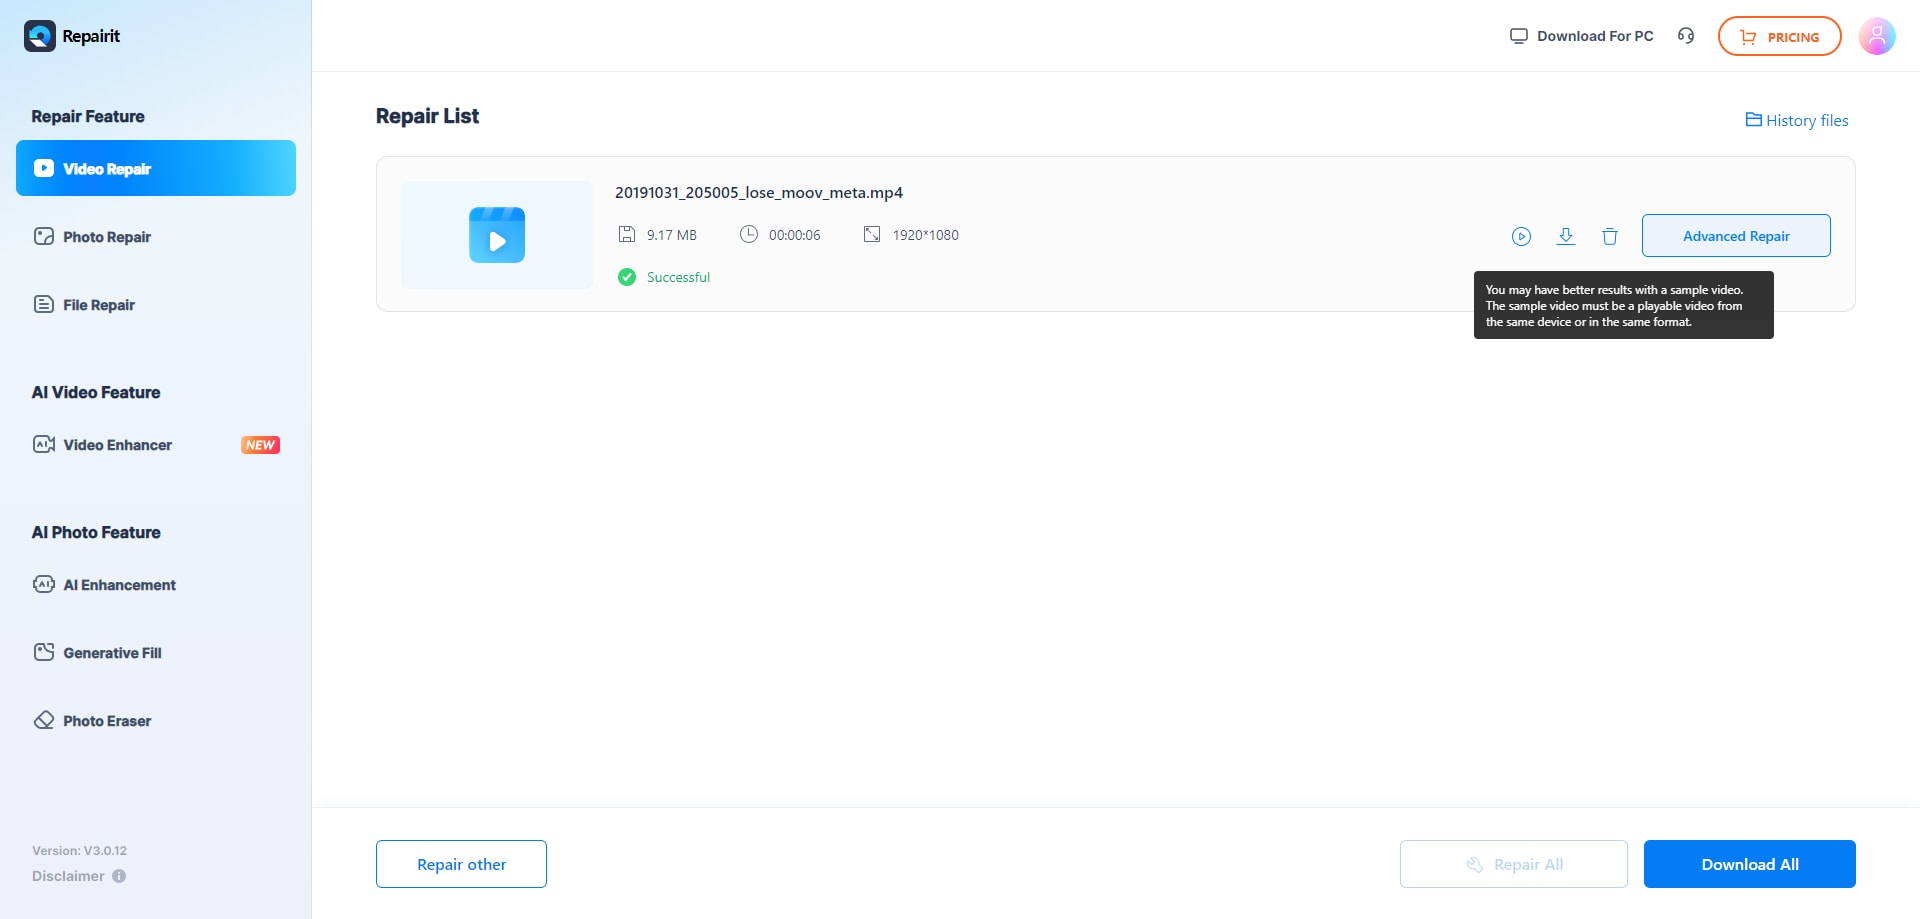
- You can preview the files to ensure that the audio codec not supported error is fixed before downloading them to your computer.
Part 6. Fix Audio Codec Not Supported on Android Device
If you encountered the same error on your mobile (android device), try using the following methods to fix this issue.
Way 1. Change Your Media Player.
Some media players are inefficient; they may not have the required codec files for handling all media formats. While the option to update or add codec files may be included in some media players, the majority don't offer such options: In such case, the only option you're left with is to change your media player entirely. If you're so attached to the media player, you can try updating it first.
Way 2. Covert Your Video to Another Format.
Merely converting your video to another format with an appropriate and efficient video tool might solve this issue. Without a PC, you can search your mobile phone's operating system's app store to download and install good video format converters; If you have access to a PC, you can do the same. You don't need to install any other apps if you have VLC installed; open up VLC, click "Media" from the top menu and click on "Convert" from the sub-menu.
After successfully converting your video file, open it with your media player.
Part 7. Fix Codec Not Supported Error On Samsung/LG Smart TV
When you are trying to play a video file (using a USB or by casting it) on a smart TV, you may encounter these video issues; The basic idea is to transfer the file to your PC/Mobile and try fixing the issue by re-compressing or converting it.
Solution 1. Convert Video to Another
In Part 2 & 3 of this article, various methods of converting your video were mentioned. In Part 3 specifically, steps to convert your video using VLC Media Player were mentioned. Convert it to one supported by your TV.
Solution 2. Use Wondershare Repairit Video Repair
Wondershare Repairit Video Repair software is a simplified and powerful video repair tool. Simply launch the app, drag and drop the affected media file(s) and proceed from there. When done, preview and save your repaired file. Next, try playing it on your TV once more.
Conclusion
Codecs are essential parts of media players. They are responsible for compressing digital data into various formats and decompressing them when needed to be viewed by media players. When these codec files are unsupported or unavailable, your video file would either not work entirely. The video and audio will be out of sync or missing entirely –leading to errors. This tutorial has covered the various causes of these errors and also ways to get rid of them.
People Also Ask
-
What does the "Audio Codec Not Supported" error mean?
It means your media player doesn't have the right software "key" to understand the audio part of the video file. The video might play, but you'll get no sound. -
What is the fastest and easiest fix for the 'Audio Code Not Supported' error?
Switch to a different media player. Use a modern player like VLC Media Player or PotPlayer. They come with a huge built-in library of codecs and can play almost any file format without errors. If doesn't work, use Wondershare Repairit to get your video files fixed.How can I install the missing codec on my current player?
You can download a codec pack like the K-Lite Codec Pack (for Windows). This installs a wide range of common codecs at once, which may allow your default player (like Windows Media Player) to work.What if I don't want to install new software or codecs to fix the 'Audio Code Not Supported' error?
Try the online video repair tool, such as Wondershare Repairit video repair online.Why does the Audio Codec Not Supported error happen with some files and not others?
Because there are hundreds of different audio formats. Your computer only has a few pre-installed. If you get a video recorded with a rare or newer audio format, your player won't know how to decode it.
Solve Media File Problems
- Recover & Repair Photos
- What's picture recovery?
- SD card pictures are lost?
- Top 5 free photo recovery software.
- Restore photos from recycle bin.
- Recover & Repair Videos
- Recover SD card videos.
- Repair MOV/M4V/MP4 videos.
- Repair MKV videos.
- Solve video black screen.
- Repair restored videos.
- Recover & Repair Audio
- Repair video without sound.
- Fix audio sync problems.
- MP4 No Sound?
- Repair corrupt WAV files.
- Corrupted video repair guide.
- Recover & Repair Cameras

 ChatGPT
 Perplexity
 Google AI Mode
 Grok
Grok


Eleanor Reed
staff Editor