

 TL;DR:
Use F12 to access the one-time boot menu on Acer desktops for temporary tasks like starting from a USB drive, and use Delete or model-specific F2 to enter BIOS Setup for persistent firmware changes.
● Connect the bootable USB directly to the computer before powering on, and if the boot menu fails to open, enter BIOS to verify that the F12 Boot Menu setting is enabled.
● Resolve a "No Bootable Device" error following a BIOS update by restoring the previous UEFI/Legacy or storage-controller modes rather than attempting an unnecessary Windows reinstallation.
● Keep Secure Boot enabled when using current official Windows 11 installation media, and ensure your BitLocker recovery key is accessible before altering any firmware configurations.
Ask AI for a summary
 ChatGPT
 Perplexity
 Gemini
 Claude
 Grok
Grok
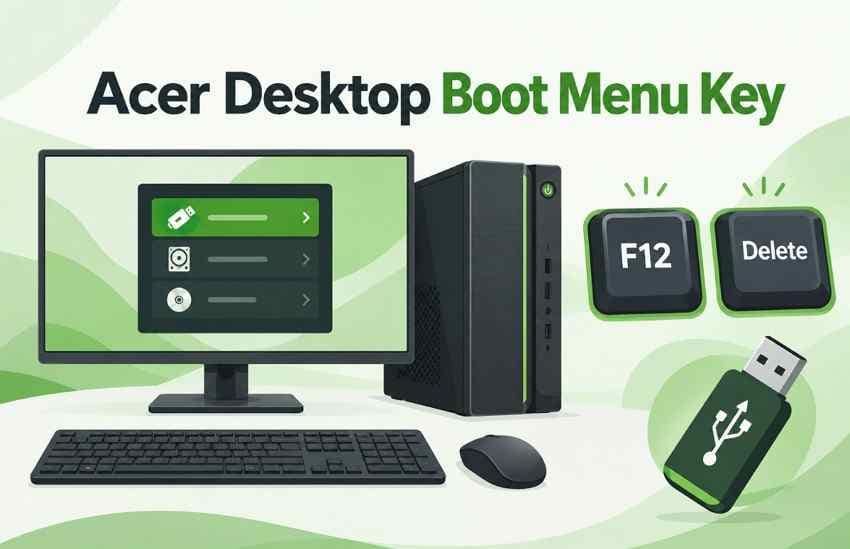
The Acer desktop boot menu key is usually F12 when the one-time Boot Menu is supported and enabled. For BIOS or UEFI Setup, Acer's current desktop guidance uses Delete; some model-specific desktops and all-in-one systems may use F2 instead. Use F12 when you only need to start from a USB drive or another disk once. Use BIOS Setup only when you need to change firmware settings or persistent boot priority.
Do not treat missing USB media, a missing Windows Boot Manager entry, and a "No Bootable Device" error as the same problem. A USB that does not appear usually points to boot-media, port, firmware-mode, or Secure Boot compatibility, while a Windows drive that disappears after a BIOS update can involve boot order or storage-controller settings. Make one documented change at a time and protect important data before reset, reinstall, formatting, or storage repair.
This user report is about an Acer laptop, not a desktop, so it is included only as real-world context for the common F12-versus-firmware confusion. The desktop key guidance below follows Acer's current desktop documentation.
In this article
Part 1. Acer Desktop Boot Keys at a Glance
The right Acer desktop boot key depends on the task. Acer's current BIOS guidance lists Delete for desktop BIOS access, while its boot-order guidance uses F12 for the one-time Boot Menu. F9 and F10 are actions inside BIOS, not alternate boot-menu keys.
| Key | What It Opens or Does | Best Use |
| F12 | One-time Boot Menu when supported and enabled | Start from a USB drive, secondary SSD, or other boot device for the current startup |
| Delete | BIOS or UEFI Setup on Acer desktops | Review firmware settings, boot order, Secure Boot, and storage configuration |
| F2 | BIOS Setup on some model-specific Acer desktops or all-in-one systems | Use only when the exact model documentation tells you to use F2 |
| F10 | Saves BIOS changes and exits on supported Acer firmware | Apply a confirmed BIOS change |
| F9 | Loads BIOS defaults on supported Acer firmware | Recover from a bad firmware configuration, not as a routine boot step |
Acer documents the desktop BIOS path as pressing Delete as soon as the Acer logo appears. Its current BIOS Setup instructions also confirm F9 for defaults and F10 for save-and-exit.
Check the Exact Acer Desktop Manual When Keys Differ
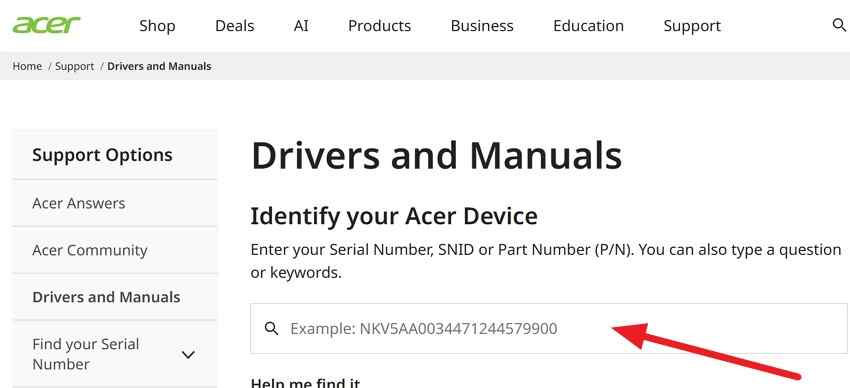
Desktop product lines such as Aspire, Veriton, Nitro, Predator, and Acer all-in-one systems do not all use identical firmware layouts. If Delete does not work or the expected setting is missing, identify the exact model before trying a different key. Acer's manual download guide explains how to locate documentation by serial number, SNID, or product model.
Instructions. Open Acer Support, identify the desktop, open the Documents section, and check the User Manual for the BIOS key, F12 support, boot-menu location, and any model-specific firmware notes.
Part 2. Choose the Correct Acer Desktop Startup Method
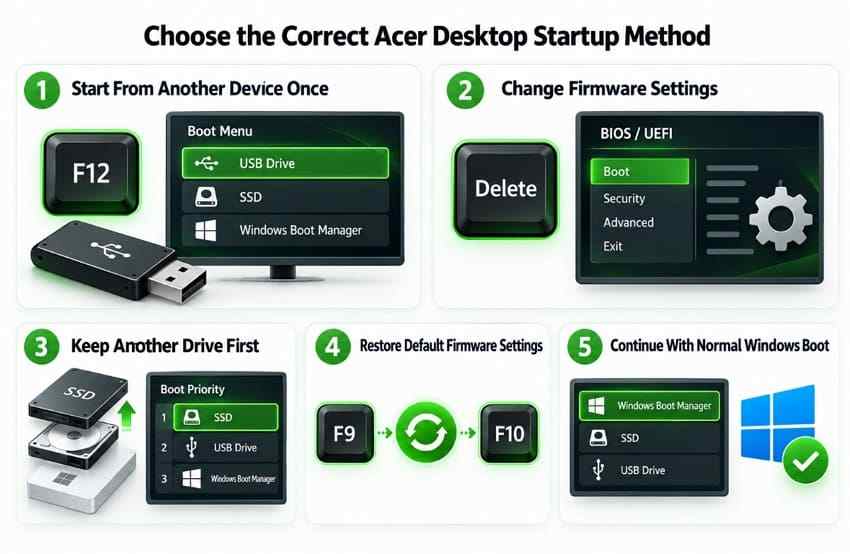
Before pressing a key, decide whether you want a temporary boot, a persistent firmware change, or normal Windows startup. Using BIOS for a one-time USB task adds unnecessary risk because saved boot-order, Secure Boot, or storage settings can affect later startups.
Use F12 for One-Time Boot and BIOS for Persistent Changes
| Goal | Best Route | Does It Persist? |
| Boot a USB installer or recovery drive once | F12 Boot Menu | No |
| Enter firmware settings | Delete, or model-specific F2 | Only saved changes persist |
| Try another disk first on every startup | BIOS Boot Order | Yes |
| Return to normal Windows startup | Windows Boot Manager | Keep it first unless another documented configuration is required |
Acer's current boot-order guidance makes the same distinction: BIOS changes the saved sequence, while F12 selects a device for one startup only.
Leave Windows Boot Manager First for Normal Startup
If Windows starts normally and you do not need a permanent alternate boot device, leave Windows Boot Manager at the top of the saved boot order. This reduces the chance of reopening a USB installer, attempting PXE/network boot first, or triggering unexpected boot behavior after the task is finished.
Part 3. Open the Acer Desktop F12 Boot Menu
Use F12 when you need to boot from a USB drive or another device without changing the desktop's normal startup order. Connect the bootable device before powering on so the firmware can detect it during startup.
Use F12 to Start From USB or Another Drive Once
Step 1. Shut down the Acer desktop completely. Connect the bootable USB drive or other startup device directly to the desktop.
Step 2. Power on the desktop and repeatedly press F12 as soon as the Acer logo appears.
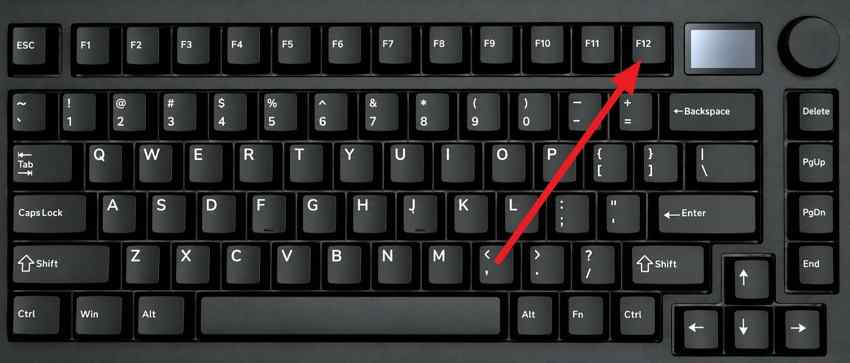
Step 3. Highlight the intended USB, SSD, or other boot-device entry and press Enter. For a current Windows 11 installer, prefer the UEFI entry when one is shown.
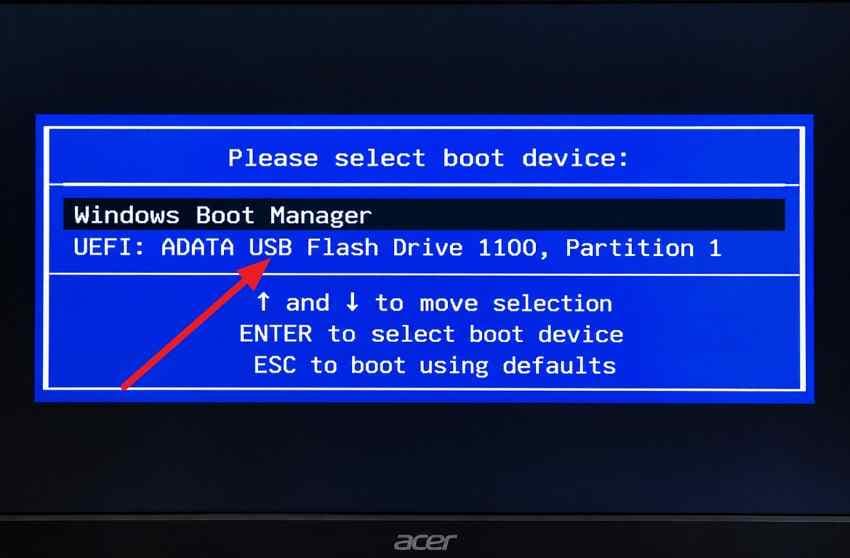
Step 4. Confirm that the expected installer, recovery environment, or diagnostic tool opens. If the wrong task appears, exit before starting installation, partition deletion, formatting, or reset.
For a broader walkthrough of USB startup behavior, Recoverit's computer USB boot guide explains the general difference between a boot menu and persistent BIOS boot order.
Part 4. Enter Acer Desktop BIOS With Delete or F2
Use BIOS or UEFI Setup when you need to enable the F12 Boot Menu, check boot priority, inspect the internal drive, or review a documented Secure Boot or storage setting. Do not change unrelated firmware options while troubleshooting one boot problem.
Use Delete First on Acer Desktops
Step 1. Shut down the desktop, turn it on, and repeatedly press Delete when the Acer logo first appears. Use F2 instead only when the exact model manual specifies F2.
Step 2. Open the Boot, Main, or equivalent startup section and review the setting you actually need to change.
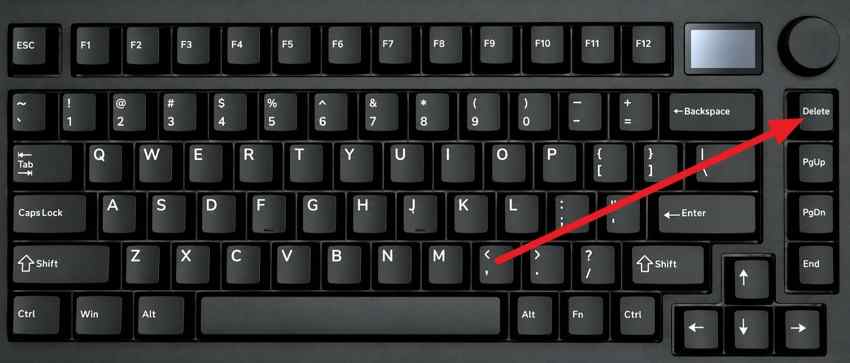
If Windows still starts and the startup key is hard to catch, Windows 11 can also reach UEFI settings through Settings > System > Recovery > Advanced startup, then Troubleshoot > Advanced options > UEFI Firmware Settings. Microsoft documents this path in its Windows 11 Secure Boot and UEFI guidance.
Use F9 and F10 Only for Their Documented BIOS Functions
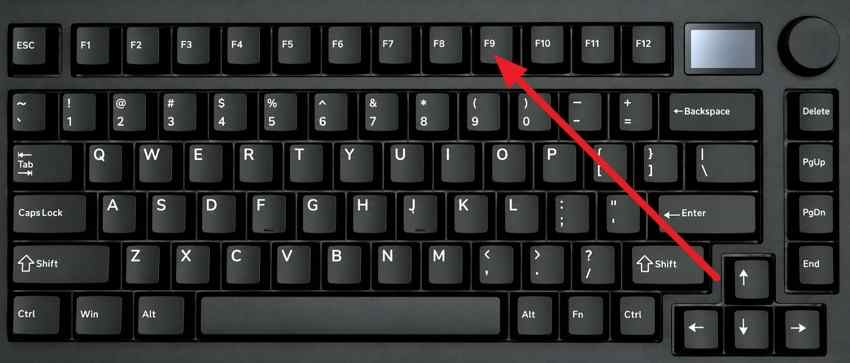
F9 loads BIOS defaults on supported Acer firmware, while F10 saves changes and exits. Loading defaults can also reset custom boot, storage, virtualization, fan, or security settings, so use F9 when you intentionally want to return firmware to a known baseline rather than as a routine startup shortcut.
Part 5. Enable F12 Boot Menu or Change Boot Order
If F12 does not open the Acer desktop boot menu, check whether the firmware exposes an F12 Boot Menu option. The exact location varies by model, so follow the labels shown in your BIOS and compare them with the exact desktop manual.
Enable F12 Boot Menu When the Option Exists
Step 1. Enter BIOS with Delete, or the model-specific BIOS key. Look under Main, Boot, or Boot Options for F12 Boot Menu.
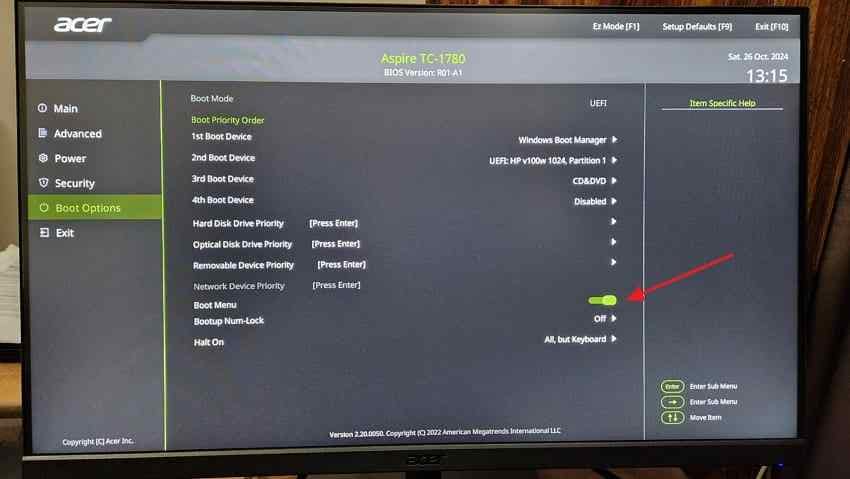
Step 2. If the option exists, set F12 Boot Menu to Enabled. Press F10, or use the firmware's documented Save and Exit command, to save the change and restart.
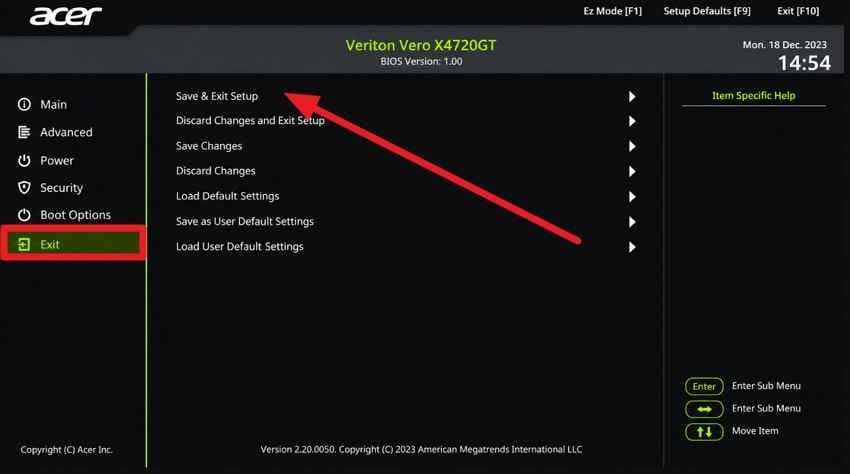
If the option does not exist, do not assume a hidden unlock combination applies. Use the exact model manual or Acer Support instead.
Change Permanent Boot Priority Only When Necessary
A saved boot-order change is useful only when the desktop must try another device before Windows on repeated startups. For a one-time repair or installation, F12 is cleaner because it leaves the normal sequence unchanged.
Instructions. Open the BIOS Boot section, highlight the intended USB or secondary drive, and use the move controls shown on screen, such as F5/F6 on some Acer firmware. Move the device above Windows Boot Manager only for as long as required, then save with F10 or the firmware's Save and Exit option.
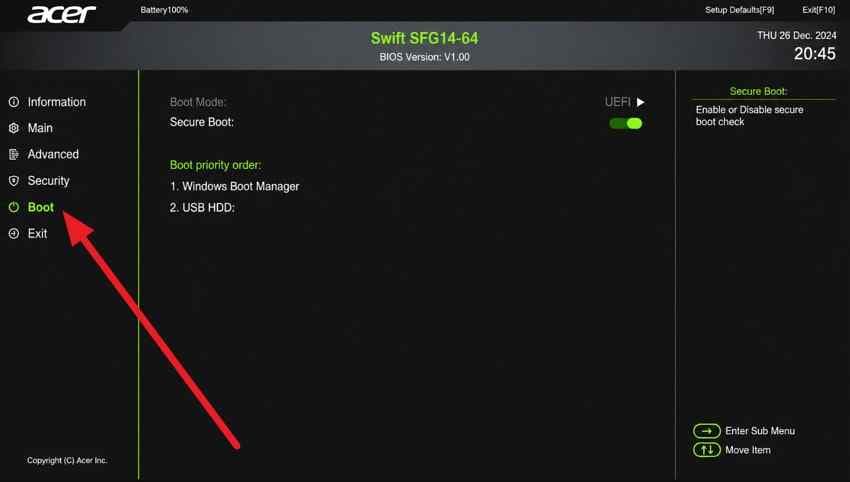
After the USB task is complete, remove the USB or restore Windows Boot Manager to its previous position so normal Windows startup remains predictable.
Part 6. Fix an Acer Desktop Boot Key or USB That Does Not Work
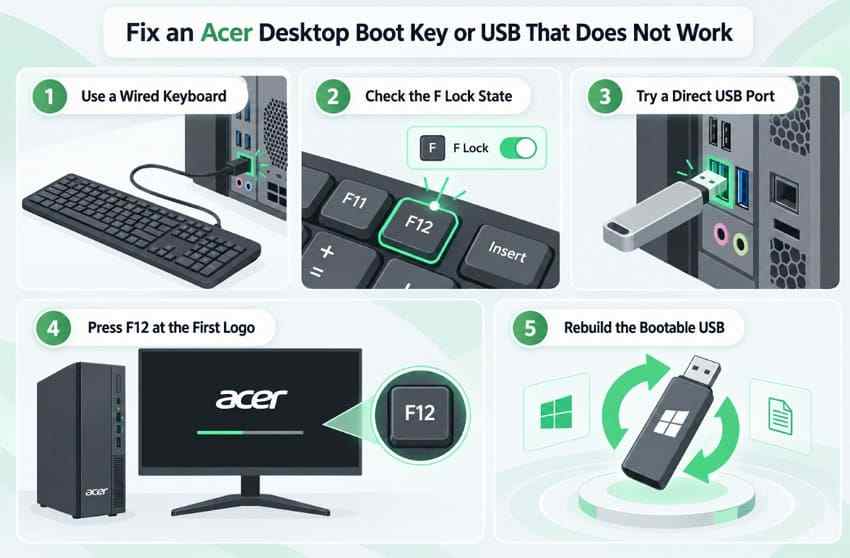
When F12, Delete, or a USB boot entry does not work, start with the input device and boot media before changing firmware. This separates a simple keyboard or USB problem from a Secure Boot, UEFI, or BIOS configuration issue.
Rule Out Keyboard, Port, and Boot-Media Problems First
- Use a wired keyboard: Connect it directly to the desktop before power-on. A Bluetooth keyboard may initialize too late for startup keys.
- Check the function-key mode: If the keyboard has F Lock or media-key behavior, make sure F12 is being sent as a function key.
- Try a direct motherboard USB port: For troubleshooting, avoid hubs, docks, and extension chains. A rear USB port can simplify detection.
- Start pressing at the Acer logo: Tap F12 or Delete repeatedly as the first Acer logo appears instead of waiting for Windows to begin loading.
- Recreate the bootable USB: Do not simply copy an ISO file. Microsoft's current Windows installation media guide requires a blank USB with at least 8 GB and warns that the media-creation process deletes the existing USB contents.
Treat Secure Boot as a Targeted Exception
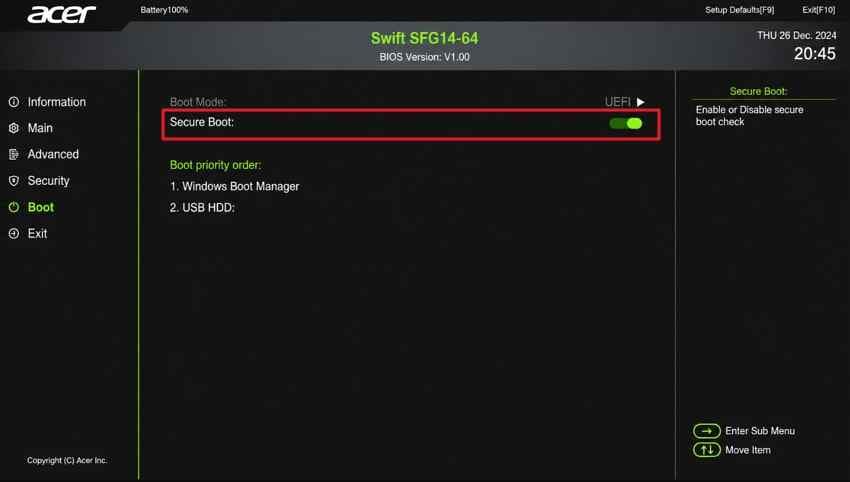
Do not disable Secure Boot just because a USB is missing. Current official Windows 11 installation media is designed for UEFI systems and normally does not require Secure Boot to be turned off. Acer says Secure Boot may need to be disabled for certain older operating systems or recovery tools, and recommends turning it back on after the task.
If a trusted bootable tool specifically requires the change, follow Acer's desktop Secure Boot guidance. Some Acer desktops require a Supervisor Password before the setting can be changed. Record that password securely and remove it later if it was created only for this task.
BitLocker warning: Firmware and Secure Boot changes can trigger a BitLocker recovery prompt. If the Windows drive uses BitLocker or Device Encryption, make sure the recovery key is available before changing firmware. Microsoft explains where to locate it in Find your BitLocker recovery key.
Restore BIOS Defaults Only After a Firmware Change
If boot problems began after a BIOS change and you do not know which setting caused them, loading Acer's default configuration can restore a baseline. This can also change custom storage, boot, virtualization, or security settings, so record important values first whenever possible.
Instructions. Enter BIOS, press F9 and confirm to load defaults, then press F10 and confirm to save and restart. Recheck Windows Boot Manager, storage mode, Secure Boot, and F12 Boot Menu afterward.
Part 7. Restore Booting After a BIOS Update or Setting Change
A "No Bootable Device" error after a BIOS update is different from simply missing the F12 menu. Acer's current No Bootable Device guidance explains that firmware updates can reset settings and change how the system recognizes the Windows drive or boot configuration.
| What Changed | What You May See | Safer Check |
| Boot priority | Another device is above the Windows disk | Restore Windows Boot Manager or the system disk to the intended position |
| UEFI or Legacy mode | Windows Boot Manager disappears or Windows no longer starts | Restore the firmware mode used by the existing Windows installation |
| SATA, RAID, AHCI, or VMD | The Windows disk is present but the OS will not boot, or setup cannot see the disk | Restore the previous documented storage-controller mode rather than guessing |
| Secure Boot | Bootloader or signature errors | Return to the previous trusted configuration unless the intended media specifically requires a change |
| Internal drive not detected in BIOS | No Windows disk appears at all | Stop OS-level fixes and investigate hardware, cabling, power, controller, or drive failure |
Check Windows Boot Manager and Boot Mode
Enter BIOS and check whether Windows Boot Manager or the primary internal SSD/HDD is still listed. If it is present but no longer first, restore the intended boot priority. If it disappeared only after a UEFI/Legacy change, return the firmware to the previous mode before assuming the drive failed.
Do not convert a system disk from MBR to GPT just because a boot entry is missing. Microsoft's MBR2GPT documentation is for planned conversion of eligible Windows system disks; validate the disk and back up important data before using it.
Restore the Previous Storage-Controller Mode Instead of Guessing
Changing AHCI, RAID, or VMD can prevent Windows from starting when the installed system expects a different controller configuration. If the problem started immediately after a BIOS update or manual firmware change, compare the current setting with your previous BIOS screenshots, Acer model documentation, or known configuration. Restore the prior value rather than cycling randomly between modes.
Stop Firmware Troubleshooting if the Internal Drive Disappears
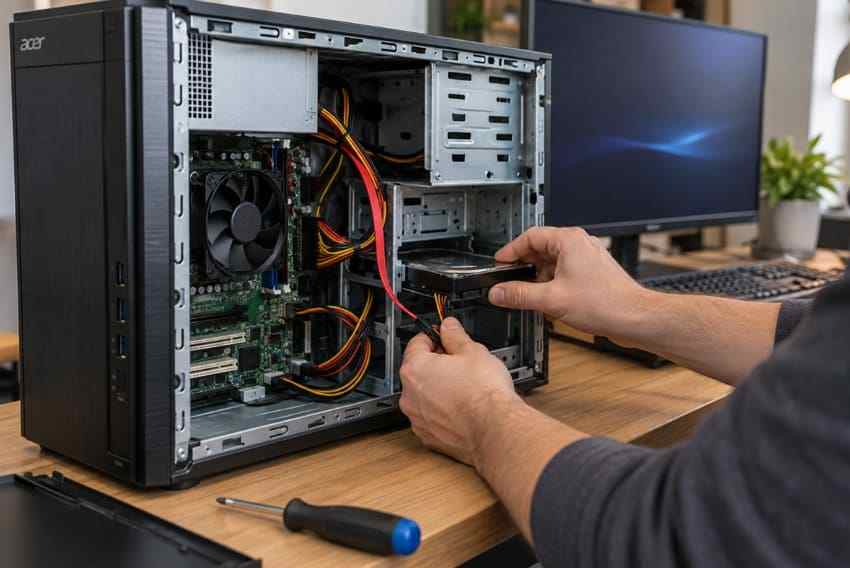
If the internal drive is no longer detected in BIOS, the issue is below Windows. Power off the desktop, disconnect power, verify only the model-appropriate physical connections if you are qualified to do so, and contact Acer or a repair technician when the drive remains missing. Do not keep reinstalling Windows, changing partitions, or scanning a drive that repeatedly disconnects or is not detected.
Part 8. Protect Files Before Installing or Resetting Windows
Boot-menu access is not itself destructive, but what you do after booting from USB can be. A clean Windows installation, partition deletion, formatting, or some reset choices can remove personal data. If Windows still starts and the files are accessible, back them up normally before proceeding. If files are already missing or Windows is inaccessible, protect the data before changing the system disk.
Back Up or Recover Data Before Destructive Startup Work
- If Windows still opens: Copy important files to another physical drive or trusted backup location.
- If the Windows drive is readable but files are missing: Stop unnecessary writes to that drive and use file recovery before reinstalling or formatting.
- If Windows will not start but the drive is detectable: Use a bootable recovery workflow so you can copy files before repair or reinstall.
- If the drive is physically failing or absent from BIOS: Do not repeatedly scan it with software. Consider professional data recovery.
Wondershare Recoverit is a data recovery product, not a BIOS or Windows repair tool. It can help recover files from readable storage when data is deleted, missing, formatted, or inaccessible. Recovery depends on the drive condition, overwriting, encryption, and whether the storage can still be detected.
For non-booting Windows systems, see Recoverit's Windows System Recovery workflow or the guide to recover data when a PC will not boot.
Recover Files From an Unbootable Acer Desktop With Recoverit
Use this path only when Windows cannot provide normal access to important files and the internal drive remains detectable.
Step 1. Create the recovery USB on a working computer.
Install Recoverit on a healthy Windows PC, open Other Tools > System Crashed Computer, and start the bootable-media workflow. Use a USB drive that can be erased because creating the recovery media formats the selected USB.

Step 2. Boot the Acer desktop from the recovery USB.
Connect the completed USB to the Acer desktop, start the computer, press F12 at the Acer logo, and select the USB device. If F12 is unavailable, use the model's documented BIOS route rather than changing unrelated firmware settings.

Step 3. Recover files to a different drive.
When the Recoverit environment loads, choose Data Recovery, scan the detectable source drive, select the needed files, and save them to another healthy storage device. Do not save recovered data back to the source disk.

Important: Recoverit cannot repair Acer BIOS settings, restore a failed motherboard or controller, bypass BitLocker, or recover overwritten data. If the system drive is not detected or is physically unstable, stop software recovery attempts.

Conclusion
For most Acer desktops, use F12 for a one-time boot-device choice and Delete for BIOS or UEFI Setup. Use F2 only when the exact desktop manual says to. F12 is the better choice for a one-time USB boot because it leaves the normal Windows Boot Manager priority unchanged.
If booting breaks after a BIOS update or setting change, restore the documented boot mode, boot priority, and storage-controller configuration before attempting a Windows reinstall. Protect important files before any reset, clean install, partition deletion, or formatting step, and use data recovery only when files are genuinely missing or inaccessible.
FAQ
-
What Is the Acer Desktop Boot Menu Key?
F12 is the Acer desktop boot menu key on systems where the one-time Boot Menu is supported and enabled. Press F12 repeatedly when the Acer logo appears, then choose the startup device and press Enter. The selection applies to that startup rather than permanently changing boot order. -
Is the Acer Desktop BIOS Key Delete or F2?
Acer's current general desktop guidance uses Delete for BIOS or UEFI Setup. Some model-specific desktops and all-in-one systems may use F2, so check the exact manual if Delete does not work. F12 is for the one-time Boot Menu, not BIOS Setup. -
How Do I Boot an Acer Desktop From USB Using F12?
Shut down the desktop, connect a correctly created bootable USB, power on, and repeatedly press F12 at the Acer logo. Select the USB or UEFI USB entry and press Enter. If the USB is missing, verify the media and port before changing Secure Boot or other firmware settings. -
Why Is Windows Boot Manager Missing From My Acer Desktop Boot Menu?
Windows Boot Manager can disappear when the firmware mode, storage-controller setting, boot priority, or disk detection no longer matches the existing Windows installation. This often follows a BIOS update or manual firmware change. Restore the previous documented configuration first; if the internal drive is absent from BIOS, investigate hardware or contact Acer instead of reinstalling Windows.


