How to Fix the Format Did Not Complete Successfully Error
To resolve the Windows format did not complete successfully error, bypass File Explorer and force the formatting process using Command Prompt or by creating a new partition via Disk Management.
● Prioritize recovering your files with Wondershare Recoverit before applying fixes, as formatting a RAW external drive or SD card will permanently erase the data and make recovery impossible.
● Execute the command FORMAT X: /FS:FAT32 /Q /V:PenDrive in the Windows Command Prompt, replacing X with your specific drive letter, to force the storage device to reformat.
● Open Disk Management by typing diskmgmt.msc in the Run box, right-click the faulty partition to select Delete Volume, and then choose New Simple Volume to bypass the error and allocate a clean partition.
Ask AI for a summary
Q: How to fix the format did not complete successfully error?
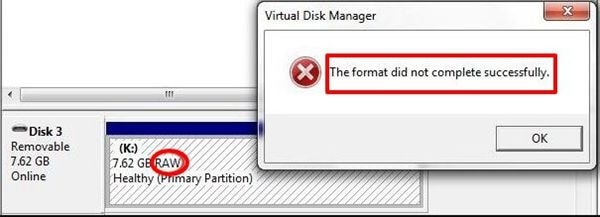
"Hi, friends, I am trying to format my 32 GB USB drive. But, I have been receiving an error that says that the format did not complete successfully. I am sure that my device is free of any viruses. So, what caused this error to pop-up on my screen? How can I resolve it?"
Every Windows system comes with Disk Management which helps in managing partitions and disks. It can be used to create a new partition, delete, resize, and format partitions. Sometimes when trying to format corrupted USB flash drives, memory cards, SSD, or external hard drives, the tool may fail. This happens when formatting in File Explorer.
When formatting storage devices such as external and internal hard drives, you get the format that did not complete successfully error. With the below solutions, you can recover your files even with this error. These are also solutions you can use to override the error and format your drive successfully.
Why Does the Format Fail to Complete Successfully?
Disk Management which is an in-built tool in Windows is used in partition and disk management. This free tool experiences some issues such as convert to MBR/GPT Disk only works after deleting all volumes. Also, Extend Volume is grayed out and Windows cannot format as expected.
If trying to format a RAW partition of an external disk such as a memory card or SSD, you can get this error. When using Windows 10/8/7, you get a message that the format did not complete successfully. This also happens with SD cards, pen drives, USB flash drives, and external hard drives.
This problem can be caused by various things. File system corruption, outdated BIOS, virus infection, Windows Service Pack, and bad sectors are some of the reasons for the error.
1. Virus Infection
One reason you could be having issues when you attempt to format your removable disk is due to a virus. Different viruses cause these issues among others. If the error is caused by a virus infection, you should install a protective application. If you already have an anti-virus, you should update it.
2. Unknown File System Corruption
The file system of the partition could be damaged or corrupted. If this is the case, the formatting cannot be completed in Disk Management.
3. Bad Sectors
Bad sectors could also be causing the error. If you have confirmed that virus infection is not the cause of the error, check for bad sectors. Storage devices such as SD cards and disks have small units for storing data and they could be having bad sectors. With this, the sectors cannot be written or read as they are already damaged. This is what inhibits file recovery and the formatting process.
4. Outdated BIOS or Windows Service Pack
Windows can fail to properly identify drive parameters on various occasions. One is when it fails to install updated Service Packs. The second scenario is when the hard drive drivers or BIOS in the PC are outdated.
How to Fix the Error - "The Format Did Not Complete Successfully"?
You are having issues formatting your external hard drive, USB flash drive, pen drive, or SD card. The below methods will help you format them.
If you work with USB drives, you could be experiencing this problem quite often. To worsen the issue, you could lose all your folders and files. If the drive has been repaired or formatted, it will not be possible to recover your data. If it is still in good shape, then you do not have to worry about it as you can recover the lost files and folders. If you know that the drive has valuable data, prioritize recovery.
1 Recover Data at First
If the driver turns to RAW and gets the format did not complete successfully error, you should prioritize on data recovery. Once you have completed this, you can proceed to learn more about formatting your drive. When formatting does not complete successfully, it is a chance to recover folders and files.
Step 1: Download and Install Recoverit
You first need to download Wondershare Recoverit, then install it.
Step 2: Select the Drive
In this step, you choose the device that is not formatting. If it is an external storage device or a computer hard disk, select it. Once you have selected it, you need to move to the next step, i.e. scanning the data; and thus, click the "Start" button.

Step 3: The Scanning Process
Now that you have clicked the start button, you have given Recoverit the go-ahead to scan the device. This takes some time; thus, you should give it time. On the left of the screen, you will see a list of the files organized by file types or folders. You can preview the targeted files by selecting them.

Step 4: Preview and Recover
Before the recovered data is shown by file types you can preview it. Recoverit also allows you to filter files as per your requirements. To retrieve the data, use the "Recover" button. Note that, you should not save your data to the disk that you will format now.

The motive of using the Recoverit Data Recovery tool is that it helps you to restore files from the device that you will format. The below steps will guide you in proper formatting.
2 Remove Virus
Unknown virus infections lead to USB malfunctions. It may also cause the format did not complete successfully error and for it to work, the virus must be cleared. Although an anti-virus program installed in the PC can clear the error, you can use CMD. By doing this successfully, you can format the USB drive.
If you have not downloaded anti-virus software, you can use Windows Defender. This is an in-built Windows 10 tool that offers protection to your computer.
Below is how you enable Windows Defender.
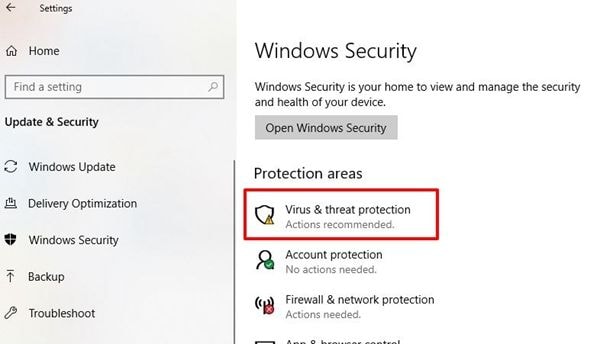
Step 1. The first step involves clicking on the "Start" menu and selecting "Settings," "Update & Security," and then "Windows Security." Finally, go to the "Virus & Threat Protection" section.
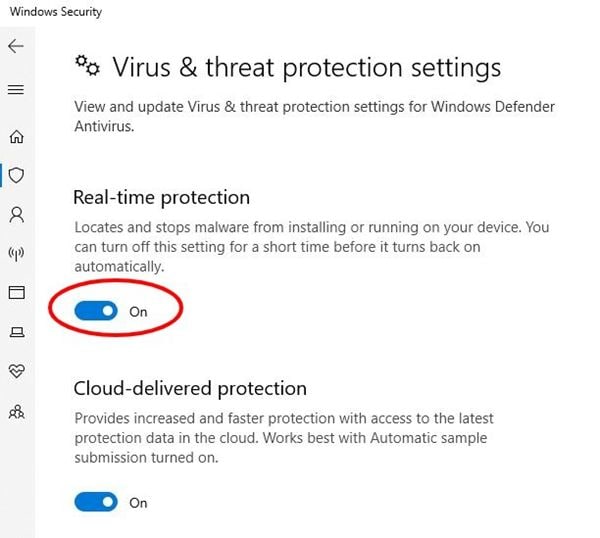
Step 2. Under the "Virus and Threat Protection," choose "Manage settings." After this, you should set the "Real-time Protection" to ON.
3 Format This Drive with Command Prompt
Even after removing bad sectors and the virus, you may still get the formatting error. It is time to use the Command Prompt to format the devices.
Step 1. In the Search option, type "cmd" and then open the DOS prompt.
Step 2. In this step, you should type command: attrib -r -h -s ./s x:\*.* . The x in the command represents your removable drive's letter. If the letter is F, this is what you should type
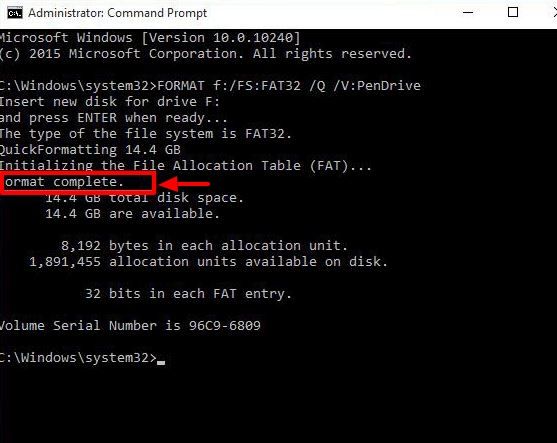
Step 3. Proceed to type this command: FORMAT X: /FS: FAT32 /Q /V: Pendrive. In the command, replace the letter X with the letter that represents your pen drive. If it is G, this is what you should type. The pen drive will then be reformatted to the FAT32 file system
4 Use Diskpart to Complete Formatting
A USB drive or SD card can also be formatted using "Command Prompt." This is an in-built tool in Windows that helps in solving the format that did not complete successfully issue. Below is how you use it
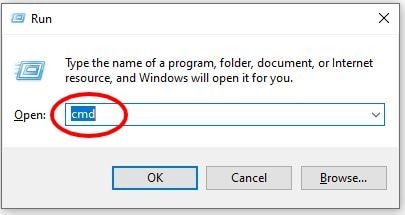
Step 1: To open Command Prompt, start by clicking "Win+R" and inputting "cmd" in it.
Step 2: Write "FORMAT X: /FS:FAT32 /Q /V:PenDrive". Here also, you should replace X with the letter that represents your drive.
5 Create a New Partition by Windows Disk Management
Apart from the above methods, you can opt to delete the target partition. You should then use Windows Disk Management to create a new partition. To delete the RAW partition in an external hard drive or partition, you can use "Delete Volume." Create a new partition using "New Simple Volume" and formatting will also be done.
Step 1. To open Disk Management, press "Windows+R" and in the "Run" box, type "diskmgmt.msc" there.
Step 2. Now, right-click on the partition that is not formatting and click on "Delete Volume" so it becomes unallocated space.

Step 3. Finally, right-click on the "Unallocated Space" before selecting "New Simple Volume." If you have no preferences, keep the default values and a full format will be possible here.
Check more detailed steps on The Easy Way to Create Partition on Windows 10 and Mac OS X.
Conclusion
Now that you understand what the format did not complete successfully error is and what causes it, it should not be a bother. You can use these four methods to make sure your external hard drive, micro SD, and SSD formats with ease. It also works on memory cards and USB drives.
To avoid losing data when formatting your drive, backup your folders and files first. To recover data from drives that are yet to be formatted, you should use Wondershare Recoverit. This tool is highly effective in ensuring you get your files back. If you have issues formatting, these methods will help in fixing them.
What's Wrong with Drive
- Recover Your Drive
- Fix Your Drive
- Format/Wipe Drive
- Know Your Drive


 ChatGPT
 Perplexity
 Gemini
 Claude
 Grok
Grok


Theo Lucia
chief Editor