6 Fixes: the Request Failed Due to a Fatal Device Hardware Error
Resolve the Windows "Request Failed Due to a Fatal Device Hardware Error" by checking physical connections, verifying the drive's SMART status, running Windows diagnostic commands, or formatting the disk as a last resort.
● Verify the drive's baseline health before attempting repairs by opening an Administrator Command Prompt, typing wmic, and executing diskdrive get status to confirm if the physical hardware is failing.
● Repair logical errors and isolate bad sectors by executing chkdsk *: /f /r /x in an Administrator Command Prompt, replacing the asterisk with your specific drive letter.
● If driver updates and CHKDSK fail, use Disk Management (diskmgmt.msc) to format and reinitialize the drive to MBR or GPT, which will resolve persistent logical errors but permanently erase all stored data.
Ask AI for a summary
Disks are electronic devices that are essential for any computer since they are where information is stored and where the operating system can be installed. Over time, they have become more sophisticated, their lifetime has increased and they work faster and more efficiently. However, we must not forget that they can stop working correctly due to several factors, therefore, Windows may throw the message "Request Failed Due to a Fatal Device Hardware." Here you will know the causes of this error and various alternatives to fix it as well as introducing you an excellent software to recover your data.
Part 1: Fix the Request Failed Due to a Fatal Device Hardware Error
Q: Yesterday, I tried to access one of my disks to check some files but Windows showed me a dialog box with a message like this: "The Request Failed Due to a Fatal Deice Hardware Error." Is there a way to solve this error and access my information again?
Disks are very important devices; without them, you could not install the operating system or store information. Its lifetime is generally long, although it also depends on the care of the equipment, cleaning and that it does not suffer from blows or shocks.
Generally, when a disk is not in optimal conditions, it indicates that its quality is being affected, for example, when opening a file, it takes longer than usual. Another characteristic symptom that the disk is failing is that the operating system takes a long time to start when it did not before. Despite this, it can continue to work, although it is recommended that it be checked to see if something bad happens on the device.
On the other hand, sometimes the Windows operating system can restrict access to the disk, showing "The Request Failed Due to a Fatal Device Hardware Error" since it cannot perform the read and write processes, therefore you cannot perform a task within it. This normally happens when the disk has serious damages, however, there are ways to still use it, although, you must remember that this error is a serious warning for you to repair or change the disk.
Part 2: What Causes the Error?
This error, as its name says, is due to a problem in the device hardware. Some of the causes may be the following:
- The hard drive cable is faulty: Disks are connected by cables, either via USB or through the motherboard ports (power cable and SATA / PATA). When the cable is worn or working properly, the power supply to the disk is not adequate, as it may be decreased or intermittent; this, therefore, will affect the performance of the device and prevent it from working properly so maybe you won't be able to access it. Try to change the cable for a new one and in this way the error may stop appearing.
- There are bad sectors in the disk: A sector is the minimum unit of information stored on the disk, this has a standard size of 512 bytes for hard disks, although there are currently sectors of 4096 bytes. A bad sector means that it cannot be read due to a physical error on the disk (generally due to a hit), in this case, the information cannot be recovered. Another reason why a bad sector can arise is due to a logical error in the drive, caused by some factors such as software misuse, a virus, or a corrupted file. You must bear in mind that when a bad sector appears, usually in a short time more bad sectors will emerge, so it is convenient to back up your information urgently.
- There is a hardware fault in the drive: All disks are units that work using electricity, therefore, they have a lifetime. Some of them are more sophisticated and durable, like Solid State Disks (SDD), however, they are not exempt from having reading and writing problems. These issues prevent documents and processes from being opened properly, restricting the operating system, this is a Windows security mechanism to prevent damaging the rest of your information.
Part 3: 6 Easy Fixes: The Request Failed Due to a Fatal Device Hardware Error
If you get the message "The Request Failed Due to a Fatal Device Hardware Error," it probably has a solution, then I will show you some alternatives to help your disk and that dialog box does not appear again.
Video tutorial: How to Fix The Request Failed Due to a Fatal Device Hardware Error?
Method 1. Basic Solutions
Sometimes, the issue may be with something other than the hard drive but the connection between the drive and the PC. To simplify the problem-solving process, you can try some basic solutions first.
- Reconnect the external hard drive or change a different USB port.
- Confirm that the cable connections work fine.
- Replace a new USB cable.
- Connect the drive to another computer to check if the issue is with the computer or the drive.
Method 2. Verifying Hard Drive Using SMART Attributes
It would be better to check your hard drive status first before proceeding with the solutions introduced below. That helps fix the The request failed due to a fatal device hardware error. SMART (Self-Monitoring Analysis and Reporting Technology) is an included functionality that all hard drives possess. To check the status of your disk and make use of SMART, it can be done using the following form:
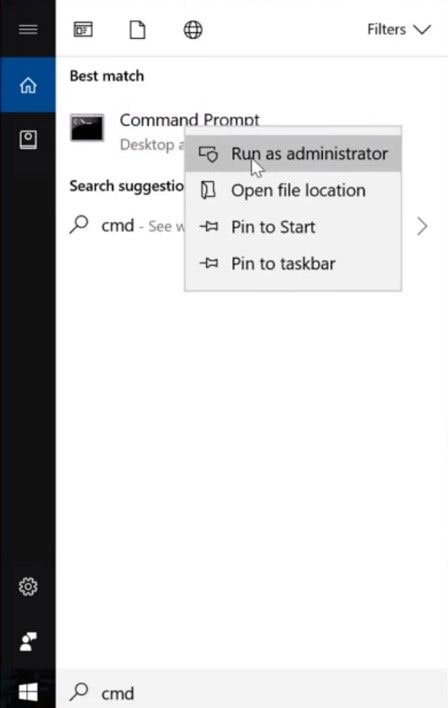
- Click on the Windows icon and then type "cmd", right-click on "Command Prompt" and select "Run as administrator".

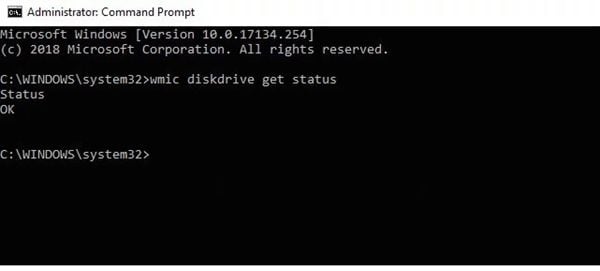
- In the Command Prompt window, enter the following command and hit Enter.
wmic
- Next, enter the command below and hit Enter:
diskdrive get status
- Wait for the result.
- If the status is OK: it means that your disk health is good. If it is Bad/Caution: it indicates that there is something wrong with your hard drive. You can try the other solutions introduced below to resolve the problem. It may show you some errors such as high temperature, calibration errors, or even future malfunctions, so this will be a good reason to prevent you from losing your information and to acquire a new disk.
SMART scanning can give an insight into your hard drive, but it doesn’t always detect all the potential issues. If you keep having problems with the hard drive, try the following methods to solve the problem.
Method 3. Running Error Checks
Windows has some tools to check logical errors. One of them is Error-checking, which directly looks for errors in the disk or files that enhance them. You can also make use of CHKDSK, which is a command (activated by the Command Prompt tool) that is used to check the integrity of disk drives as well as repair logical errors in the file system.
To check errors via Error-checking, follow these steps:
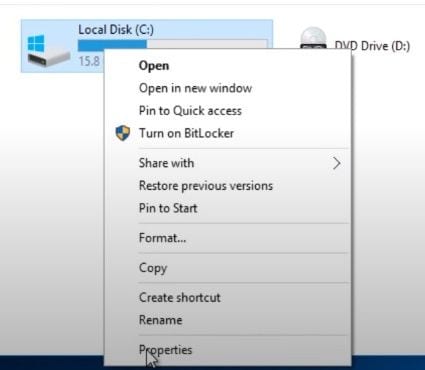
- Go to your local disk and right-click it, then click on "Properties."
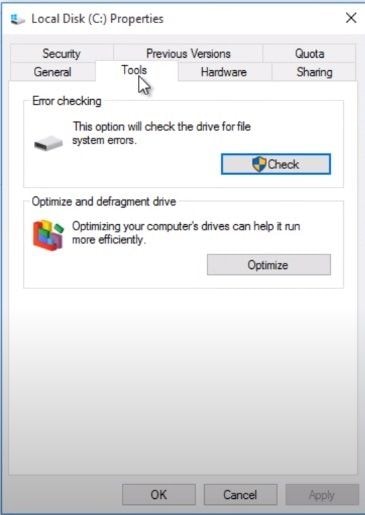
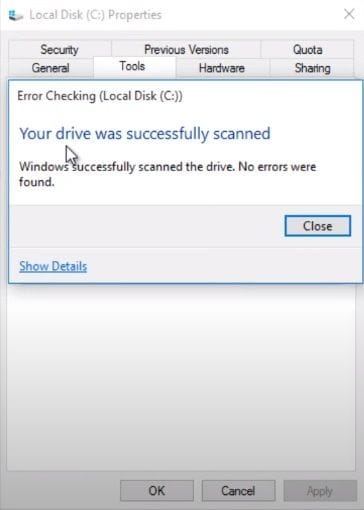
- On the Local Disk Properties window, click on the "Tools" tab and then on "Check." This will initiate the process.
- This dialog box may emerge. Just click on "Scan drive" to confirm and start the process.
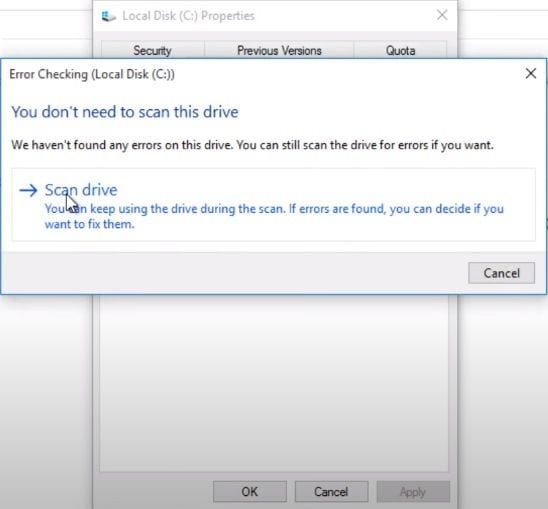
You should wait for some minutes. In the end, the tool will show the errors and it may repair them. However, this is a basic tool and it won't be strange to see that no errors were found so, if that's the case, you can keep reading and switch to CHKDSK to perform a more professional disk scan.
Method 4. Running CHKDSK Command
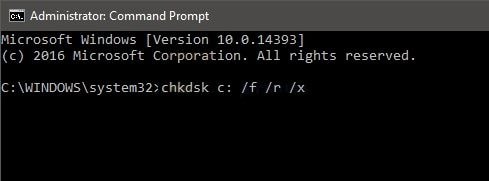
Follow the next steps to run CHKDSK Command to fix the request failed due to a fatal device hardware:
- Click on the Windows icon and then type "cmd", right-click on "Command Prompt" and select "Run as administrator".
- Now, type chkdsk *: /f /r /x and press "Enter" to start the process. Remember to change "*" for the letter of the disk you want to remove write protection. This command is a combination of three commands that can be activated at the same time "/f" is for fixing disk errors, "/r" is for locating bad sectors, and recovering readable information, and "/x" is for forcing the volume to dismount first if necessary.
If chkdsk found errors, they may be repaired, and you just have to restart your PC. If it didn't find errors or it couldn't repair them, you should use the next method.
Method 5. Update Disk Driver
The outdated driver can also cause the request failed due to a fatal device hardware error. In this case, follow the steps below to update your disk driver:
- Launch the Search box by pressing the Windows+S keys. Then type in device manager there and press Enter.
- Expand the Disk drives section.
- Locate the device with the error. Regularly, the device with error would be covered by an exclamation mark.
- Right-click on the device and select Update driver.
- Select Automatically search for driver software online.
- Wait for the update process to complete, then restart the computer and check if the problem is solved.

Method 6. Formatting your drive/initializing:
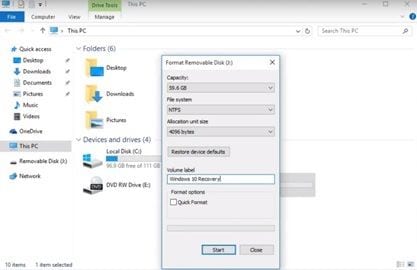
Formatting your disk is the most effective way to delete logical errors since this process erases all the information. It should be remembered that you should make sure to back up your information before doing this task. After applying format, you will need to initialize your disk (either an SDD or HDD); to do this, just follow these steps:
- Right-click on the disk you want to format, make sure "Quick Format" is unchecked, and then click on "Start." You have to wait for some minutes and the process will finish automatically.
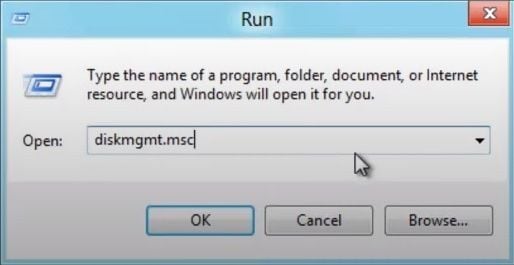
- Right-click on the Windows icon and click on "Run," then type "diskmgmt.msc" and click on OK to open Disk Management.
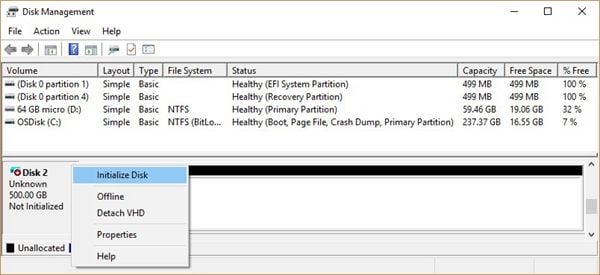
- Right-click on the disk you want to initialize, then a drop-down list will emerge. Just click on "Initialize Disk."
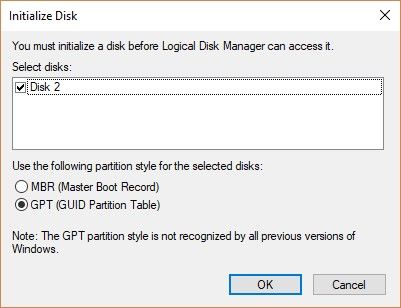
- Choose MBR or GPT. If you have a recent disk, it is recommended to choose GPT.
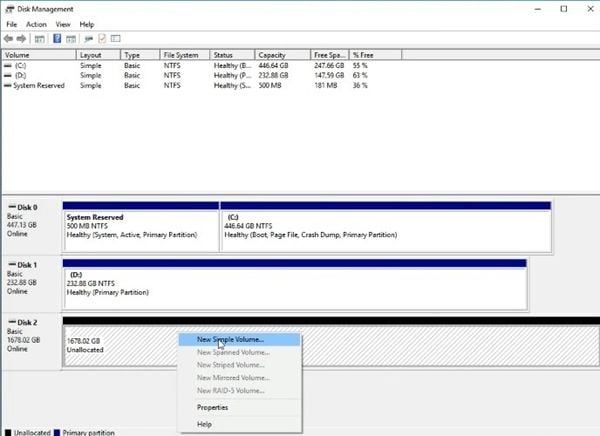
- After you selected partition style, you will get back to the Disk Management window. Your disk will be as "Unallocated," so you have to assign volume. Right-click it and click "New Simple Volume" then you have to specify volume size and assign a drive letter, because you have already formatted it, it is not necessary to format it again. After this, your disk will be ready to be used again.
Part 4: How to Recover Data from Inaccessible Hard Disk?
If your hard drive is inaccessible and has no solution, it is natural that you worry about your information. However, there is a professional program that will help you recover your files in a very simple way, this software is Recoverit and you can download it at https://recoverit.wondershare.com/. To recover all your data, you only have to do the following:
Step 1: Select a Drive
Launch Recoverit and look into "Hard Disk Drives". Your drive will be there. Select and click on "Start".

Step 2: Scan Your Drive
Recoverit will initiate a scan on the drive. You'll have great features you can use to streamline the scan and recovery process. For instance, you can simply tick the file types you want to recover instead of each one.

Step 3: Preview and Recover Drive Data
The conclusion of the scan will reveal a long list of the files the software found. Recovering them is just a matter of you selecting all the files or specific ones and clicking "Recover". The files will all be retrieved and saved on any location of your choice.

Conclusion
Request Failed Due to a Fatal Device Hardware Error is a very serious sounding message and sometimes it can be that severe. There are several ways to solve this error if your disk has logical problems, however, on many occasions you will need to format it or delete files for a solution, leaving your stored data adrift. Fortunately, there is Recoverit, professional software that can help you to recover files, even on disks that are damaged or inaccessible to Windows. Just a few clicks and all your information will be with you again through this powerful application.
People Also Ask
-
What does "Request Failed Due to a Fatal Device Hardware Error" mean?
This error message indicates that a critical hardware failure has occurred in the device, causing the requested operation to fail.
-
What can cause a fatal device hardware error?
A fatal device hardware error can be caused by a variety of issues, including defective hardware components, outdated device drivers, or physical damage to the device.
-
Is there a way to prevent fatal device hardware errors?
While it's not always possible to prevent hardware failures, you can minimize the risk of fatal device hardware errors by regularly updating device drivers, performing routine maintenance, and handling devices with care to avoid physical damage.
What's Wrong with Drive
- Recover Your Drive
- Fix Your Drive
- Format/Wipe Drive
- Know Your Drive


 ChatGPT
 Perplexity
 Gemini
 Claude
 Grok
Grok


Theo Lucia
chief Editor