How to Solve Hard Drive Error Code 0142 Issue
Dell diagnostic error 2000-0142 indicates a critical hard drive failure caused by loose SATA cables, a corrupted Master Boot Record (MBR), or mechanical damage, and the safest recommendation is to replace the drive immediately without attempting repairs if the device is still under warranty.
● Diagnose the specific hardware fault by pressing F12 during a restart to run Dell's built-in PSA or ePSA diagnostic tools, or by entering the BIOS setup utility to execute a S.M.A.R.T. self-test.
● Out-of-warranty drives can be troubleshot by physically reseating the internal motherboard connection cables or by booting from a Windows 10 installation disc to execute the `chkdsk X:/r` repair command via the Advanced options command prompt.
● Reinstalling Windows serves as a final system-level fix that guarantees complete data loss, requiring users to secure external backups beforehand or rely on third-party tools like Recoverit to retrieve files if the data is wiped.
Ask AI for a summary
Q: How to fix DELL diagnostic error 2000-0142?
"Dell computers have been in my use for more than 5 years now. Recently, an issue occurred with error code 2000 0142 on the system. I'm unable to continue my work, as the computer is not functioning properly. This is the first time I've seen this error. I am completely out of options right now. If there is any method to solve this problem, I'm desperate to know."
The error 2000-0142 indicates that your PC/laptop has gone through a hardware failure, which most users report. The failure might be because of CPU collapse, the HDD failing to pass a self-test, crashed OS, etc. So, there can be multiple factors behind this error, they are discussed in detail below. Not only this, in the guide you will have all the possible solutions to this problem. You just need to read the guide carefully to get all your answers.
Part 1: Reasons for Dell Error Code 2000-0142
Just simply jumping to the solutions won't help you out that much. You must know the reasons for Dell Error Code 2000-0142. No error just happens randomly, there is surely a back story behind it.
Here are some of the most common reasons for Dell error code 2000 0142;
- Loose SATA connection cables
Usually, people ignore the fact that loose SATA connection cables can be a reason for your trouble. If IDE or SATA is not properly attached or are not in their finest condition, this may create an issue for you. Loose attachment at either one of the ends is prone to create errors like these.
- Corrupt MBR and bad sectors on the hard drive
The viruses on your computer can corrupt the MBR, master boot record is a record on a hard drive that tells the computer where to find the Windows operating system. So, if the MBR gets corrupt, this issue might become your fate. Not only this but the bad sectors on the hard drive are also the culprit of this error.
If not for the above two reasons, then certainly your drive has hardware damage. It may have mechanical damage, overheating damage, mechanical damage including a broken reader head and broken spindles, etc.
Part 2: How to fix Dell Error Code 0142?
Now, coming to the core of the guide. In this section, you will have the finest possible solutions for the Dell error code 0142. There is a list of methods mentioned below, you just need to have a look at them carefully, before you implement them on your hard drive. Choose the method according to your scenario, you don't know which method workaround for you might.
Here's the list of methods;
Method 1: Check the hard disk connection
First of all, you need to check the connection between your hard drive and the motherboard and make sure they are attached properly. Turn your computer off, open the CPU's case, and check the cables. Now, turn the computer back on to see the results.
Method 2: Perform a disk check from the Windows installation disc
If the connections are all steady, perform a disk check from the Windows installation disc. The disk-checking process will help you detect the fault in your computer and fix it accordingly. Follow the steps to do;
Step 1: Insert the Windows 10 installation disc and boot from it.
Step 2: Secondly, choose the time, language, and keyboard type, and click next.
Step 3: A new window will pop up, choose the option of "Repair your computer"
Step 4: Select the options "troubleshoot"> "Advanced option"> "command prompt"

Step 5: In the command prompt dialog, type the command line chkdsk X:/r, "X" is the drive letter that will be scanned and repaired.
Step 6: Close the command prompt and restart the computer and see if the issue still exists.
Method 3: Re-install the windows
If you find the above two methods useless in your scenario, then you can just reinstall your windows. Before doing this make sure you have made the backup of your data, as re-installation can cause total data loss.
Here are the steps to re-install the windows;
Step 1: Download the media creation tool from Microsoft on a computer.
Step 2: right-click on the media creation tool and enable the option of "Run as administrator"
Step 3: A license term page will open, select the "Accept" option.
Step 4: A new page will open, select "Create installation media for another PC", and then select "Next"
Step 5: Further, check the "Use the recommended option for this PC" and click "Next".

Step 6: Choose the "USB flash drive" option.

Step 7: Now, plug an empty USB with more than 4GB space and click "next"
Step 8: once you see the message "Your USB flash drive is ready" take out your USB.
Step 9: Restart your computer and attach the USB, and boot from USB.
Step 10: Select the option "install now" and follow the instructions to successfully install the windows.
Method 4: Replace the faulty hard drive
If all the above methods are of no use, you just can replace the faulty hard drive. If the drive is under warranty, then you are lucky as it will be exchanged. If not, then you simply have to give it away and buy a new one.
Method 5: "S.M.A.R.T" Test
Various computers/laptops provide users with the utility of the S.M.A.R.T test feature. These pre-boot diagnostic tools aids in fixing hardware/software failures. Self-monitoring, analysis, and reporting technology tests on the hard drive will do some basic monitoring analysis and will detect the reason behind the hardware failure.
Follow the steps to run the S.M.A.R.T test;
Step 1: Restart your computer, and enter the BIOS setup utility.
Step 2: Choose your faulty drive and press "enter". Select the option 'SMART support' and press enter again.
Step 3: You can select any of the three tests, as you desire;
- Smart status check
- Smart short self-test
- Smart extended self-test
Step 4: After you perform the chosen test, press the "Esc" key.
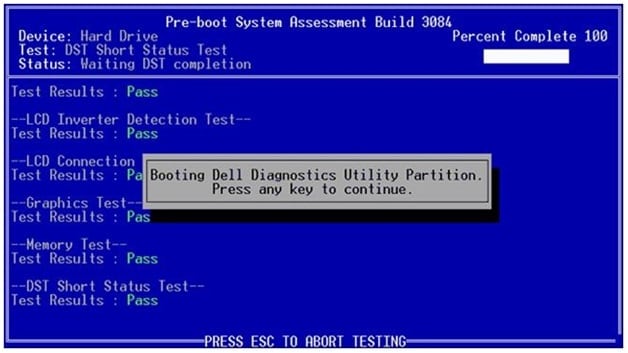
Method 6: fixing the error 0142 with built-in and online diagnostics- PSA or ePSA Error codes
As mentioned earlier, the error is primarily associated with the Dell company, which uses special hardware properties. The bright side is that the company offers built-in and online diagnostics tools like PSA (pre-boot system assessment) or ePSA (enhanced pre-boot system assessment).
Here are the steps to use the tools;
Step 1: Restart your Dell computer, press F12 multiple times to enter the one-time boot menu, and choose diagnostics. Follow the given instruction to run the test and note down the error.
Step 2: To utilize online diagnostics tools, open the Dell support site, now enter your service tag and click submit & diagnostic.
Part 3: How to retrieve the data loss caused by error code 2000-0142?
Unfortunately, if during all the above methods or by error code 2000-0142, you lost your precious data. There is nothing to worry about, errors like these can disturb your data, but you just need to get the right software at the right time to retrieve your data from the hard drive. Follow the guide to get your data restored;
Recoverit
Recoverit Data Recovery is one of the finest data recovery software in the market. It's powerful enough to recover almost every type of data lost due to various reasons. Here are the steps to use Recoverit.
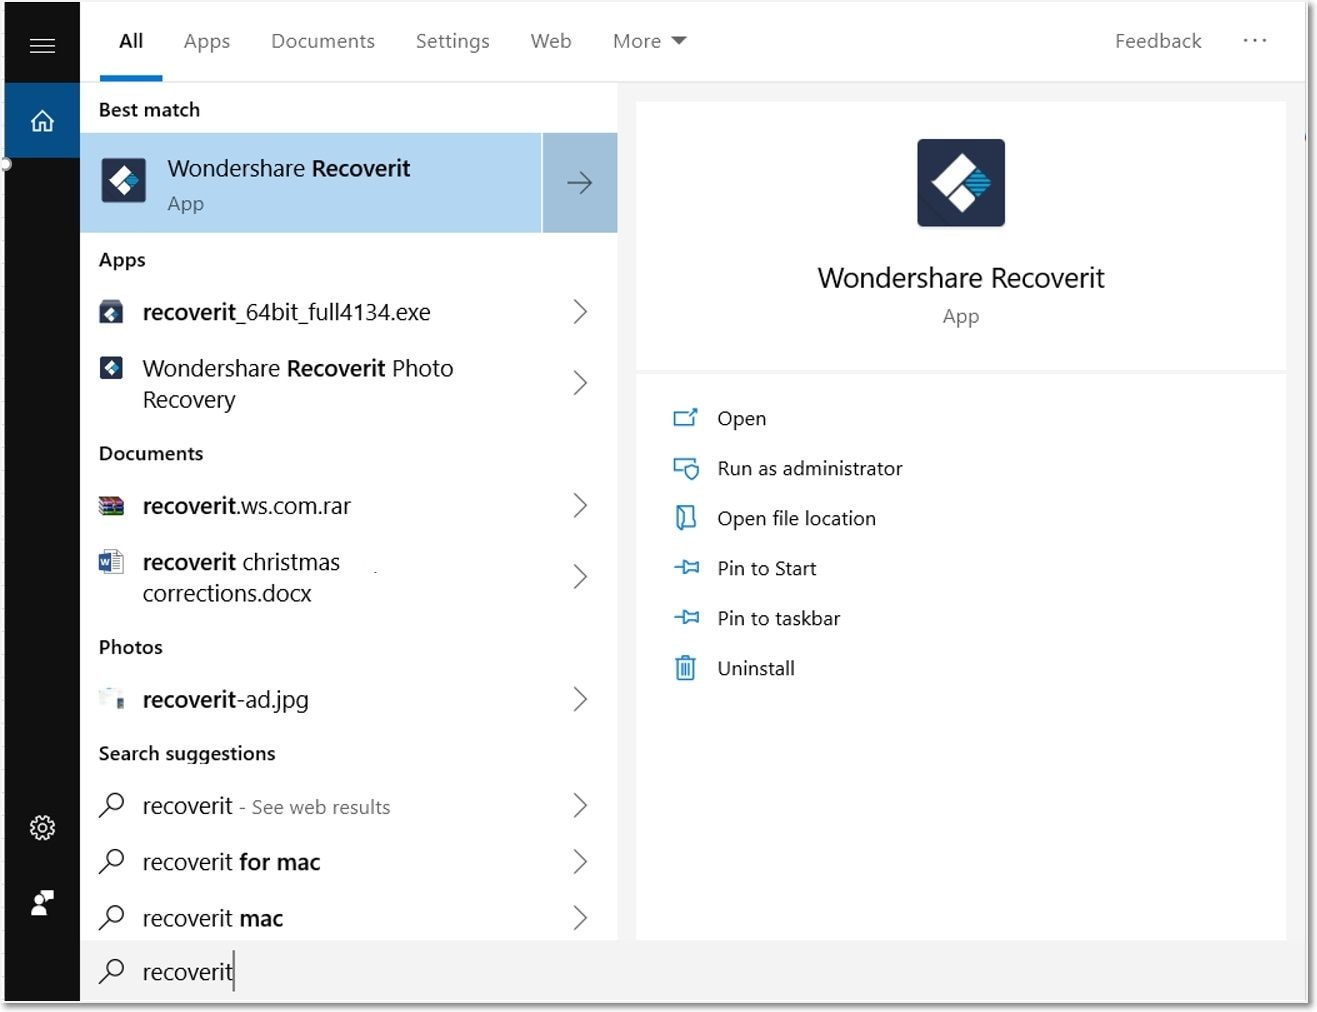
Step 1: Launch Recoverit on the computer
The first task is to download and install the Recoverit software on the computer. Once it is installed, just open the application.
Step 2: Select the device
Select the drive under the "Devices" option in front of you. Make sure you select the hard drive on which you lost the data due to an error. Once you have recognized your hard drive. Click on the "Start" tab to move forward.

Step 3: Scan the location
After the pressing "start" button, the software will start the deep scanning process for the hard drive you want to recover data from. During the scanning process, you can also pinpoint the files you desire.

Step 4: Preview and recover files
The scanning process might take some time, depending on your data size. After the process has been completed, you will be able to preview all the data you have on your undetectable hard drive and now found after the deep scanning process. You can preview multiple types of data, may it be videos, pictures, or audio. Now, select the button "recover" to enable the final and most important recovering process. Recovery will start instantly, and the recovery time will also depend on the size of the data lost. In the end, save your recovered data at the desired location.

Conclusion
If your hard disk is under warranty, then don't follow any of the methods and get it replaced right away. Performing unnecessary tasks on the hard drive sometimes results in vanishing all your data on it. So, you must make a backup of your data when applying tricks on the hard drive.
What's Wrong with Drive
- Recover Your Drive
- Fix Your Drive
- Format/Wipe Drive
- Know Your Drive


 ChatGPT
 Perplexity
 Gemini
 Claude
 Grok
Grok


Theo Lucia
chief Editor