


 TL;DR:
To create a Linux bootable USB, you can use various free, open-source, or command-line utilities tailored for simple single-image flashing, multi-boot configurations, or simultaneous mass duplication.
● Choose Ventoy or Yumi to run multiple Linux distributions from a single drive without repetitive formatting, or use Popsicle and GNOME Multiwriter to flash identical ISOs to up to 20 USB devices simultaneously.
● Advanced users can use the `dd` command in the Linux terminal, which strictly requires unmounting the USB partition first and will permanently erase all existing data on the target drive.
● Native Windows tools like Rufus are incompatible with Linux, while commercial alternatives like PowerISO require a paid subscription to unlock their full disk processing features.
Ask AI for a summary
 ChatGPT
 Perplexity
 Gemini
 Claude
 Grok
Grok
Are you ready to get the best out of freeware via Linux distribution? Then you need to learn how to make a Linux bootable USB. Making a bootable USB in Linux is a handy trick that comes to play when it involves recovering an existing system or exploring a new operating system. Most noteworthy, the creation process is easy when you have a few necessities, such as a Linux distribution and a USB Drive with adequate capacity. Do not hesitate. Let's walk through several accessible ways to create a Linux bootable USB and enjoy the possibilities it provides.
In this article
5 Open-Source Utilities That You Can Use To Make a Linux Bootable USB
Open-source utilities are software tools whose source code is released to the public so that users can view, change, distribute, and enhance it. They are famous for enhanced security, absolute transparency, and remarkable flexibility. Thus, Users always leverage on open-source tools to deal with IT issues, including creating a Linux bootable USB. Let's explore examples of prominent utilities below!
1. UNetbootin
UNetbootin is a utility that caters to a broad range of Linux distributions. It enables you to make a USB Bootable Linux Distro easily by choosing the required ISO and suitable USB drive.
Key features of UNetbootin include:
- Cross-platform support (Windows, macOS, Linux).
- download distributions directly within the tool
- Non-destructive install
- User-friendly interface.
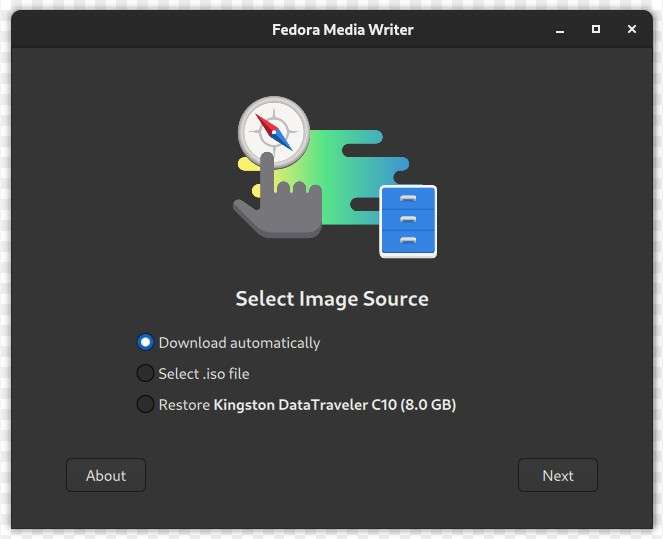
2. Fedora Media Writer
As the name depicts, Fedora Media Writer is designed for installing Linux from bootable USB drives for Fedora-based distributions. It's easy, durable, and optimized for Fedora users.
Some crucial features of Fedora Media Writer include:
- Official tool for creating Fedora Linux installation media.
- Automatically download the latest Fedora release.
- Persistent storage creation.
- User-friendly interface.
3. Ventoy
Ventoy is a distinct utility that enables you to create a multiboot USB drive. It assists many Linux ISOs, making it a good choice for transmitting various distributions in a single bootable USB.
Some top-tier features of Ventoy include:
- Unique and innovative approaches such as non-destructive formatting and drag-and-drop ISO files used in creating multiboot USB drives.
- Support booting multiple ISO files directly from the USB Drive.
- No need to format the USB drive for each new ISO.
- Support MBR and GPT partition styles, x86 Legacy BIOS, and various UEFI boot methods.

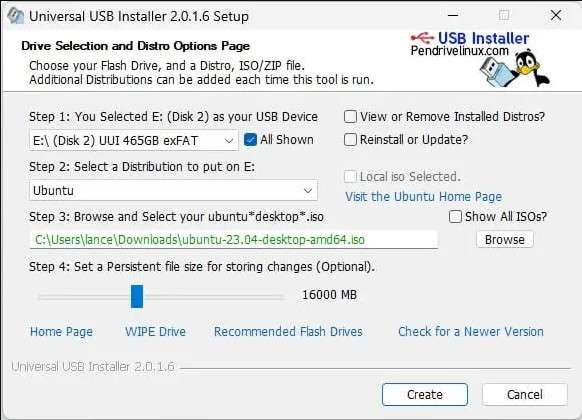
4. Universal USB Installer
Universal USB Installer is a useful utility mainly constructed for making bootable USBs for Linux distributions. It delivers a simple-to-follow technique, guaranteeing a smooth setup.
Some key features of Universal USB Installer include:
- Support various Linux distributions and Windows tools.
- Provide additional information regarding each distribution, including category, website URL, and download link for quick reference.
- Keep persistent files to save changes made from the running environment back to the flash drive.
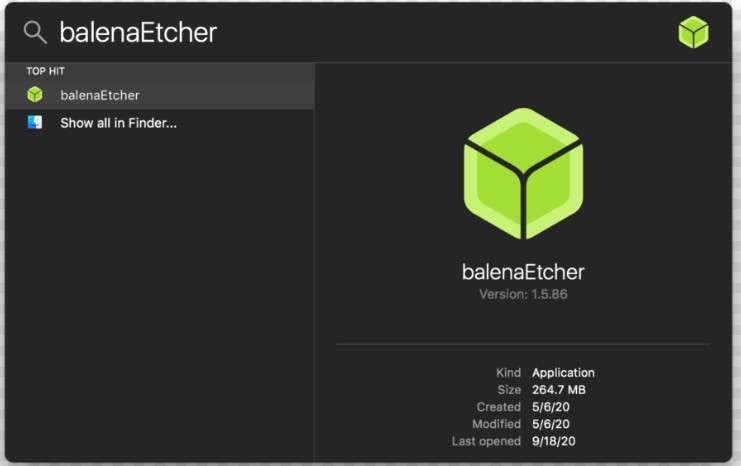
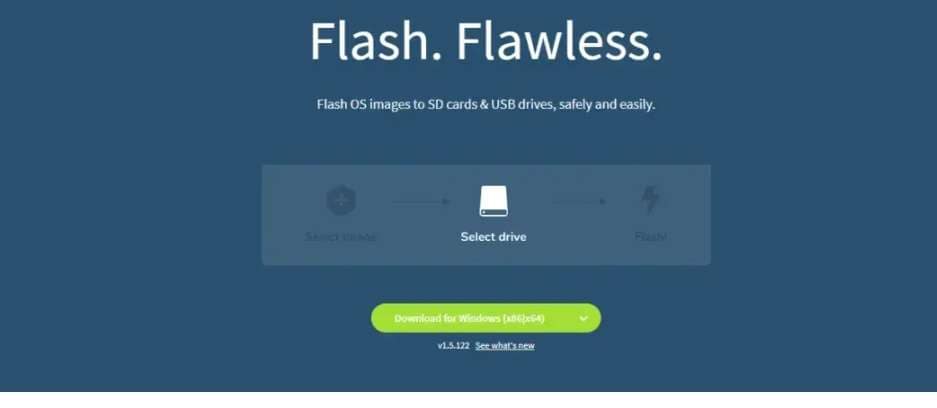
5. BalenaEtcher
BalenaEtcher is renowned for its simplicity and speed, functioning seamlessly across Mac OS, Windows, and Linux. Notably, its verification procedure ensures data integrity, adding to its popularity.
Some outstanding features of BalenaEtcher include:
- Fast and reliable USB and SD card flashing.
- Cross-platform compatibility.
- Simple and intuitive interface.
Steps To Make a Linux Bootable USB via BalenaEtcher
Among these useful open-source tools for making a Linux bootable USB, BalenaEtcher stands out for its simple and intuitive interface, progress indication, error prevention, and continuous updating. Now let's pick this powerful tool as an example to create a bootable USB. Scroll through the practicable steps together.
- Step 1: Download BalenaEtcher from the official website.
- Step 2: Inject your USB drive and launch BalenaEtcher.
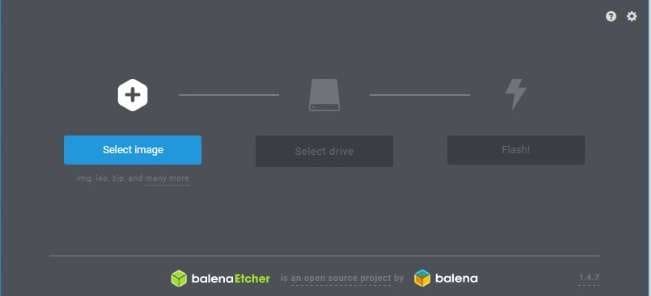
- Step 3: Choose the specific Linux ISO file by clicking Select Image and select your USB drive as the target.

- Step 4: Double-check your choices and click Flash to begin the process.
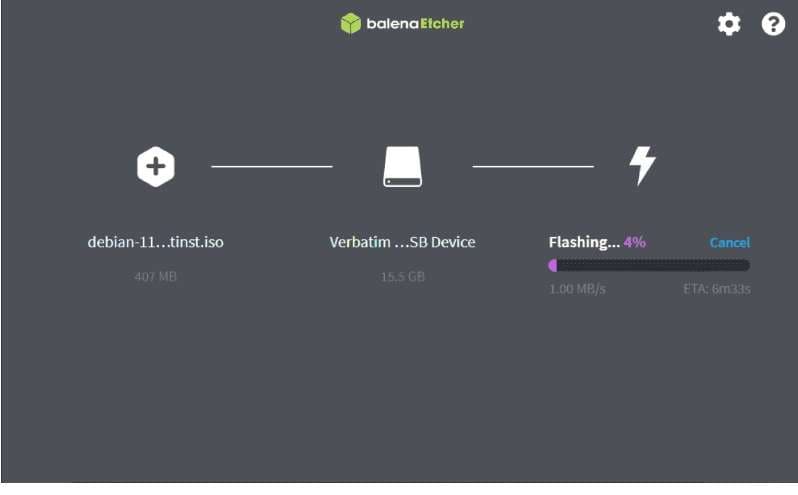
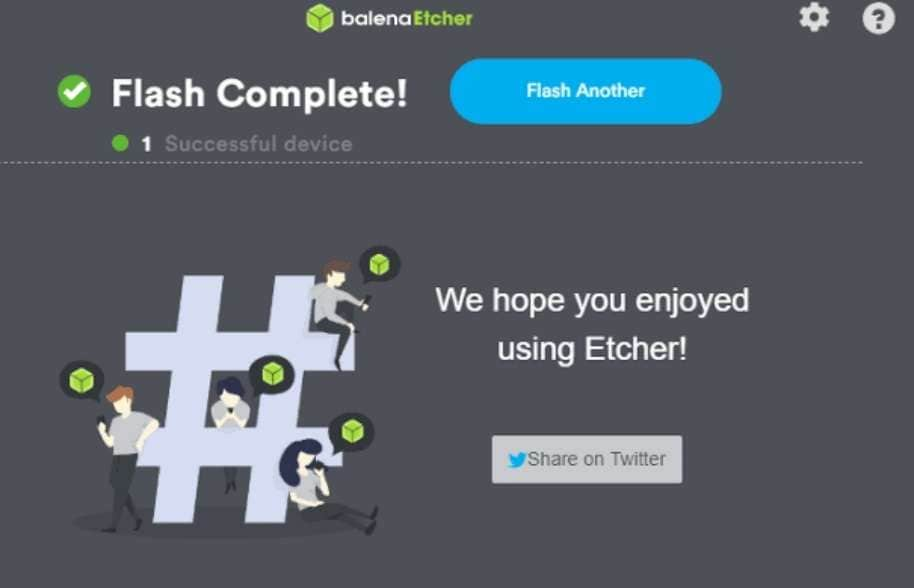
- Step 5: BalenaEtcher will finish the flashing process, and once the process is complete, you can explore your Linux from a bootable USB.
6 Free and Paid Useful Utilities That You Can Use To Make a Linux Bootable USB
Besides open-source utilities, you can also find flexible and trustworthy paid and free tools to install Linux from a bootable USB. These tools not only assist in crafting bootable drives but also enhance your capabilities in areas such as system administration, data retrieval, network troubleshooting, and comprehensive system protection. Let's examine some of these vital tools:
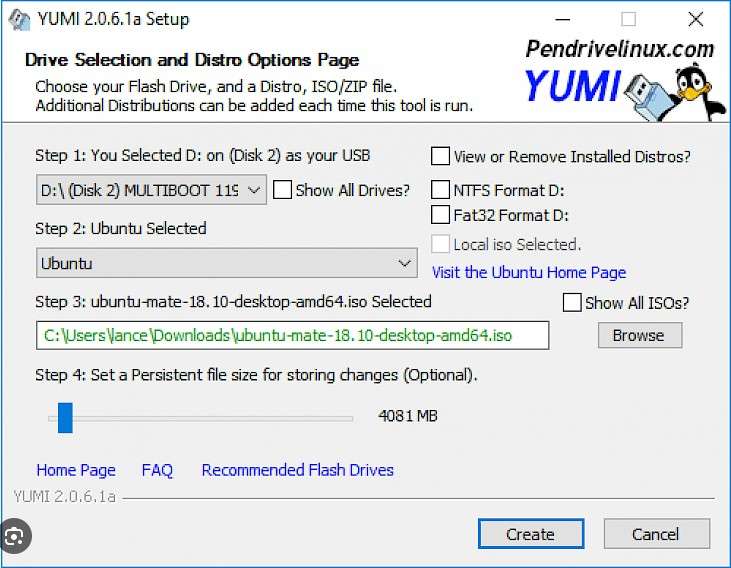
1. Yumi
Yumi, which stands for Your Universal Multiboot Installer, enables you to install a Linux multiboot USB with numerous Linux distributions.
Some notable features of Yumi include:
- create a multi-boot Live USB containing several operating systems and diagnostic utilities.
- Persistence feature for storing changes and data between sessions.
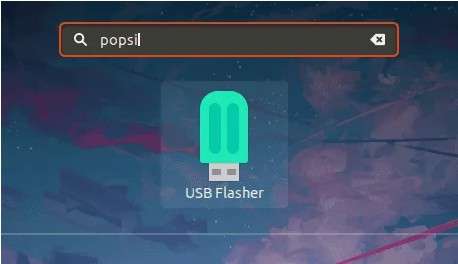
2. Popsicle
Popsicle is a Linux portable and simple utility to flash multiple USB devices in parallel, written in Rust.
Some key features of Popsicle include:
- Able to write to multiple USB devices at the same time.
- Verify ISO images with checksum MD5 or SHA256.
- Simple and user-friendly interface.
3. GNOME Multiwriter
GNOME Multiwriter is a very user-friendly utility that aids in writing many Linux distributions to several Linux bootable USBs. These Linux distributions can be written simultaneously, making it advantageous for bulk installations.
Some excellent features of GNOME Multiwriter include:
- Write and verify an ISO file to up to 20 USB devices at once.
- Support QA testing
4. PowerISO
PowerISO is a strong tool due to its versatility and compression which makes it accessible to Windows users. While it is not open-source, it allows you to easily manage ISO files and make Linux bootable USBs. However, it's free with limited features. If you want to access all features, you need to make a paid subscription.
Some key features of PowerISO include:
- Comprehensive tool for processing disk image files.
- Mount virtual drives to access contents without burning to physical media.
- Ability to create, extract, and burn various image formats.
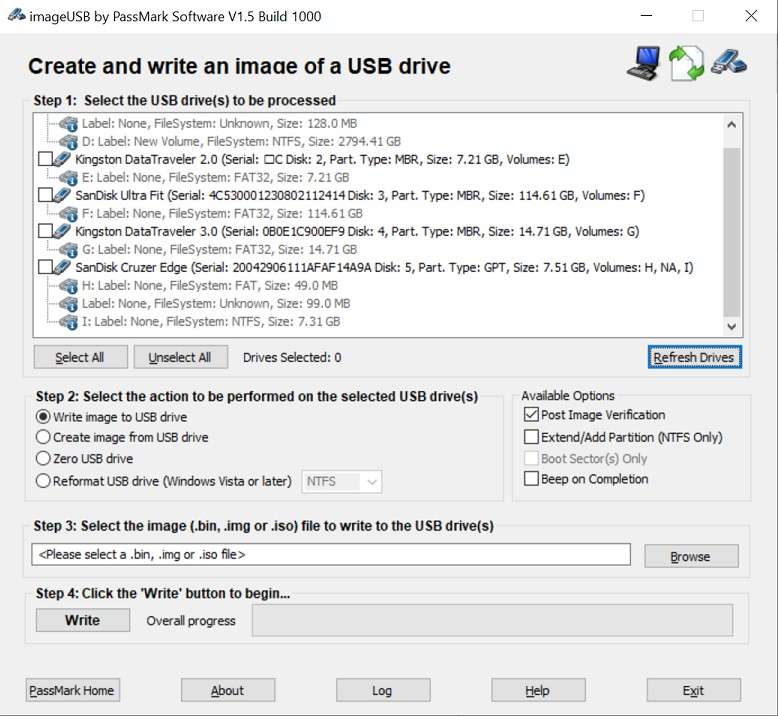
5. ImageUSB Writer
ImageUSB Writer is a Windows-based free utility for making Linux bootable USBs from image records. It is able to assist mass duplication of UFDs in an effective manner.
Some impressive features of ImageUSB Writer include the following:
- Preserve all unused and slack space within the cloning process, including the MBR.
- Perform flawless mass duplications of bootable UFDs.
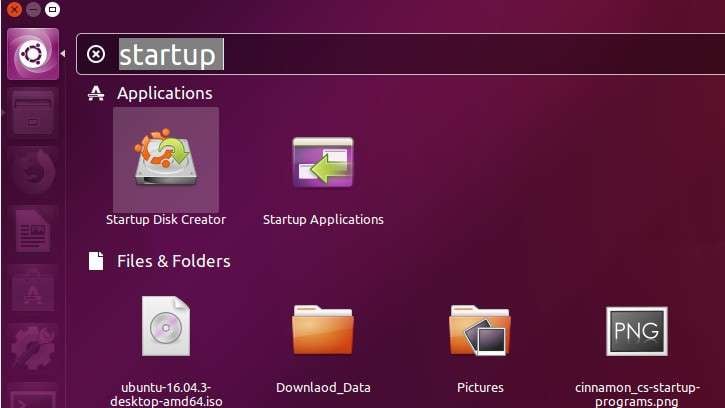
6. Startup Disk Creator
Startup Disk Creator is commonly pre-installed in most Linux distributions like Ubuntu. It's simple to use and suitable for beginners, as it streamlines the procedure of making Linux bootable USBs.
Some outstanding features of Startup disk creator include:
- Official Ubuntu tool for creating bootable USB drives.
- Option to include extra space for storing files and settings.
Steps To Make a Linux Bootable USB using Startup Disk Creator
In view of its popularity and simplicity, let's take Startup Disk Creator as an example. Here are the easy steps to create a Linux bootable USB in Ubuntu.
- Step 1: Insert your USB drive and open the Startup Disk Creator.
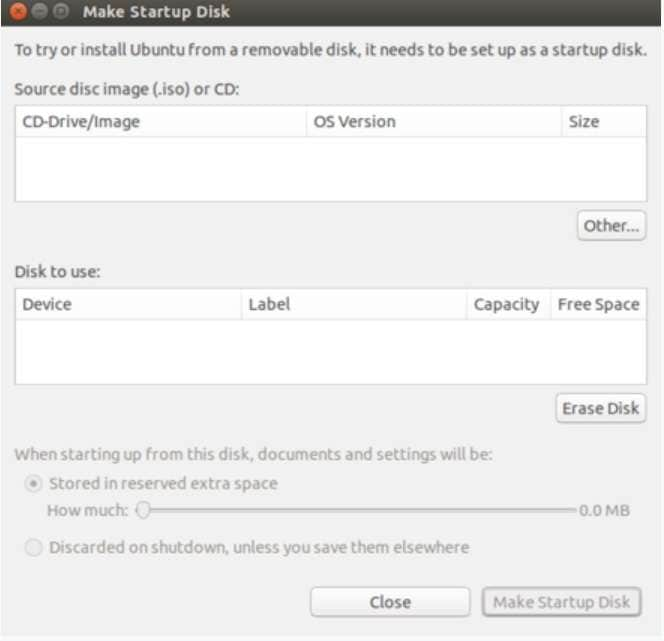
- Step 2: Click Other to select the Linux ISO file you want to use.
- Step 3: Choose your specific ISO file and click Open.
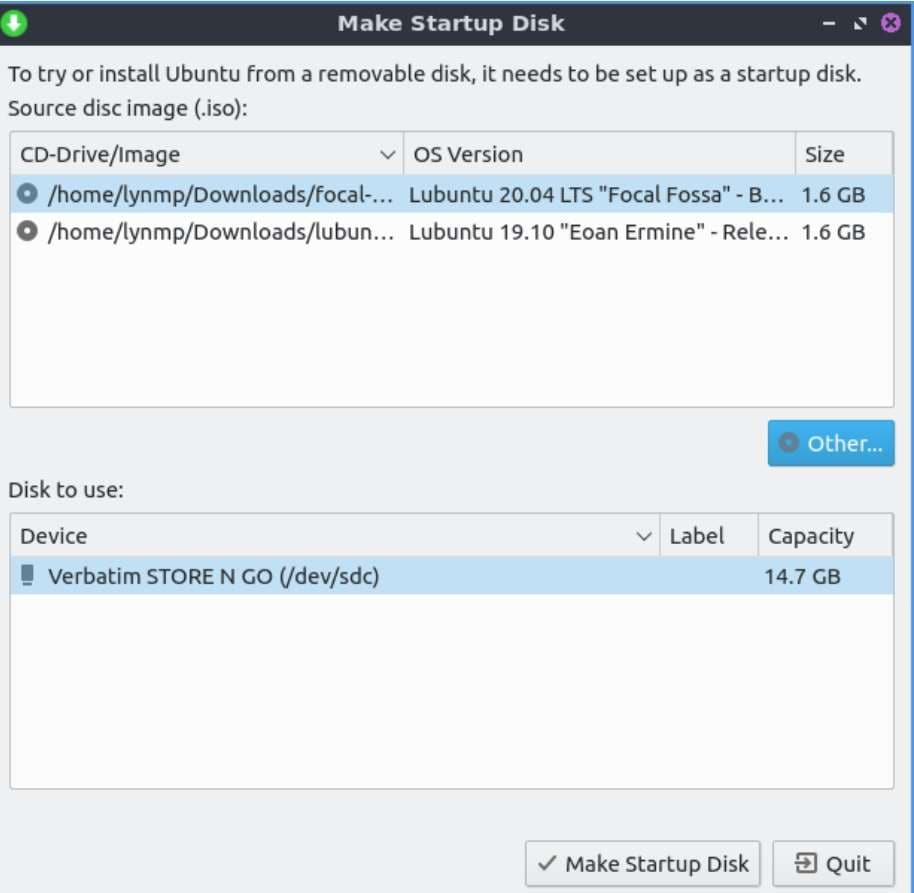
- Step 4: Confirm that the required USB drive is established as the Disk to use and modify the Storage slider to distribute constant storage if necessary.
- Step 5: Click Make Startup Disk to start the operation.
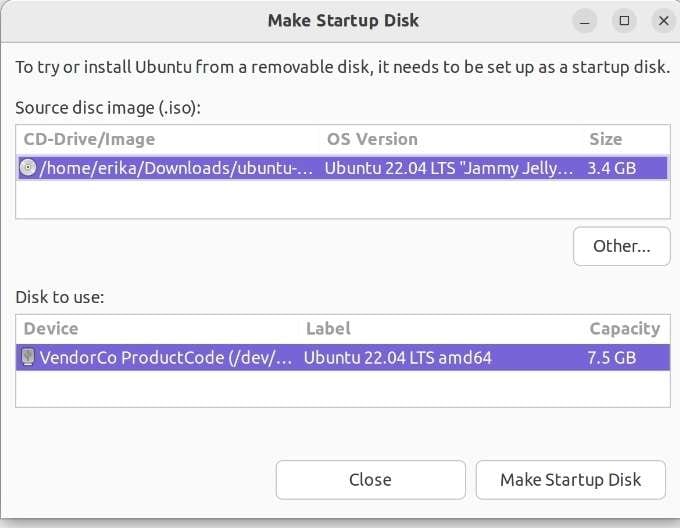
- Step 6: Ensure you seek to wipe out all data on the USB drive and continue.
- Step 7: Wait for the operation to finalize, and your Linux bootable USB will be completed.
Make a Linux Bootable USB With Linux Terminals
For Advanced Linux users, creating a Linux bootable USB can be more comfortable and faster with the help of data duplicator command (dd). The dd command is a CLI tool that assists you to copy and convert files in a swift manner. Thus, this terminal can be a good choice for sophisticated Linux users to create a bootable USB. Here are simple steps to follow:
- Step 1: Download the Linux ISO:
Go to the official website of the Linux distribution to download and install the ISO file.
- Step 2: Inject the USB drive:
Inject the USB drive into your computer's USB port. Remember to back up any crucial data on the USB drive, as the process will eliminate all existing data.
- Step 3: Identify the USB drive:
Unlock the terminal and enter the command to list all accessible storage devices. Identify the USB drive's device name, usually labeled as something like /dev/sdX, where X represents the particular letter assigned to your USB drive.
- Step 4: Unmount the USB drive:
To unmount any partitions on the USB drive, execute the command umount /dev/sdX1. Replace X with the appropriate letter corresponding to your USB drive.
- Step 5: Write the ISO to the USB:
Execute the command sudo dd bs=4M if=path_to_linux_iso of=/dev/sdX status=progress, where path_to_linux_iso is the path to the downloaded Linux ISO file, and X is the correct letter for your USB drive.
- Step 6: Wait for the completion:
This process may take some time, and you'll see the evolution in the terminal.
- Step 7: Verify the USB:
Once the command completes, run `sync` to confirm that all data is inscribed to the USB. You can then use sudo eject /dev/sdX to safely expel the USB drive.
Now you have a Linux bootable USB ready to install the Linux distribution on your desired system. What you need to do next is to insert the USB drive and boot your computer from it. No worries about the installation process because all the instructions are on the screen.
[Bonus] How To Retrieve Your Crashed Data from Unbootable Linux?
When facing a frustrating situation where you boot your Linux computer but lose vital data, what should you do? At this point, Recoverit can come to your rescue. With advanced recovery algorithms, Recoverit can be your top-tier option for data recovery tasks.
In this video below, we'll walk you through step-by-step methods to effectively recover your valuable data, showcasing both beginner-friendly techniques and more advanced options.
Alternatively, here is a thorough step-by-step text guide on using Recoverit to retrieve lost data from Linux computer.
- Step 1: Select the Linux Recovery
Download the applicable version of Recoverit for your operating system and open it on the computer. You will be welcomed with the main interface showing many recovery alternatives. Select the NAS and Linux and tap on Linux Recovery to go ahead.

- Step 2: Connect the Linux Computer
A new window pops up on your screen, as shown below. Put in the necessary information to establish a remote connection and then click on the blue-colored button: Connect.
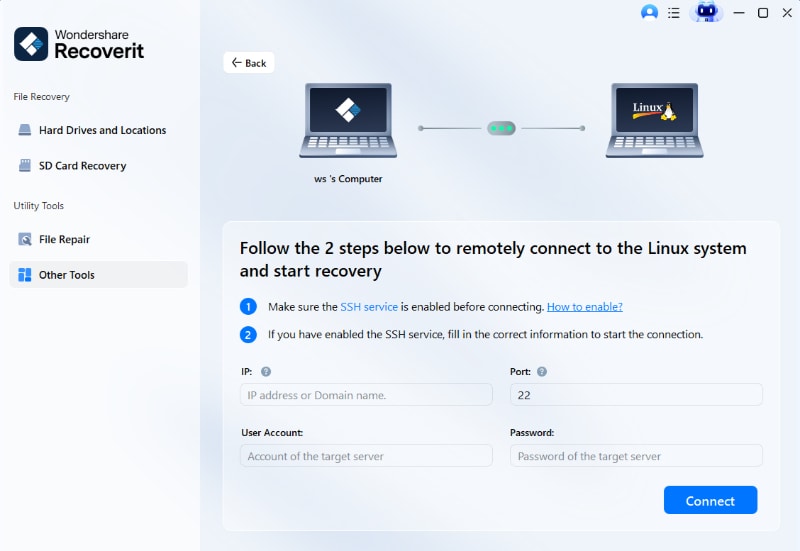
It will take some time before the successful connection. Once completed, Recoverit will start an automatic scan to look for your lost files in the Linux computer.
- Step 3: Preview and Recover the Data
Once the scanning process is finished, you will see a list of recoverable files. You can preview the files to ascertain their integrity and choose the ones you want to recover. After choosing the files, click the Recover button to launch the data recovery process. Select a distinct storage location on the operating computer or an external drive to save the recovered data.

Conclusion
If you are looking for a versatile and reliable way to install Linux on your computer, Linux bootable USB is a great option. By following the easy-to-follow steps above, the installation process can become a walk in the park. However, the need to recover data after this process always pops up. In such instances, the presence of a reliable data recovery solution like Recoverit can be a lifesaver.
FAQ
-
1. Is Rufus available for Linux?
No, Rufus is not usable for Linux. Rufus is an outstanding tool for making bootable USB drives for Windows operating systems. It is precisely built for Windows and does not have a native version for Linux. However, there are alternative utilities accessible on Linux that can perform identical functions. One such tool is Etcher, which is widely operated and has a user-friendly interface. -
2. Can Command Prompt work for Linux?
No, the Command Prompt is a Windows-specific command-line interpreter. It does not fit in on Linux systems. The comparable command-line interpreter on Linux is called the "Terminal" or "Shell". The most common shell used in Linux is Bash, which delivers identical functionalities to the Command Prompt but with different commands and syntax. -
3. How do I run Windows software on Linux?
You can run some Windows software on Linux using compatibility tools like Wine. Wine is a compatibility layer for Linux and other Unix-like operating systems that allows you to run Windows applications on non-Windows platforms. Hence, Wine allows you to run many Windows applications directly on a Linux system without requiring a Windows operating system or virtualization.


