
 TL;DR:
Linux RAID arrays can be recovered manually using the mdadm command-line utility for standard drive replacements, but complex failures like damaged RAID controllers or missing superblocks require third-party software like Wondershare Recoverit.
● Before rebuilding an array with mdadm, you must stop active processes, ensure identical block sizes across physical disks, and run mdadm --zero-superblock /dev/sdX on replacement drives to clear conflicting old superblocks.
● The manual mdadm recovery sequence requires verifying array status via cat /proc/mdstat, installing GRUB on the remaining drive's MBR to prevent boot failure, and cloning the working partition table using sfdisk.
● Wondershare Recoverit Linux Data Recovery is necessary when the RAID controller is damaged or the array refuses to build, but the software only operates on Windows or macOS and must process the recovery through a remote connection to the Linux device.
Ask AI for a summary
 ChatGPT
 Perplexity
 Gemini
 Claude
 Grok
Grok
Users can enhance data security by using Linux-based RAID arrays. However, one must remember that RAID arrays can also fail. The most important point is that RAID failures are frequently unrepairable using the built-in Linux tools. In this guide, you will discover how to perform Linux RAID recovery using mdadm (a powerful command-line utility) and mdadm alternative.
Part 1: Recover Linux-based RAID Using mdadm
What Is mdadm
“mdadm” is a command-line utility for creating, managing, and monitoring Linux software RAID arrays. RAID, or Redundant Array of Independent Disks, stores data across multiple disks to improve performance, increase capacity, or provide redundancy.
mdadm supports several RAID levels, including:
- RAID 0: Also known as "striping," this RAID level splits data across multiple disks to improve performance. However, it provides no redundancy, so if one disk fails, all data is lost.
- RAID 1: Also known as "mirroring," this RAID level stores copies of data on multiple disks, so if one disk fails, the data can still be read from the remaining disks.
- RAID 5: This RAID level strips data across multiple disks, with parity information stored on one or more disks. It allows for data recovery in the event of a single disk failure.
- RAID 6: Similar to RAID 5, this RAID level also stores parity information on multiple disks but allows for data recovery in the event of up to two disk failures.
- RAID 10: Also known as RAID 1+0, this level uses striping and mirroring to improve performance and provide redundancy. It requires a minimum of four disks.
mdadm supports linear, multipath, and other custom levels as well. You can use it to create, modify, monitor, and manage RAID arrays from the command line, and it can also be used to assemble arrays from existing components.
Tips Before RAID Recovery Using mdadm
- First, back up your data before using mdadm to create or modify a RAID array. It will ensure you have a copy of your data if something goes wrong.
- Make sure that you have the necessary hardware and that it is properly configured. It includes having the correct number and type of disks and ensuring they are connected to the appropriate ports.
- Always use mdadm with caution, especially when running commands that can modify or delete an array. It is a powerful tool but can cause data loss if misused.
- Before creating a RAID array, it's recommended to use mdadm --zero-superblock /dev/sdX to ensure that the disk you want to use as a RAID is free of any previous RAID superblock because they can cause issues when creating a new array.
- When creating RAID arrays, ensure the same block size and alignment in all the physical disks; otherwise, the performance will be affected, especially on RAID 5 and 6.
- When creating or resizing a RAID, it's recommended to stop any process because the data may become corrupted if the RAID is used during these operations.
- Continuously monitor your RAID arrays for problems and take action immediately if a problem is detected. mdadm can be configured to send email alerts or other notifications when an array experiences a problem.
- Keep in mind that RAID is not a substitute for proper backups; it is just a way to improve the availability of the data but not to protect you against deletion, file corruption, or ransomware attacks.
How To Recover RAID Using mdadm
Step 1. Assess Your RAID Array's Status.
- Enter the following commands as root to examine the status of your RAID array. Because there are two disks accessible and the RAID array is in an active state, notice the two U's (UU):
# cat /proc/mdstat
Personalities : [raid1]
read_ahead 1024 sectors
md2 : active raid1 hda3[1] hdb3[0]
      262016 blocks [2/2] [UU]
md1 : active raid1 hda2[1] hdb2[0]
      119684160 blocks [2/2] [UU]
md0 : active raid1 hda1[1] hdb1[0]
      102208 blocks [2/2] [UU]
     unused devices:
- Use the mdadm -misc command to learn more about the state of the RAID array:
mdadm --misc --detail /dev/md2
- Enter the following to obtain a list of all partitions on a disk:
cat /proc/partitions
Step 2. Restore a Broken RAID Array.
- Install GRUB on the remaining hard drive's MBR.
# grub
Note: Before removing the failed hard drive, double-check that GRUB has been installed on the remaining drive. When replacing a non-hot-swap hard drive, your system must be rebooted. Your system will not boot if GRUB is not on the remaining drive.
- Track down the grub setup files first:
grub> find /grub/stage1
This step should guarantee that your system boots appropriately after you replace your hard drive. You are strongly advised to follow these steps during the initial server installation. That way, if trouble comes knocking, you'll be ready.
Step 3. Replace the Failed Drive's Partition Structure.
- Operate fdisk to see what partitions are on the working drive to get the mirrored drives working again:
# fdisk -l /dev/sda
We can copy the partition table from the working drive to the new drive: the -force token may be required.
- If sda has been changed:
sfdisk -d /dev/sdb | sfdisk /dev/sda
If sdb has been changed:
sfdisk -d /dev/sda | sfdisk /dev/sdb
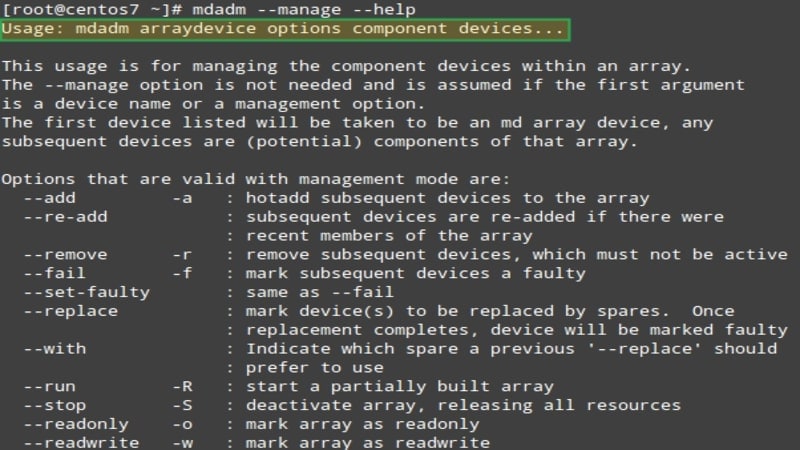
Step 4. Reconstruct the partition table.
Now that the partitions have been configured on the freshly installed hard drive, we can start rebuilding the RAID Array partitions. Please keep in mind that synchronizing your hard drive may take some time.
mdadm /dev/md1 --manage --add /dev/sda1
mdadm /dev/md2 --manage --add /dev/sda2
Step 5. Recreate a swap partition.
- Be sure that the swap partition is added to the array. Check out the current swap partition:
cat /proc/swaps
Filename Type Size Used Priority
/dev/sdb3 partition 522104 43984 -1
- Use the commands below to re-create the swap partition. Please ensure that partition SDA3 is changed to the correct partition as determined by the cat /proc/swaps command:
mkswap /dev/sda3
swapon -a
Limitation of mdadm
Although mdadm has robust functionality for managing RAID arrays, there are times when using the built-in tools to rebuild a RAID array is either impossible or takes a very long time. It is particularly true for inexperienced users who use a RAID array for home usage.
For instance, it frequently happens for a system to remove a superblock off a disk unintentionally. As a result, Linux does not know how to establish a RAID array appropriately, and it stops working. Such circumstances can be noticed with RAID 0 when the user wants to gain maximum speed by striping.
It is a minor issue because some file systems create two copies of a superblock or more - one at the beginning and one at the end of the disk. Restoring a superblock requires much knowledge and time to get the array back up and running. Furthermore, each time you attempt to recover a superblock, the risk of losing all of the data on the disk increases.
In such a case, using third-party RAID recovery software is preferable to save time and nerves. You also get a near-complete data recovery guarantee. Read on as this article features the best RAID data recovery tool in the market today.
Part 2: Recover Linux-based RAID Using the mdadm Alternative
Regarding the limitations of mdadm, it can be a great and convenient option for all users to employ a third-party RAID recovery software as a mdadm alternative. Here we recommend using Wondershare Recoverit Linux Data Recovery to recover data from Linux-based RAID.

Wondershare Recoverit - Your Safe and Reliable RAID Recovery Software
5,481,435 people have downloaded it.
Recovers lost or deleted documents, photos, videos, music, emails, and other 1000+ file types effectively, safely, and completely.
Compatible with all RAID levels, including RAID 0, RAID 1, RAID 5, RAID 6, and RAID 10.
Assists in 500+ data loss scenarios, such as deletion, disk formatting, OS crash, power outage, virus attack, lost partition, and many more.
The simple point-and-click interface allows you to recover data from Linux hard drives in just a few clicks.
Your data on RAID storage media can be recovered in 3 simple steps using Wondershare Recoverit Linux Recovery.
Note: Wondershare Recoverit is currently only available for Windows and Mac. The Linux Recovery works through a remote connection. The developer is considering a Linux version in the future.
Video Tutorial on How to Recover Linux Files?
For Windows Vista/7/8/10/11
For macOS X 10.10 or later
Step 1. Choose Linux Recovery.
Download and install Wondershare Recoverit. Open the software, then select NAS and Linux on the main interface's left side. To continue, click Linux Recovery.

Step 2. Connect the Linux-based RAID Device.
A new window will start to open on your screen. Enter the required data to establish a remote connection between the file recovery tool and your RAID device. Once finished, select Connect.
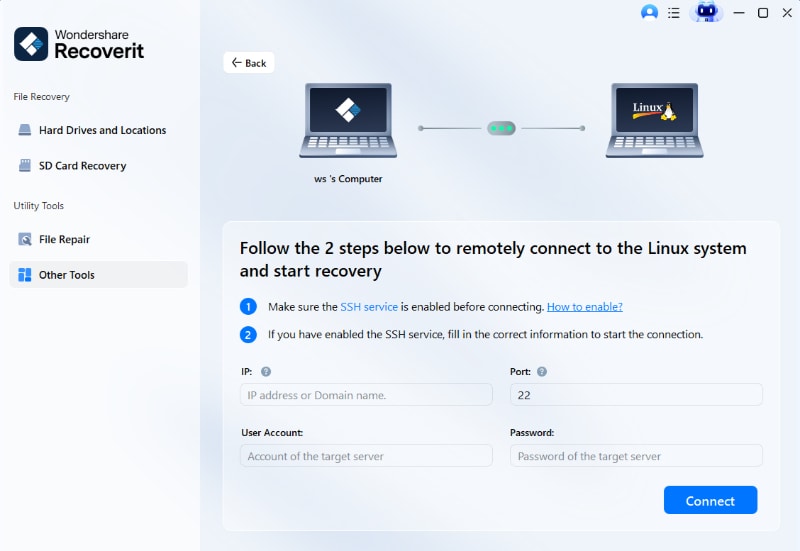
Recoverit will run an automatic scan to look for your missing files in a Linux computer once the connection has been established successfully.

Step 3. Preview and Retrieve Files.
The scanning process takes some time, depending on the amount of data being scanned. The scanning status is displayed on the bottom bar. The most excellent part about Recoverit is that you can preview the scanned files during the scanning.

When you find the files that you want to restore, click Recover to save them to a safe location.

For Windows Vista/7/8/10/11
For macOS X 10.10 or later
Part 3: Situations When It Is Better to Use the mdadm Alternative
As previously said, there are circumstances when it is preferable to save time and quickly use specialized third-party tools to restore the RAID array's performance. Here are the situations to prove that it is better to use Recoverit Linux Recovery as a mdadm alternative:
Linux RAID Controller Troubles
The most critical component of a RAID array is the RAID controller. It can even be more crucial in some circumstances than the disks. It is the one that distributes data across the disks and keeps track of the disk order and the location of the first blocks of data from which all data is read, among many other functions.
As a result, you may replace the disk if something happens to it. Everything will fail if the controller is damaged, regardless of the type or number of disks in the RAID array.
The issue is that the Linux operating system cannot put together the RAID array because it does not know where the first block of data is kept. The command to force an array does not function. The built-in Linux utilities cannot repair a faulty RAID controller. There is no use in making any attempt. As a result, a reliable RAID recovery tool like Recoverit is necessary.
Sudden RAID Initiation Issues
A RAID array's initial configuration, assembly, and startup are referred to as RAID initiation. A new logical structure is built on the drives once they have been formatted. Of course, all data is lost as a result.
Unfortunately, the default Linux tools are useless in this case and only worsen things. You must comprehend how the operating system deletes the data to understand why this is the case. Linux does not erase the data when you delete it. It removes a connection to the file, rendering it invisible and allowing other data to replace it. Therefore, every additional alteration raises the possibility that new data will overwrite a critical file.
Recoverit Linux Recovery allows you to save your data and easily retrieve your RAID array even though Linux currently lacks a RAID recovery tool. Therefore, as soon as you notice an issue with your Linux distribution or RAID array, you should use Recoverit to recover your data and store it somewhere secure rapidly.
RAID Building Failures
Users may occasionally encounter a situation where a RAID array refuses to construct. The order is helpful in several circumstances. Unfortunately, it frequently occurs that Linux tools are useless, and you cannot build a RAID array. It is preferable to use expert Recoverit Linux Recovery rather than wasting time.
For Windows Vista/7/8/10/11
For macOS X 10.10 or later
More Related: How To Recover Deleted Files on Kali Linux?
FAQs
Does Linux work with RAID?
Yes, Linux supports RAID natively. The Linux kernel provides a software RAID implementation through the MD driver, which can be managed using the command-line utility mdadm. Linux also supports hardware RAID through specialized drivers provided by the hardware vendor, and it can be managed through the BIOS or RAID card's utilities.
Can I recover data from RAID?
Yes, you can restore data from a RAID, but it depends on the RAID level and the cause of data loss. You can use software like Wondershare Recoverit Linux Recovery to recover lost, deleted, or formatted files from a RAID.
Can Superblock be recovered with mdadm?
Yes, it is possible to recover a superblock with mdadm. The command "mdadm --assemble --scan" can scan for available RAID arrays and assemble them, including the Superblock. Additionally, the "mdadm --examine" command can display the superblock information of a specific RAID device.
In what situations can the mdadm fail to rebuild a RAID array?
Mdadm may fail to rebuild a RAID array if the RAID level or configuration is not properly identified, if there are multiple or inconsistent superblocks, or if one or more disks in the array have failed or are too damaged to rebuild.
How can I fix the RAID auto-build error after rebooting?
To fix the auto-build error after a reboot, try running “mdadm --assemble --scan,” check the RAID configuration file, ensure all devices are functioning properly, and use “mdadm --examine” and “mdadm --zero-superblock” commands. If the problem persists, seek professional help.
Conclusion
To summarize, all of the data from Linux-based RAID can be recovered! Follow the steps discussed above carefully using mdadm, a Linux command utility. And if you want a more convenient way of recovering, install a third-party RAID recovery software like Wondershare Recoverit Linux Recovery and see its wonders!


