

 TL;DR:
The "Could not mount Disk2s2 after erase" error on macOS indicates a corrupted partition map or incompatible file system, which can usually be resolved by re-erasing the disk with correct formatting parameters or forcing a command-line mount.
● To rebuild the drive's structure, open Disk Utility and re-erase the disk, ensuring the format is strictly set to APFS (for SSDs) or Mac OS Extended (Journaled) (for HDDs) alongside a GUID Partition Map scheme.
● If Disk Utility fails to reconnect the drive, bypass the interface by opening Terminal, locating the drive identifier via `diskutil list`, and executing the `diskutil mountDisk /dev/disk2s2` command.
● Because macOS cannot natively read unmounted volumes, you must use a third-party tool like Wondershare Recoverit to extract any trapped files before attempting further formats that could cause permanent data loss.
Ask AI for a summary
 ChatGPT
 Perplexity
 Gemini
 Claude
 Grok
Grok
When you erase a drive on your Mac using Disk Utility, it should mount again after the process. But sometimes, things do not go as expected. You may see a message that says: Could not mount Disk2s2 after erase. This message means that macOS tried to remount the disk but failed. The drive stays invisible or grayed out, leaving you unable to open or use it.
Fortunately, the error is fixable. With a few simple steps, you can get your drive working again without much trouble. This guide explains the common causes, several proven fixes, and a reliable way to recover lost data if your drive refuses to mount after erasing.
Try Recoverit to Recover Lost Data
![]() Security Verified. Over 7,302,189 people have downloaded it.
Security Verified. Over 7,302,189 people have downloaded it.
Table of Contents
Common Causes: Why Disk2s2 Fails to Mount?
When macOS displays “Could not mount Disk2s2,” it simply means that it could not access the drive’s volume. This could be due to technical, hardware, or even small procedural errors. Understanding the cause helps prevent the same issue in the future.
Possible Reasons
- Wrong File System Format If the disk was formatted with the wrong file system, macOS might not recognize it. For example, a Windows NTFS drive may show “Could not mount Disk2s2” when connected to a Mac without proper drivers. Always choose APFS or Mac OS Extended when formatting drives for macOS use.
- Disk Utility Malfunction Disk Utility sometimes crashes or hangs during the erase process. When that happens, it may fail to properly write or confirm the file system, causing a “Could not mount Disk 2s2” error afterward.
- Corrupted Partition Table Every disk has a partition map that tells the system where volumes start and end. If that table is damaged, the drive may remain unmounted even if the erase was successful.
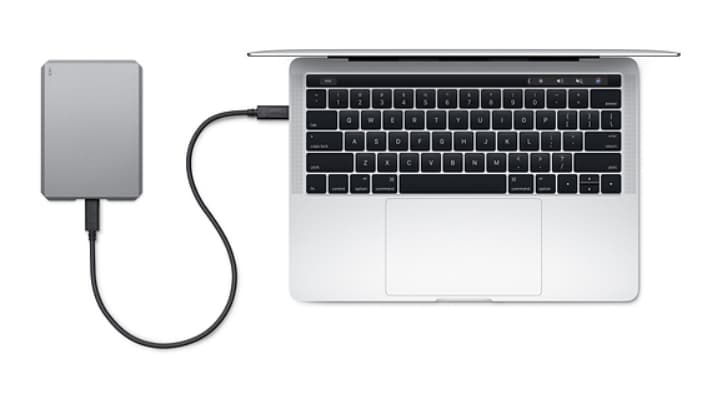
- Faulty USB Cable or Port A simple hardware fault can block the data connection between your Mac and the disk. Loose or damaged cables can make the system believe the disk is unreadable.
How to Fix “Could not Mount Disk2s2 after Erase”?
When faced with “Could not mount Disk2s2 after erase,” stay calm. The error does not always mean your data or drive is permanently damaged. The fixes below cover everything from simple restarts to command-line mounting.
Fix 1: Restart Your Mac
Restarting your computer may seem basic, but it resets several internal processes that handle disks. It also clears cache files and reloads disk drivers, which sometimes resolves the mounting issue.
If your system was under heavy use or the Disk Utility froze mid-process, a restart gives macOS a clean start to re-establish drive communication.
How to restart mac to reconnect disk:
Step 1: Disconnect the problem disk and shut down your Mac completely.
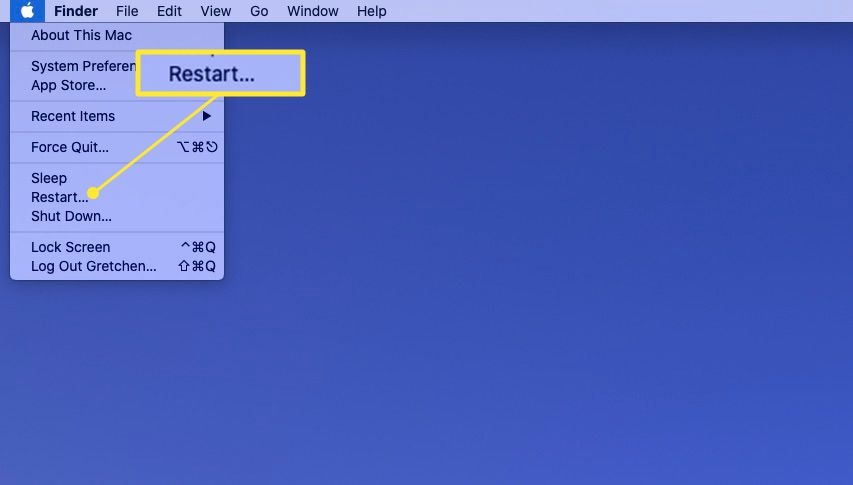
Step 2: Wait a few seconds, power it back on, then reconnect the drive and check if it mounts.
If the drive appears, the issue was likely temporary. If not, move on to the next method.
Fix 2: Run First Aid in Disk Utility
First Aid is a built-in repair tool designed to fix logical issues in storage devices. It can detect and correct directory errors, invalid file permissions, and corrupted partition maps.
Running it can resolve many cases of “Could not mount Disk2s2” without erasing your data.
How to run first aid in disk utility
Step 1: Open Disk Utility (Applications > Utilities).
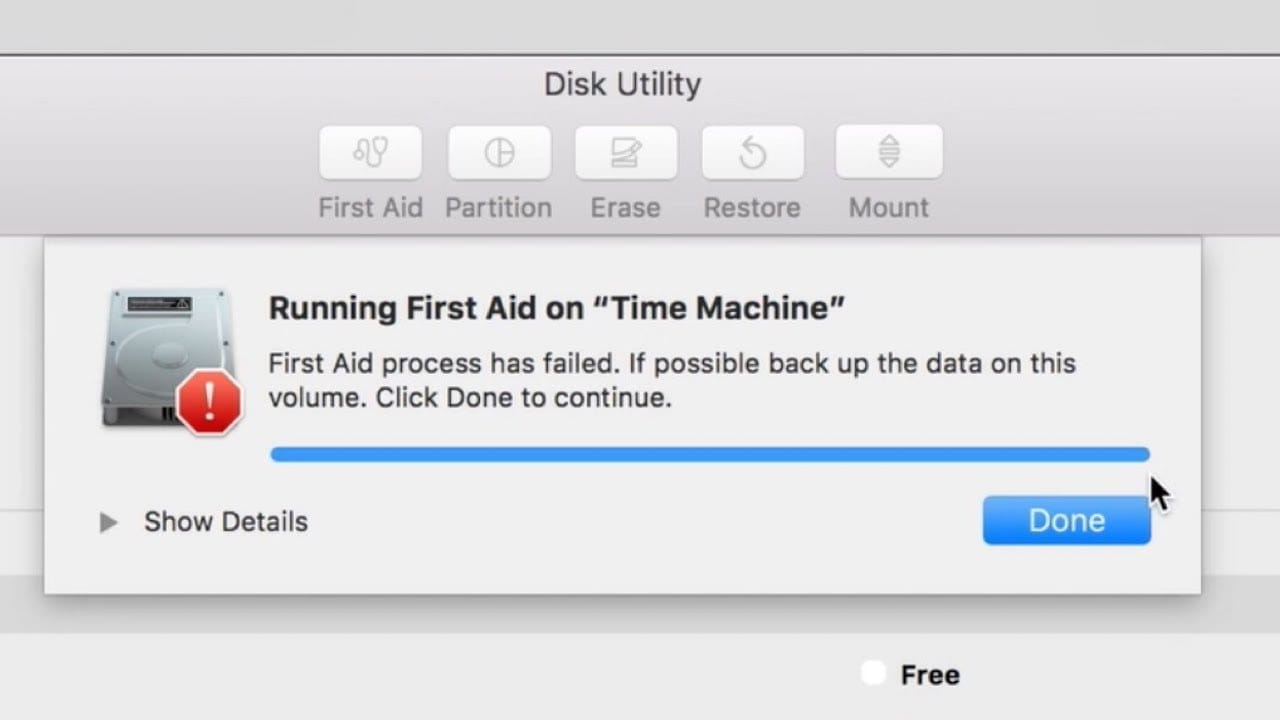
Step 2: Select the affected drive from the sidebar and click First Aid. Choose Run to begin the repair.
Once finished, try mounting the disk again manually by clicking Mount at the top of the window. If the error persists, go to the next fix.
Fix 3: Erase Again with Correct Settings
Sometimes, the format you chose during the first erase was incorrect or incompatible. Re-erasing the disk using proper settings can rebuild the partition map and file system.
When macOS cannot interpret the previous format, you might see “Could not mount Disk2s2 after erase.” Erasing it again ensures that the disk structure is rewritten correctly.
How to Erase Again with Correct Settings:
Step 1: Open Disk Utility again and select your disk.

Step 2: Click Erase, choose APFS (for SSDs) or Mac OS Extended (Journaled) (for HDDs), and make sure the Scheme is GUID Partition Map. Then click Erase.
After the process, the disk should automatically mount. If not, use the “Mount” button manually or continue with the next fix.
Fix 4: Try Mounting from Terminal
When Disk Utility fails to mount the disk, you can use the Terminal app for direct command-line control. Terminal communicates with the system’s disk management tools and may succeed where Disk Utility cannot.
This method helps bypass interface bugs and provides clearer error messages. It’s a reliable option for advanced users who want more control.
How to Try Mounting from Terminal:
Step 1: Open Terminal (Applications > Utilities). Type diskutil list and press Enter to view all disks.
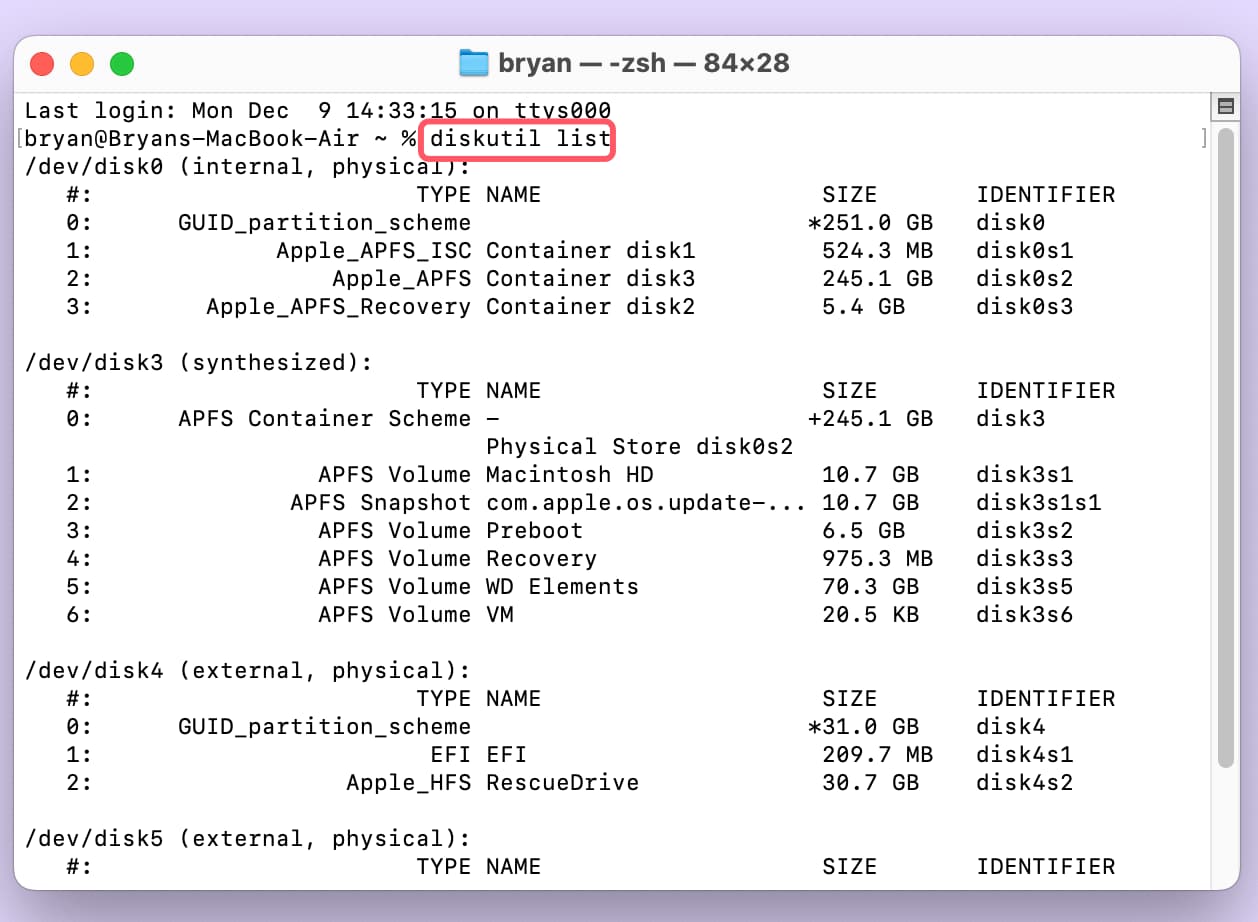
Step 2: Find your disk identifier (for example, /dev/disk2s2). Then type diskutil mountDisk /dev/disk2s2 and hit Enter.
If you see “Volume mounted successfully,” the drive should now appear in Finder. If Terminal also fails, the problem might be physical or cable-related.
Fix 5: Use a Different USB Port or Cable
Hardware issues are surprisingly common. A bad connection or insufficient power supply can make your Mac think the disk is unreadable.
When “Could not mount external hard drive Mac” appears, testing another port or cable often solves the issue instantly. Always connect directly to your Mac rather than through a hub, as hubs may cause interference.
How to Use a Different USB Port or Cable to reconnect disk:
Step 1: Unplug the disk and attach it to another port on your Mac.
Step 2: If the drive still does not appear, try a different cable, especially if the original one is old or bent.
If the drive works with a new cable, your original setup was the culprit. If not, your disk might have internal damage that requires recovery software.
Lost Data on Mac Due to Disk Mount Issues? Use Recoverit
If your drive was erased or failed to mount and your files disappeared, do not panic. You can still recover lost data from unmounted drives. macOS alone cannot access such disks, but specialized tools can. One of the most trusted programs for this purpose is Recoverit by Wondershare.
Recoverit is designed to handle errors like “Could not mount Disk2s2” or “Could not mount disk on Mac.” It can restore deleted or lost files even after formatting or partition loss. The software works on both internal and external drives, SD cards, and USBs.
Recoverit uses advanced scanning algorithms that search deep within the drive to locate recoverable files. It is safe to use, lightweight, and compatible with the latest macOS versions.
Key Features
- Restores data from unmounted or formatted disks
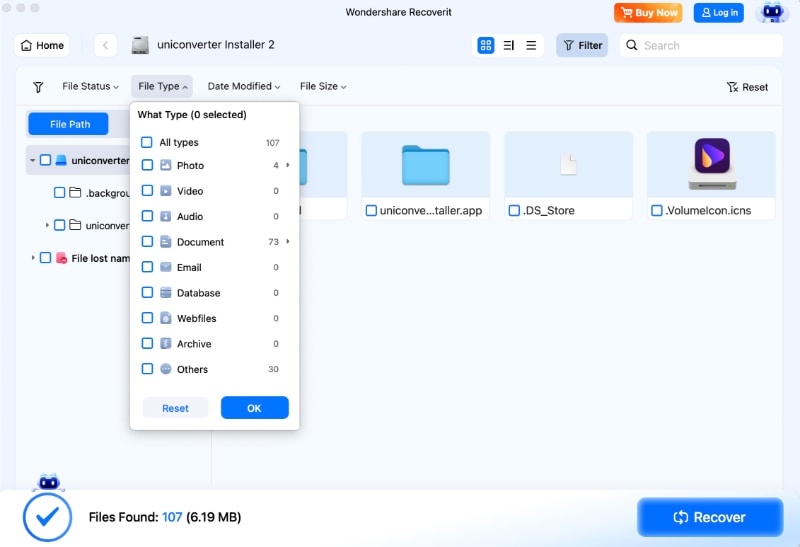
- Supports all file systems (APFS, HFS+, exFAT, FAT, NTFS)
- Offers quick and deep scan options
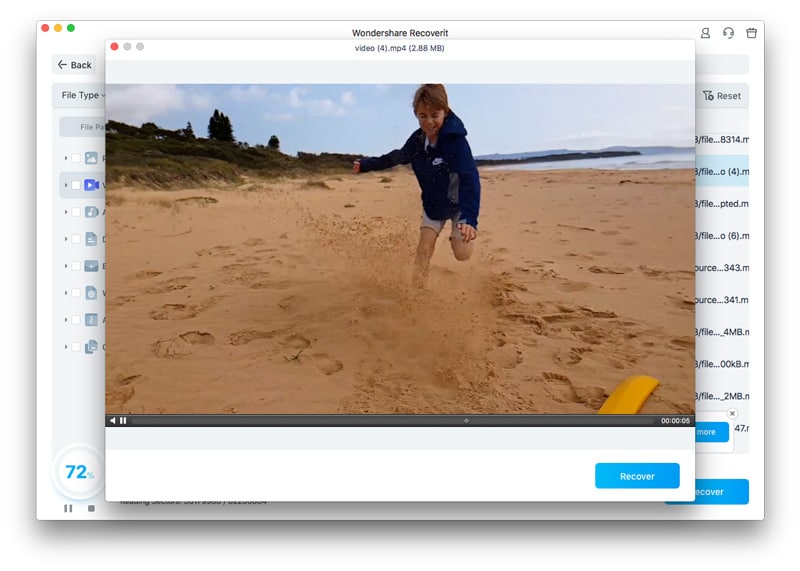
- Provides a real-time preview before recovery
- Works on SSDs, HDDs, USB drives, and SD cards
- Maintains original file names and folder structure
Recoverit helps users who see “Could not mount Disk2s2 after erase” regain access to critical data before reformatting or replacing their disk.
Steps to Recover Data Using Recoverit on Mac
Step 1: Download Recoverit and install it. Open the program and connect the unmounted drive to your Mac.

Step 2: From the main screen, choose the unmounted disk that shows errors like “Could not mount disk” and click Start. The software will begin scanning for lost or hidden files.
Step 3: After the scan completes, preview the recovered files. Select what you want to restore and click Recover, saving them to a different, healthy drive.
How to Recover Deleted Pictures From Laptop?
This ensures your data is safe even if the original disk remains unmountable. Recoverit is a reliable way to protect important files and avoid permanent loss after disk issues.
Conclusion
The “Could not mount Disk2s2 after erase” problem on Mac can occur due to several issues—wrong formatting, damaged partitions, faulty cables, or small macOS bugs. Fortunately, there are straightforward solutions. Restarting your system, running First Aid, erasing again with correct settings, or mounting through Terminal can all help bring your drive back.
With the right tools and careful use, even complex errors like “Could not mount Disk2s2” or “Could not mount external hard drive Mac” can be resolved without losing your important data.
Try Recoverit to Recover Lost Data
![]() Security Verified. Over 7,302,189 people have downloaded it.
Security Verified. Over 7,302,189 people have downloaded it.
FAQs
-
Why does my Mac say “Could not mount Disk2s2 after erase”?
It usually happens when the erase process fails to write a proper file system or partition map. The drive structure becomes unreadable, and macOS cannot connect to it correctly. -
How can I fix “Could not mount disk on Mac”?
Start by restarting your Mac. Then try Disk Utility’s First Aid. If that fails, erase the disk again using APFS or Mac OS Extended and GUID Partition Map. If still unresolved, use Terminal commands or test another cable. -
Can I recover data if my drive shows “Could not mount Disk 2s2”?
Yes, recovery tools like Recoverit can scan unmounted or erased disks to restore files safely. Always recover data before attempting risky operations like formatting again.


