

 TL;DR:
To fix macOS Tahoe installation failures, such as freezing while upgrading from Sequoia 15.7 to Tahoe 26.0, you must first verify your Mac hardware is compatible and clear 40 to 60 GB of storage space.
● macOS Tahoe is restricted to Apple Silicon (M1-M4) Macs and select 2019 or newer Intel models, requiring at least 40 to 60 GB of free disk space to handle the installer, temporary files, and setup buffers without crashing.
● If the standard Software Update interface repeatedly fails, you can force a clean installation package download by entering the command softwareupdate --fetch-full-installer --full-installer-version 26.0.0 into Terminal.
● For severe crashes that corrupt the upgrade path, boot into macOS Recovery by holding Command + R to reinstall the OS, or use Wondershare Recoverit to scan the drive and retrieve inaccessible files lost during the failed attempt.
Ask AI for a summary
 ChatGPT
 Perplexity
 Gemini
 Claude
 Grok
Grok
MacOS Tahoe introduces better security features that protect sensitive files from attack. Failure to update your Mac exposes it, slows down your Mac, and makes it unable to work with key applications. Many users face the error message cannot update to macOS Tahoe during installation. This problem can be observed due to a lack of storage space, instability of the internet, or old system settings.
Failing updates can interrupt important work and stop access to new features. Understanding the cause and applying simple fixes can quickly resolve the update issue. By using reliable methods, you can fix errors and complete updates without trouble.
Try Recoverit to Perform MacOS Tahoe Data Recovery
 Security Verified. 3,591,664 people have downloaded it.
In this article

Part 1. Common Reasons | Cannot Update to macOS Tahoe
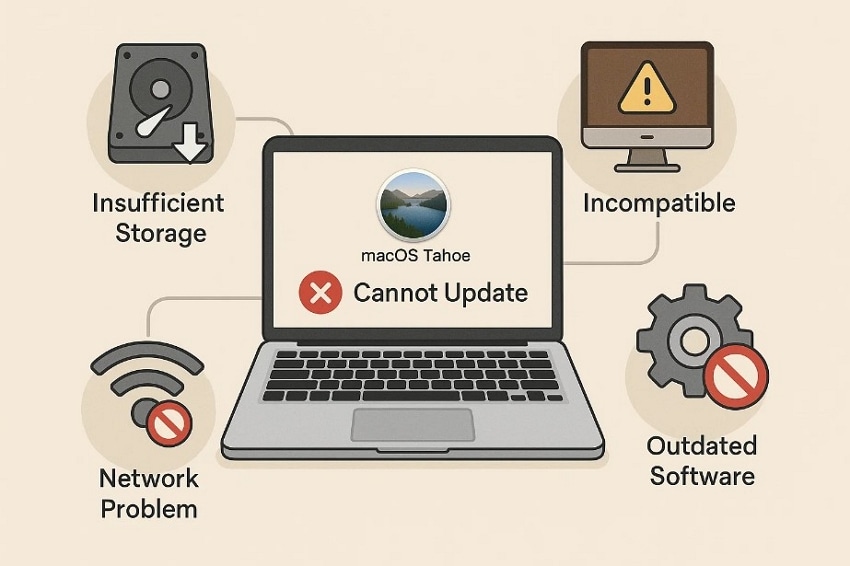
In case the macos update failed, it may help to understand the following general causes that may lead to solutions:
- Hardware Incompatibility: macOS Tahoe does not support older Macs, which were released prior to 2019. Apple restricts updates to newer hardware to increase the speed, stability, and general security of the hardware.
- Poor Storage Space: macOS Tahoe needs at least 10GB for the installer to work. For smooth installation, Apple recommends 20-25 GB of free disk storage. Without enough space, updates fail, showing an error message or stopping halfway.
- Apple Server Issues: A stable internet connection is required to download and verify macOS Tahoe updates. Weak connections or issues with the Apple server may cause downloads to stall. Updates might freeze during the preparation or verification process repeatedly.
- System Bugs: Glitches in NVRAM, SMC, or old apps may block updates. Third-party tools or outdated system extensions can interrupt and corrupt the upgrade process. Outdated system extensions often trigger errors that block successful macOS upgrades.
- Driver Problems: Certain new Macs experience failures linked to firmware and driver bugs. The Apple Neural Engine driver sometimes prevents Tahoe validation during setup. These device-specific errors stop installation, forcing the Mac to remain outdated.
More related: What to Do When macOS Installation Couldn't Be Completed.
Mac Keeps Crashing After Tahoe Update: How to Fix.
Part 2. Cannot Update to macOS Tahoe? Here’s How to Fix It
Now that you know the reasons, let’s explore the methods to fix the macos update installation failed issue:
1. Check Mac Compatibility
Checking Mac compatibility is essential when facing the cannot update to macOS Tahoe issue. This will verify that your Mac can support the new system according to the minimum requirements of Apple. To begin with, click on the Apple icon and choose “About this Mac” to see your model. Then you can compare with Apple’s list below that supports macOS Tahoe update:
| Mac Model | Supported Years | Chip Support |
|---|---|---|
| MacBook Air | 2020 and later | Apple Silicon (M1, M2, M3, M4) |
| MacBook Pro | 2019 and later | Intel (2019-2020), Apple Silicon (M1-M4) |
| iMac | 2020 and later | Intel (2020), Apple Silicon (M1-M4) |
| Mac mini | 2020 and later | Apple Silicon (M1-M4) |
| Mac Studio | 2022 and later | Apple Silicon (M1-M4) |
| Mac Pro | 2019 and later | Intel (2019), Apple Silicon (M2 Ultra) |
2. Free Up Sufficient Storage Space
The installer, temporary files, and post-installation buffer together need 40-60 GB of free space. In case this space is not provided, updates will probably crash in between or fail to start at all. Deleting useless applications and junk files is one of the steps that create the necessary space to upgrade with ease. Follow the simple guide below to fix the macos update failed issue while clearing storage space on your Mac:
- First, click the “Apple” icon, go to “About this Mac” to select the “General > Storage > Storage Settings” and review available space.
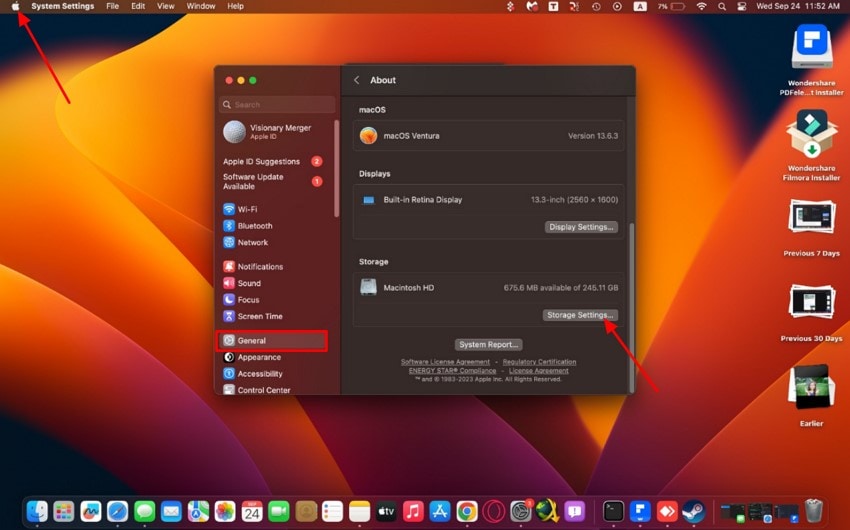
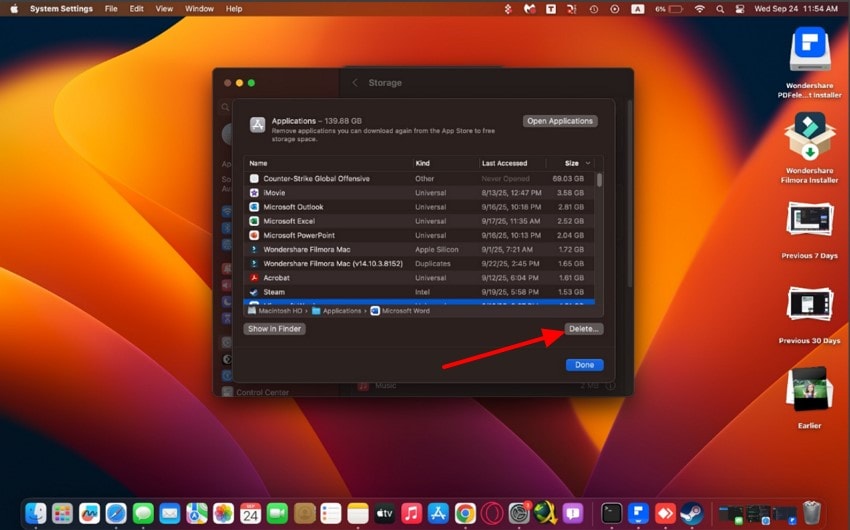
- Navigate to the “Applications” section and delete large files from Downloads, Movies, Documents, and uninstall unused apps by pressing the “Delete” button.
3. Restart and Try Again
Restarting the Mac is a reliable fix if you cannot update to macOS Tahoe. It clears memory leaks, temporary glitches, and stalled installer files. By refreshing cached processes, restarting ensures the update runs cleanly without the interface. In case you are inquiring how to do it, then the following are the steps to follow:
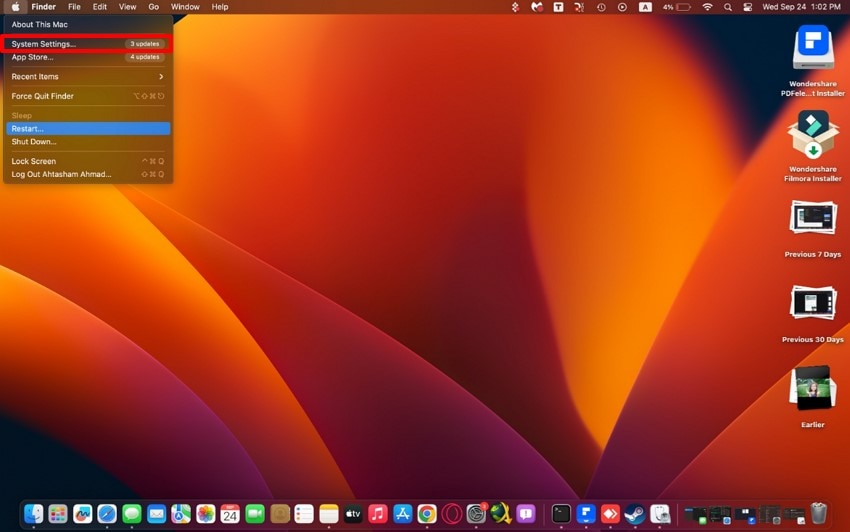
- To begin, click the “Apple Menu” and select the “Restart” option to refresh memory and cached update files.

- After reboot, go to “System Settings> General> Software Update” and retry installation.
4. Check Internet Connection and Apple’s System Status
The installer can also fail to download due to a poor or unstable connection, and Apple servers can also go offline. Both checks are useful in determining whether the issue is on your local network or in the update system of Apple. You should make sure that you have Wi-Fi turned on and that everything works. Testing on Safari or using Speedtest.net verifies stability and speed.
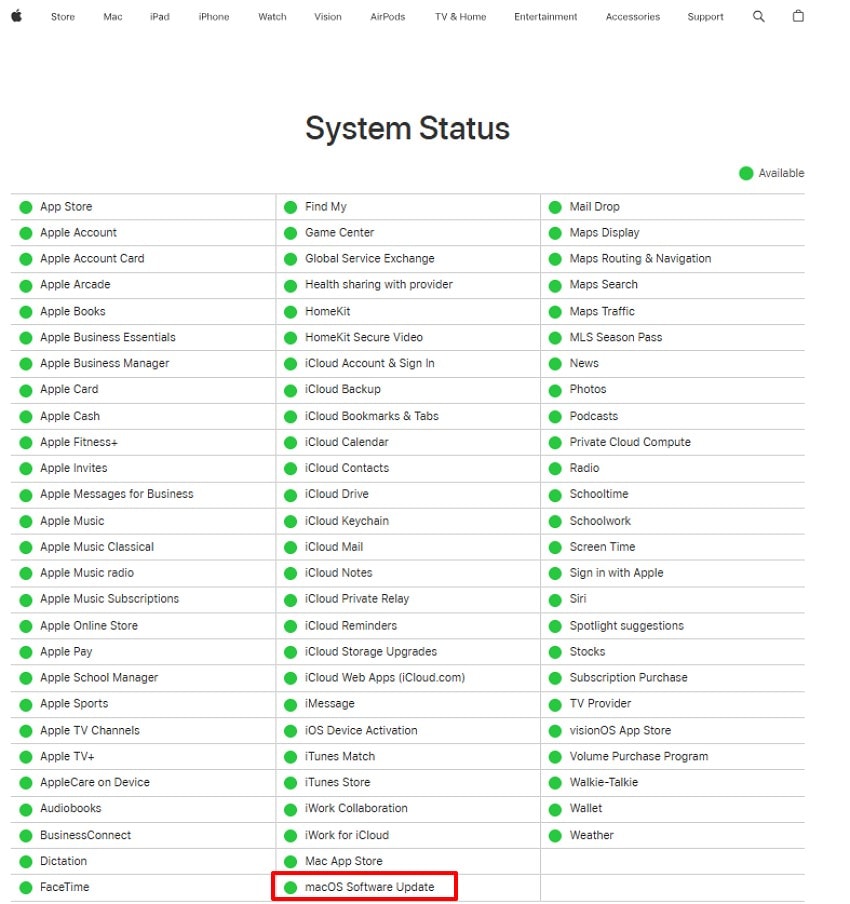
To check Apple servers, visit the official Apple System Status page. If it shows green for macOS Software Update, the servers are fine; yellow and red indicators confirm outages. Identifying this saves time troubleshooting unnecessary device issues, so checking internet connectivity and Apple’s System Status is an essential fix for the macos update installation failed issue.
5. Update Your Current macOS First
Outdated systems sometimes block the upgrade, stopping it from appearing or installing correctly. By applying the latest patches, bug fixes, and required system files, you reduce errors. It prevents incompatibility and ensures your Mac is fully ready to handle the Tahoe upgrade. To know how you can update your current macOS first to fix the cannot update to macOS Tahoe issue, follow the steps below:
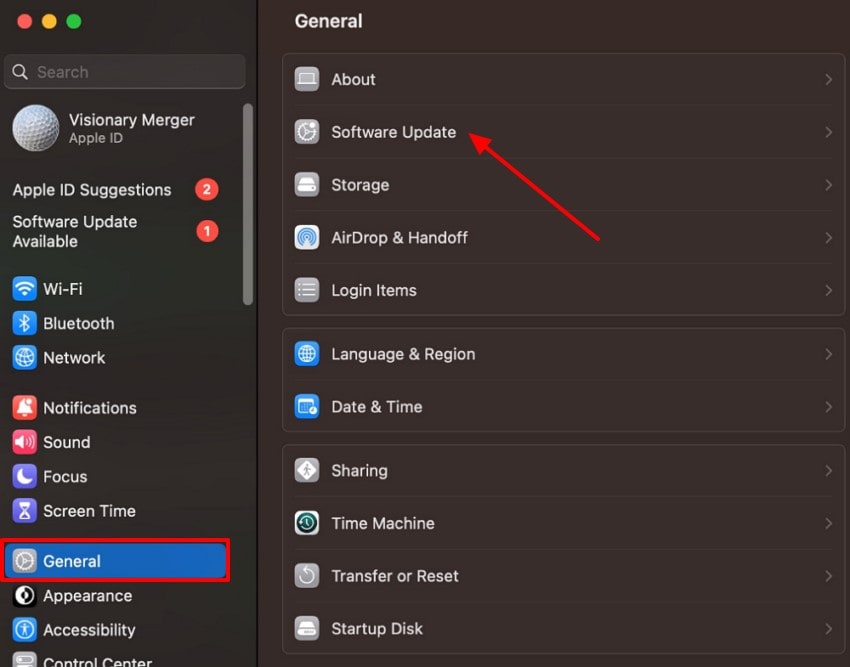
- Firstly, click on the “Apple Menu” in the top-left corner of the screen to select “System Settings.”
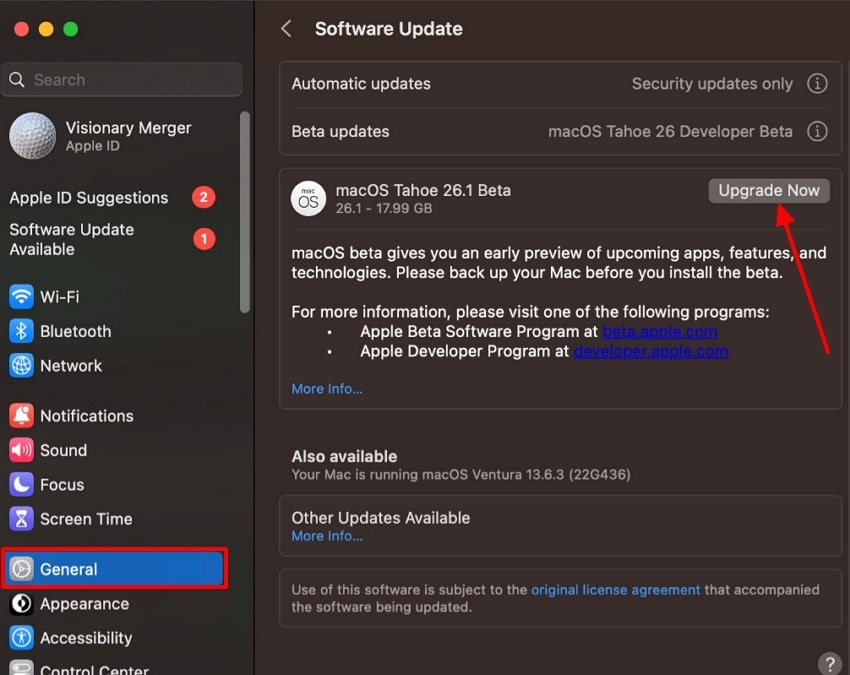
- Next, select “General” and click on “Software Update” to check if updates are available. If updates appear, press the “Upgrade Now” button to update.
6. Use Safe Mode for Update
To resolve the issues that may block the upgrade process, one can update in Safe Mode. Your Mac loads only the necessary system files and also deactivates third-party software in this mode. This clean environment minimizes the conflicts, hence simplifying the work of the updater.
For Intel Macs
Follow the steps below to use safe mode for updates on Intel-based Macs:
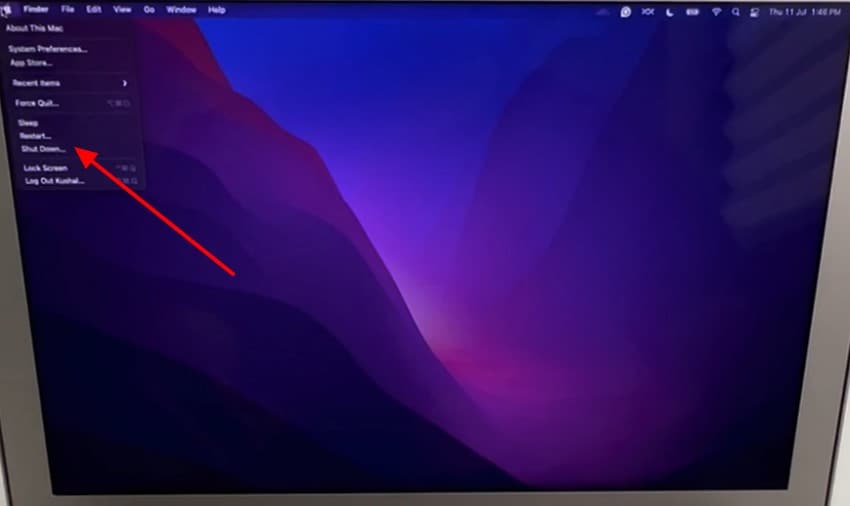
- Firstly, go to “Apple Menu” and select the “Shut Down” button, or you can press and hold the “Power” button to force a shutdown.
- After that, press and hold the “Shift” key immediately when the Apple logo appears. Release the “Shift” key at the login screen and log in to macOS, and you will see “Safe Boot” in the menu bar.

For Apple Silicon Macs
If you are using Apple Silicon Macs, you can use Safe Mode for the update with the guide below:
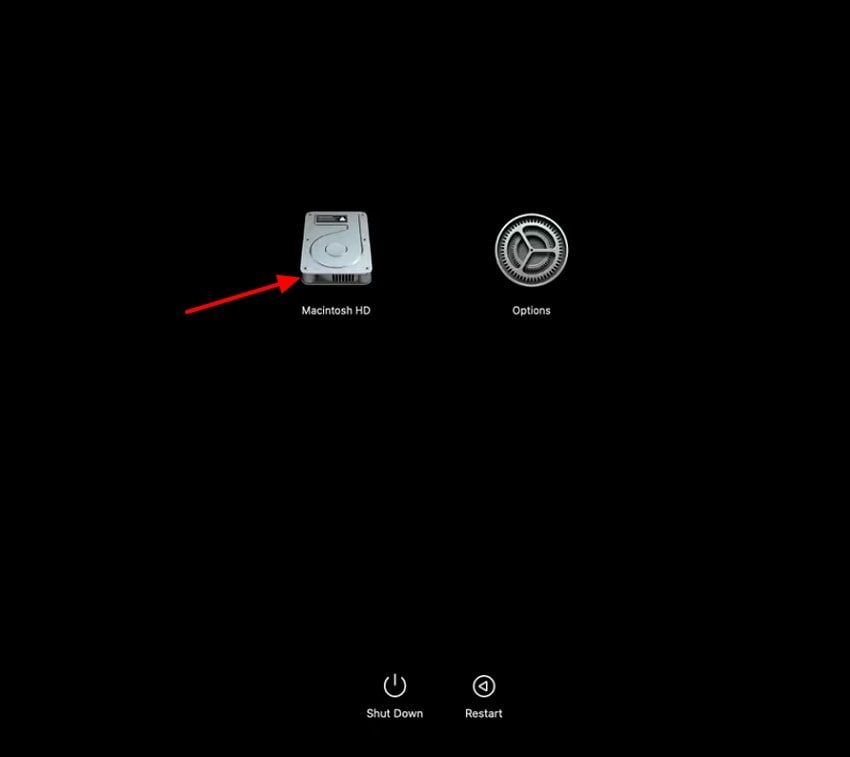
- Here, press and hold the “Power” button until you see the start-up options, and choose the “Start-up Disk” option among them.
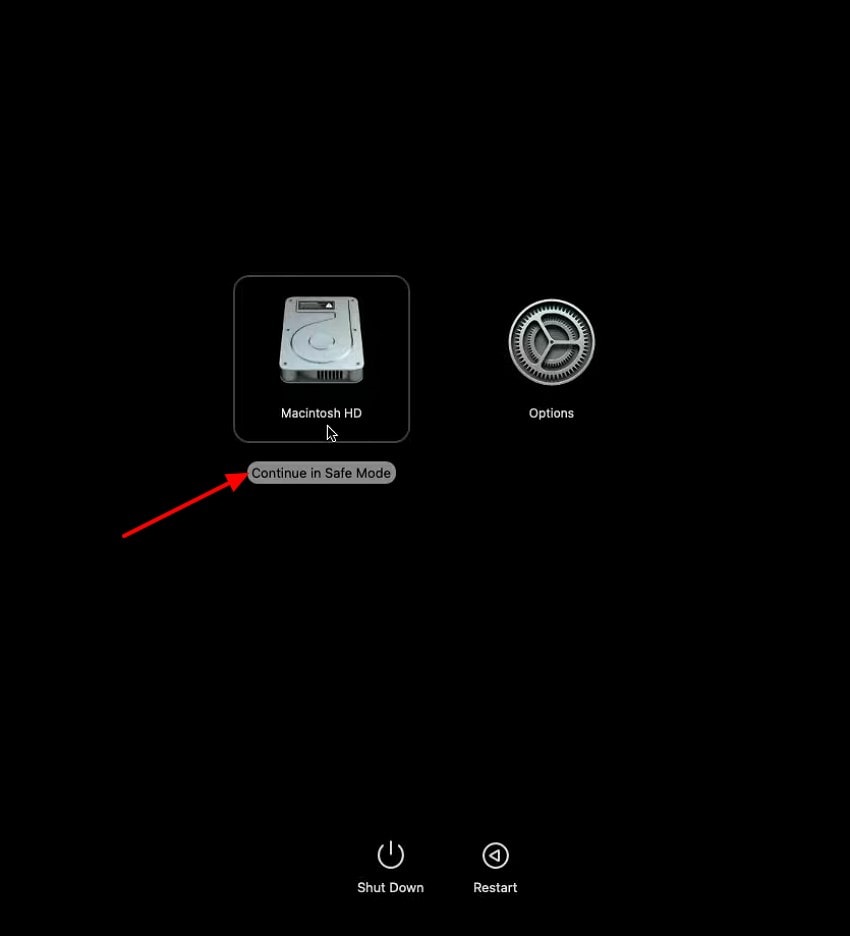
- The next step is to press and hold the “Shift” key and click “Continue in Safe Mode.” Release the “Shift” key at the login screen and log in.
7. Install from macOS Recovery
A good remedy in case of failure of the normal upgrade is installing via macOS Recovery. This procedure involves the download and installation of the new standard-compatible version of macOS through the built-in recovery system of your Mac. It helps when the macOS update failed through Software Update, ensuring a clean installation by following the simple steps:
- Restart your Mac by holding “Command (⌘) + R” until the Apple logo appears.

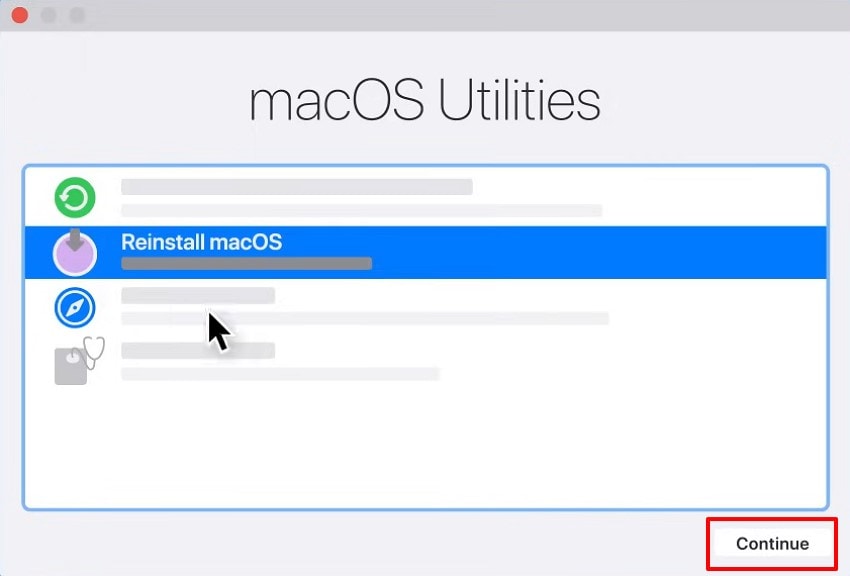
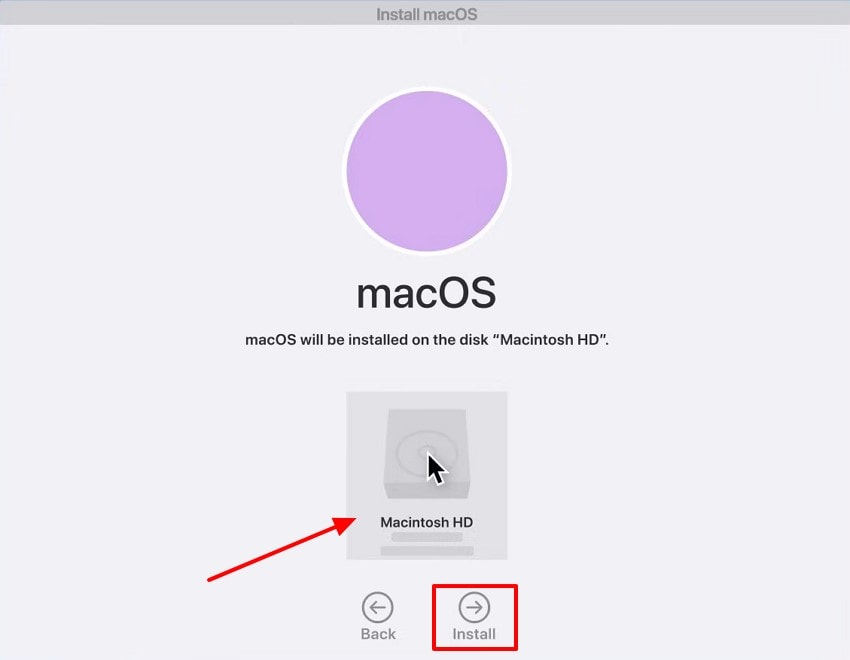
- When your Mac turns on, select “Reinstall macOS” in the “macOS Utilities” window and click on the “Continue” option.
- Next, select the “Disk” you want to install and click on the “Install” option to continue the installation process.
8. Download a Fresh Installer via Terminal
A clean installer that can be downloaded using Terminal is very useful to solve macos update failed issues. This operation downloads the official package directly from the servers, so no corrupt or deleted files will disrupt the installation. Here is how you can run the Terminal command for a fresh installer.
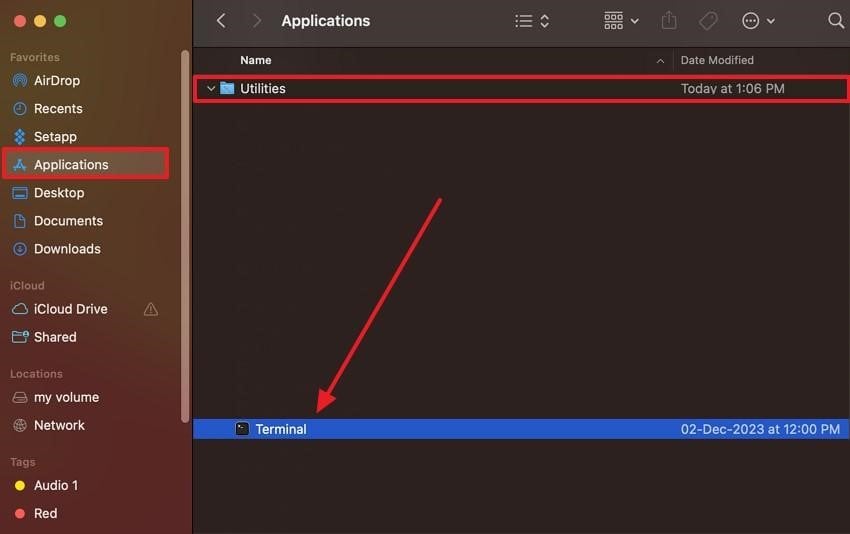
- Access the “Applications” option in Mac, expand the “Utilities” folder, and choose the “Terminal” option.
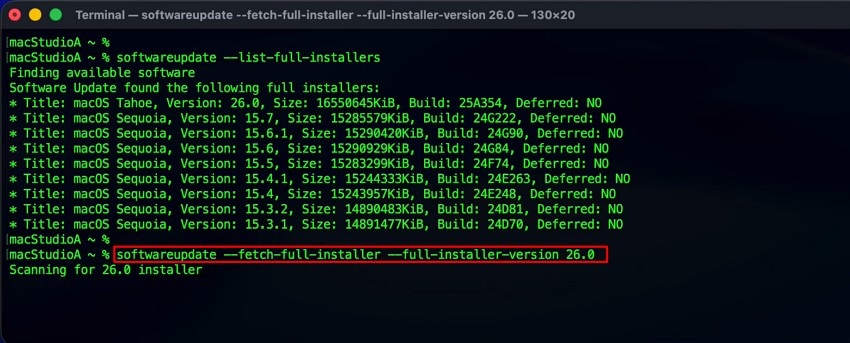
- When the “Terminal” window displays, enter your command “softwareupdate --fetch-full-installer --full-installer-version 26.0.0” right next to “macStudio ~ %”. The command will download the full installer and place the macOS Tahoe.app in your Application folder.
Pro Tip. Recover Lost Data After a Failed macOS Update with Recoverit
When a macos update failed, important files may vanish or become inaccessible. Recoverit by Wondershare is designed to handle these situations with precision. It scans your Mac deeply, locating lost photos, videos, and documents caused by failed installation, and gives users a reliable way to retrieve their missing data. It simplifies recovery with a clean interface and guided process that anyone can follow.
After a failed update, it rebuilds broken file paths and restores data without damaging original content. Whether it is personal memories or work projects, Recoverit ensures your files come back intact, making it an essential tool for tackling data losses.
Key Features
- Deep Scan Technology: Recovers files due to the macOS update failing by scanning every storage sector thoroughly.
- Multiple File Support: Restores over 1000 file formats, including photos, videos, documents, and application data.
- Safe and Reliable Recovery: Allow users to retrieve files without overwriting or damaging original content, ensuring data integrity remains safe.
Step-by-Step Guide to Recover Lost Data After a Failed macOS Update with Recoverit
Follow these steps to restore your files using Recoverit after a failed update:
- Launch Recoverit on Your Mac
After accessing the tool, navigate to the “Hard Drive and Location” section and select Drive Location.

- Scan the Drive for Lost Files
Next, click on the “Start Scan” and once it is done, all the lost files will appear under the “File Lost Name” folder.

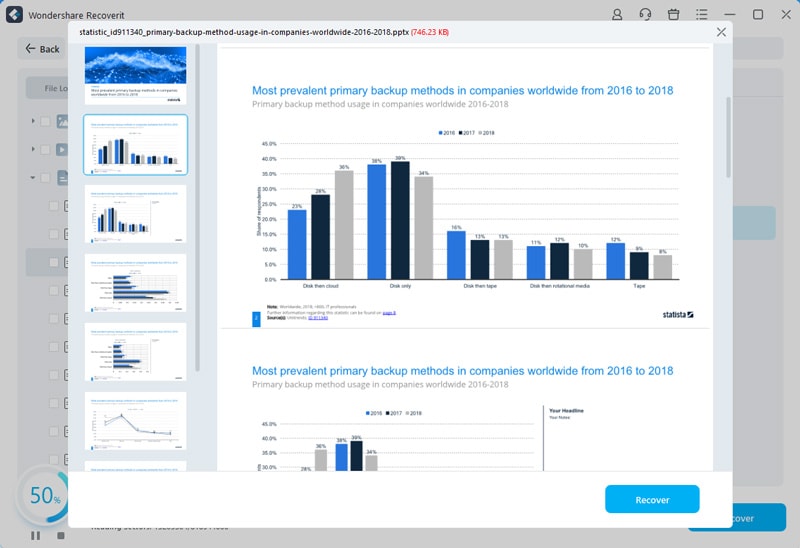
- Preview and Recover Your Data
Finally, preview the scanned results, choose the files you need, and click “Recover” to restore them safely.
Conclusion
To sum up, many users face issues when the macos update installation failed during installation attempts. In this article, we explained common reasons and shared effective troubleshooting methods. These solutions address compatibility, storage, internet stability, and other possible software-related conflicts. For lost files after failures, try Recoverit as it offers secure and reliable data recovery.
FAQ
1. Why does the macOS update fail error appear during installation?
The errors of the macOS update frequently occur due to a lack of space, internet issues, or obsolete system files. These problems are normally addressed by checking compatibility and making sure that there is sufficient free space.2. How much storage is required for macOS Tahoe installation?
The macOS Tahoe usually needs a safe installation of 40-60 GB of free space. This consists of the installer, temporary setup files, and a buffer to prevent mid-process failures.3. Can Safe Mode help when the macOS update installation failed?
Yes, the Safe Mode can avoid conflicts when loading necessary system files only. It removes third-party applications, wipes down caches, and frames a cleaner environment to update.4. What if I lose files after a macOS update fails?
In case of a failed update, which causes the disappearance of important files, use Recoverit. It searches your Mac's hard disk, locates any missing data, and recovers it without rewriting.


