

 TL;DR:
iPad Recovery Mode is a built-in system repair state that connects an unresponsive device to a computer to reinstall iPadOS and fix severe software failures like boot loops, failed updates, or a stuck Apple logo.
● For iPads with a Home button, hold the Home button while connecting to a computer; for Face ID models, quickly press Volume Up, then Volume Down, and hold the Top button until the recovery screen appears.
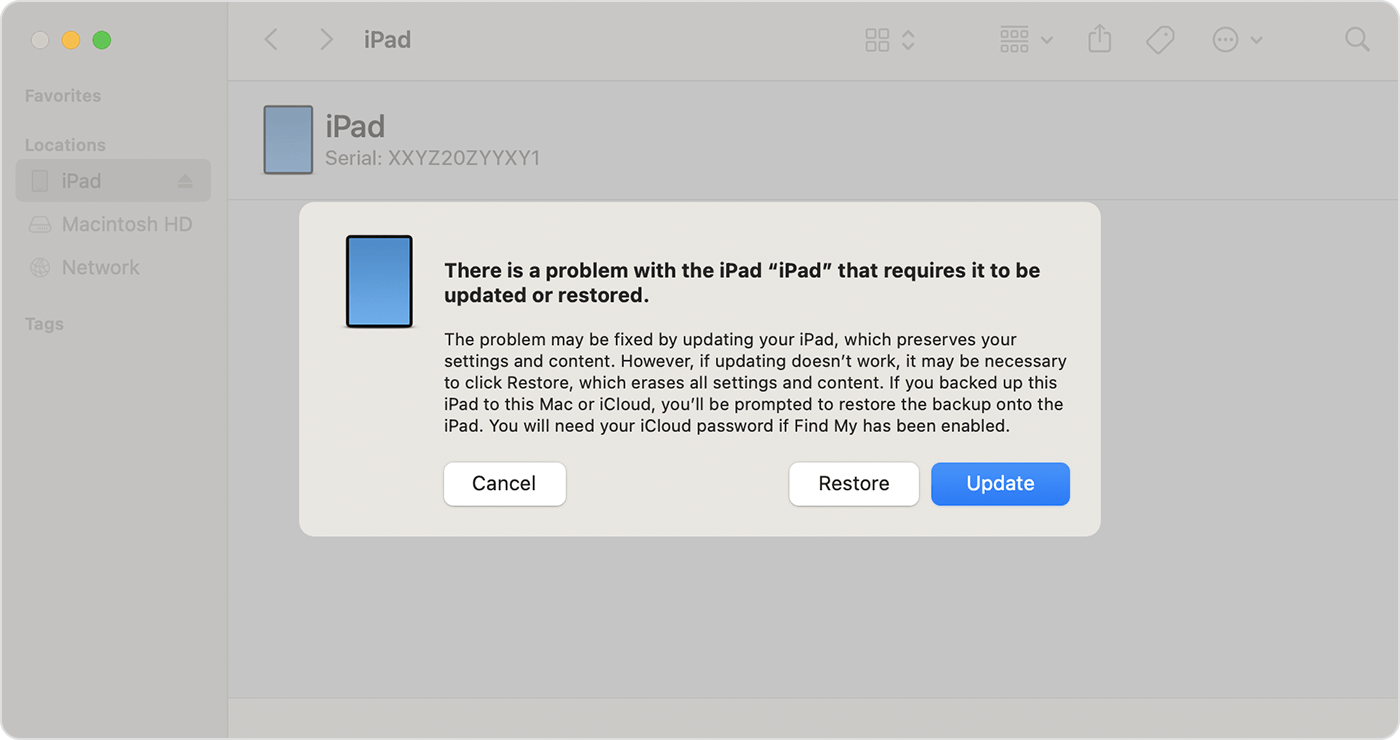
● Entering recovery mode does not erase personal data by itself, but choosing the Restore option in iTunes or Finder will permanently delete all content and settings.
● Before starting, ensure the iPad has at least 50% battery, use a certified Apple USB cable to prevent system damage from sudden disconnections, and update iTunes or macOS to the latest version for proper device detection.
Ask AI for a summary
 ChatGPT
 Perplexity
 Gemini
 Claude
 Grok
Grok
iPads are reliable devices. Yet, like any digital device, they can face serious software issues. Your iPad may freeze on the Apple logo. It may refuse to update. It may show a black screen. In such cases, normal restart options may not work. This is when many users start searching for how to put iPad in recovery mode. Recovery mode is a powerful built-in feature. It helps fix deep system problems. It allows your computer to detect the iPad and repair the system.
Many people feel worried when they hear about recovery mode. It sounds hard and risky. But it is actually a safe Apple feature. If you use it the right way, it can bring your device back, fix big problems, and help after a failed update.
In this guide, you will learn what is iPad recovery mode, how do you put an iPad in recovery mode, when to use iPad recovery mode, and what can iPad recovery mode do. You will also learn how to recover lost data when enabling iPad recovery mode if something goes wrong.
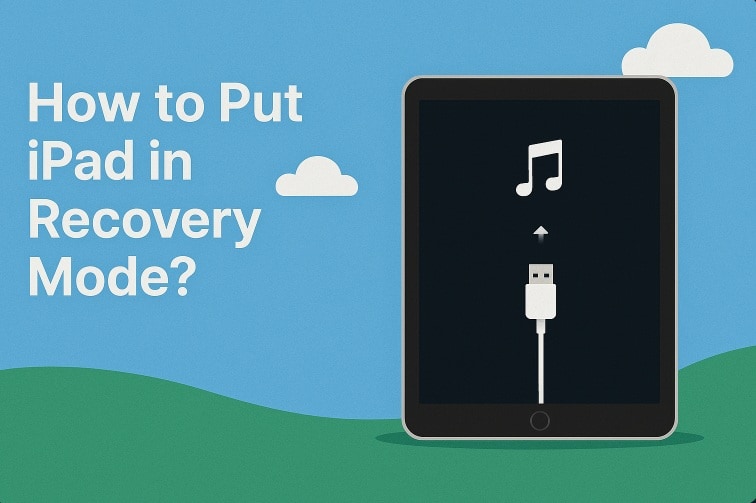
Table of Contents
Part 1: What is iPad Recovery Mode?
If you are wondering what is iPad recovery mode, think of it as a repair state. It is a special system mode created by Apple. In this state, your iPad connects to a computer. It allows iTunes or Finder to update or restore the system. It does not fully load iPadOS. Instead, it loads only the basic files needed for repair.
When users ask what can iPad recovery mode do, the answer is simple. It can reinstall iPadOS. It can remove system errors. It can fix boot loop problems. It can recover the device after failed updates. Learning how to put iPad on recovery mode is helpful when normal restarts fail.
Benefits of iPad Recovery Mode
- Fixes stuck Apple logo issues
- Repairs failed iOS updates
- Solves boot loop errors
- Restores an unresponsive iPad
- Removes corrupted system files
- Helps prepare the device for a factory reset
- Can help before selling the device
- Supports clean software reinstall
Understanding what iPad recovery mode is helps you stay calm during device problems. It is not harmful if used properly.
Part 2: Why Put an iPad in Recovery Mode?
There are many cases when to use iPad recovery mode becomes important. Sometimes the device behaves strangely. Other times it stops responding fully. Normal restart options do not help in these cases.
Most people only look up how to put an iPad in recovery mode when the problem gets serious. That is normal. But it is better to understand the reasons early. Knowing what recovery mode can do helps you decide if it is the right fix.
Top Reasons to Use Recovery Mode
- iPad stuck on Apple logo The device starts but does not fully load.
- iPad frozen screen The screen does not respond to touch.
- Failed software update Update stops midway, and the device crashes.
- Boot loop problem iPad keeps restarting again and again.
- iPad not turning on Black screen even after charging.
- Forgot passcode and locked device Recovery mode allows restoration.
- System crash after jailbreak Recovery mode helps reinstall the system.
- Serious performance lag Clean restore improves stability.
These are common situations when to use iPad recovery mode. It is a troubleshooting method. It is not for small issues.
Part 3: Quick Methods to Try: Put iPad in Recovery Mode Easily
Now, let us learn how to put iPad in recovery mode. The steps depend on your iPad model. The button design is different in each version. Some models have a Home button. Others use Face ID. You can also use a computer.
Understanding how to put iPad on recovery mode properly reduces mistakes.
Method 1: Using Home Button Models
(iPad with Home button)
Older iPads have a Home button at the bottom. The steps are easy, but the timing is important. Follow each step closely. This section shows how to use recovery mode on classic iPad models.
Step 1:
Turn off your iPad. Press and hold the Top button. Slide to power off. Wait until the screen turns completely black.

Step 2:
Plug your iPad into your computer while holding the Home button. Keep holding it until a screen shows up with a picture of a cable pointing to a computer. That means your iPad is in recovery mode.
Your iPad is now in recovery mode.
Method 2: Using Face ID Models
(iPad without Home button)
Newer iPads do not have a Home button. They use volume buttons instead. The process is slightly different.
This method answers how to put iPad in recovery mode for modern models.
Step 1:
Press the Volume Up button quickly and let go. Do the same with the Volume Down button. After that, hold down the Top button until the screen changes.

Step 2:
Keep holding the Top button even after you see the Apple logo. Release it only when the recovery mode screen appears.
Your iPad is now in recovery state.
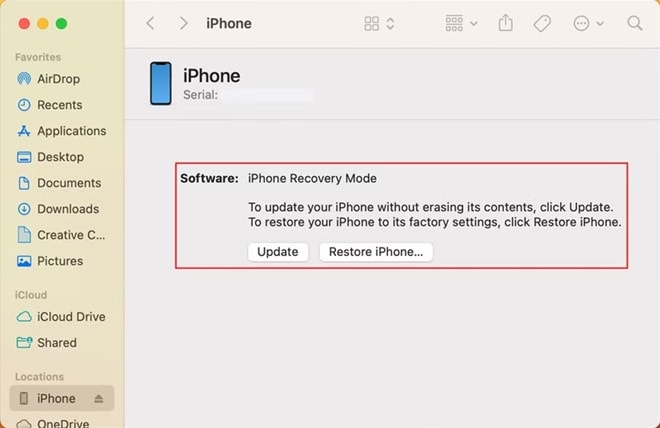
Method 3: Using iTunes or Finder on Mac or Windows
If button methods feel confusing, you can rely on iTunes or Finder. This method is helpful for beginners.
It also explains how to put an iPad in recovery mode using official Apple tools.
Step 1:
Install the latest version of iTunes on Windows. On Mac, open Finder. Connect your iPad using a USB cable.
Step 2:
Follow the button method for your model while connected. Once the recovery screen appears, the computer will show a message. It will ask if you want to update or restore. Choose carefully.
This method shows clearly how to put an iPad in recovery mode with computer help.
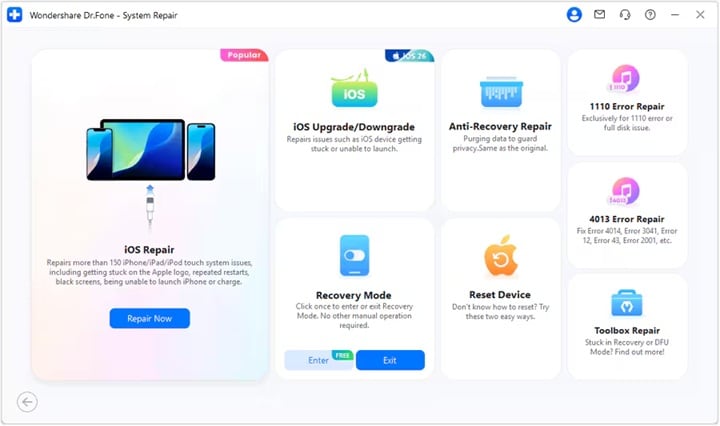
Method 4: Using Wondershare Dr.Fone – System Repair
If you do not want to press buttons manually, you can use a trusted third-party tool like Wondershare Dr.Fone: System Repair (iOS). This software is designed to fix iOS system problems. It can also help you enter recovery mode with a single click. This is useful if your buttons are not working properly or you feel unsure about the manual steps.
Wondershare Dr.Fone provides a clear interface. It guides you step by step on the screen. It supports many iPad models, including both Home button and Face ID devices. When users look for how to put iPad in recovery mode in a simple way, this tool offers an easier alternative.
Step 1:
Download and install Wondershare Dr.Fone – System Repair on your Windows PC or Mac. Open the program. Connect your iPad using a certified USB cable. From the main screen, select System Repair. Then choose the iOS option.

Step 2:
Select Recovery Mode from the available options. Follow the instructions shown on the screen. The tool will automatically guide your device into recovery mode without complicated button combinations.
Always download Wondershare Dr.Fone from its official website. This ensures safety and proper performance.
Part 4: Lost Data While Entering Recovery Mode? Recover Lost Data Easily Using Recoverit
Sometimes users feel anxious about losing their files. This concern is understandable. Recovery mode by itself does not remove your personal data. It only prepares the device for repair. However, if you choose the Restore option in iTunes or Finder, the system will erase all content and settings. That is when files such as photos, messages, videos, and documents may disappear. In such situations, many people begin searching for how to recover lost data when enabling iPad recovery mode because they want their important files back.
Recoverit is a trusted data recovery tool designed to handle this type of problem. It can scan storage deeply and locate deleted or missing files. It works with internal drives, backups, and even external storage devices. The program supports common file types like photos, videos, documents, audio files, and more. The layout is clear and simple. You do not need technical knowledge to use it. The step-by-step process makes recovery easier for beginners.
If you lost family photos, school files, work documents, or personal videos after restoring your device, this tool can make a real difference. It gives you a chance to recover valuable data instead of accepting permanent loss. This reduces the fear many users feel when learning how to put an iPad in recovery mode and worrying about possible data loss.
Why Use Recoverit?
- Simple interface
- Supports many file types
- Deep scan technology
- Works on Windows and Mac
- Quick preview before recovery
- High success recovery rate
How to Recover Lost Data
Step 1: Install Recoverit on your computer. Launch the program. Select the location where your lost data was stored.

Step 2: Click Scan. Wait for the deep scan to finish. You can preview the found files.

Step 3: Select the files you want. Click Recover. Save them to a safe location.

This solves the concern about how to recover lost data when enabling iPad recovery mode.
Part 5: Smart Tips Before You Begin
Before learning how to put an iPad in recovery mode, take a moment to prepare. Small steps can prevent stress later.
- Backup your iPad if possible Before entering recovery mode, create a full backup. You can use iCloud or a computer. This protects your photos, apps, and messages in case you need to restore the device.
- Charge the battery above 50 percent Make sure the battery level is at least half full. If the device turns off during the process, it may cause system errors.
- Use the original USB cable Always use the Apple cable that came with your iPad, or a certified one. Low-quality cables can disconnect suddenly and interrupt the restore process.
- Update iTunes or macOS Install the latest version of iTunes on Windows. On Mac, make sure macOS is updated. Older versions may fail to detect the iPad correctly.
- Do not disconnect during restore Once the process begins, keep the iPad connected. Disconnecting too early can damage system files and cause boot issues.
- Know your Apple ID password After restoring, you may need to enter your Apple ID details. Make sure you remember your password to avoid activation problems.
- Avoid interruptions Perform the process in a quiet place. Do not close your laptop or shut down the computer during the update or restore.
These tips help when deciding when to use iPad recovery mode.
Conclusion
Now you clearly understand how to put the iPad in recovery mode. You also learned what iPad recovery mode is and what it can do. It is a helpful repair option. It solves serious software problems. It restores device stability.
Always remember to use recovery mode only when needed. Know when to use iPad recovery mode wisely. If you face data loss, remember how to recover lost data when enabling iPad recovery mode using reliable tools. With careful steps, your iPad can return to normal safely.
FAQs
-
1. Does recovery mode erase data?
Recovery mode alone does not remove your personal data. It simply allows your computer to detect the iPad and repair the system. However, if you choose the Restore option instead of Update, the device will be erased and reset to factory settings. This means all apps, photos, messages, and settings will be deleted unless you have a backup. -
2. How long does recovery mode take?
The full process usually takes between 15 and 30 minutes. The exact time depends on your internet speed, the size of the iPadOS file, and the performance of your computer. If the download takes too long, the iPad may exit recovery mode, and you may need to repeat the steps. -
3. Can recovery mode fix all problems?
Recovery mode can solve serious software issues such as boot loops, update failures, and frozen screens. It is designed to repair system-level errors. However, it cannot fix hardware damage like a broken screen, battery problems, or internal component failure. For physical issues, professional repair is required.


