
 TL;DR:
To format an SD card to FAT32 on a Mac, select MS-DOS (FAT) as the format and Master Boot Record as the partition scheme in Disk Utility for cards up to 32 GB, or use Terminal for 64 GB and larger cards since macOS hides the FAT32 GUI option for SDXC capacities.
● FAT32 restricts individual files to a 4 GB maximum size which prevents saving large 4K or 8K video recordings, making exFAT the practical alternative for modern cameras using 64 GB and larger cards.
● To bypass the 32 GB restriction and force FAT32 on larger cards, identify the disk index using the diskutil list command and execute diskutil eraseDisk FAT32 SDCARD MBR /dev/diskN in Terminal.
● If the Erase button is greyed out, slide the physical lock switch on the SD card toward the metal contacts to disable hardware write protection, and ensure View > Show All Devices is selected to target the correct capacity volume instead of its parent container.
Ask AI for a summary
 ChatGPT
 Perplexity
 Gemini
 Claude
 Grok
Grok
An SD card that has changed file system, is giving errors, or simply works best on older cameras can be reformatted on a Mac in minutes. The hardest part of the job is picking the right file system, because the option in Disk Utility is labeled MS-DOS (FAT), not FAT32, and macOS hides MS-DOS (FAT) for SDXC cards above 32 GB even though the underlying driver supports FAT32 to 2 TB. This guide covers both the GUI workflow in Disk Utility and the Terminal workflow for cards that resist the GUI, so the right method is one read away regardless of your card size.
Formatting erases every byte of data on the volume, so the right sequence matters: first understand which file system and scheme the card readers in your workflow actually accept, then unlock the physical lock switch and close apps holding the card, then format with Master Boot Record as the scheme so cameras, Windows PCs, and Android phones can read the card.
Quick Answer
● Right format: for SDHC cards 32 GB or smaller, pick MS-DOS (FAT) in Disk Utility, which is FAT32; for SDXC cards 64 GB and up, pick ExFAT, or use Terminal if you specifically need FAT32.
● Protect data: copy accessible files off the card first; if the card was already formatted accidentally, scan it with a recovery tool before another format, because data recovery gets harder with every write.
● Right scheme: always pick Master Boot Record under Scheme in Disk Utility so cameras, Windows PCs, and Android phones recognize the card.
In this article:
Part 1. Pick the Right File System for Your SD Card
Choosing the file system comes before opening Disk Utility, because the wrong choice leaves you with a card the Mac can read but your camera, dashcam, or older PC cannot. macOS 26 Tahoe supports FAT32, ExFAT, APFS, and Mac OS Extended (Journaled) natively for reading and writing. NTFS is read-only on macOS without third-party drivers, so format an SD card to NTFS only if it will never leave a Windows PC, which is rare for an SD card.
1.1 FAT32 vs exFAT vs APFS at a Glance
The right file system depends on the size of the card and the devices that need to read it. The table below maps the common cases.
| File System | Card Size | File Size Limit | Best For |
| MS-DOS (FAT) = FAT32 | 2 GB to 32 GB | 4 GB per file | SD and SDHC cards, cameras from any decade, dashcams, game consoles, Android phones |
| ExFAT | 64 GB and up | No practical limit | SDXC cards, video files over 4 GB, modern cameras from 2010 or later, Windows and Mac |
| APFS | Any | No practical limit | Cards used only between Macs, Apple devices, and iPadOS |
| Mac OS Extended (Journaled) | Any | No practical limit | Legacy macOS volumes not shared with other operating systems |
A FAT32 volume drops compatibility for any single file larger than 4 GB, which rules out most 4K and 8K video recordings. exFAT removes that file size limit, which is why SDXC cards of 64 GB and up ship pre-formatted to exFAT. Per SanDisk's macOS format guide, FAT32 is recommended for SDHC cards from 4 GB to 32 GB, and exFAT is the recommended format for SDXC cards of 64 GB and higher.
1.2 Pick the Right Partition Scheme (MBR vs GUID)
Disk Utility exposes two dropdowns when you erase a card: Format and Scheme. Most users fill in Format and ignore Scheme, then wonder why their camera asks to format the card again. The Scheme dropdown controls the partition layout that cameras, Windows PCs, Android phones, and macOS read at boot.
- Master Boot Record (MBR) is the right choice for every SD card read by cameras, dashcams, game consoles, Android phones, and Windows PCs.
- GUID Partition Map is the right choice only when the card is used as a macOS boot disk or a Time Machine volume on a Mac, both of which are out of scope for an SD card.
Pick Master Boot Record even when formatting to exFAT. The camera firmware reads the partition scheme first, then the file system, and a GUID scheme can prevent older devices from recognizing an otherwise valid exFAT volume.
Part 2. Prepare the SD Card Before Formatting
A few preparations prevent most failed formats. Newer Macs from 2021 onward have no built-in SD slot, so use a built-in slot, a USB-C hub, or a dedicated card reader.

2.1 Unlock the Lock Switch
SD cards have a tiny sliding switch on the side of the card. If the switch sits in the locked position, macOS mounts the card read-only and the Erase button in Disk Utility is greyed out. Slide the switch up toward the metal contacts to unlock it, remove the card, and reinsert it.

The lock switch is easy to miss because it sits flush with the card edge. Cards carried loose in a bag or pocket often arrive locked by accident, which looks identical to a card that has failed.
2.2 Close Apps Holding the Card
An SD card stays in use by any process with a file handle open. Before formatting, quit the apps that commonly open the card: Photos and Image Capture if you imported from the card, QuickTime if you opened a video straight from the card, Time Machine if the card is configured as a backup destination, and any terminal session with a `cd` into the card. Then eject the card through Finder so macOS records that no app holds it open.
2.3 Back Up or Recover Files First
Formatting a card erases every byte of data on the volume. If the card is currently readable, copy its files to another drive before you click Erase. If the card is no longer readable, or if you just formatted it and realized too late, scan the card with a recovery tool. The order below is the safe order: stop using the card first, then scan, then save the recovered files to a different drive.
Part 3. Format the SD Card in Disk Utility
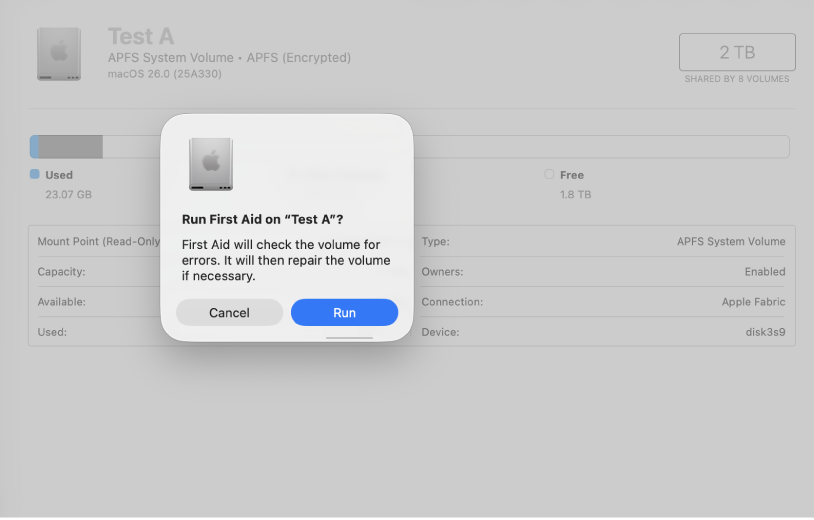
Disk Utility is the right starting point on macOS 26 Tahoe, macOS 15 Sequoia, and macOS 14 Sonoma. The Erase flow takes five clicks when the card is healthy and the lock switch is unlocked.
3.1 Pick the Volume, Not the Container
The sidebar shows a tree in which the SD card's container sits on top and the volume sits below it. Pick the volume that lists the capacity, not the parent container. Clicking the parent container formats the partition layout but leaves the empty partition confused on some card readers. To see the full tree, choose View > Show All Devices from the menu bar.
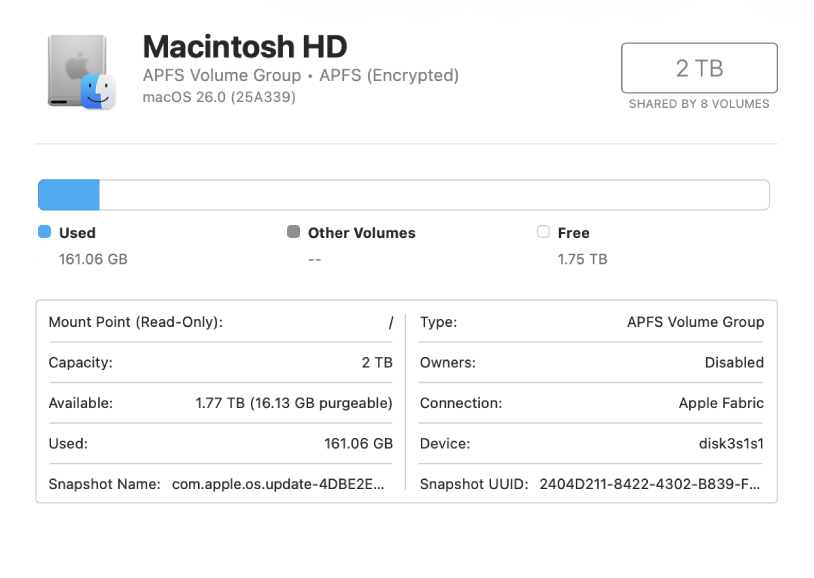
- Open Disk Utility. The fastest path is to press Cmd + Space, type Disk Utility, and press Return.
- In the sidebar, click the SD card volume that matches your card's capacity, not the parent container.
- Confirm the Erase button in the toolbar is not greyed out. If it is grey, scroll up to Part 5 for the diagnostic steps before continuing.

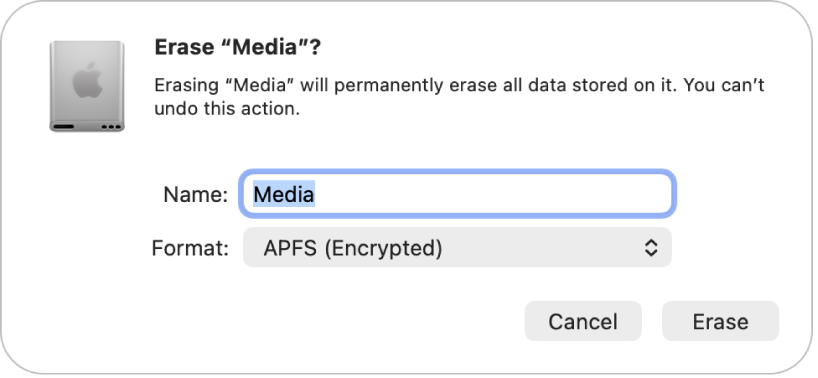
3.2 Set MS-DOS (FAT) FAT32 and Master Boot Record
- Click Erase in the toolbar to open the dialog.
- Type a name for the card, for example
SDCARD. - From the Format dropdown, pick MS-DOS (FAT) for cards up to 32 GB. MS-DOS (FAT) is FAT32. Per Apple's Disk Utility eraser reference, MS-DOS (FAT) applies the FAT32 file system.
- From the Scheme dropdown, pick Master Boot Record. Do not pick GUID Partition Map for a card.
- Click Erase to begin the format.

3.3 Erase and Verify
The Erase dialog shows a progress bar that runs for seconds on small SDHC cards and minutes on large SDXC cards. When the bar fills, Disk Utility shows a green tick with the message that the volume was erased successfully. Confirm the format worked by ejecting and reinserting the card, copying a small file, and reading that file back from the card.
Part 4. Format the SD Card with Terminal
Use Terminal when Disk Utility refuses to format the card, or when you need to format a 64 GB+ card to FAT32 (Disk Utility hides MS-DOS (FAT) for SDXC cards even though the underlying `diskutil` driver supports FAT32 to 2 TB). Terminal is also faster for batch-formatting several cards with the same layout.
4.1 Identify the Card with diskutil list
Wrong-volume mistakes in Terminal are not recoverable, so identify the SD card by its identifier before any erase command.
- Open Terminal. The fastest path is to press Cmd + Space, type Terminal, and press Return.
- Type
diskutil listand press Return. The terminal prints a table of every block storage device on the Mac: internal disk, external SSDs, USB sticks, and the SD card. - Locate the SD card by matching its capacity. The card appears as
/dev/diskNwhere N is its index, for example/dev/disk2. - Note the
diskNidentifier for the erase command in the next step.
Run diskutil info /dev/diskN if you need to double-check the device name and size before the erase.
4.2 Run diskutil eraseDisk FAT32 (Including 64 GB+)
The Terminal-based format command for FAT32 is:
diskutil eraseDisk FAT32 SDCARD MBR /dev/diskN
Replace SDCARD with the name you want for the card, and replace diskN with the identifier from `diskutil list`. macOS asks for your Mac login password before formatting. Per Apple's diskutil eraseDisk reference, this command erases the entire device and rewrites it with the FAT32 file system and Master Boot Record partition scheme.
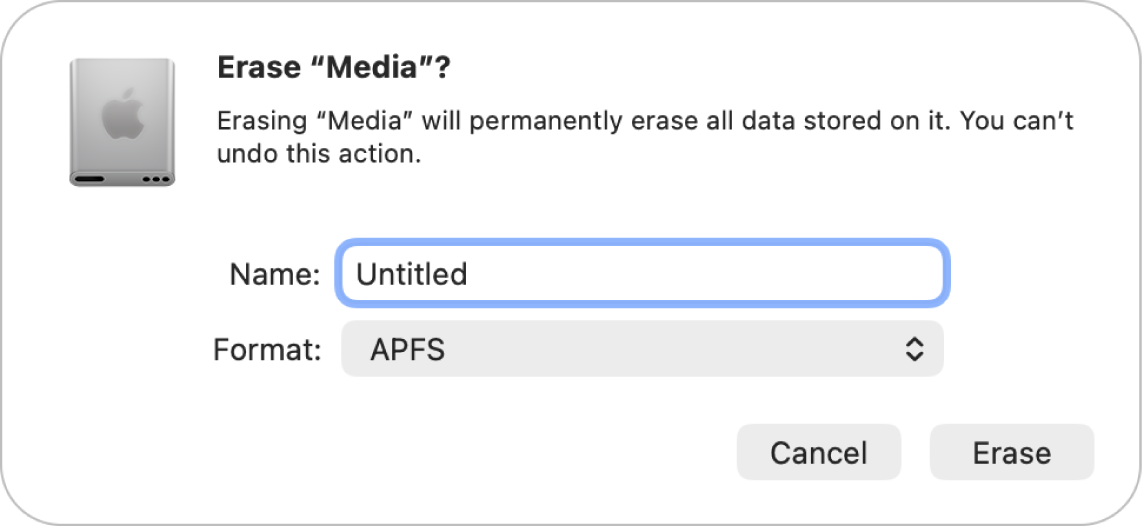
Why Disk Utility won't show FAT32 for 64 GB+ cards: Apple ships the GUI with a 32 GB cap on MS-DOS (FAT) to match what cameras, Android phones, and game consoles actually support. The underlying `diskutil` driver does not enforce that cap, so the same Terminal command yields a valid FAT32 volume above 32 GB. FAT32 partitions above 32 GB use 32 KB clusters and format more slowly than exFAT, which is the practical reason exFAT is recommended above 32 GB by SanDisk.
4.3 Format to exFAT Through Terminal
For SDXC cards of 64 GB and up used by modern cameras and Macs, exFAT is the practical choice. The same `diskutil eraseDisk` syntax applies:
diskutil eraseDisk ExFAT SDCARD MBR /dev/diskN
Replace SDCARD with your desired volume name and diskN with the identifier from `diskutil list`. exFAT has no 4 GB per-file limit and no 32 GB cap, but it is not supported by cameras manufactured before 2010 or by older routers and set-top boxes that only read FAT32.
Part 5. Fix "Cannot Format the SD Card on Mac" Errors
When Disk Utility refuses to format, the failure is almost always one of three categories. Each has a different fix.
5.1 Erase Button Greyed Out
The Erase button is greyed when the lock switch is locked, when the sidebar shows the parent container instead of the volume, or when the disk layout is not loaded. Work through the fix list in order.
- Slide the lock switch on the card up toward the metal contacts, remove the card, and reinsert it.
- Choose View > Show All Devices in Disk Utility so the sidebar reveals both the container and the volume under it.
- Click the volume that lists the correct capacity, not the parent container.
- If the button is still grey, the card has a hardware write-protection and Disk Utility can only read it. Move to the lock-switch check or try Terminal.
5.2 "Couldn't Unmount Disk" Error
This error means a process is still reading or writing the card while Disk Utility tries to remount it. Quit Photos, Image Capture, QuickTime, and any time-machine-aware backup app that has the card in its source list. Close every Finder window whose sidebar shows the card. If the error persists, run diskutil unmountDisk /dev/diskN in Terminal to force the unmount, then return to Disk Utility and Erase.
5.3 Card Not Visible in Disk Utility
If the card does not appear in Disk Utility at all, the issue is at the reader or hardware level before the file system even loads.
- Insert a different SD card into the same slot. If the second card appears, the slot works and the first card has failed.
- Insert your card into another computer. If it appears there, the card is fine and the issue is your reader.
- If your Mac has no built-in slot, try a different USB-C or USB-A reader, ideally one that supports UHS-II for SDXC cards.
- If the card is silent in every reader, the card is physically damaged. Stop repeated erase attempts and contact a hardware recovery service.
Part 6. Recover Files from an Accidentally Formatted SD Card
If the card was formatted by mistake, stop using it the moment you notice. Every new write can overwrite the sectors that hold the directory entries a recovery tool reads. The fastest path to the files is a scan that reads the raw sectors of the card and reconstructs files from their headers.
- Connect the SD card to your Mac and launch Recoverit. The card appears under External Drives on the main screen. Select the SD card and click Start.
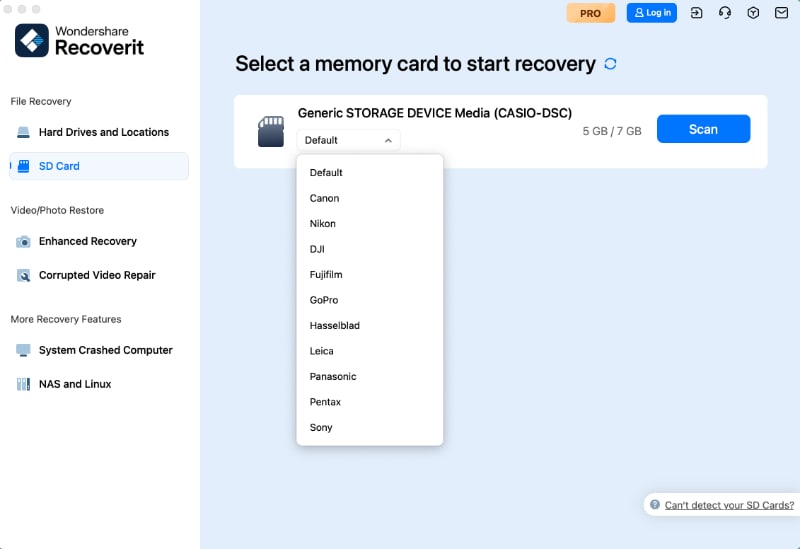
- Recoverit scans the card for recoverable files. The scan can take minutes for an SDHC card and longer for an SDXC card. You can use the file-type filter and search box to narrow the results while the scan runs.
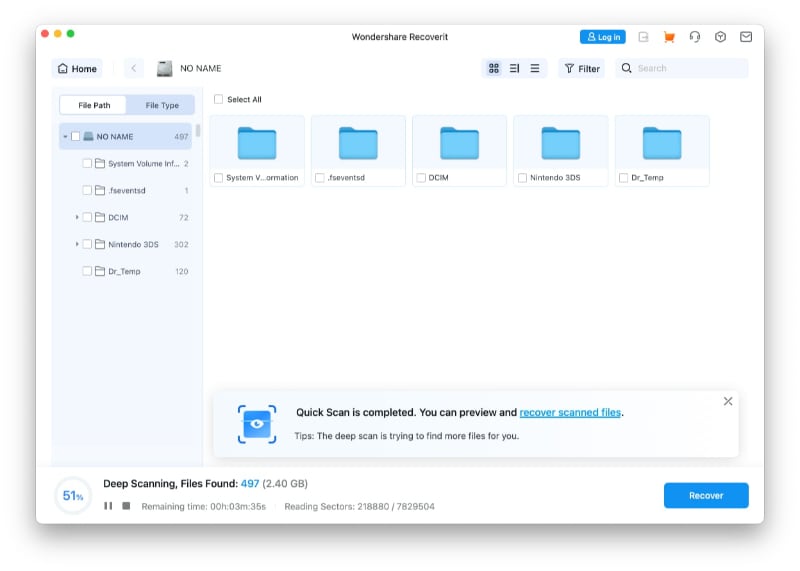
- Preview the files you want, select them, and click Recover. Save the recovered files to a different healthy drive, never back onto the same card.
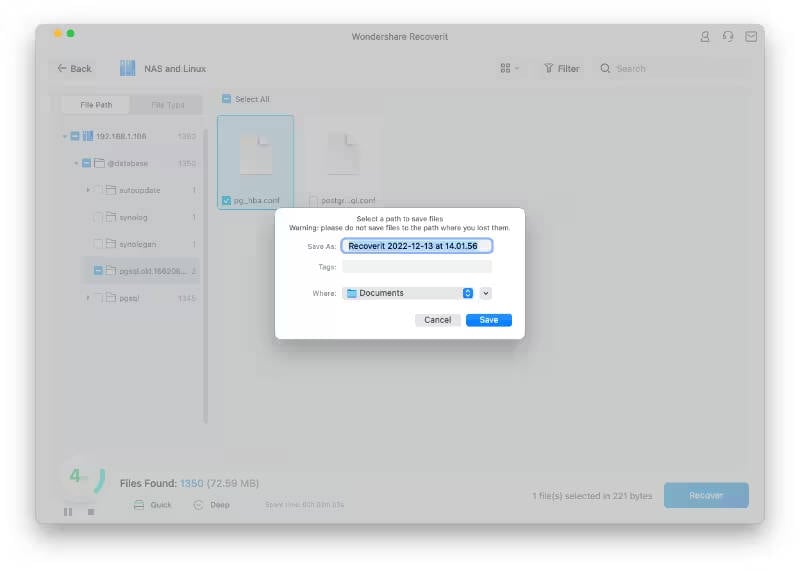
No software can guarantee recovery from a card that was overwritten, formatted multiple times, or physically damaged (water, heat, bending, or a clicking noise from inside the card). For those situations a hardware recovery lab is safer than repeated scans. Per Apple's Disk Utility disclosure, severely damaged devices require a recovery service rather than repeated software attempts.
Conclusion
To format an SD card to FAT32 on Mac, pick MS-DOS (FAT) for cards up to 32 GB and exFAT for cards 64 GB and up, always choose Master Boot Record as the scheme, unlock the physical lock switch, close any app that holds the card open, then run Erase in Disk Utility. Use Terminal with `diskutil eraseDisk FAT32 SDCARD MBR /dev/diskN` when the card is corrupted, when the GUI hides FAT32, or when a 64 GB+ card needs FAT32 specifically. Back up or recover first if the card holds data you cannot re-create, because every format erases the previous volume completely. The right file system and scheme together are what guarantees the camera, dashcam, or PC will read the card without asking to reformat it.
FAQ
-
Why is my SD card not showing the FAT32 option in Disk Utility?
Disk Utility hides MS-DOS (FAT) for SDXC cards above 32 GB because most cameras and Android phones do not support FAT32 above that size. The macOS file-system driver itself does support FAT32 to 2 TB, so the option is reachable through Terminal: rundiskutil eraseDisk FAT32 SDCARD MBR /dev/diskN, wherediskNis the SD card's identifier fromdiskutil list. -
How do I format an SD card to FAT32 on Mac for free?
Use Disk Utility, which is shipped with every Mac. Open Disk Utility, click the SD card volume in the sidebar, click Erase, choose MS-DOS (FAT) under Format and Master Boot Record under Scheme, then click Erase again. MS-DOS (FAT) is FAT32. For cards above 32 GB, rundiskutil eraseDisk FAT32 SDCARD MBR /dev/diskNin Terminal instead, because Disk Utility will not list MS-DOS (FAT) for an SDXC card. -
Can a Mac read a 64 GB SD card in FAT32?
Yes. macOS 26 Tahoe reads FAT32 volumes of any size, including those formatted by another tool above 32 GB. Apple just hides the FAT32 option in Disk Utility for SDXC cards because the format combination is uncommon in production cards. Camera compatibility, not Mac compatibility, is the reason exFAT is recommended for cards above 32 GB. -
What is the difference between MS-DOS (FAT) and ExFAT in Disk Utility?
MS-DOS (FAT) is FAT32, which limits a single file to 4 GB and a partition to 2 TB. ExFAT removes both limits, so a single file can be larger than 4 GB and a partition can be larger than 2 TB. ExFAT is supported by most cameras from 2010 onward and by every Mac and Windows PC, while FAT32 is the universal default for SDHC cards up to 32 GB and for older devices. -
Is NTFS a good choice for an SD card on Mac?
No. macOS reads NTFS but cannot write to NTFS without third-party driver software, and that software has to be installed on every Mac that needs to write the card. NTFS also adds metadata overhead that slows down SD card reads. For a card shared between Mac, Windows, Android, cameras, and game consoles, use FAT32 (cards up to 32 GB) or exFAT (cards 64 GB and up). -
Will formatting an SD card erase everything on it?
Yes. Every byte of data on the volume is overwritten with a new file system. Copy accessible files off the card first, or run a recovery tool like Recoverit for Mac to scan for files before you format. After a format, software recovery is possible only for files whose sectors have not been overwritten by subsequent use of the card.


