


 TL;DR:
To select multiple items on a Mac across Finder, Photos, and Apple Mail, use Command-click for scattered files, Shift-click for a continuous range, Command-A for everything in the active window, or drag a selection rectangle around grouped icons.
● To fix a selection mistake without losing the entire highlighted group, keep holding the Command key and click the specific item to remove it.
● Switch to List view in Finder to easily identify start and end points for Shift-click ranges, and use the search field in Mail to filter unrelated messages before applying bulk actions.
● Press Space to preview your selection with Quick Look before batch deleting; if you accidentally delete the wrong files, immediately stop saving new data to that original volume to prevent overwriting the data before checking the Trash or using recovery software.
Ask AI for a summary
 ChatGPT
 Perplexity
 Gemini
 Claude
 Grok
Grok
To select multiple files on Mac, use Command-click for files that are scattered around a folder, Shift-click for an adjacent range, Command-A to select everything in the active window, or drag a selection rectangle around items. The same shortcuts work on MacBook Air, MacBook Pro, iMac, Mac mini, Mac Studio, and Mac Pro.
The best method depends on where the items are and whether you want all of them or only a specific group. This guide covers Finder first, then shows the correct ways to select photos in the Photos app and multiple messages in Mail without mixing those workflows together.
In This Article
Part 1. Which Mac Selection Method Should You Use?
macOS uses a small set of selection patterns across Finder and many other apps. Apple's current guidance confirms that Command-click selects nonadjacent items, Shift-click selects an adjacent range, Command-A selects all items in the active window, and a dragged selection rectangle is especially useful in Finder's Icon view. You can check the same behavior in Apple's Mac item-selection guide.
| What You Want to Select | Best Method | Shortcut or Action |
| A few files that are not next to each other | Command-click | Hold Command and click each item |
| A continuous range of files | Shift-click | Click the first item, hold Shift, then click the last |
| Everything in the active Finder window | Select All | Command-A |
| Several visible icons in one area | Selection rectangle | Click empty space and drag around the items |
| All or selected photos in Photos | Photos shortcuts | Command-A, Shift-click, or Command-click |
| Several messages in a Mail list | List selection | Command-click, Shift-click, or Command-A |
If you are still getting familiar with folders, views, the sidebar, and file locations, this Mac Finder tutorial explains the broader Finder interface. Otherwise, go straight to the selection method that matches your file layout.
Part 2. How to Select Multiple Files in Finder
Finder is where most Mac file-selection tasks happen, including selecting documents, folders, downloads, files on external drives, and items on the desktop. The following four methods cover nearly every Finder situation without requiring a third-party app.
Select Scattered Files With Command-Click
Use Command-click when the files you need are not next to one another. This is the most flexible way to select multiple individual items while leaving unrelated files unselected.
Step 1. Open Finder and navigate to the folder that contains the files you want.
Step 2. Click the first file, then press and hold the Command key.
Step 3. While holding Command, click each additional file you want to add to the selection.
Step 4. If you selected one file by mistake, keep holding Command and click that file again to deselect only that item.
Best for: selecting scattered PDFs, photos, folders, downloads, or files with different names without selecting everything between them.
Select Adjacent Files With Shift-Click
Use Shift-click when the files form one continuous range. If the visual order is unclear in Icon view, switch to List view first so the start and end of the range are easy to identify.
Step 1. Open the folder and, if needed, use the Finder view controls to switch to List view.
Step 2. Click the first file in the range.
Step 3. Hold the Shift key and click the last file in the range. Finder includes the items between the first and last selection.
Step 4. If the range includes files you do not want, use Command-click afterward to remove individual items without clearing the rest of the selection.
Best for: selecting a block of files sorted by name, date, kind, or another Finder column.
Select All Files With Command-A
When you truly need every item in the active Finder window, Command-A is faster and less error-prone than clicking files one by one. Check the folder contents before applying a batch delete, move, or rename action.
Step 1. Click inside the Finder window so it is the active window.
Step 2. Press Command-A. Every selectable item in that Finder window is highlighted.
Step 3. If you prefer the menu, choose Edit > Select All instead.

Step 4. Before moving or deleting the selection, glance through the active folder once more to confirm that all highlighted items should be included.
Best for: selecting everything in Downloads, a project folder, a USB drive folder, or another active Finder location.
Select Multiple Files With a Mouse or Trackpad
A selection rectangle is useful when several visible files are grouped together, especially in Finder's Icon view. Unlike Shift-click, you control the selection by drawing a box around the icons you want.
Step 1. Open the folder and switch to Icon view if that makes the target files easier to see together.
Step 2. Click an empty area near the first target item. Do not start the drag on a file icon, because that can move the file instead of drawing a selection rectangle.
Step 3. Keep the mouse or trackpad button pressed and drag the rectangle around the files you want.
Step 4. Release the button when the target items are highlighted. Use Command-click to add or remove individual files afterward if necessary.
Best for: selecting a visible cluster of icons on the desktop or inside a Finder folder.
Part 3. How to Select All or Multiple Photos on Mac
There are two different situations behind the query "select all photos on Mac." If the pictures are normal image files inside a Finder folder, use the Finder methods above. If they are inside your Photos library, make the selection in the Photos app instead.
Select Photos in the Photos App
The Photos app has its own library view, but the core shortcuts are familiar. Apple's current Photos guidance supports Command-A for all photos, Shift-click for a range, Command-click for nonadjacent photos, and a dragged selection rectangle for photos shown together.
Step 1. Open Photos, then choose Library or another collection that contains the pictures you need.

Step 2. To select every photo in the current view, press Command-A.
Step 3. To select a continuous range, click the first photo, hold Shift, and click the last photo.
Step 4. To select photos that are not next to one another, hold Command and click each photo. Command-click a selected photo again if you need to remove only that photo from the group.
Step 5. To clear the selection, click an empty area in the Photos window or use Shift-Command-A. Apple's Photos keyboard shortcuts and gestures provide the current shortcut reference.
Tip: A Photos library is not the same as a Finder folder. If you are working with JPEG, HEIC, RAW, PNG, or other image files stored in a normal folder or external drive, use Finder selection instead.
Part 4. How to Select Multiple Emails on Mac
Email selection is another common batch task, especially when you need to archive, flag, move, or delete several messages. Start by narrowing the message list so you do not accidentally act on unrelated email.
Select Messages in Apple Mail
Apple Mail uses a message list where standard Mac selection patterns are practical: Command-click for individual messages, Shift-click for a range, and Command-A when you intend to select the active list. Search first when the mailbox contains many unrelated messages.
Step 1. Open Mail and choose the mailbox you want. If necessary, use the search field to narrow the list by sender, subject, date, or another term.
Step 2. For messages that are not next to each other, hold Command and click each message you want.
Step 3. For an adjacent range, click the first message, hold Shift, and click the last message in the range.
Step 4. To select the complete active message list, press Command-A. Check the selected list before using Delete, Move, Archive, or another bulk action.
Step 5. If a shortcut behaves differently because of your language or keyboard layout, check the current commands shown in the Mail menu and keyboard shortcut reference.
Note: If you use Mail on iCloud.com in a browser instead of the native Mail app, Apple explicitly documents Command-click for multiple messages, Shift-Up Arrow or Shift-Down Arrow for consecutive messages, and Command-A for all messages.
Part 5. What to Do After Selecting Multiple Files
Selecting the files is only the first half of the task. Once several items are highlighted, macOS applies many commands to the whole selection, so it is worth checking exactly what will happen before you continue.
| Task | What to Do | Watch For |
| Copy selected files | Press Command-C, open the destination, then press Command-V | Confirm the destination has enough free space |
| Move selected files | Drag the selected group to the destination folder | Moving between different volumes can behave differently from moving within the same volume |
| Preview selected files | Press Space to open Quick Look | Use the preview to confirm the right files are selected before a batch action |
| Rename selected files | Control-click the selection and choose Rename | Review the naming format before applying it to every item |
| Delete selected files | Move the selection to Trash | Do not empty Trash until you confirm nothing important was included |
If your next step is transferring the selected items to removable storage, follow the correct connection, copy, eject, and file-system workflow in this guide to use a USB flash drive on Mac.
Part 6. What If You Deleted the Wrong Selected Files?
Batch selection makes file management faster, but it also means one mistaken delete can affect many items at once. If that happens, use the least destructive recovery option first and avoid creating unnecessary new data on the source volume.
Recover Accidentally Deleted Mac Files Safely
If files disappeared after a batch delete, first determine whether they are still in Trash or an app's Recently Deleted area. Data-recovery software should come later, only when built-in recovery options no longer contain the files.
Step 1. If the delete just happened, try Command-Z. Then check Trash in Finder. For photos, also check Recently Deleted in Photos; for email, check the appropriate Trash mailbox.
Step 2. If the files are no longer in those locations, reduce new writes to the original drive. Avoid downloading, installing, exporting, or saving more data to that same volume because new writes can overwrite deleted file data.
Step 3. If the original storage is still detected by macOS, scan that source for recoverable files. The Recoverit Mac deleted-file recovery guide covers the full workflow and the built-in options to check first.
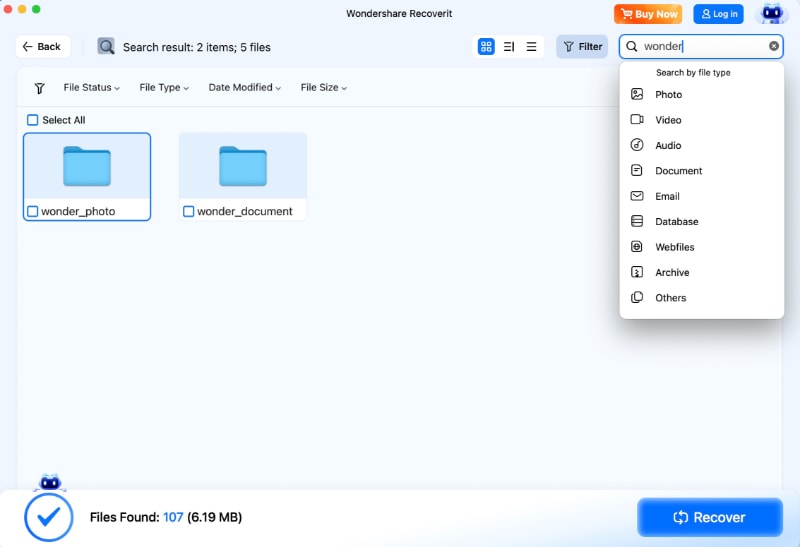
Step 4. Preview the files you need and save recovered data to a different healthy drive or location rather than back to the affected source.
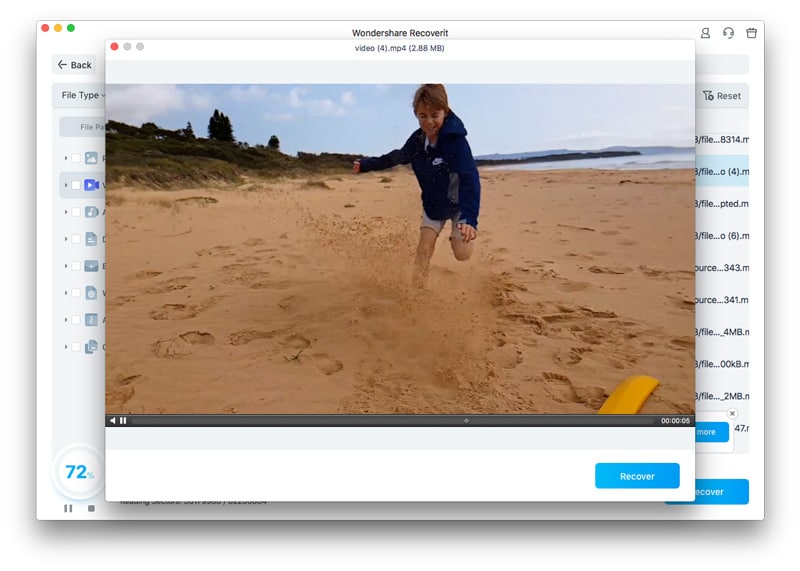
Important: Recovery is not guaranteed after overwrite. If a drive is not detected, repeatedly disconnects, makes unusual noises, smells burned, or has physical or liquid damage, stop repeated scans and consider a professional recovery service.
Conclusion
For most Mac file-selection tasks, remember four patterns: Command-click for scattered items, Shift-click for an adjacent range, Command-A for everything in the active view, and a dragged selection rectangle for visible groups of icons. The same logic covers MacBook Air, MacBook Pro, iMac, and other Macs, while Photos and Mail use their own lists and libraries around the same core selection habits.
Before a batch move, rename, or delete, verify the highlighted items once. That small check is especially useful when you have selected dozens or hundreds of files at once.

FAQ
-
How do I select multiple files on a MacBook Air?
Hold Command and click each file when the files are scattered. For files next to each other, click the first file, hold Shift, and click the last. These shortcuts are the same on MacBook Air, MacBook Pro, iMac, and other Macs. -
How do I select all files on a Mac or MacBook?
Click inside the Finder window you want to work with, then press Command-A. You can also choose Edit > Select All from the Finder menu. Check the active folder before applying a bulk delete, move, or rename. -
How do I select several files without selecting everything between them?
Use Command-click. Hold the Command key while clicking each file you want. If you accidentally include a file, Command-click that selected item again to remove it without clearing the rest of the group. -
How do I select multiple files with a Mac trackpad?
In Finder Icon view, press the trackpad in an empty area and drag a selection rectangle around the items. You can then Command-click individual files to add or remove them from the selection. -
How do I select all photos on Mac?
In the Photos app, open the library or collection you want and press Command-A to select all photos in the active view. Use Shift-click for a continuous range or Command-click for individual nonadjacent photos. -
How do I select multiple emails on Mac?
In Mail, Command-click individual messages, Shift-click to select an adjacent range, or use Command-A when you intend to select the full active message list. Narrow the mailbox with search first if you only want messages matching a specific sender or subject. -
How do I deselect one file without losing the rest of my selection?
Hold Command and click the selected file you want to remove. The other selected items remain highlighted.


