

 TL;DR:
To recover an unsaved or lost Word document on a Mac after a crash, immediately check Word's hidden AutoRecovery folder or system temporary files, utilizing Time Machine backups or Recoverit software only if the file remains missing.
● Press `Command + Shift + G` in Finder and navigate to `~/Library/Containers/com.microsoft.Word/Data/Library/Preferences/AutoRecovery` to locate `.doc` or `.docx` drafts, provided AutoRecover was active to save copies every 10 minutes.
● Type `open $TMPDIR` into the macOS Terminal and press Return to access hidden system temporary directories that may still retain short-term Word data missed by standard visible folders.
● Scan the specific Mac drive or external device with Recoverit to extract traceable DOCX data strictly when the Trash is emptied, AutoRecovery fails to capture the latest edits, and no prior Time Machine backup exists.
Ask AI for a summary
 ChatGPT
 Perplexity
 Gemini
 Claude
 Grok
Grok
TL;DR
- Quick Checks: Start with Recent files and Trash when the document was closed, moved, or deleted recently.
- AutoRecovery: Check Word's hidden AutoRecovery folder if the file vanished after a crash or freeze.
- Temporary Files: Use Terminal to inspect macOS temporary folders when normal locations show nothing useful.
- Backups: Restore older versions through Time Machine when backups were enabled before the loss.
- Recoverit: Try deeper scanning for permanently deleted Word files when built-in Mac recovery options fail.
Quick Answer: To understand how to recover a lost Word document on a Mac, first check Recent files, Trash, AutoRecovery, temporary folders, and Time Machine backups. When these options fail, use Recoverit to scan Mac storage and restore missing DOCX files safely from selected locations.
Losing a Word file on a Mac can disrupt work, deadlines, and important document updates. Sometimes, the file disappears after a crash, forced shutdown, or failed save. Many users first check familiar folders, yet the missing document may remain elsewhere. However, recovery becomes easier when users follow the correct path for each situation.
Therefore, this guide explains how to recover lost Word documents on Mac through safe recovery guidance. It will also help in reducing the risk of overwriting recoverable Word files on Mac. Users can then restore important work before recovery chances become more limited later.
In this article
-
- Method 1. Check Recent Files and Trash First
- Method 2. Recover Unsaved Word Documents from the AutoRecovery Folder
- Method 3. Recover Lost Word Files Using Mac Temporary Folder via Terminal
- Method 4. Restore Previous Word Documents with Time Machine
- Method 5. Recover Permanently Lost Word Files with Recoverit
Part 1. Where Are Lost or Unsaved Word Documents Stored on Mac?
When learning how to retrieve a lost Word document on a Mac, it's important to know the file's location. Thus, this section explains where you can find lost files and the differences among deleted, unsaved, and lost Word documents.
Common Places Mac Stores Lost Word Files
For Word file recovery, the reliable method is the AutoRecovery Folder. Since Microsoft Word automatically saves progress every few minutes, this is the first place to look at, as guided:
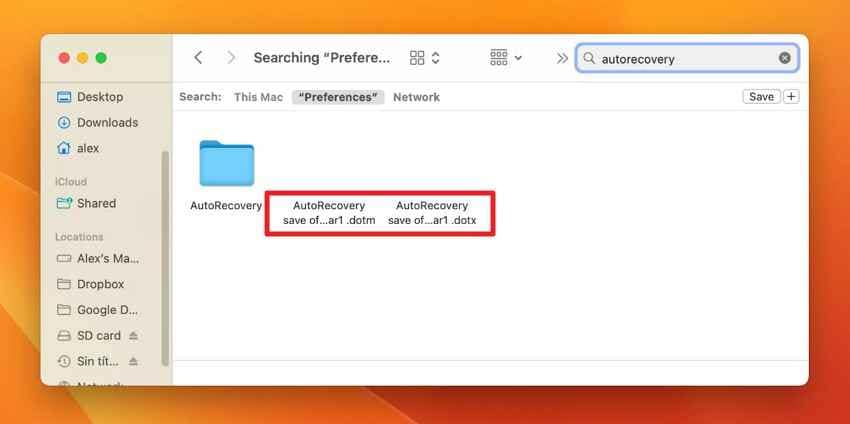
Step 1. In Finder, press "Command + Shift + G" and paste the given path:
~/Library/Containers/com.microsoft.Word/Data/Library/Preferences/AutoRecovery

Step 2. When the list of files appears, search for the "AutoRecovery Save Of..." file ending in .docx or .doc.
Note: Since you can also use the macOS Recent and Temp folders for "Lost" files, they will be guided in Part 3.
Difference Between Deleted, Unsaved, and Lost Word Documents
Before you explore other ways on how to recover lost Word documents on Mac, know the difference between lost, unsaved, and deleted Word files via the mentioned table:
| Feature | Deleted | Unsaved | Lost |
|---|---|---|---|
| What It Is | A file you manually moved to the Trash or erased. | A new or edited file closed without hitting "Save." | A file that vanished due to a crash, power failure, or disk error. |
| Storage Status | Exists in Trash or remains as hidden data on the disk. | Exists only in RAM or as a temporary "AutoRecovery" cache. | Usually sits in a temporary system folder or a hidden directory. |
| Best Recovery Method | Check Trash or use Time Machine backups. | Look in the AutoRecover folder or TemporaryItems. | Search by name or extension, check Recent, AutoRecovery, temporary folders, Trash, backups, and cloud storage. |
| Ease of Recovery | High (unless Trash was emptied). | Medium (depends on AutoRecover settings). | Low (may require data recovery software). |
Part 2. Can Microsoft Word Recover Unsaved Documents on Mac? Yes --- Here's How
On the quest for learning how to recover lost Word files on Mac, AutoRecover is the main fix. Nonetheless, this option raises many concerns, and this section will address them all.
Does AutoRecover Work on Mac?
Yes, AutoRecover works on Mac if the feature is turned on, and Word has enough time to create recovery files in the background. If Word or your Mac crashes, Word will check for these AutoRecover files the next time you open the app and may automatically restore your unsaved work. When you manually save the document, older AutoRecover copies are usually deleted because the latest version is already saved.
How Long Does Mac Keep Temporary Word Files?
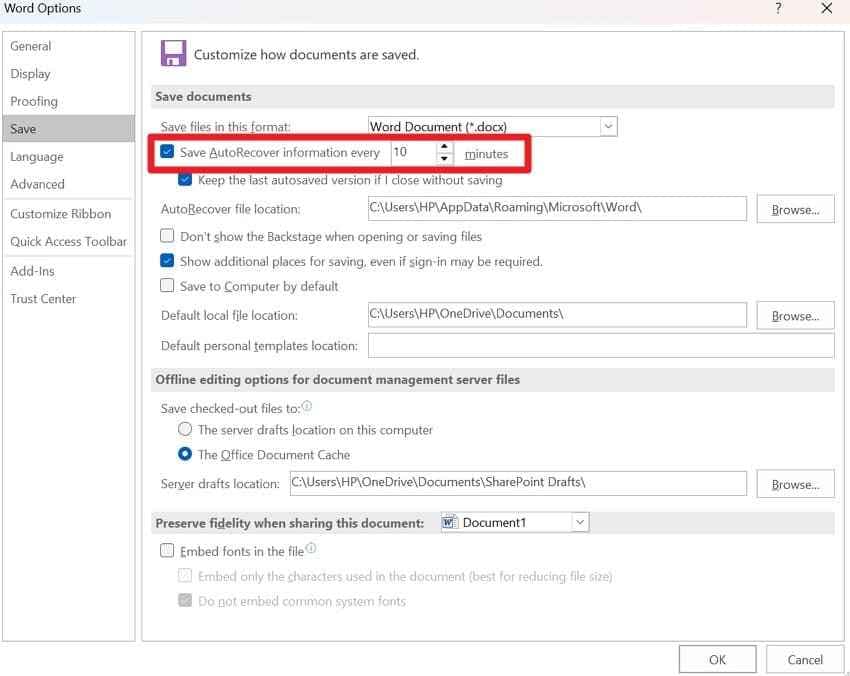
By default, Word automatically saves a hidden recovery copy of your document every 10 minutes. You can also change how often Word saves AutoRecover files by going to "Word > Preferences > Save > Save AutoRecover Information Every."
Why Word Files Disappear After a Mac Restart or Crash
So far, you have basic concepts on how to restore a lost Word document on Mac. To determine the root cause of lost or deleted Word files, here are some reasons you need to know:
- Forced Restart During Saving: Forced restarts interrupt Word while it writes recent edits into storage files. After macOS reloads, the document can open incomplete, outdated, or entirely missing.
- AutoRecover Copy Not Created: AutoRecover needs time to create a temporary copy before Word closes unexpectedly. Without that copy, reopening Word shows no recent draft for restoration later.
- Cloud Sync Delay: Cloud syncing delays keep newer edits from reaching OneDrive or iCloud storage. A weak connection causes Mac to display an older version during recovery checks.
- Closing an Unsaved Document: Closing Word without saving removes edits before recovery data gets stored. During a shutdown, a single wrong click can discard drafts without a clear warning prompt.
- Temporary File Replacement: Mac temporary files get replaced after crashes, restarts, or fresh Word activity. New sessions overwrite hidden traces before users check temporary recovery folders.
Can You Recover a Word Document That Was Never Saved?
Yes, sometimes you can recover a Word document on a Mac even if you never saved it. However, it's possible only if Word or macOS created an AutoRecover or temporary file in the background before the crash or shutdown. Word may restore the file automatically when reopened, or you can check the AutoRecovery folder and the temporary files folder for unsaved drafts.
Part 3. How to Recover Lost Word Documents on Mac (5 Proven Methods)
After locating a possible storage area, the user should move toward practical recovery steps. The following methods explain how Mac users can restore files from different loss situations:
Method 1. Check Recent Files and Trash First
This method should be the first choice when users have recently closed, moved, or deleted a Word file. Mac may still show the document in Word's Recent Lost or Trash before permanent removal. Moreover, it supports how to retrieve a lost Word document on Mac without deeper recovery steps. Now, follow the steps below to carefully check both locations:
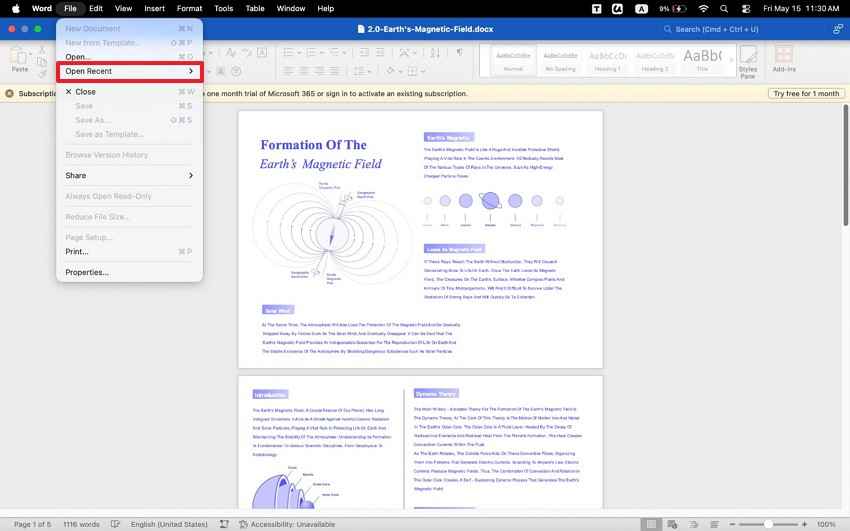
For Recent Files: Open Microsoft Word on Mac, then go to "File > Open Recent." Then, choose the missing document if it appears, open it, and save a fresh copy using "File > Save As."
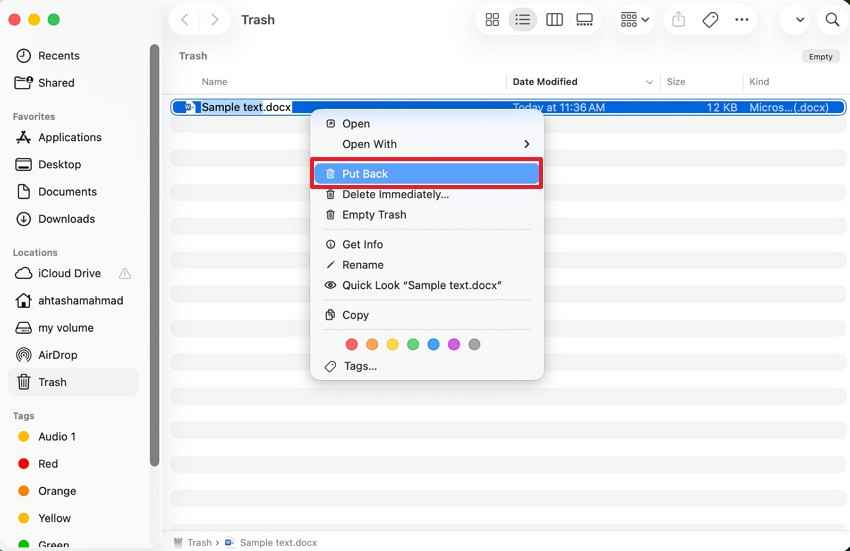
For Mac Trash: From the Dock, choose the "Trash," then search for the missing DOC or DOCX file. Right-click the file and choose "Put Back" to recover the file.
Method 2. Recover Unsaved Word Documents from the AutoRecovery Folder
AutoRecover helps when Word closes suddenly before recent changes are saved manually. Microsoft Word can keep a temporary copy inside its hidden Mac AutoRecovery folder after crashes, freezes, or forced shutdowns. To reach that hidden folder quickly, users can use the Finder shortcut: "Command + Shift + G." Afterward, they can check whether Word created a recoverable document copy.
Note: As the AutoRecovery folder location and access steps are already covered in Part 1, you can review that section.
Method 3. Recover Lost Word Files Using Mac Temporary Folder via Terminal
Mac temporary folders can retain short-term Word data during editing, saving, or sudden application failure. So, Terminal helps users reach hidden system locations that Finder usually keeps out of view. Hidden storage may be useful when Recent files, Trash, and AutoRecover provide no usable copy. Therefore, use the instructions below to safely check temporary storage:
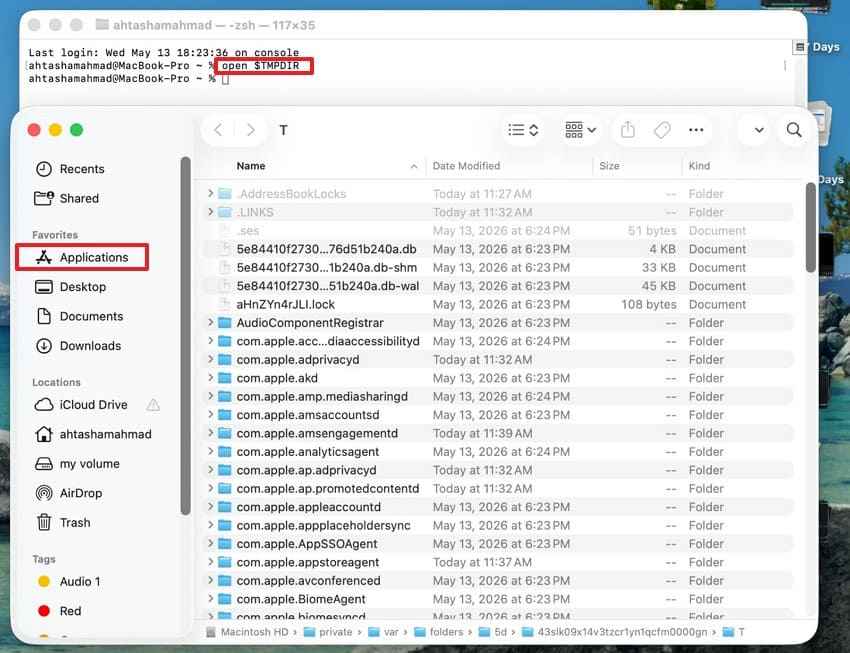
- Upon accessing the Terminal from "Applications > Utilities," type "open $TMPDIR" and press "Return." A Finder window will open the current temporary directory used by macOS.
Method 4. Restore Previous Word Documents with Time Machine
Time Machine works when backups existed before the Word document disappeared from Mac storage. It can restore earlier versions after deletion, overwriting, accidental edits, or failed saves. Therefore, this backup route supports how to recover lost Word files on Mac safely. Use the instructions below to locate and recover the required previous version:
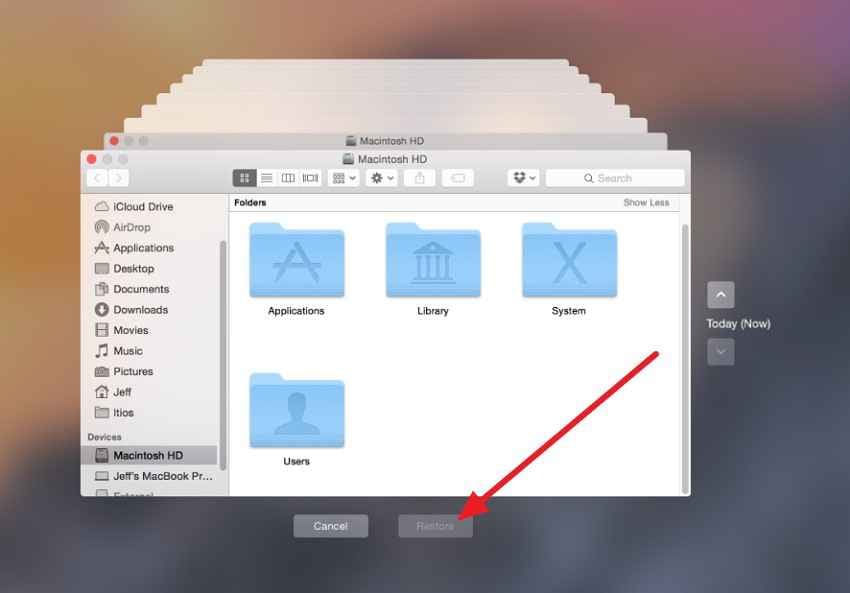
- Go to the folder where the Word document was last saved, then launch "Time Machine."
- Browse earlier versions through the timeline, select the required Word file, and click "Restore" to return it.
Method 5. Recover Permanently Lost Word Files with Recoverit
A missing Word document can leave no clear trail after a crash, failed transfer, accidental deletion, or storage error. Recent files may only show old entries, the Trash may be empty, and the AutoRecovery folder may miss the latest draft. When Time Machine has no backup, the issue shifts from simple restoration to deeper recovery from Mac storage itself, instead of visible folders.
Recoverit Word Recovery fits this stage by searching the chosen drive, folder, or external device for recoverable Word files. Instead of depending on existing recovery copies, it looks for lost DOC and DOCX data still traceable on storage. This makes it a practical answer to how to recover lost Word files on Mac when standard Mac recovery routes show nothing.
Key Features
- Deep Scan Options: Uses quick and deep scan options to search selected Mac locations for recoverable DOCX files.
- Filtered Recovery Results: Filters scan results by file type or keyword, making DOCX selection faster during recovery checks.
- Emptied Trash Recovery: Searches for DOCX files removed from Mac Trash after accidental deletion or folder cleanup sessions.
When You Need Professional Word Recovery Software
Professional recovery software becomes useful when Word files are permanently deleted, missing after crashes, or unavailable through Mac backups. It also helps when users cannot find documents in Trash, AutoRecovery, temporary folders, or Time Machine. Instead of checking random locations repeatedly, recovery software scans storage areas more deeply for recoverable Word files.
Why Recoverit is Recommended for Mac Word File Recovery
Recoverit is recommended because it handles the stage where normal Mac recovery paths stop helping. When Trash is empty, AutoRecovery misses the draft, and Time Machine has no backup, Recoverit searches deeper storage traces for missing Word files. It gives users a more structured recovery route instead of forcing repeated manual checks across hidden folders.
How to Recover Lost Word Documents on Mac with Recoverit
The following steps explain how Recoverit helps locate missing Word files and recover them from selected Mac storage locations:
Step 1. In Recoverit, select "Hard Drives and Locations," then choose the Mac drive, Desktop, Time Machine backup, or external device that contained the missing Word file.

Step 2. Now the scan starts, and the recovered items will appear under "File Path" or "File Type." Moreover, use "Search" or "Filter" to find the missing Word document faster.

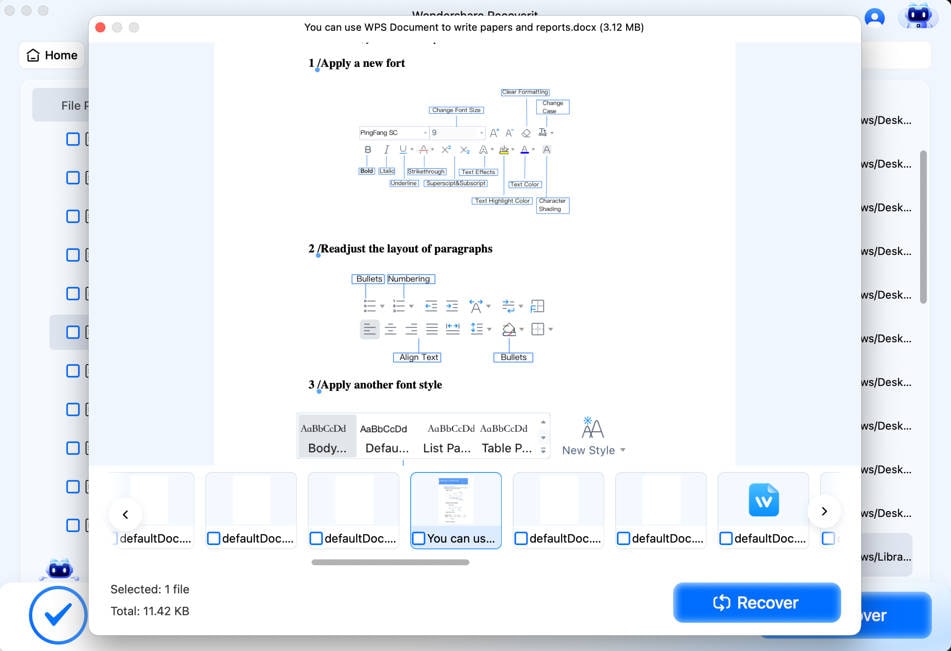
Step 3. Select the DOC or DOCX file and preview it to confirm the content. Afterward, press the "Recover" button and save the restored document to a safe location.
Part 4. 7 Ways to Protect Your Word Documents from Accidental Loss on Mac
A recovered document still needs better protection against future loss. The following practices help Mac users keep Word files safer during editing, saving, and backup routines:
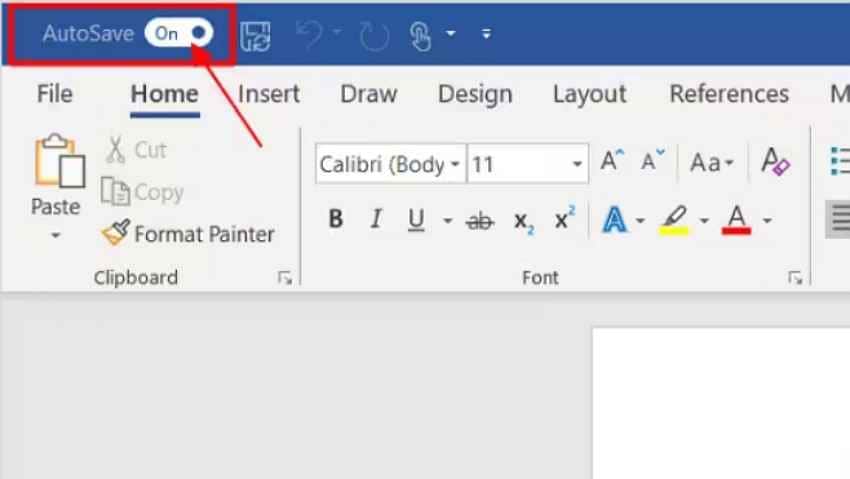
1. Enable AutoSave in Microsoft Word
AutoSave protects active Word files by saving changes while users continue editing. It works best when the document is stored in OneDrive or SharePoint, so updates are not limited to local storage. Moreover, this habit reduces future searches for how to recover a lost Word document on a Mac after sudden closure. Below are the instructions to enable AutoSave in Microsoft Word:
- Open Word and save the document to OneDrive or SharePoint.
- Then, turn on the "AutoSave" toggle from the top-left corner.
2. Save Files to OneDrive or iCloud
Saving copies to iCloud Drive or another cloud folder protects Word documents when Mac storage fails, gets damaged, or becomes inaccessible. Users can move important files into iCloud Drive, OneDrive, or any trusted synced folder. Then, they should confirm syncing completes before closing Word or shutting down the Mac, especially for long drafts or client work.
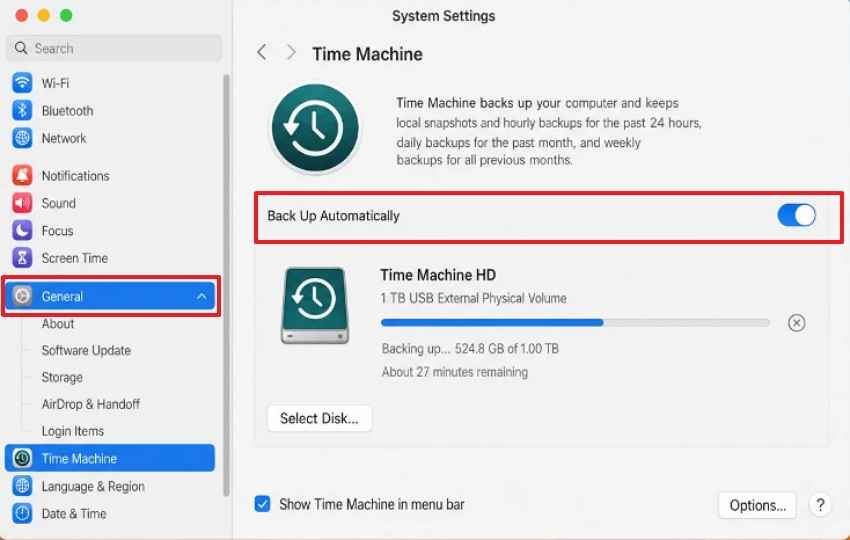
3. Turn On Time Machine Backup
Time Machine creates backup snapshots that help users restore earlier Word document versions. It is especially useful when files are deleted, overwritten, or damaged during editing. Therefore, users exploring how to restore lost Word documents on Mac should keep Time Machine active before the document is lost. Follow the instructions mentioned below to turn on Time Machine Backup:
- Start by navigating to "System Settings," then go to "General > Time Machine."
- Then choose "Select Disk," pick an external backup drive, and enable "Back Up Automatically" to start regular Time Machine backups.
4. Avoid Force Quitting Word
Use Force Quit only as a last resort because it can stop Word from saving active changes correctly. Users should give the app time to respond, save the document manually, and close files through the normal menu. This prevention protects AutoRecover data and lowers the risk of damaged drafts, incomplete copies, or missing versions later.
5. Update macOS and Microsoft Office Regularly
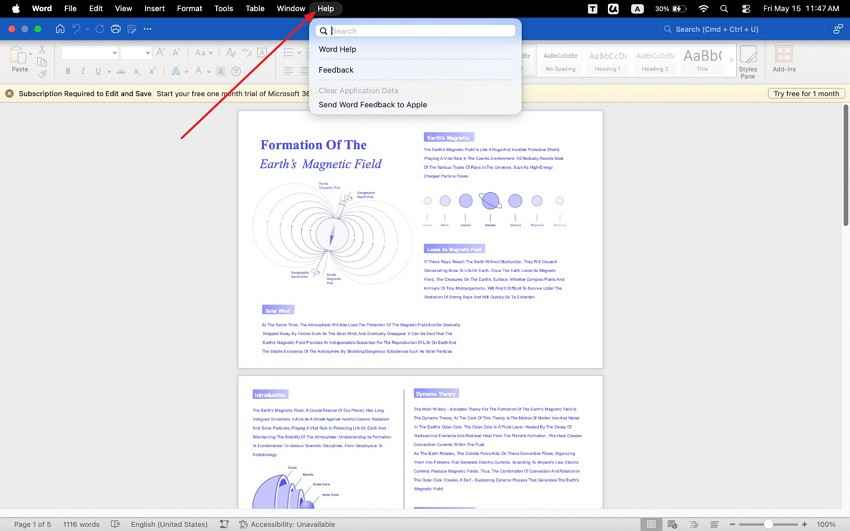
Updates help fix bugs that can affect saving, syncing, AutoRecover, and file stability. Keeping macOS and Microsoft Office current also improves compatibility between Word and Mac system features. In addition, this reduces the need for users to know how to recover lost Word files on Mac after software errors. Review the steps below to update macOS and Microsoft Office:
For macOS: To update macOS, navigate to "System Settings > General > Software Update."

For Microsoft Office: Install the latest Word updates from "Help > Check for Updates" in Microsoft Office.
6. Keep Enough Free Disk Space
Word needs available storage to save edits, create temporary files, and maintain recovery copies during active work. When Mac storage becomes too full, saving can slow down, fail, or leave incomplete document versions. Clear unused downloads, large duplicate files, and unnecessary folders regularly so Word can run smoothly during long writing sessions.
7. Create Duplicate Backups for Important Documents
Important Word documents need more than one storage location before major edits. Users can keep one Mac copy and another on iCloud or external drives. Furthermore, duplicate backups protect key documents from deletion, overwriting, and sudden storage failure. They also reduce panic during urgent deadlines or important submission days.
Conclusion
To conclude, recovering Word files on Mac becomes easier with the right recovery path. Users should first check Recent files, Trash, AutoRecovery, temporary folders, and backups. To recover lost Word documents on Mac, choose methods based on the loss type. When manual options fail, deeper scanning may locate missing DOCX files. Recoverit can help restore important Word documents from selected Mac storage safely.
Frequently Asked Questions
-
How do I recover an unsaved Word document on a Mac?
Check Word's AutoRecovery folder first, then open any available recovered document copy. Save it immediately with a clear name in a secure Mac folder. -
Where are AutoRecovery files stored on a Mac?
AutoRecovery files are usually stored inside Word's hidden Mac Library container folder. Use Finder's Go to Folder shortcut to reach that location quickly and safely. -
Can I recover a Word document after emptying the Trash on Mac?
Yes, Time Machine can restore deleted documents when earlier backups already exist. Recovery software can also help before new data overwrites storage sectors permanently. -
Why did my Word document disappear on Mac?
Word documents disappear because crashes, failed saves, sync delays, or deletion occur. Restart problems can interrupt AutoRecovery before Word stores a usable recovery copy. -
How do I recover a lost Word document after a Mac crash?
Reopen Word first, because AutoRecovery can automatically present crash-affected files after restarting. Afterward, check AutoRecovery, temporary folders, Recent files, backups, and Trash on Mac. -
Does Microsoft Word automatically save documents on Mac?
Word automatically stores recovery information when AutoRecover remains enabled during editing sessions. AutoSave needs Microsoft 365 and supported cloud storage for real-time saving features. -
What is the best Word recovery software for Mac?
Recoverit is suitable when built-in Mac recovery options cannot locate missing documents. It helps recover DOCX files from Mac drives, USBs, and external storage.


