

 TL;DR:
To maximize your chances of recovering deleted files in Windows 11, immediately stop using the affected drive to prevent data overwriting, and check built-in backups like File History or OneDrive before using dedicated recovery software.
● If your Windows 11 system uses an SSD, you must attempt recovery immediately before the active TRIM feature permanently clears the deleted data blocks.
● Choose Microsoft's free Windows File Recovery utility if you are comfortable executing exact winfr terminal commands, or use Recoverit if you are a beginner who requires a visual interface, file type filtering, and recovery previews.
● Regardless of the software used, you must always save the restored files to a completely separate destination drive to prevent overwriting the remaining recoverable data on the source drive.
Ask AI for a summary
 ChatGPT
 Perplexity
 Gemini
 Claude
 Grok
Grok
Losing important documents, family photos, videos, or work folders on Windows 11 can feel urgent, especially when the Recycle Bin fails, the system crashes, or files disappear after deletion. The good news is that deleted files are not always gone immediately. The right recovery method depends on where the files were lost, how they were deleted, and whether new data has overwritten them.
This guide explains how to recover files in Windows 11 using built-in methods first, including Recycle Bin, File History, Previous Versions, OneDrive, and Windows Backup. Then, it shows how to use Microsoft Windows File Recovery with winfr commands. If command-line recovery feels too technical, you will also learn when a visual recovery tool like Recoverit may be easier.
In this article
Part 1. Stop First: Safe Rules Before Windows 11 File Recovery
Every successful Windows 11 file recovery attempt starts with the right first steps. The goal is to prevent deleted data from being overwritten.
| Do | Why It Matters |
| Stop using the affected drive immediately. | Continued use can overwrite deleted file data. |
| Avoid downloading, copying, or installing new files on that drive. | New data may replace the files you want to recover. |
| Do not install recovery software on the drive you are recovering. | Installation writes data to the disk and may reduce recovery chances. |
| Save recovered files to a different drive. | Saving recovered files to the same drive can overwrite other recoverable data. |
| Avoid running CHKDSK or repair tools before recovery. | Repair tools can change file system records and reduce recovery options. |
| Use a stable USB port or card reader for external devices. | Unstable connections can interrupt scans or damage recovery results. |
| Stop scanning if the drive clicks, overheats, or disconnects. | Physical damage may need professional recovery instead of software scans. |
SSD and TRIM Warning
Many Windows 11 computers use SSDs. When TRIM is enabled, deleted data may be cleared more quickly than on traditional hard drives. If files were deleted from an SSD, stop using the computer as soon as possible and try recovery immediately.
If Files Were Lost from Drive C
If the files were deleted from the system drive, reduce computer activity as much as possible. Windows updates, browser caches, downloads, and temporary files may write new data to the same drive.
Part 2. Quick Diagnosis: Choose the Right Windows 11 File Recovery Method
Choosing the wrong recovery method can waste time and increase the risk of overwriting lost files. Use this table to decide what to try first.
| Your Situation | Likely Cause | Best Recovery Method |
| Files Were Recently Deleted | Accidental deletion | Check the Recycle Bin or File History |
| Files Are Still in the Recycle Bin | Not permanently deleted | Restore directly from the Recycle Bin |
| Files Were Deleted with Shift + Delete | Recycle Bin bypassed | Use Windows File Recovery, Previous Versions, or recovery software |
| Files Were Lost After Formatting or Partition Changes | Drive formatted or repartitioned | Stop using the drive and run recovery software immediately |
| Files Were Lost from a USB, SD Card, or External Drive | Deletion, formatting, or file system issues | Connect the device and perform a recovery scan |
| Files Were Synced and Deleted from Backup Locations | Cloud sync or backup deletion | Check OneDrive Recycle Bin, version history, or backup copies |
| Recovered Files Are Corrupted or Will Not Open | Partial recovery or file corruption | Try file repair tools or recover an earlier version |
Part 3. Recover Files in Windows 11 with Built-In Methods First
Before using command-line tools or third-party software, try Windows 11 built-in recovery options. These methods are safer because they do not require scanning deleted sectors unless necessary.
1. Restore Files from Recycle Bin
Recycle Bin is the easiest way to recover files in Windows 11 if the files were deleted normally. This method may not work if you used Shift + Delete, emptied the Recycle Bin, deleted files from some external drives, or lost files after formatting.
- In “Recycle Bin," right-click the deleted file and select “Restore.”
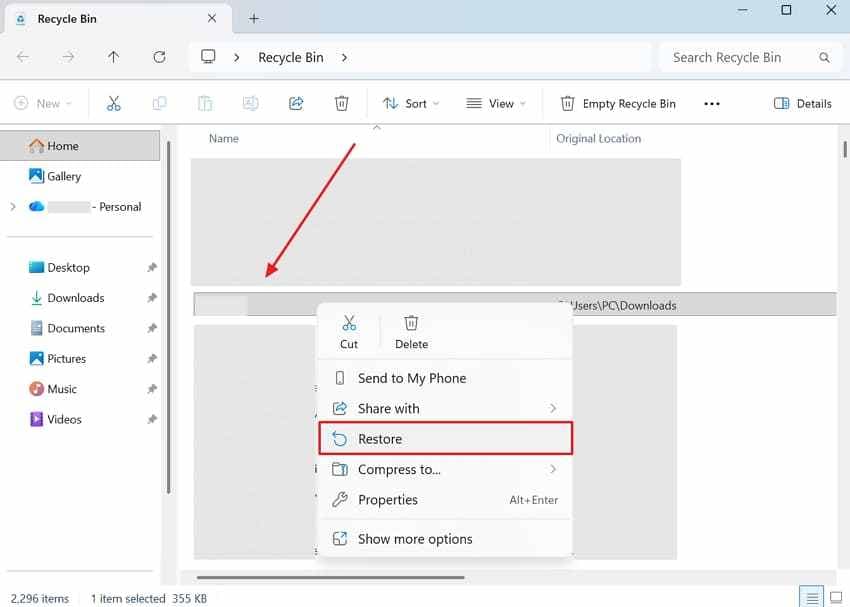
The file should return to its original location. If Windows freezes or the restore fails, stop using the affected drive and move to deeper recovery methods.
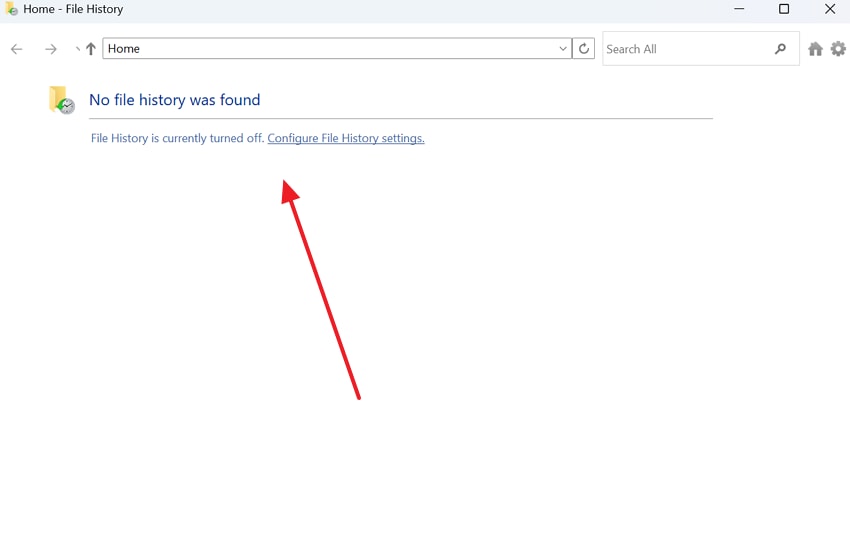
2. Restore Files from File History
File History is a Windows backup feature that saves versions of files in selected folders. It only works if File History was enabled before the file was deleted.
Step 1. Users need to search for "Control Panel > Click Open.”
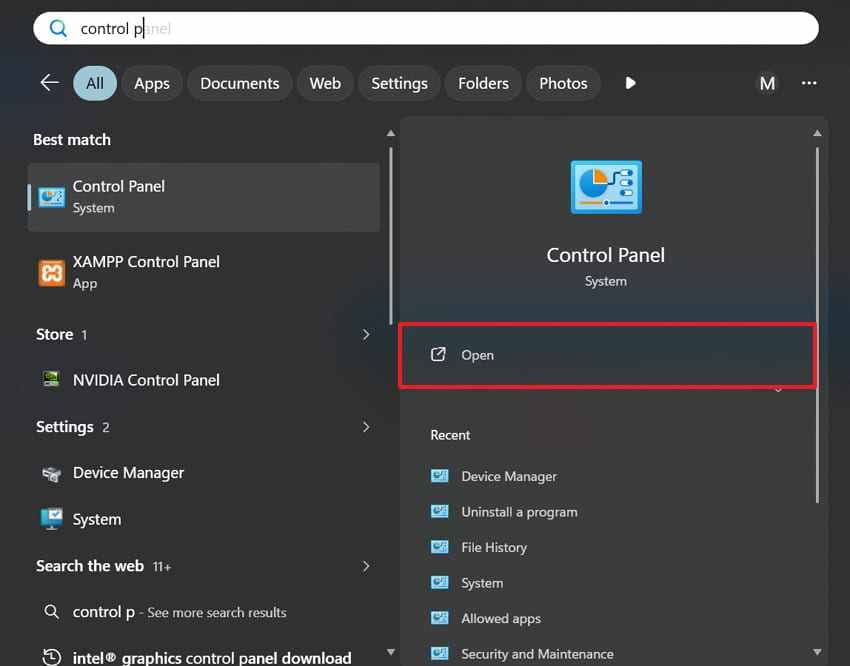
Step 2. Select the “Small Icons” view category and press “File History.”
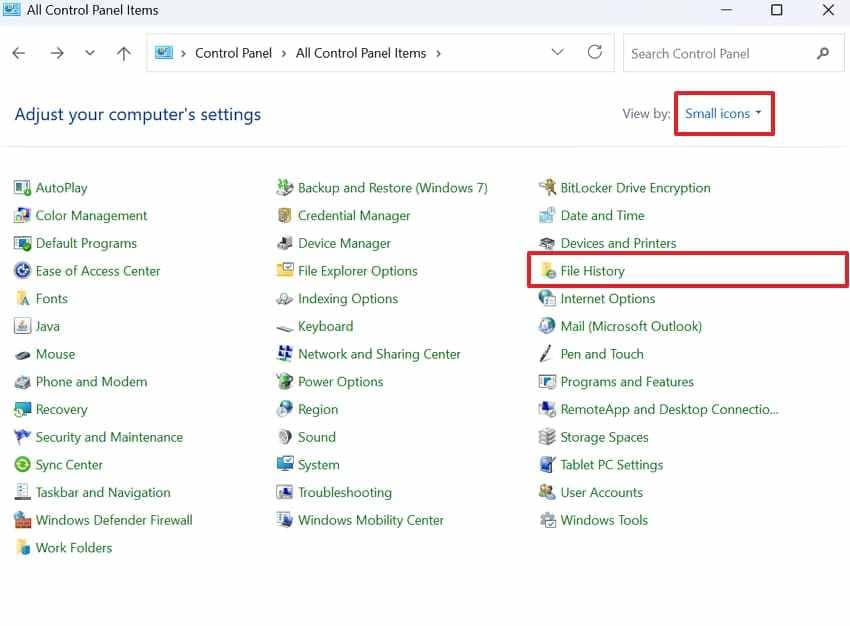
Step 3. Select the “Restore Personal Files” option.
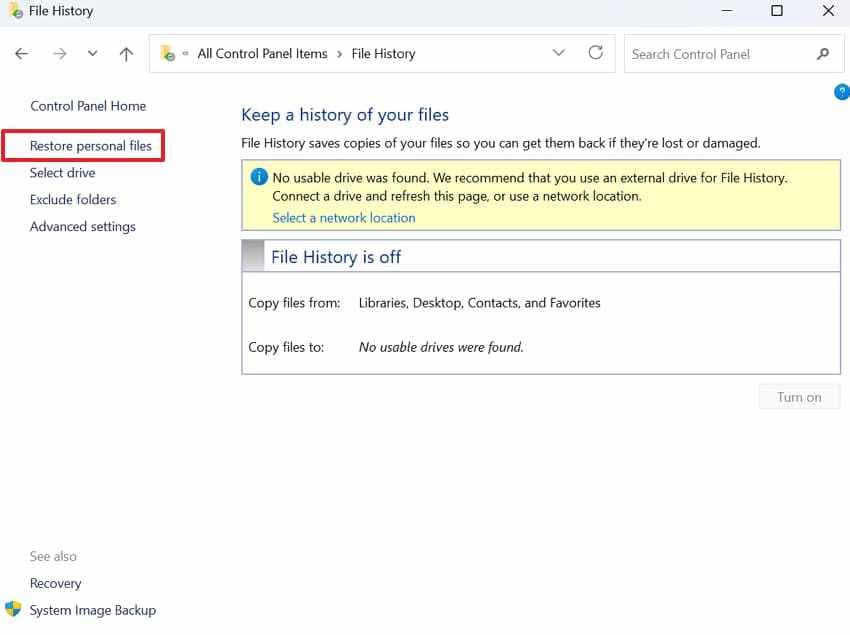
Step 4. This will display the backed-up files, allowing you to review the available versions for recovery.
3. Restore Previous Versions of Files or Folders
Previous Versions can help restore older versions of files or folders, but it depends on File History, restore points, or backups being available.
Step 1. After right-clicking the file, head to the “Show More Options” option.
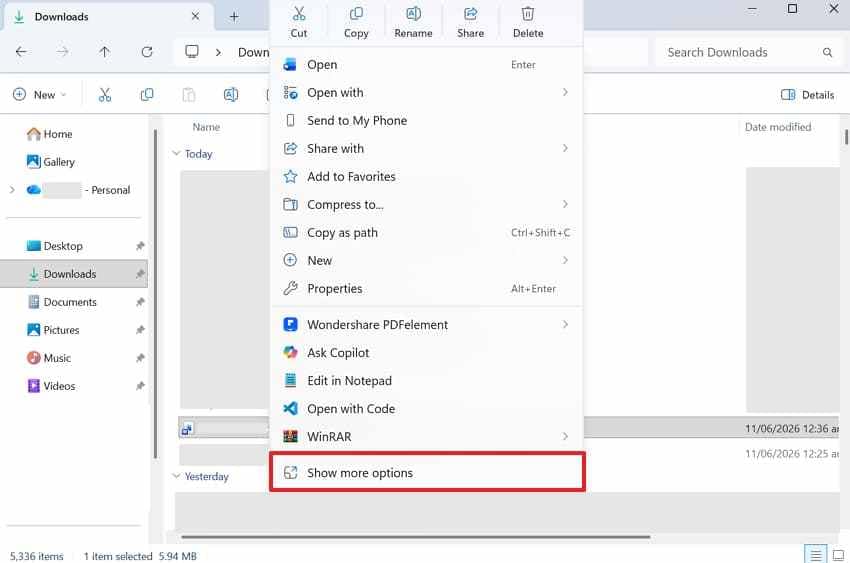
Step 2. Here, you need to choose “Restore Previous Version.”
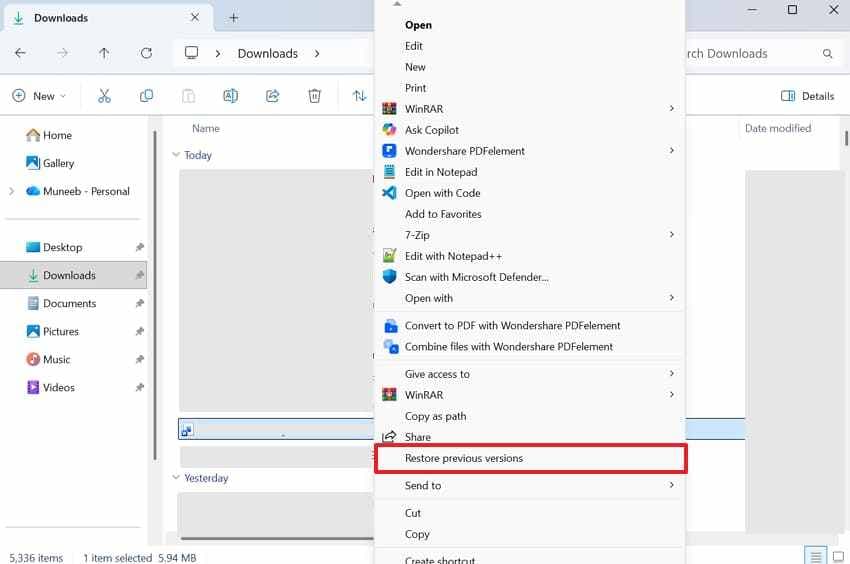
Step 3. Select your desired version if available > Press “Restore" > Click "OK.”
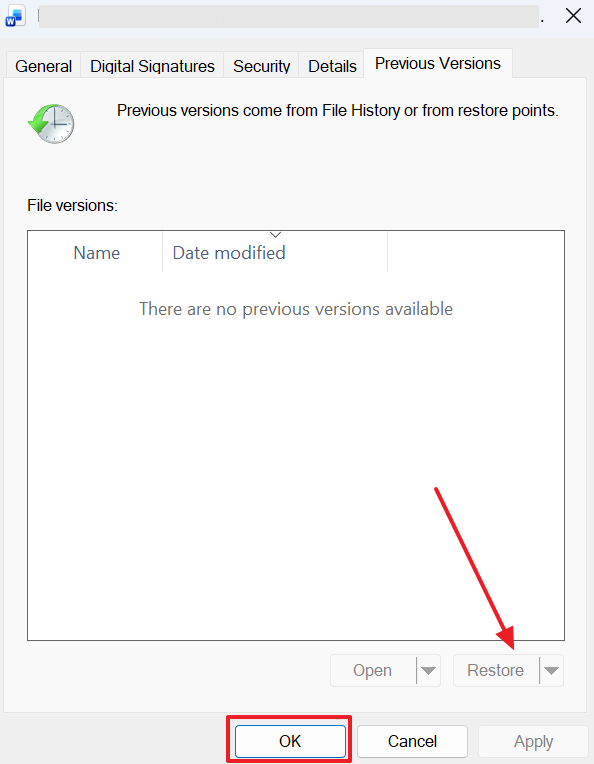
If no previous version appears, this feature was likely not enabled or no backup version exists.
4. Check OneDrive Recycle Bin and Version History
If your files were stored in Desktop, Documents, Pictures, or another folder synced with OneDrive, check OneDrive online. Deleted synced files may still be recoverable from the OneDrive Recycle Bin or version history.
- Access OneDrive “Recycle Bin” > Right-click the synced deleted file > Choose “Restore.”
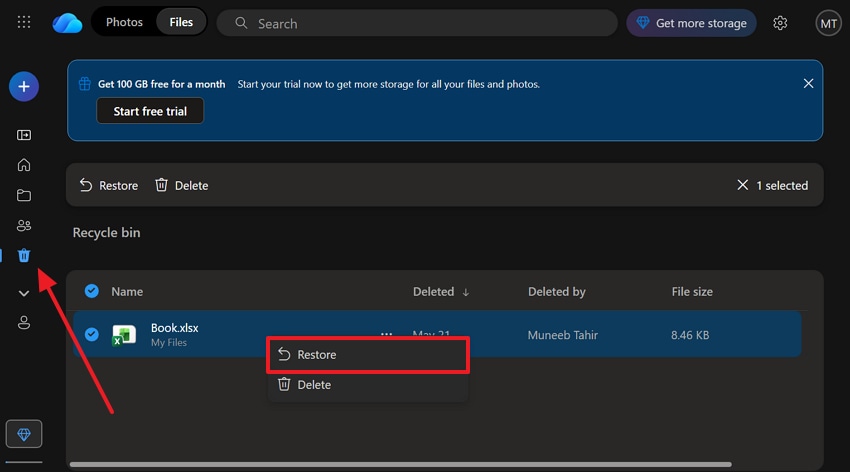
OneDrive sync is useful, but it is not the same as a full backup. If a deletion syncs across devices, you may need to check OneDrive Recycle Bin or version history quickly.
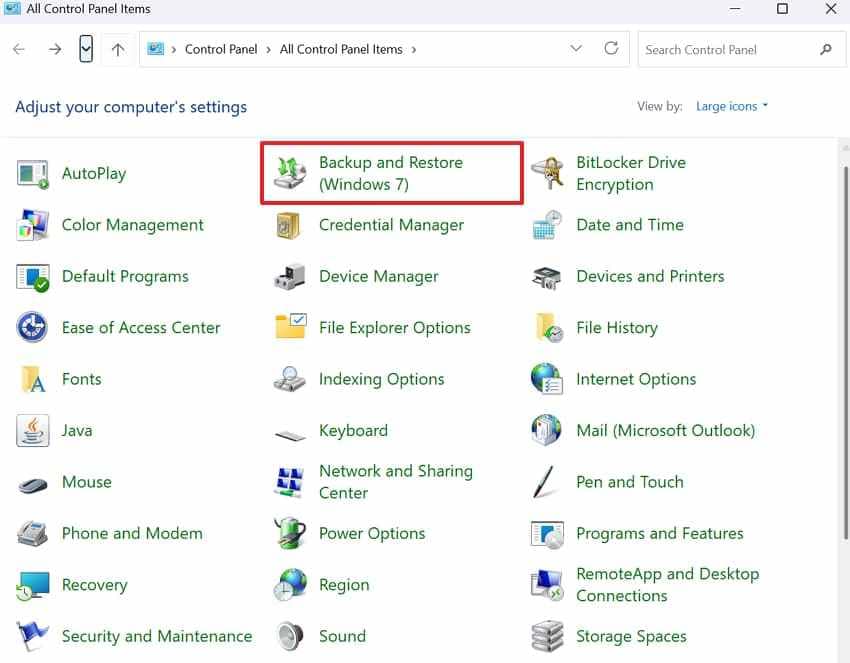
5. Restore from Windows Backup or External Backup Drives
If you previously created backups with Backup and Restore, an external drive, or another backup tool, restore files from that backup before using deeper recovery methods.
Step 1. From “Control Panel,” head to “Backup and Restore (Windows 7).”
Step 2. Go ahead and press the “Restore My Files” button.
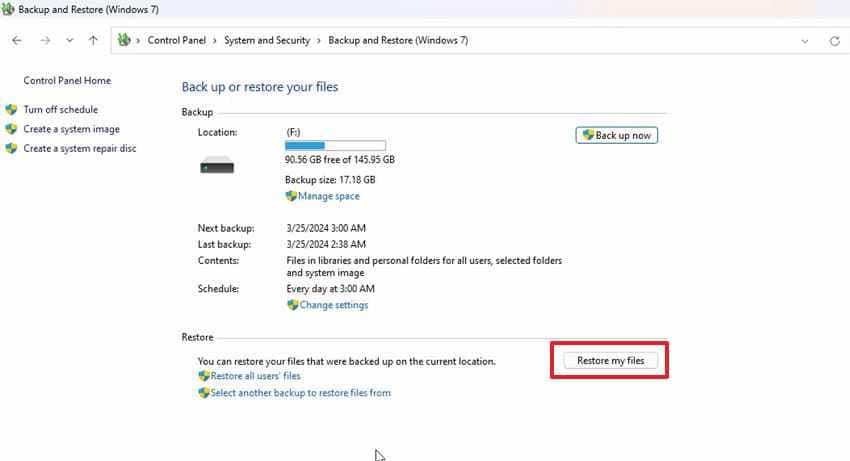
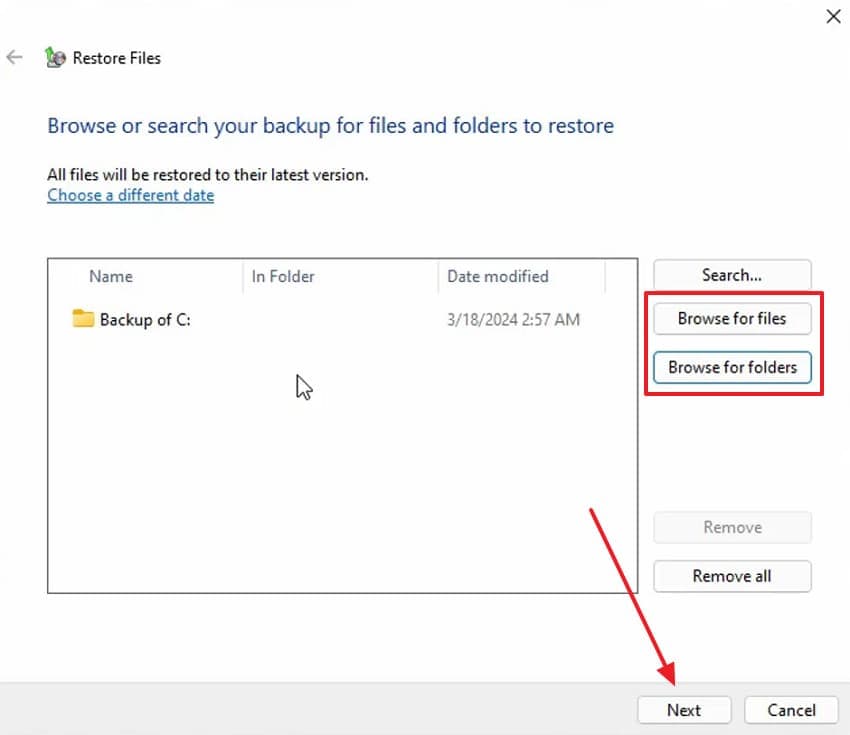
Step 3. Press either “Browse for Files” or “Browse for Folders” > Select your deleted file > Click the “Next” button.
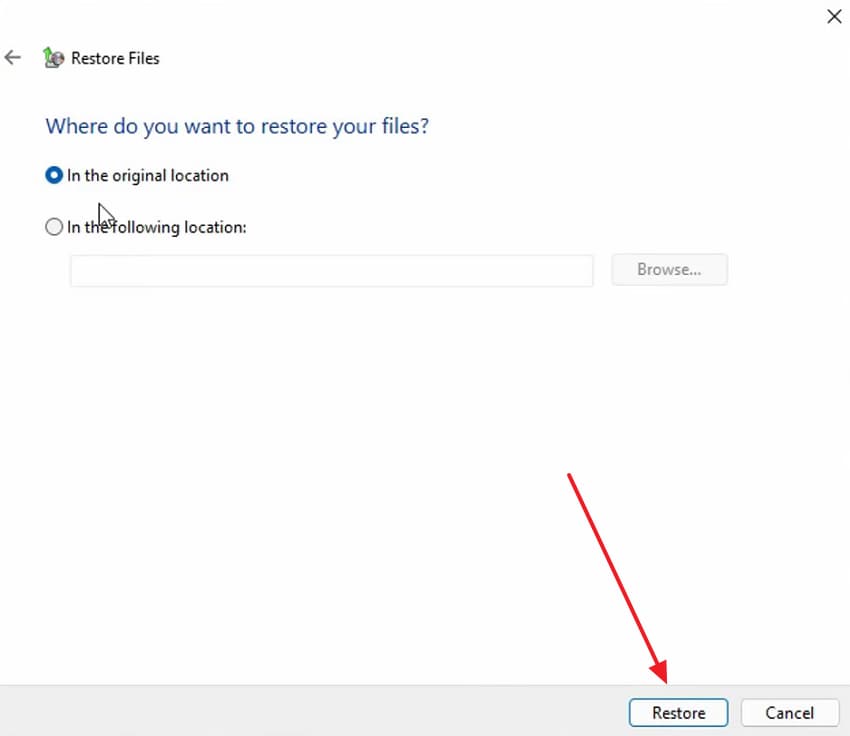
Step 4. You will then need to enable the output location and press “Restore.”
Part 4. How to Use Windows File Recovery in Windows 11
Windows File Recovery is a free Microsoft command-line app for recovering deleted files that are no longer in Recycle Bin. It uses the winfr command to scan a source drive and recover files to a separate destination drive.
It is useful when files were permanently deleted, removed with Shift + Delete, lost from USB drives, or missing from formatted storage. However, it is not a visual tool, and it cannot guarantee recovery.
What Windows File Recovery Can and Cannot Recover
This app functions differently from standard free file recovery software Windows 11 options. Review this table to understand the precise capabilities of this native utility:
| Category | Can Recover | Cannot Recover |
| Storage Location | Internal drives, external drives, USB drives, SD cards, and memory cards. | Cloud-only files, online-only storage, or inaccessible network locations. |
| File Systems | NTFS, FAT, exFAT, and ReFS file systems. | Unsupported, encrypted, or inaccessible file systems without proper access. |
| File Types | Documents, photos, videos, audio files, PDFs, ZIP archives, and other common files. | Unsupported files or files with no recoverable data left. |
| Deletion Scenarios | Shift + Delete files, emptied Recycle Bin files, and some formatted drive cases. | Files that have been overwritten. |
| SSD Recovery | May recover files if data has not been cleared by TRIM or overwritten. | Data permanently cleared by TRIM or overwritten by new files. |
| Recovery Modes | Recent deletion and deeper recovery scenarios. | Guaranteed recovery of every file. |
| File Names and Folders | Some original file names and folder paths. | Guaranteed preservation of all names and folder structures. |
| Corrupted Drives | Logically corrupted or formatted drives. | Physically damaged or unreadable drives. |
Install Windows File Recovery from the Microsoft Store
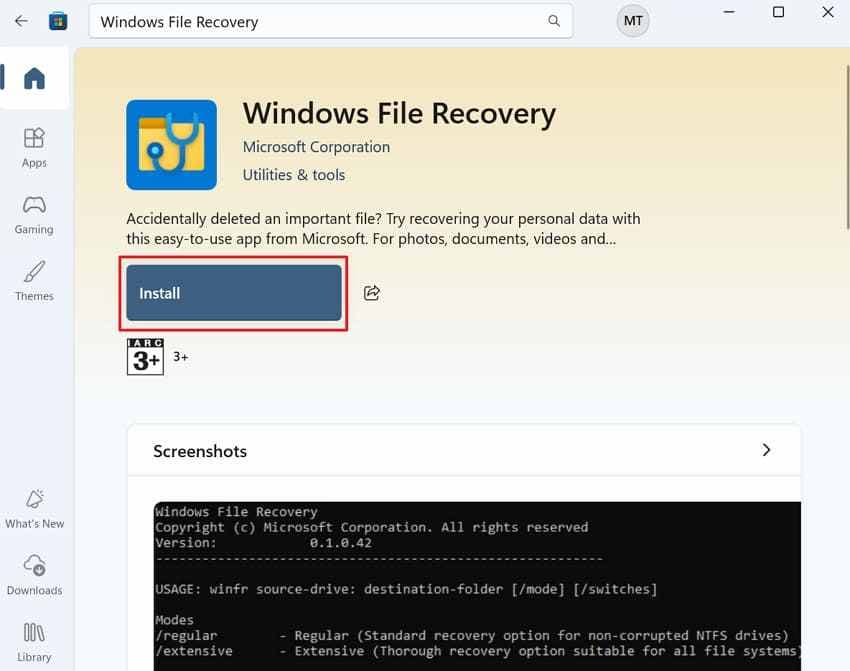
You have to first install this tool prior to initiating the retrieval of deleted files. For that, individuals have to run the “Microsoft Store” on their system and look for “Windows File Recovery.” After that, press the “Install” button to download and set it up on your system.
Understand the Basic Winfr Command Format
Using the core syntax properly is necessary for Windows File Recovery in Windows 11 tasks. You need to type “winfr source-drive: destination-drive: [/mode] [/switches].”
The source drive shows where files were deleted originally. Furthermore, a destination drive helps recover files on separate storage. Recovery modes like “/regular” or “/extensive” are added directly after both drives.
Key Parameters and Recovery Options
- Choose Recovery Mode: Regular mode works best for recently deleted files on NTFS drives. On the other hand, the extensive mode handles formatted or older deletion recovery scenarios.
- Use Location Switches: The /n switch filters recovery results by specific file name or path. The /y switch targets specific file type groups like photos or documents.
- Save Separately: Always save all recovered files to a different storage drive. Using the same source drive risks overwriting other still-recoverable deleted files.
Part 5. Windows File Recovery Command Examples
These examples show common ways to use Windows File Recovery in Windows 11. Replace the drive letters and file extensions with your own situation.
1. Recover Deleted Documents from Drive C to Drive D
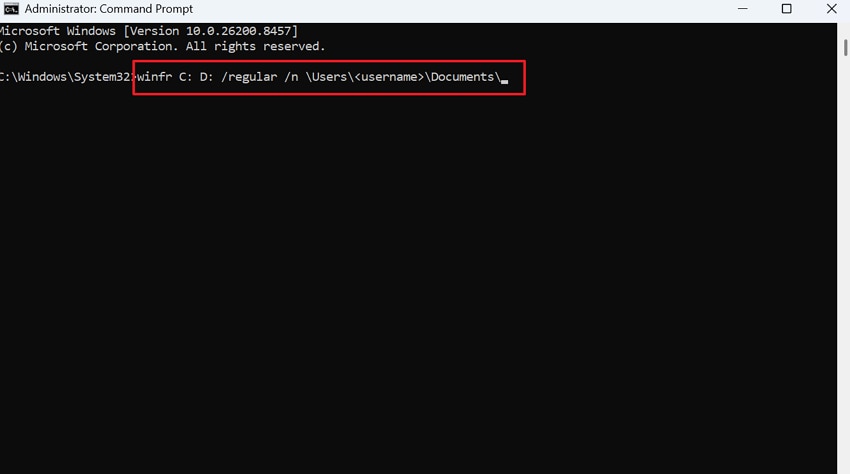
At this point, regular mode works best for recovering recently deleted documents from NTFS drives. Use the /n switch to target specific file extensions like DOCX or PDF.
Command Example: “winfr C: D: /regular /n *.docx /n *.pdf”
2. Recover Photos, Videos, or ZIP Files by Extension
In such cases, extension filters help locate specific media files without scanning everything. The Extensive mode can help recover files when file system records are unavailable or damaged.
Command Example: “winfr C: E: /extensive /n *.mp4 /n *.mov”
3. Recover Files from USB or External Drive
UUSB drives and SD cards using FAT or exFAT typically require Extensive mode. Moreover, save recovered files to a separate destination drive afterward.
Command Example: “winfr F: D: /extensive /n *.jpg”
4. Recover Files from a Formatted or Corrupted Drive
Formatted or corrupted drives often require deeper scanning because file system metadata may be damaged or unavailable. Thus, the extensive mode can improve recovery results in these situations.
Command Example: “winfr D: E: /extensive /n *.docx”
5. Common Windows File Recovery Errors and Fixes
Review these terminal errors alongside practical solutions to resolve execution issues:
| Error | Cause | Fix |
| Source and destination are the same | Same drive letter used for both locations. | Use a different destination drive. |
| Path not found or no results | Incorrect path or overly restrictive filter | Check the path and broaden the search. |
| Access denied | Windows File Recovery is not running as administrator. | Run Terminal or Command Prompt as administrator. |
| Recovered files will not open | File corruption, incomplete recovery, or overwritten data. | Try another mode, restore from backup, or use file repair tools. |
| Scan is stuck or very slow | Large drive, extensive scan, or broad search scope. | Narrow the file type filter or allow more time. |
| Multiple copies recovered | Multiple versions or fragmented recovery results. | Preview files and keep the most complete version. |
| No files found on SSD | TRIM may have cleared deleted data. | Try backups, File History, or cloud versions. |
Part 6. Use Recoverit for Easier Windows 11 File Recovery
Windows File Recovery can be effective, but many everyday users find command-line recovery confusing. If you prefer a visual recovery process, Recoverit can be a practical alternative for deleted files, formatted drives, lost partitions, emptied Recycle Bin cases, USB drives, SD cards, memory cards, and external drives.
Recoverit is useful when:
- You want a guided interface instead of terminal commands.
- You need to preview recoverable files before saving them.
- You want to filter results by file type, size, date, or name.
- You lost files from an internal drive, USB drive, SD card, or external disk.
- You want to recover photos, videos, documents, ZIP files, audio files, or other common files.
- You need a tool that is easier for non-technical users.
Important: Recoverit cannot guarantee recovery of overwritten files or physically damaged drives. If a drive is clicking, overheating, not detected, or disconnecting repeatedly, stop scanning and consider professional data recovery.
Key Features
- Visual recovery workflow for Windows 11 users.
- Quick scan and deep scan options.
- File preview before recovery.
- Filters for file type, date, size, and name.
- Recovery from deleted files, formatted drives, lost partitions, and external storage devices.
- Support for common file types, including photos, videos, documents, archives, and audio files.
Quick Guide to Use Recoverit for Easier Windows 11 File Recovery
Users can take guidance from the given steps and recover their data using this AI data recovery tool:
Step 1. Access the Drive Where the Data Was Lost
You need to access the “Hard Drive and Locations” tab of Recoverit. Go ahead and select the exact drive or folder where your files were stored or deleted.

Step 2. Run a Deep Scan on the Selected Drive
After selecting the target location on your Windows 11, initiate the scanning process. Recoverit then searches for deleted or missing data while showing detected items.

Step 3. Check & Recover Windows 11 Files
Go through the list of recovered files and preview them to confirm accuracy. Following that, mark the files you need in your Windows 11 and click the “Recover” button.

Windows File Recovery vs Recoverit: Which Should You Use?
Windows File Recovery is free and official, but it is command-line based. Recoverit provides a visual interface for users who prefer guided recovery, previews, filters, and easier navigation.
| Feature | Windows File Recovery | Recoverit |
| Cost | Free Microsoft tool. | Free scan and limited free recovery depending on current plan. |
| Interface | Command-line. | Visual interface. |
| Best For | Users comfortable with winfr commands. | Beginners and users who want guided recovery. |
| Preview | No visual preview. | Preview supported. |
| Filters | Command switches such as /n. | Visual filters by type, date, size, or name. |
| External Devices | Supports USB drives, SD cards, and external drives. | Supports USB drives, SD cards, external drives, and other storage devices. |
| Learning Curve | Higher. | Lower. |
| Limitations | Requires correct command syntax and separate destination drive. | Free recovery amount may be limited, and recovery is not guaranteed. |
Choose Windows File Recovery if you want a free Microsoft tool and are comfortable with commands. Choose Recoverit if you want a simpler visual workflow, preview before recovery, and easier filtering.
Part 7. How to Prevent File Loss in Windows 11
For many individuals, preventing file loss is far easier than recovering data. Therefore, this section covers a prevention table to help you protect your files going forward:
| Prevention Method | What to Do | Why It Matters |
| Turn On File History | Enable File History in Control Panel settings | Automatically backs up files at regular intervals |
| Use OneDrive Carefully | Enable version history in OneDrive settings | Restores earlier file versions after accidental deletion |
| Keep Version Backups | Use backups with version retention, not just sync | Sync alone deletes files across all connected devices |
| Test Backups Regularly | Restore a sample file to confirm the backup works | Untested backups often fail when needed most |
| Use Multiple Drives | Never store important files on a single drive | A single drive failure can cause permanent data loss |
Conclusion
Recovering files in Windows 11 starts with the safest options first. Check Recycle Bin, File History, Previous Versions, OneDrive Recycle Bin, and Windows backups before trying deeper recovery. If files were permanently deleted, removed with Shift + Delete, lost after formatting, or missing from an external device, Microsoft Windows File Recovery can help through winfr commands.
Windows File Recovery is free and official, but it requires command-line steps. If you want a simpler recovery experience with visual filters, preview, and a guided workflow, Recoverit can be an easier alternative for Windows 11 file recovery.
No tool can guarantee every file will be restored. Stop using the affected drive, avoid overwriting data, save recovered files to another location, and consider professional help if the drive shows physical damage.
FAQs
-
Q1. Does Windows 11 have a file recovery tool?
Yes. Windows File Recovery is Microsoft’s free command-line app for recovering deleted files that are no longer in Recycle Bin. It uses the winfr command. -
Q2. How do I recover files deleted with Shift + Delete in Windows 11?
Try File History, Previous Versions, Windows File Recovery, or trusted recovery software. Stop using the affected drive first to reduce the chance of overwriting deleted data. -
Q3. Can Windows File Recovery recover files from an emptied Recycle Bin?
It may recover files from an emptied Recycle Bin if the data has not been overwritten or cleared by SSD TRIM. Recovery is not guaranteed. -
Q4. What is the basic Windows File Recovery command?
The basic command is winfr source-drive: destination-drive: [/mode] [/switches]. The source and destination drives must be different. -
Q5. Why does Windows File Recovery find no files?
Possible reasons include overwritten data, SSD TRIM, incorrect path, overly narrow filters, wrong recovery mode, unsupported file system, or physical drive problems. -
Q6. Is Recoverit easier than Windows File Recovery?
Yes, for many non-technical users. Recoverit provides a visual interface, preview, and file filters, while Windows File Recovery uses command-line commands. -
Q7. Can I recover files from a Windows 11 drive that will not boot?
Sometimes. You can connect the drive to another working computer and scan it from there. If the drive has physical damage, avoid repeated scans and consider professional recovery. -
Q8. Should I save recovered files to the same drive?
No. Always save recovered files to another drive, external disk, USB drive, or safe location. Saving them to the same drive can overwrite other recoverable data.


