Every PC user wants their device to work as well as a Swiss clock, no matter the scenario. However, you may encounter issues that will turn your experience upside down. In such cases, you should rely on backup solutions like Acer eRecovery Management to get your PC up and running again.
If you're an Acer user, you've probably discovered the mysterious Acer eRecovery Management feature and wondered about its purpose. We'll dive deep into this tool to help you get the most out of your Acer device.
In this article
About Acer eRecovery Management
Acer eRecovery Management is a built-in tool for Acer computers that allows you to create system backups. You can choose between three features: System Backup, Factory Reset, and System Recovery. This means you can restore your operating system to the latest working version or factory setting.
This tool can help you prevent significant issues like failure and get your device up and running again. All Acer devices with Windows 7 or higher have this built-in software and can start creating backups immediately.
Recover Your Data Before Using Acer eRecovery Management
Since Acer eRecovery Management will restore your device to the latest working version, you may lose the data in the current version. Thus, we recommend that you recover data before using Acer eRecovery Management.
You'll need a powerful, third-party recovery solution to recover your data successfully. One of the best tools currently on the market is Wondershare Recoverit. It has the most advanced, patented technologies, ensuring you'll get your data back.
Wondershare Recoverit also has a 98% success rate (one of the highest in the industry), so you'll get all your data back within minutes if you opt for this tool.
Thus, download the software and recover your data by following the steps below:
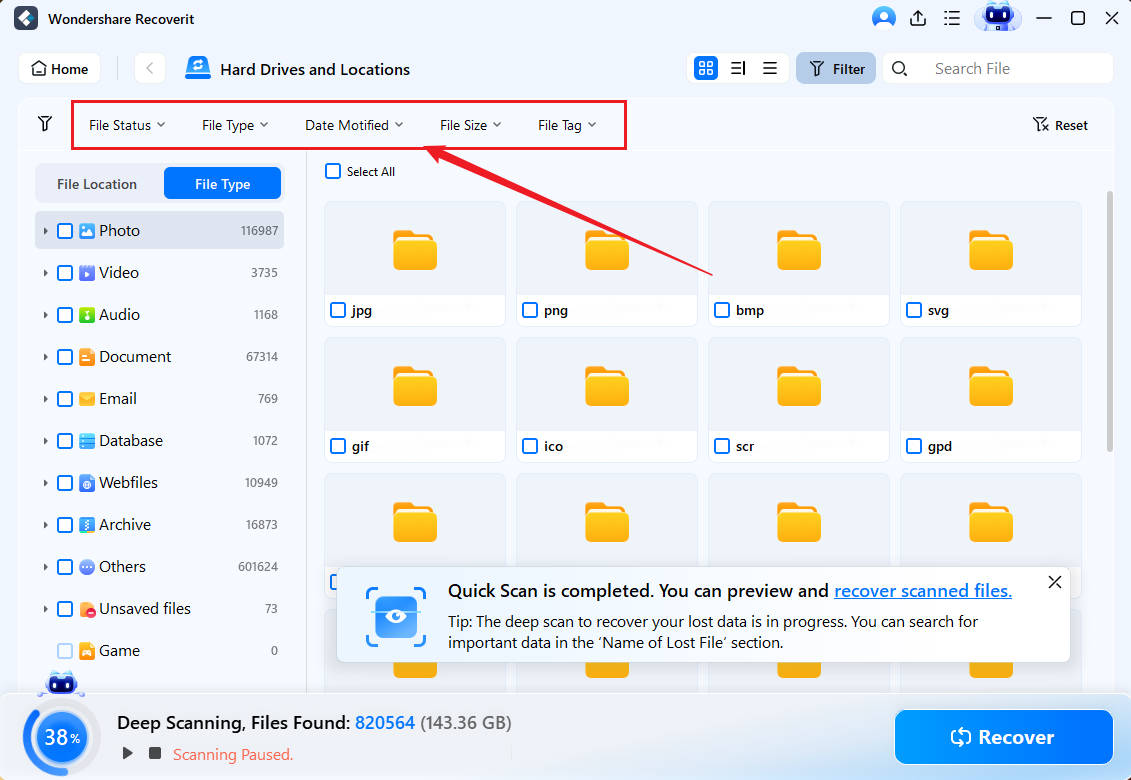
- Open Wondershare Recoverit and click the Hard Drives and Locations tab.
- Choose a location to scan.

- The program will initiate an automatic scan. You can monitor the progress or suspend the process to continue recovering data later.

- You can filter your results according to file type, size, tag, status, and modification time.
- You can also search for specific files by name.

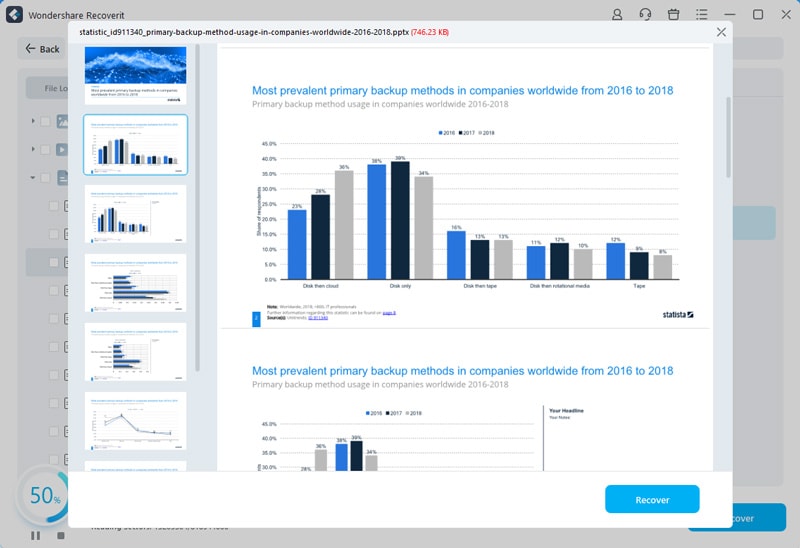
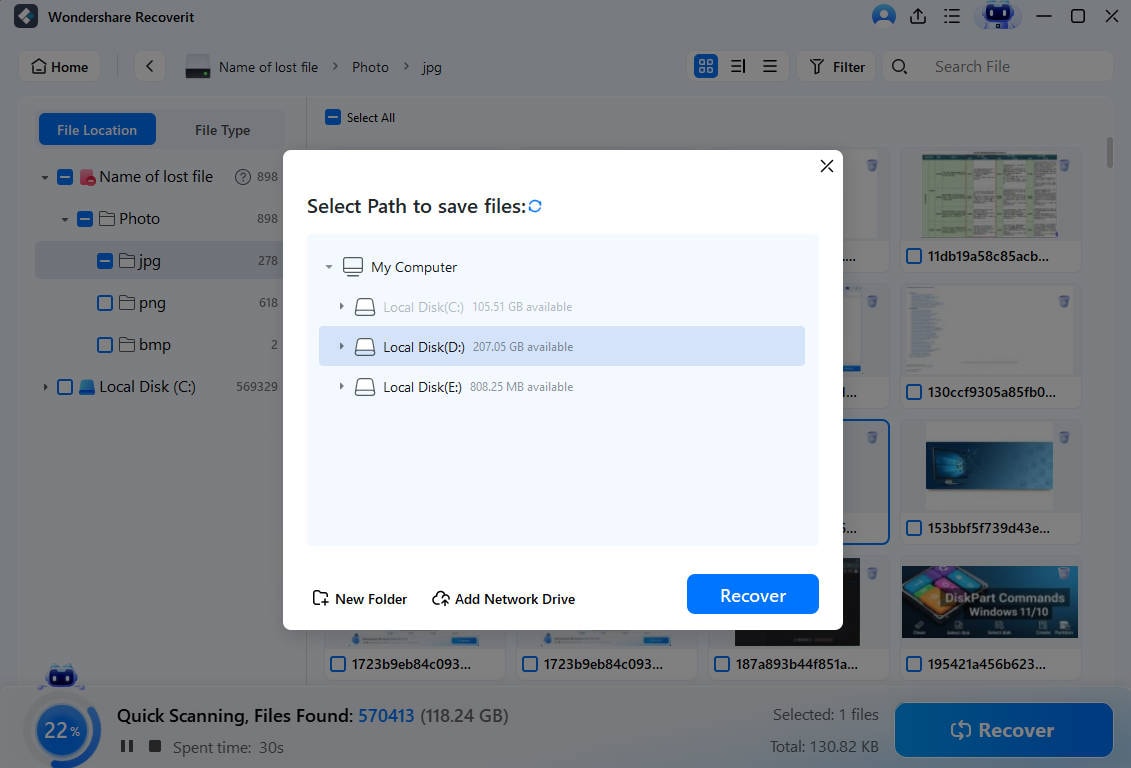
- Once the program finds recoverable files, preview and select them. Click Recover.

- Choose where to save the files.


Wondershare Recoverit provides a quick and efficient data solution that will save you a lot of trouble during your Acer eRecovery Management experience.
How to Start Acer eRecovery Management on Windows 10
You can try several methods to start Acer eRecovery Management on Windows 10, including:
- From the search box – open the search box, type Acer eRecovery Management, and click the first option.

- From the start menu – head to Start > All Apps > Acer > Acer eRecovery Management.

- Boot into recovery – while your computer is booting up, press Alt + F10.

How to Use Acer eRecovery Management on Windows 10
Once you launch Acer eRecovery, follow the steps below to learn how to create a backup and reset and refresh your PC.
Create a Backup in Acer eRecovery on Windows 10
Here's how to create a Windows 10 system backup using Acer eRecovery Management:
- Open Acer eRecovery Management.
- Click the Backup tab.

- Click Get Started next to Create Factory Default Backup.

- Tick the Backup System Files to the Recovery Drive checkbox. Click Next.

- Choose a drive to save the backup and click Next.

- Click Create on the next screen.

Creating a backup will take a few minutes.
Reset Your PC Using Acer eRecovery Management
Here's how to reset your Windows 10 PC using Acer eRecovery Management:
- Open Acer eRecovery Management.
- Click Get Started next to Reset your PC in the Restore tab.

- Choose whether you want to keep your files on the next screen.

- The program will notify you about removing your apps. Click Next.

- Click Next to confirm.

- Click Reset.

Refresh Your PC Using Acer eRecovery Management
To refresh your PC with Acer eRecovery Management, follow the steps below:
- Open Acer eRecovery Management.
- Click Get Started next to Refresh your PC in the Restore tab.

- Follow the on-screen instructions.
Troubleshooting: Acer eRecovery Management Not Working
Sometimes, your Acer eRecovery Management may not work as it should, or you may be unable to load it. If you're currently in this scenario, check out the two straightforward fixes below. They will help you resolve the issue quickly.
Enable D2D Recovery in the BIOS
D2D (Disk-to-Disk) Recovery is a recovery partition for restoring your Acer computer. Here's how to enable it in the BIOS:
- Restart your device. While it's powering on, press the F2 key to enter the BIOS.
- Head to the Main tab and enable D2D Recovery.

- Press F10 to save the changes and exit the BIOS.
Fix Bad Sectors on your Hard Drive
Bad sectors on your hard drive might prevent Acer eRecovery Management from working correctly. Here's how to fix them:
- Search for CMD and select Run as administrator.

- Type the chkdsk C: /f /r command and press Enter.
- Press y to confirm.

Restart your PC after completing these steps. Once the computer powers up, Acer eRecovery Management should work as usual.
Conclusion
Acer has developed an advanced technology that lets you back up your system files and restore them if things go downhill. This tool is Acer eRecovery Management. We've thoroughly discussed it to help you start your successful backup journey. Refer to the guide above for all the necessary features this tool offers and the steps to using it.
However, we recommend recovering and backing up your data before using Acer eRecovery Management. This tool will delete all the files from your system's current version, so this step is necessary for data preservation. Use reliable data recovery software like Wondershare Recoverit, which supports 1,000+ file formats across 2,000+ devices.
FAQ
Do I need Acer eRecovery Management?
Acer eRecovery Management isn't necessary; you can remove it from your device anytime. However, we don't recommend doing that, as it can be valuable in critical scenarios. If all your solutions fail and you have no one to turn to, Acer eRecovery Management can save the day and make your device as good as new.What is the Acer eRecovery Management key?
Acer eRecovery Management key will make your device go into recovery mode while booting, so you can safely reset, restore, or refresh your system. This key is a combination of Alt and F10 keys on your keyboard.


 ChatGPT
 Perplexity
 Google AI Mode
 Grok
Grok


